This is how to turn a Raspberry Pi into a powerful VPN box, that automatically connects to a VPN on boot and keeps itself connected by trying to reconnect when disconnected. If it gets disconnected from the VPN at one point we are ensuring that all traffic gets drop until we are back connected with the VPN.
WARNING: the openvpn service is heavily CPU intense on the Pis ARM CPU and affects your download speed through expressVPN dramatically!
Therefore you should ALWAYS go with the fastest available CPU modell of the Raspberry Pi (right now tis the Pi4 and RAM is not making much of a difference). You will run into speed limitations through ExpressVPNs openvpn service if you use a Pi 1,2,3 or Zero. Even the Pi 4 caps out for me at around 10 to 15 Mbps.
Preparing your Raspberry
I recommend a Raspberry Pi 4 or later. The VPN itself is very CPU intense (openvpn service) and needs the most powerful Pi you can get. So lets get started by flashing the SD Card with the latest Raspbian, enable SSH and connecting to it via SSH.
Ensure we are at the latest version by running these commands:
$ sudo apt-get update
$ sudo apt-get -y upgrade
$ sudo apt-get -y dist-upgrade
$ sudo apt-get -y autoremove
$ sudo apt-get clean
Now go into the Raspbian config and change the default password:
$ sudo raspi-config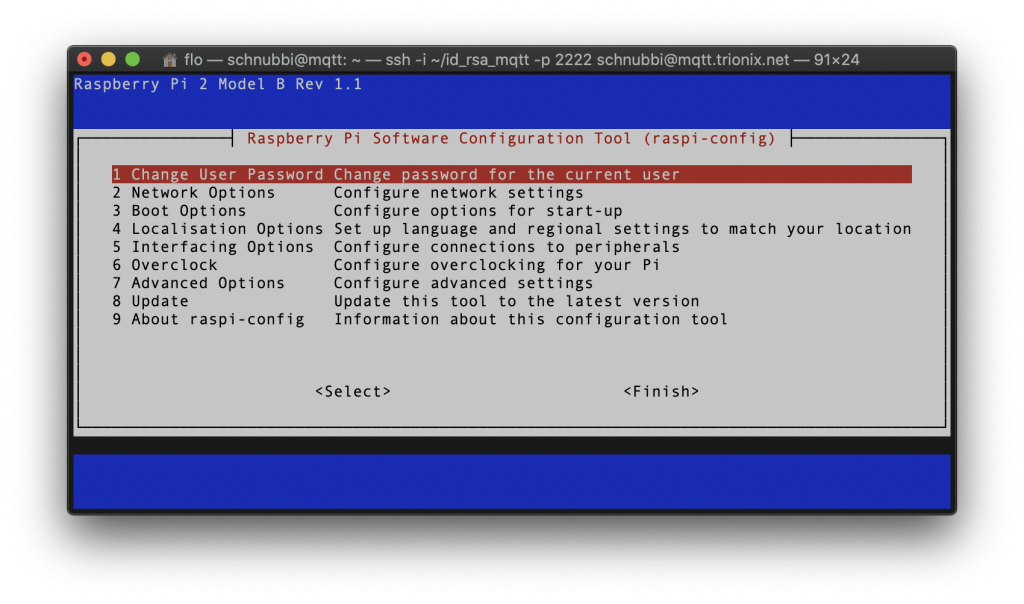
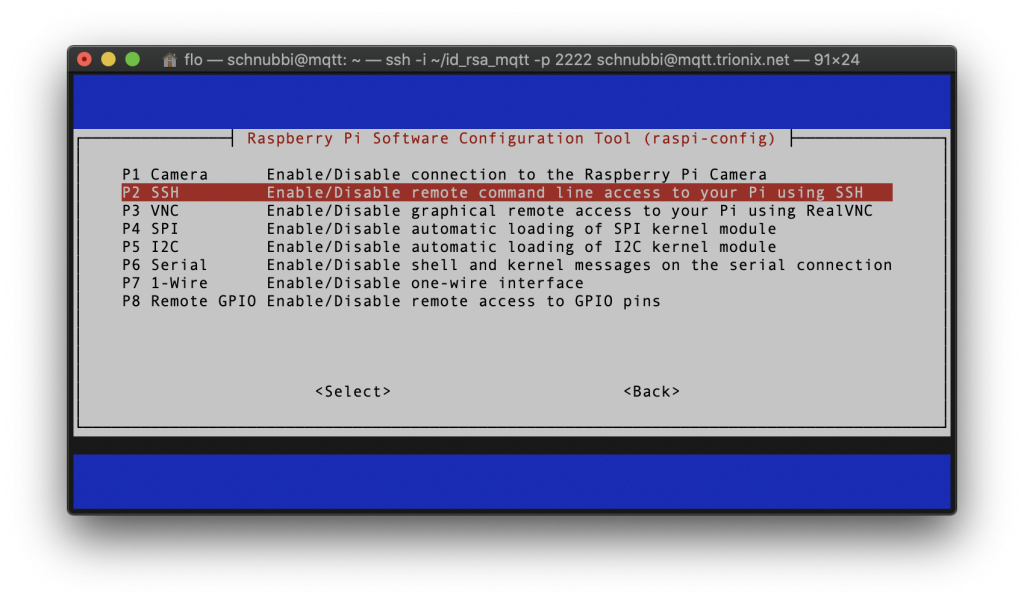
Also adopt the locales/timezone if needed (Option 4) and enable SSH (Option 5):
Also ensure under Network (Option 2) the "Wait for Network on Boot" is enabled:

Thats it for now with the basic setup.
Add share volume
If you will use a downloader later, we will also need to use to mount a network share we can files write to or you connect a harddrive or USB stick to the pi. In this example we will setup a NFS share folder from a Synology NAS:
First mount server share for download target:
IMPORTANT: replace "192.168.X.X:/volume1/pibackup/00_download" with your share volumes IP and path.
$ sudo mkdir -m 777 /mnt/incoming
$ sudo mount 192.168.X.X:/volume1/incoming/00_download /mnt/incoming
Add mount share volume to fstab to mount on boot:
$ sudo nano /etc/fstabAdd the following line to the bottom of the file:
IMPORTANT: replace "192.168.X.X:/volume1/pibackup/00_download" with your share volumes IP and path.
192.168.X.X:/volume1/pibackup/00_download /mnt/incoming nfs rsize=8192,wsize=8192,timeo=14,intr,noauto,x-systemd.automount 0 0Perfect, now we have all space we need under /mnt/incoming.
Set static IP
I recommend a fixed IP address for the Pi, so go to dhcpcd.conf and edit your network settings for eth0:
$ sudo nano /etc/dhcpcd.confFind #eth0 and uncomment the following lines and adapt to your needs:
#static domain_name_servers=192.168.0.1Save & exit the file with CTRL + X and y.
Now reboot your Pi by entering the following command.
sudo rebootInstall and setup VPN provider
For our example we will use the VPN provider ExpressVPN. Go to their website and create an account and choose a subscription model. When you are done login to their website and press the big red "setup" button on the top right corner of the site.
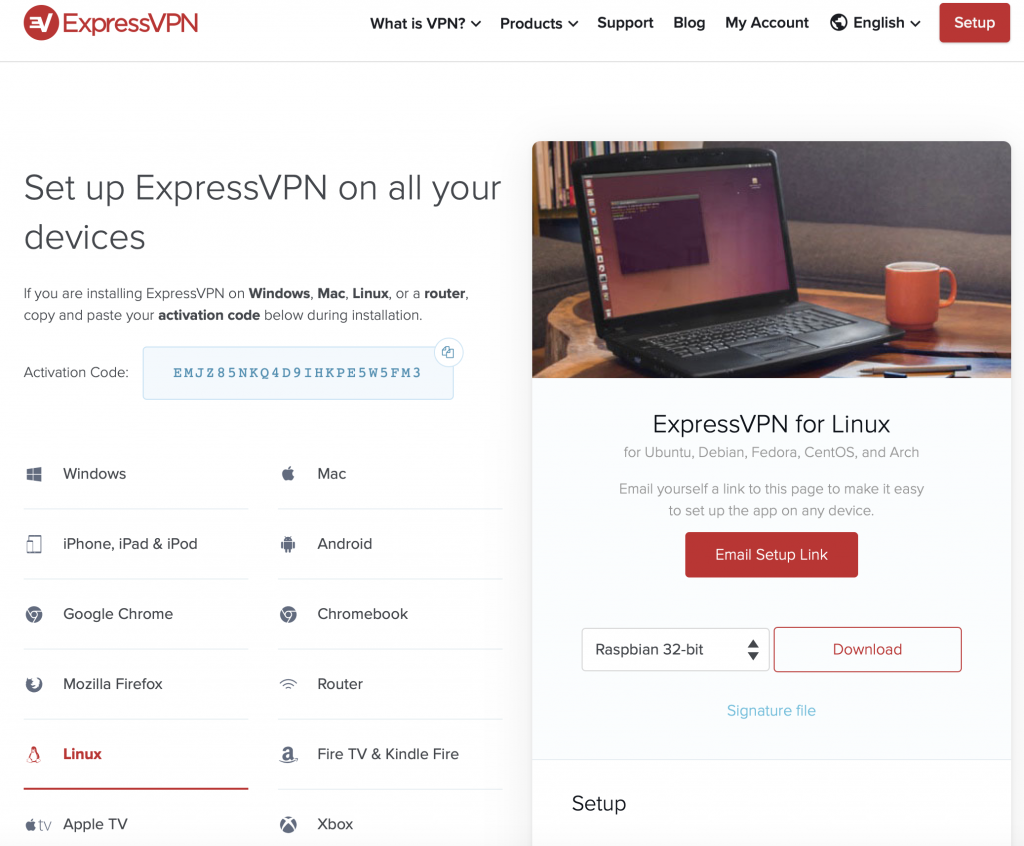
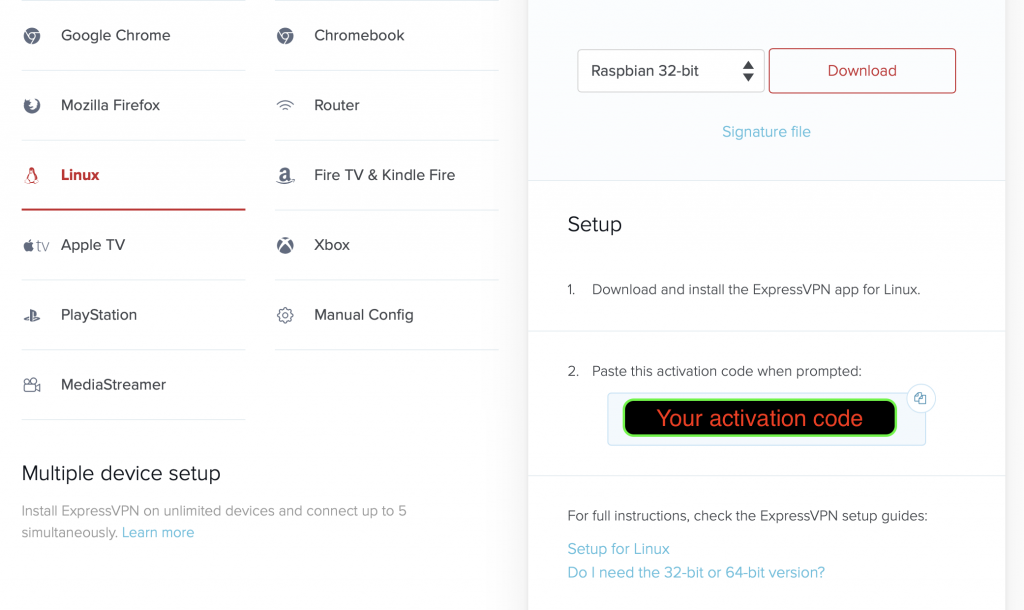
Then select the tab "Linux" on the left and choose in the dropdown on the right "Raspbian 32-bit". Now right click on the Download button and say "copy link address". Save that copied link in a note or temporary text file, we will need it later.
Next copy the Activation code that is below the "Download" button on the ExpressVPN website and save it for later as well.
Go back to the terminal and the connected Raspberry.
Ensure you are in your home dir:
$ cd ~/Now use the copied link from the ExpressVPN website and wget the file:
$ wget https://download.expressvpn.xyz/clients/linux/expressvpn_2.3.0-1_armhf.debNow we can install the downloaded VPN client:
IMPORTANT: the filename of the downloaded .deb package can vary depending on newer releases.
$ sudo dpkg -i expressvpn_2.3.0-1_armhf.debOnce it has installed, run the following activation command. It will ask you for the activation code we copied earlier also from their website:
$ expressvpn activateInsert the activation code and it will now ask if you want to share anonymous information, enter n to decline. Now we are ready to connect via VPN!
HINT: If you accidentally entered the wrong option, then use the following line. Change false to true if you want to share anonymous information:
$ expressvpn preferences set send_diagnostics falseNow make sure that the network lock is enabled, so our connection is not accidentally revealing packets to the public:
$ expressvpn preferences set network_lock defaultThis sets the network lock to default (on).
The basic VPN commands:
1. Connect to the VPN with the settings you used last time. This is the common connect command:
$ expressvpn connect2. Disconnect:
$ expressvpn disconnect3. List all available servers and countries:
$ expressvpn list4. You can connect to that specific location in the list by either using the location names or the alias names.
For Alias:
$ expressvpn connect aumeFor Location:
$ expressvpn connect "Australia - Melbourne"5. There are also more settings! Refer to the manual with:
$ man expressvpnNow choose a country and connect to it. Lets use in our example Switzerland:
$ expressvpn connect chVerify your IP and connection status to the VPN:
$ expressvpn status
$ curl ifconfig.me
That should return your Public IP and you can copy and check it with any IP Lookup tool in the net, like extreme-ip-lookup.com.
Setup VPN and auto reconnect
Most important with a VPN is to prevent DNS Leaks. By default, ExpressVPN takes measures to prevent your DNS from leaking, but you can alter these advanced settings. Consult the expressvpn manual. I recommend leaving DNS and Network Lock on default!
Next setup connect on boot with:
$ expressvpn autoconnect trueNow Raspbian always connects instantly to the network on boot.
Now we create a cronjob that trys to connect back every 5 minutes in case we lost the connection. We also log the output to vpn.log.
HINT: for your own timing you can use crontab.guru.
$ crontab -eGo to the last line in the crontab file and add the following line:
*/5 * * * * expressvpn connect >> /home/pi/vpn.log 2>&1Save and close with CTRL + X and confirm with Y.
Now we are connecting on boot and trying constantly to stay connected to our vpn connection. There is also a more advanced method by randomly switching locations every hour. For that refer to: LINK HERE
Congrats, no you have a VPN enabled Raspberry Pi!
Install headless jDownloader
First we create a folder where we will load the java file and install it:
mkdir ~/bin
mkdir ~/bin/jdownloader
cd ~/bin/jdownloader
wget http://installer.jdownloader.org/JDownloader.jar
Now install Java:
$ sudo apt-get install openjdk-11-jre-headlessStart the jdownloader install with:
$ java -jar JDownloader.jar -norestartWait until the installer asks you for your MyJdownloader account settings and enter them.
Wait until everything is loaded and the terminal halts at "update progress". Terminate with CTRL + C.
Now we setup the autostart in "jdownloader.service":
cd /etc/systemd/system
sudo nano jdownloader.service
Add the following lines:
[Unit]
Description=JDownloader
Wants=network.target
After=network.target

[Service]
Type=simple

ExecStart=/usr/bin/java -jar /home/pi/bin/jdownloader/JDownloader.jar
User=pi

RemainAfterExit=yes

[Install]
WantedBy=multi-user.target
Reload all services with:
sudo systemctl daemon-reload
sudo systemctl start jdownloader.service
sudo systemctl enable jdownloader.service
Now reboot your Pi with:
sudo rebootGo to my.jdownloader.org and wait until your new install appears. Last open up the device and setup the download path of your mounted share volume in the settings, in our case: /mnt/incoming
Install jdcrawler script
Install python3 and pip3
$ sudo apt install python3-pipNow get script from git:
cd /home/pi/
wget https://github.com/florianmueller/jDcrawler/archive/master.zip
unzip master.zip
mv /home/pi/jDcrawler-master /home/pi/JDcrawler
rm /home/pi/master.zip
cd /home/pi/JDcrawler/
Install requirements and tools:
$ sudo pip3 install -U pip setuptools
$ sudo pip3 install -r requirements.txt
Edit ftp.yml and config.yml to your needs:
$ sudo nano /home/pi/JDcrawler/ftp.yml
$ sudo nano /home/pi/JDcrawler/config.yml
If you want to use pushover service to receive push notifications for sucessful crawljobs, enter your pushover API key and credentials in the rmz.py file under the section PUSHOVER.
$ nano /home/pi/JDcrawler/rmz.pyIf you don't want to use Pushover, please fill in your Pushover credentials in the first 5 rows of rmz.py:
### START CONFIG ###
pushoverToken = 'yourToken'
pushoverUser = 'yourUserName'
pushoverDevice = 'yourDeviceName'
### END CONFIG ###
or leave the pushoverToken variable blank like this if you don't want to use pushover:
pushoverToken = ''Test run the script with:
$ python3 /home/pi/JDcrawler/rmz.pyTo autorun in a certain cycle add this to your crontab:
*/5 * * * * python3 /home/pi/JDcrawler/rmz.py > /home/pi/JDcrawler/log.txtAdditional infos
If you want to install the Raspbian firewall as an additional security layer, read and use my other article on that: Harden Raspbian with firewall and TLS certification.
If you need to uninstall ExpressVPN software from your Raspberry Pi use:
sudo dpkg -r expressvpnFor further help regarding connectivity issues to ExpressVPN, you might want to visit their support center. Also, remember to use the man command to bring up the manual for the ExpressVPN application. You can also use ipleak.net and check that your DNS is no longer leaking.