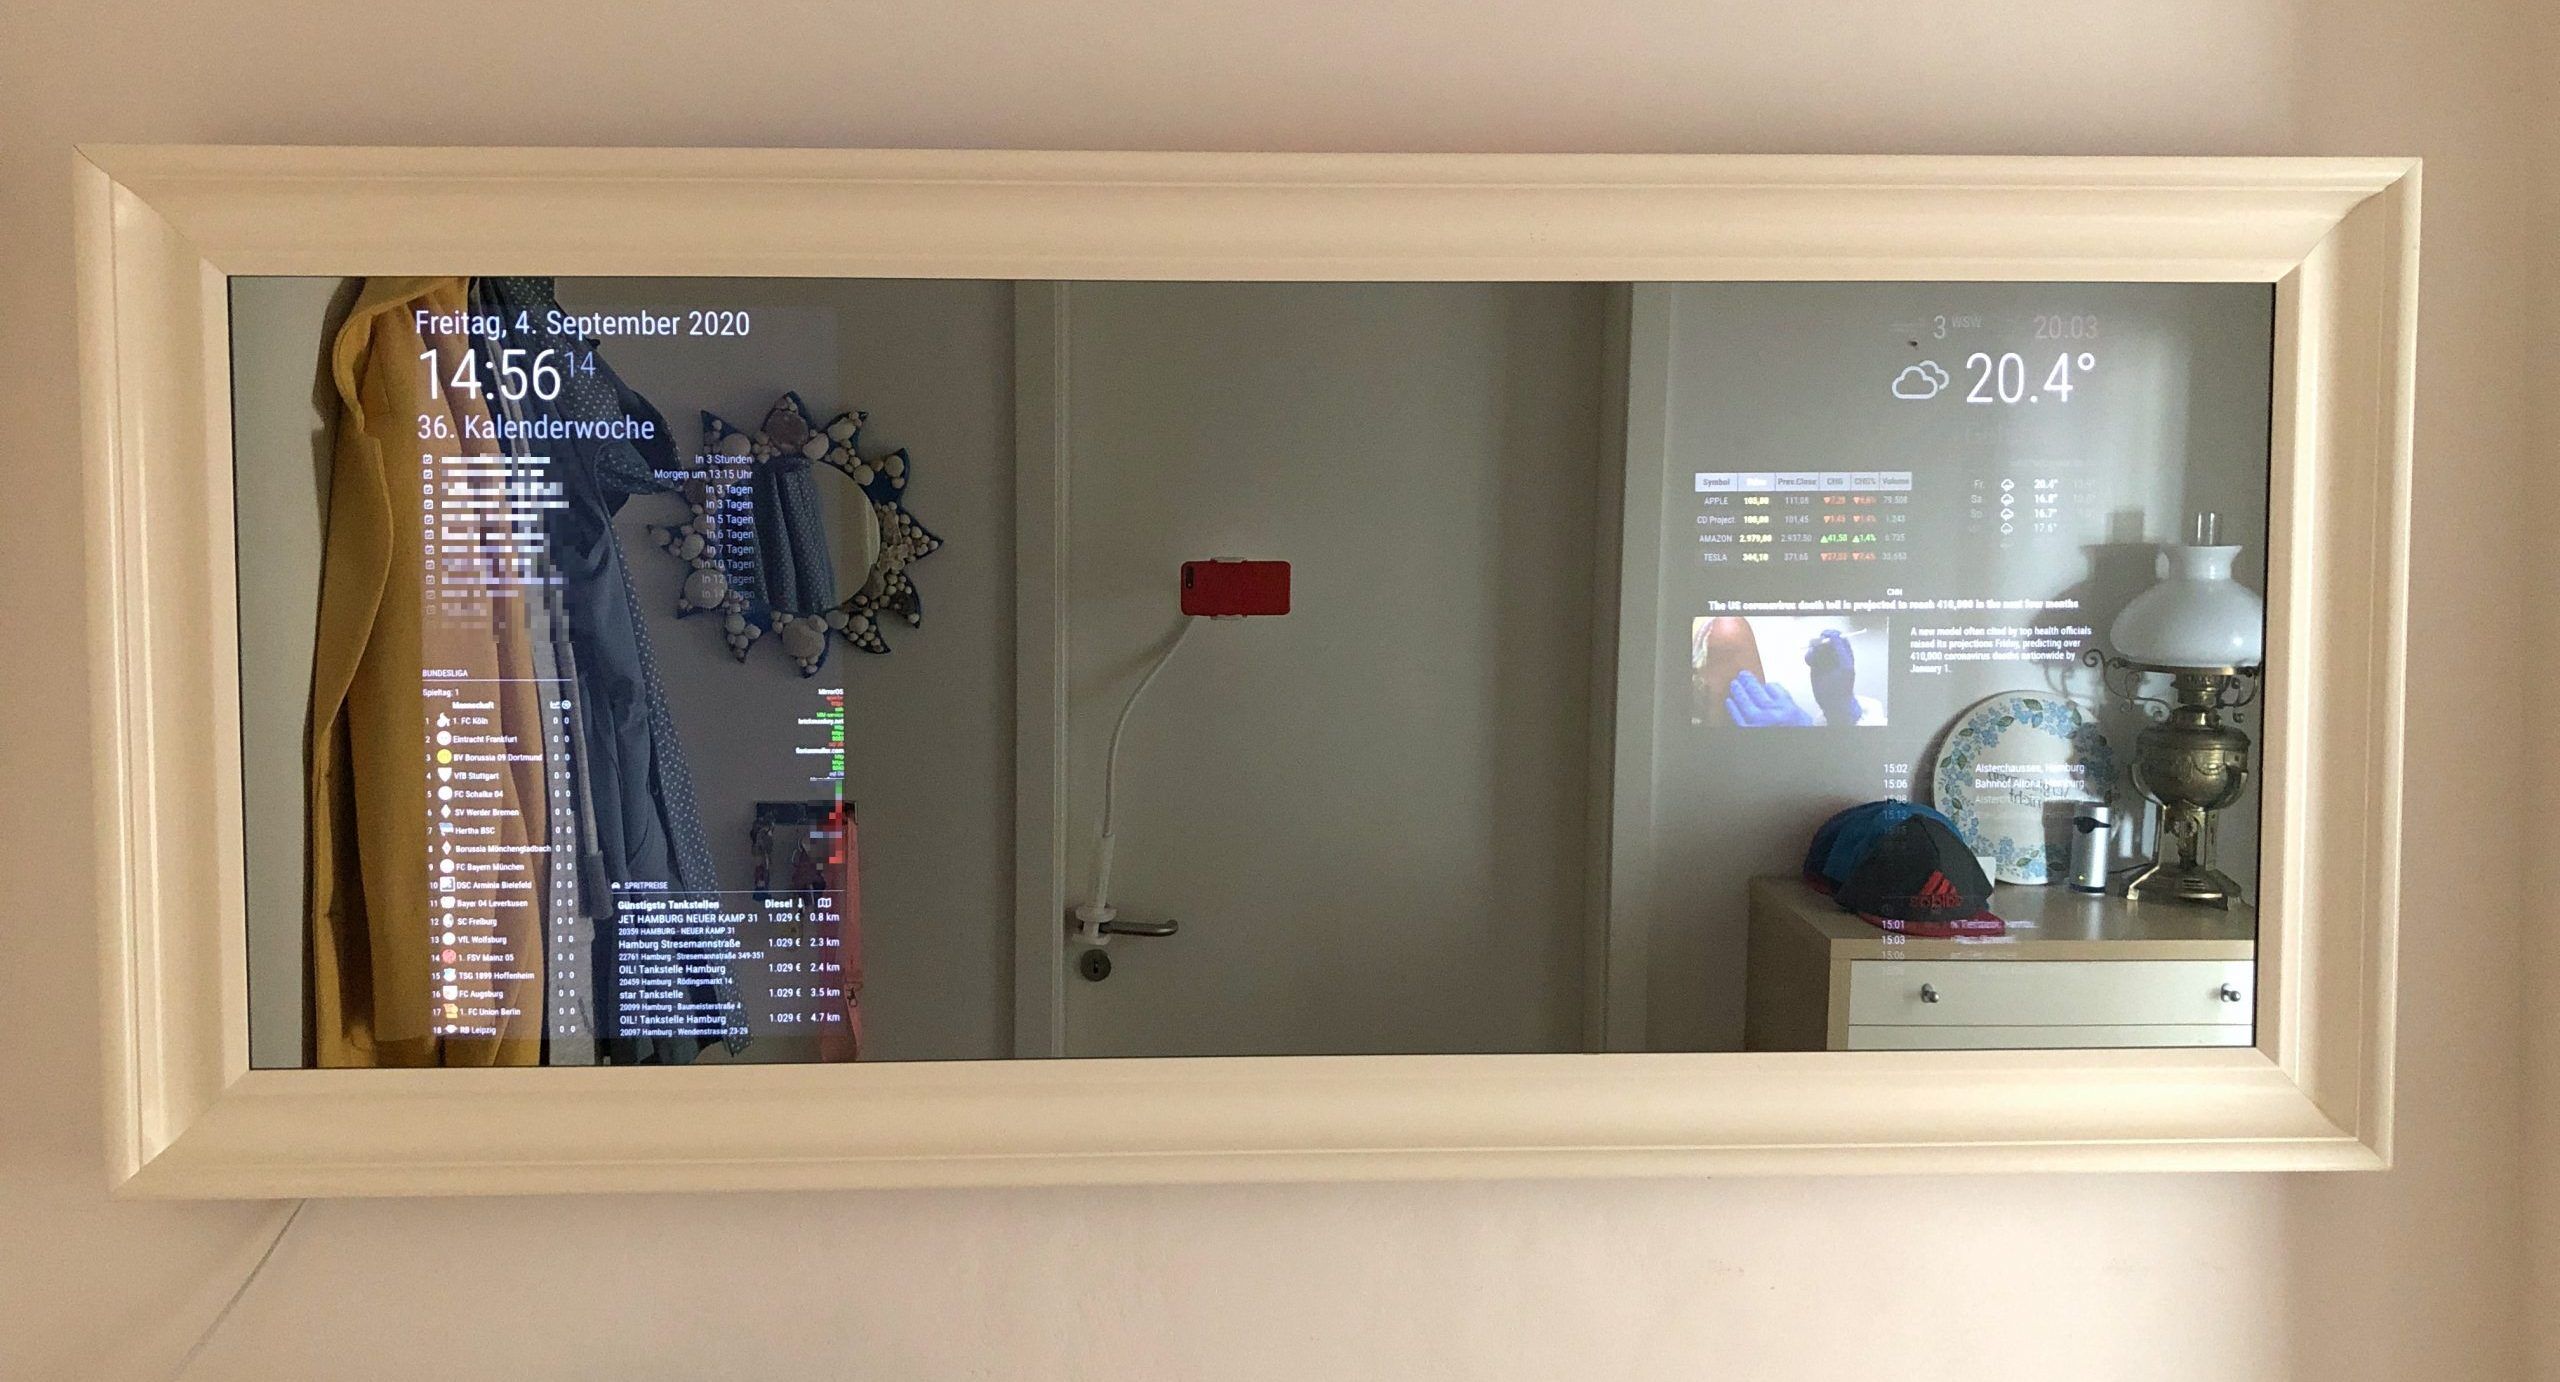
This project was already build in 2015, but due to a recent reinstall of the MagicMirror software on my mirror, I decided to share the whole build including the up to date software setup process from scratch. Also I can tell that it ran flawless for the past 5 years now, so pretty stable 🙂
Contents of article:
List of components used
This is the list of things I used to get that build done, some of it are mandatory, some of them are up to your own taste of how you want to design the whole thing.
Main components:
- 1x Mirror with one-way spy glass, I used IKEA TOFTBYN
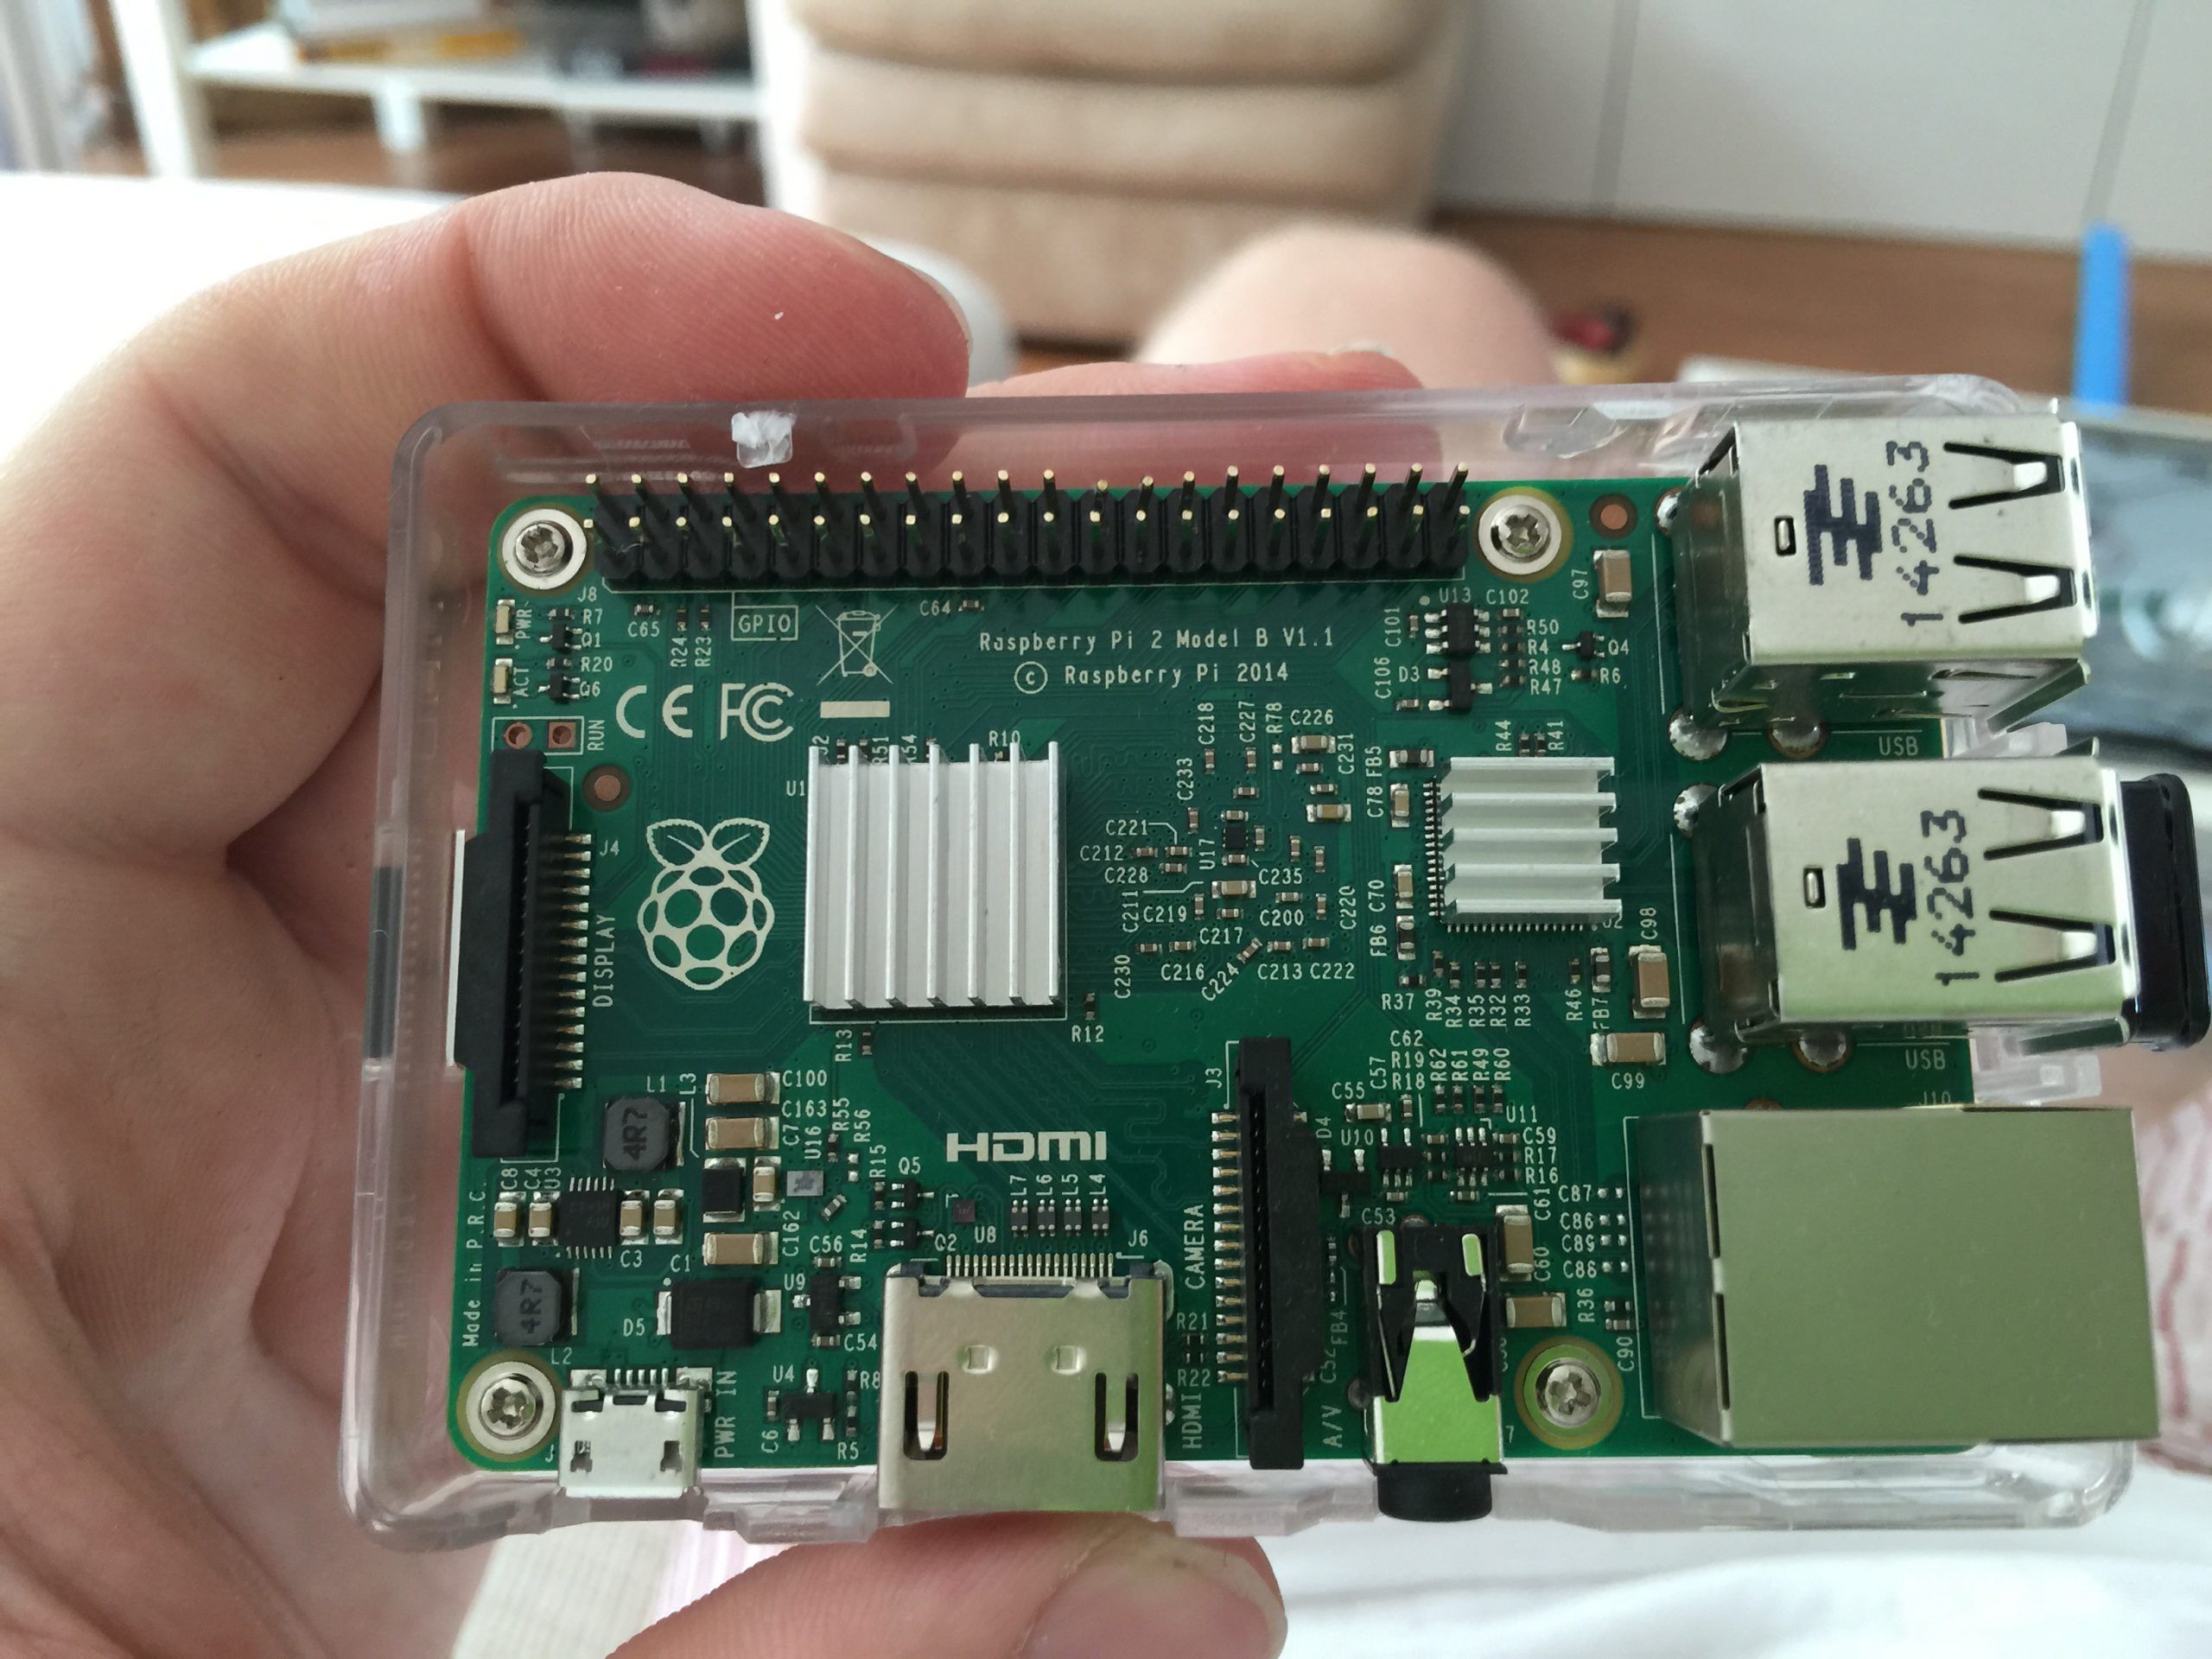
- 2x Raspberry Pi 2 with a USB WIFI dongle for each
- 2x 8 GB Sandisk micro SDcard
- 2x old 24" 16:9 TFT monitors
- 2x micro usb cable for power
- 1x Anker 4 port USB charger with flat power cord
- 1x Super flat 3-port power strip with 3 flat plug ports
- 1x power switch
- Some wiring tools and insulation equipment
- Everything else you might need for assembly, which is pretty much up to your creativity.
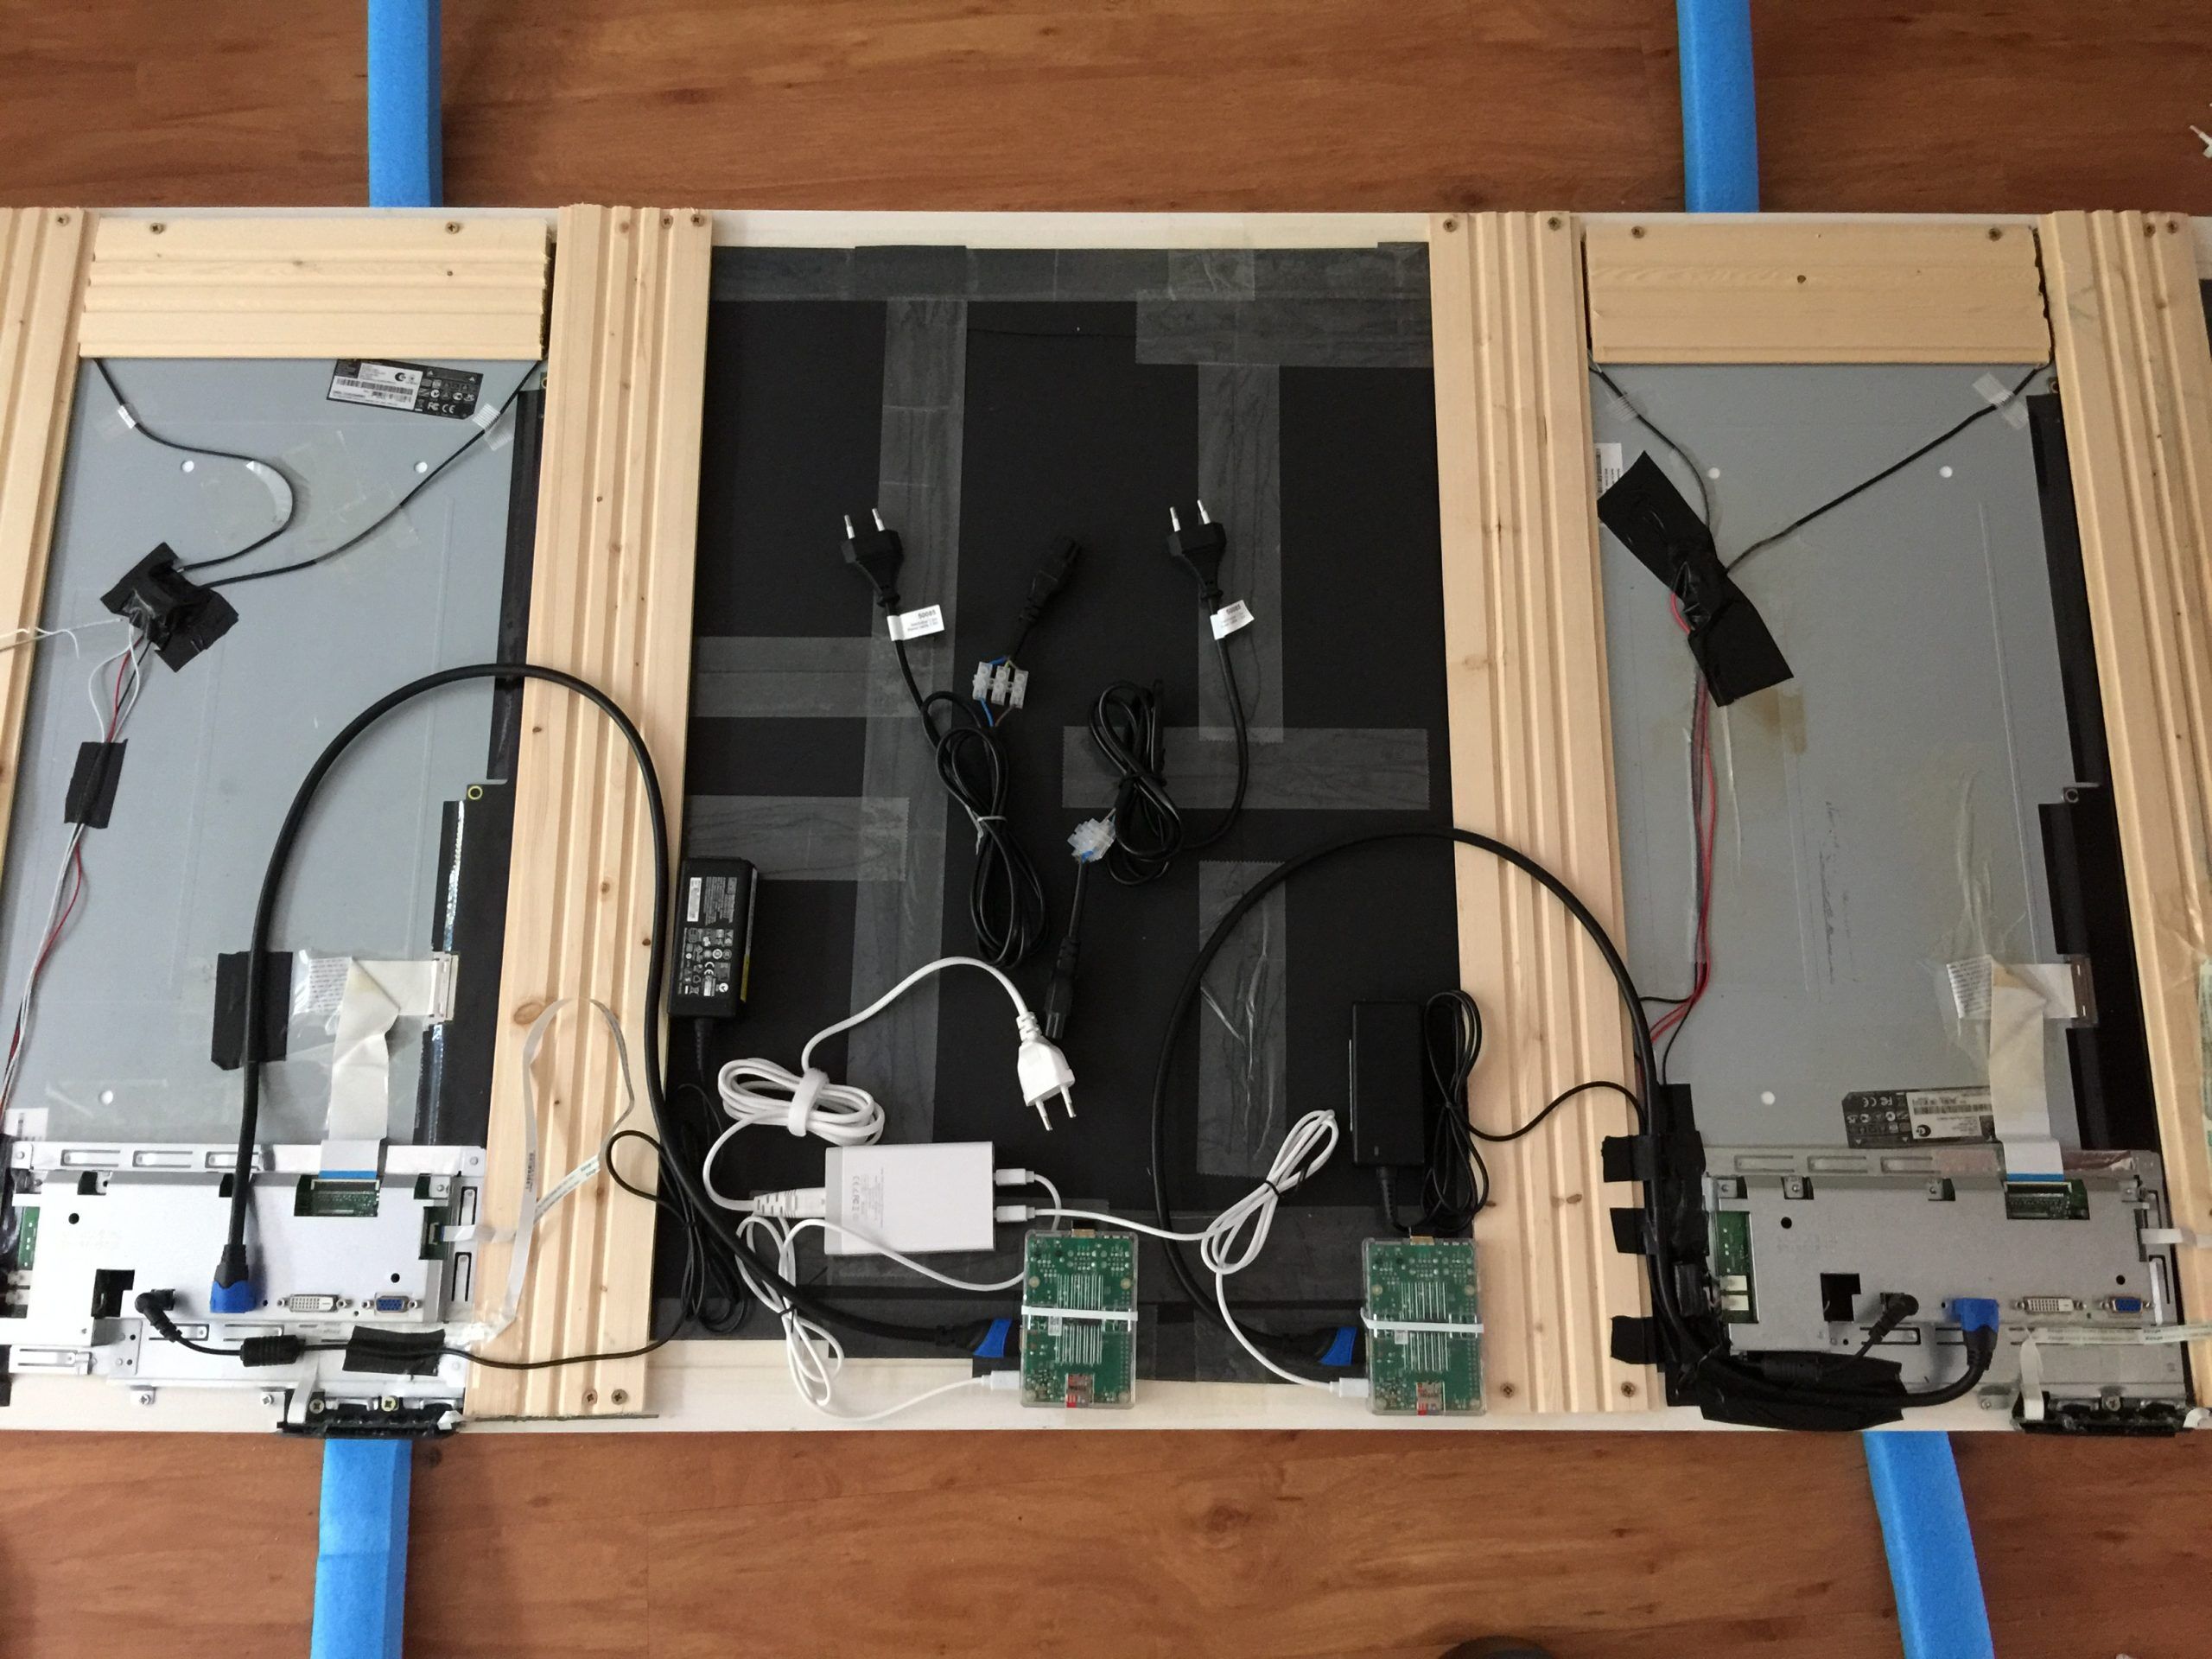
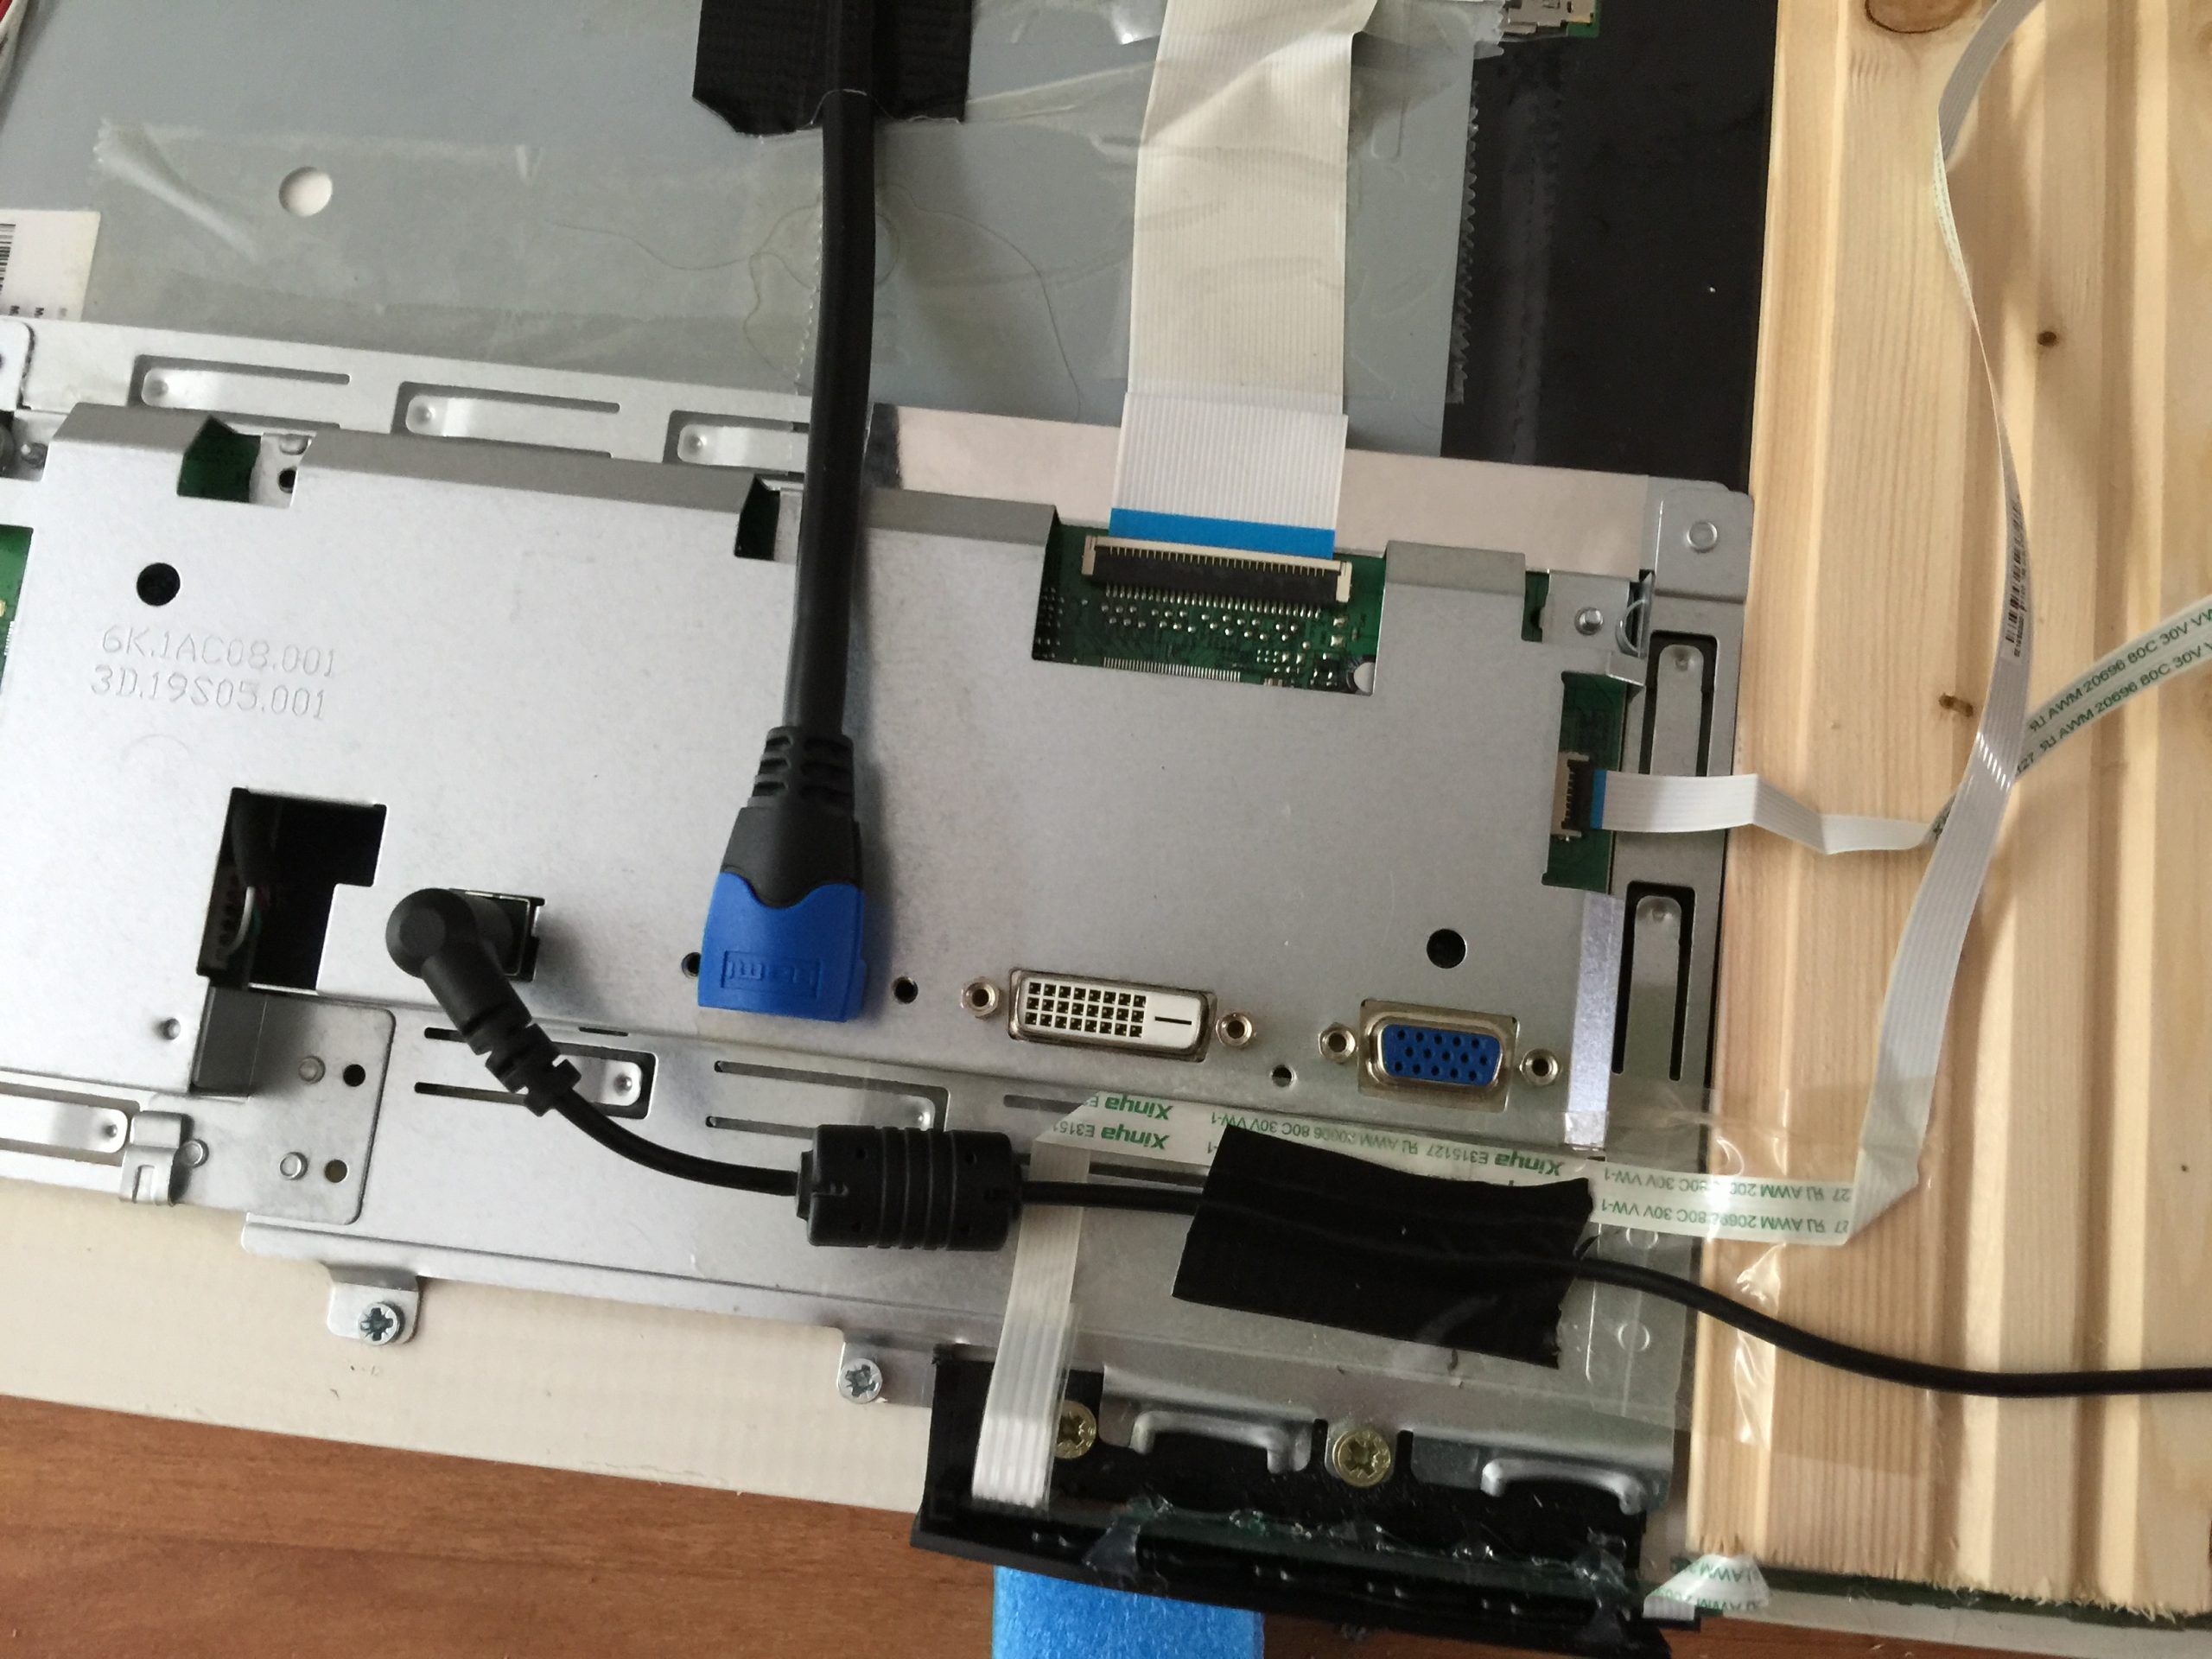
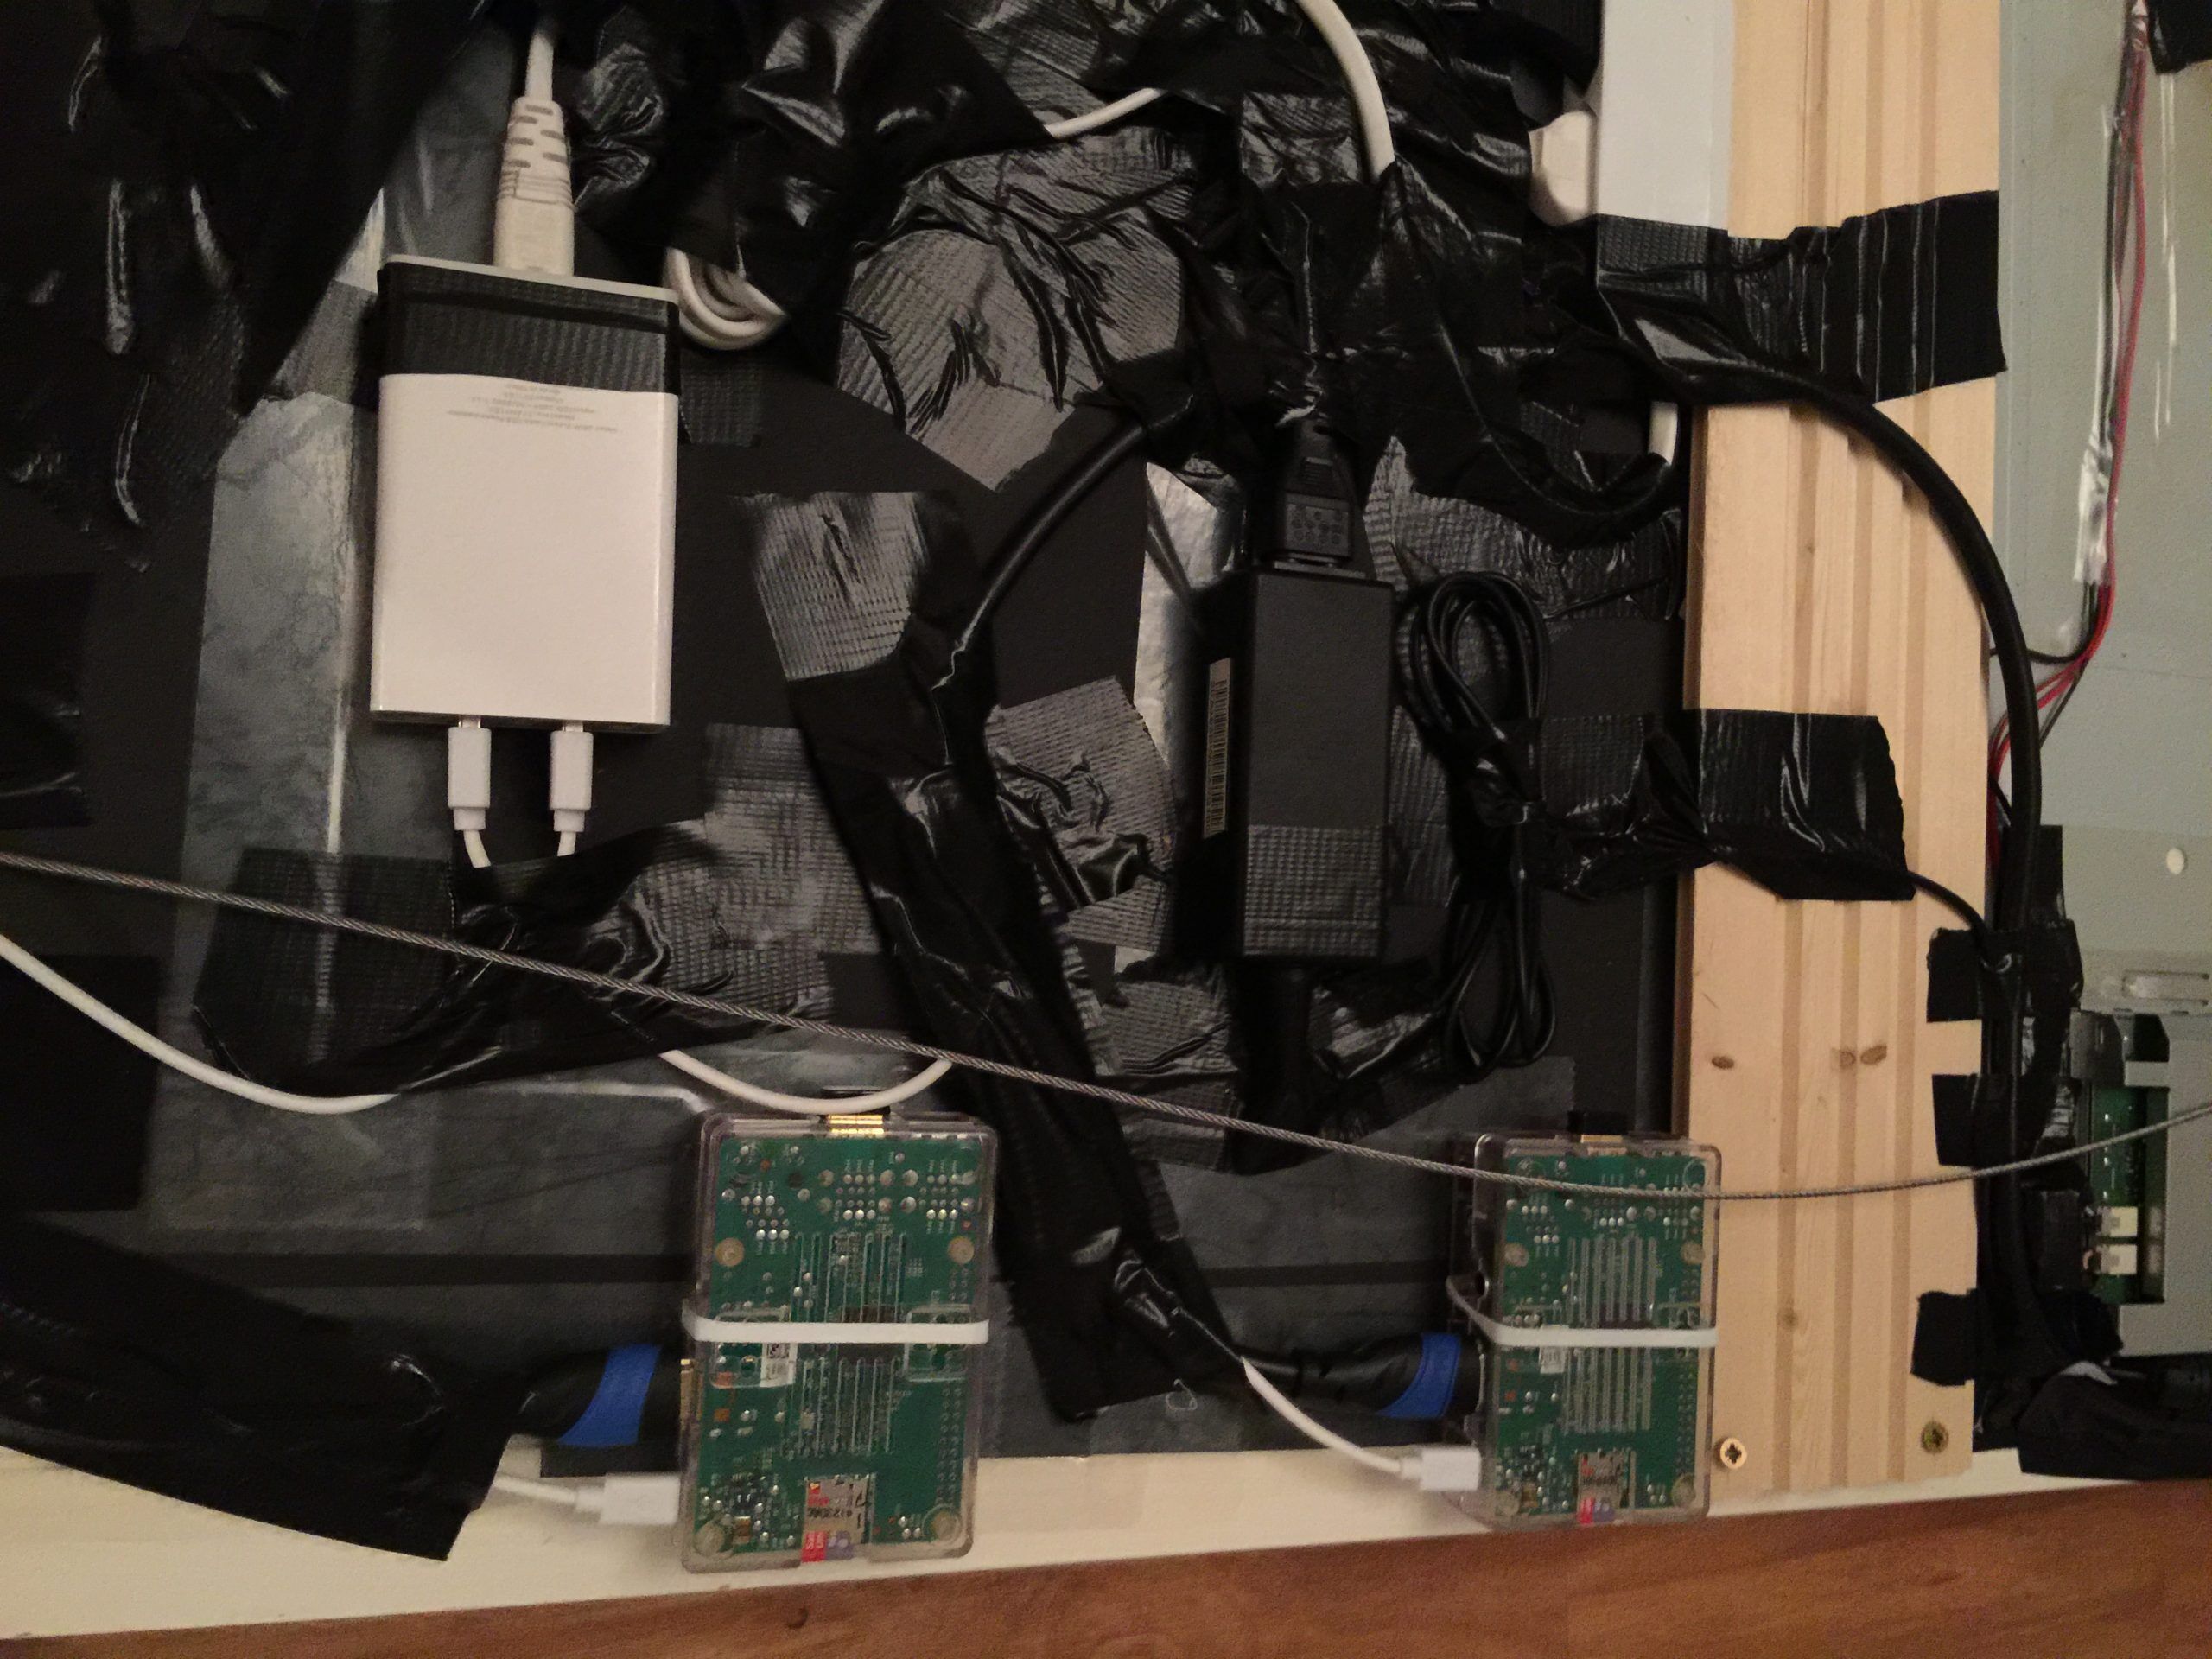
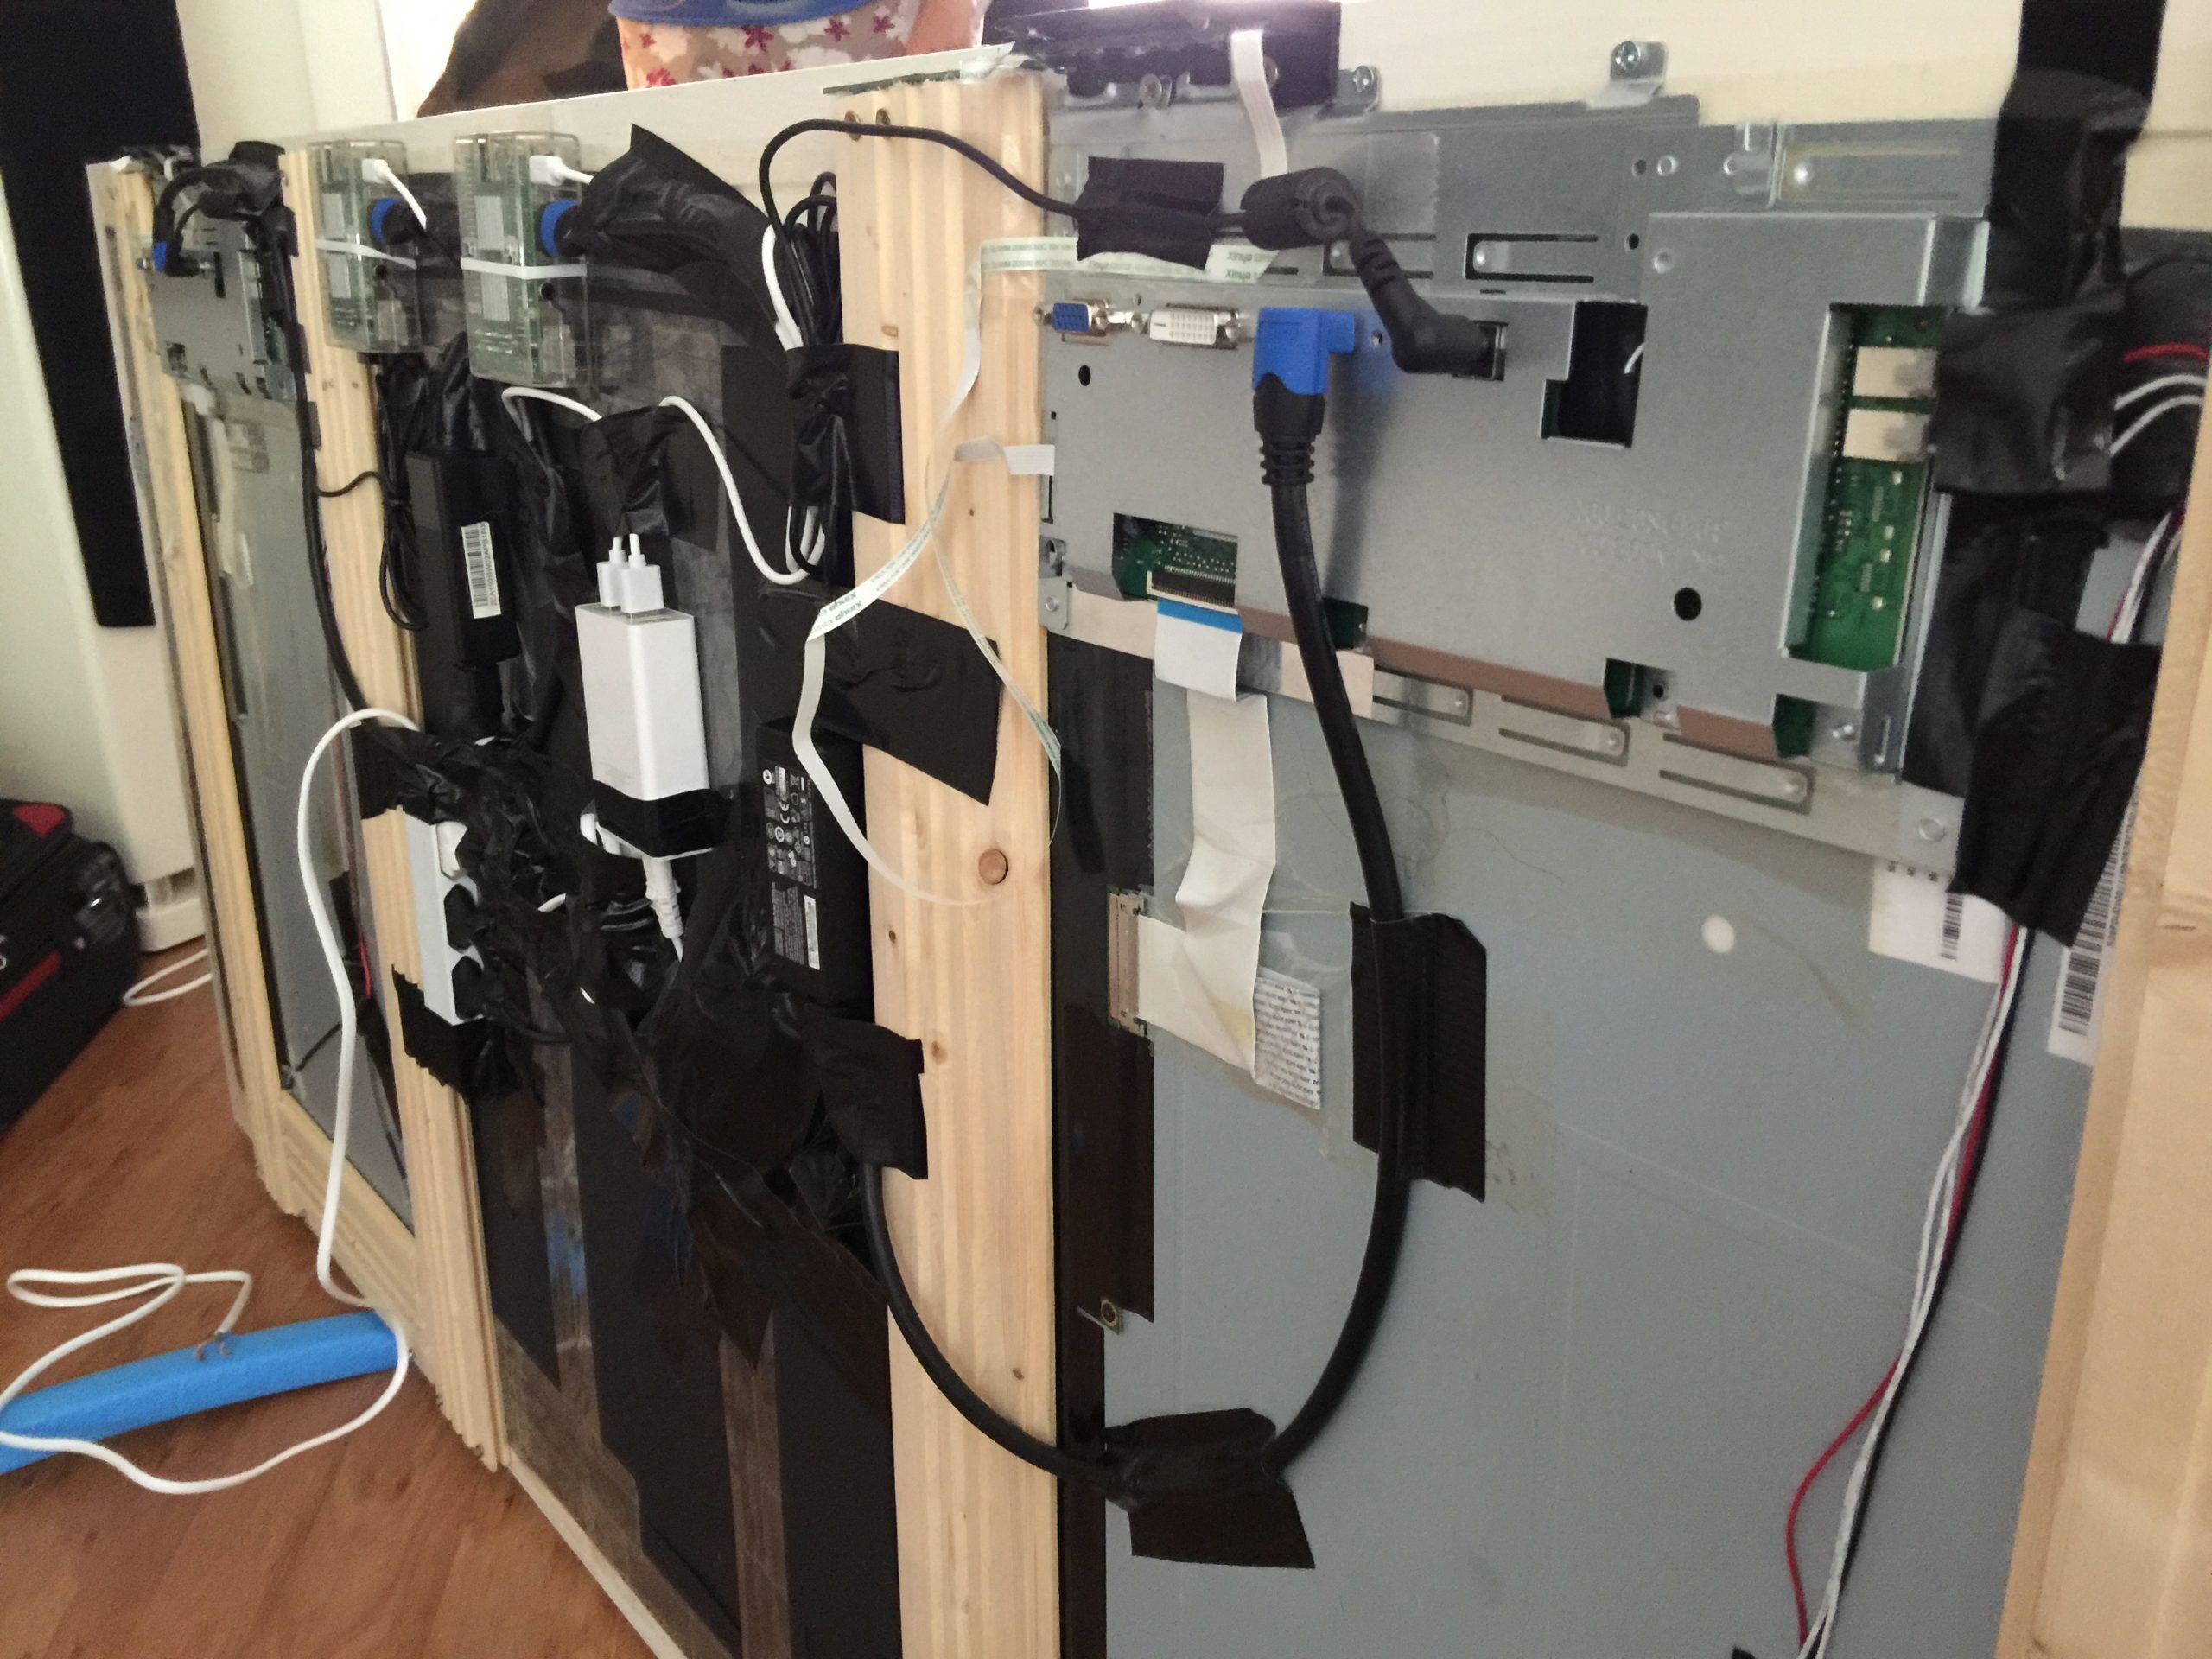
The build of the hardware
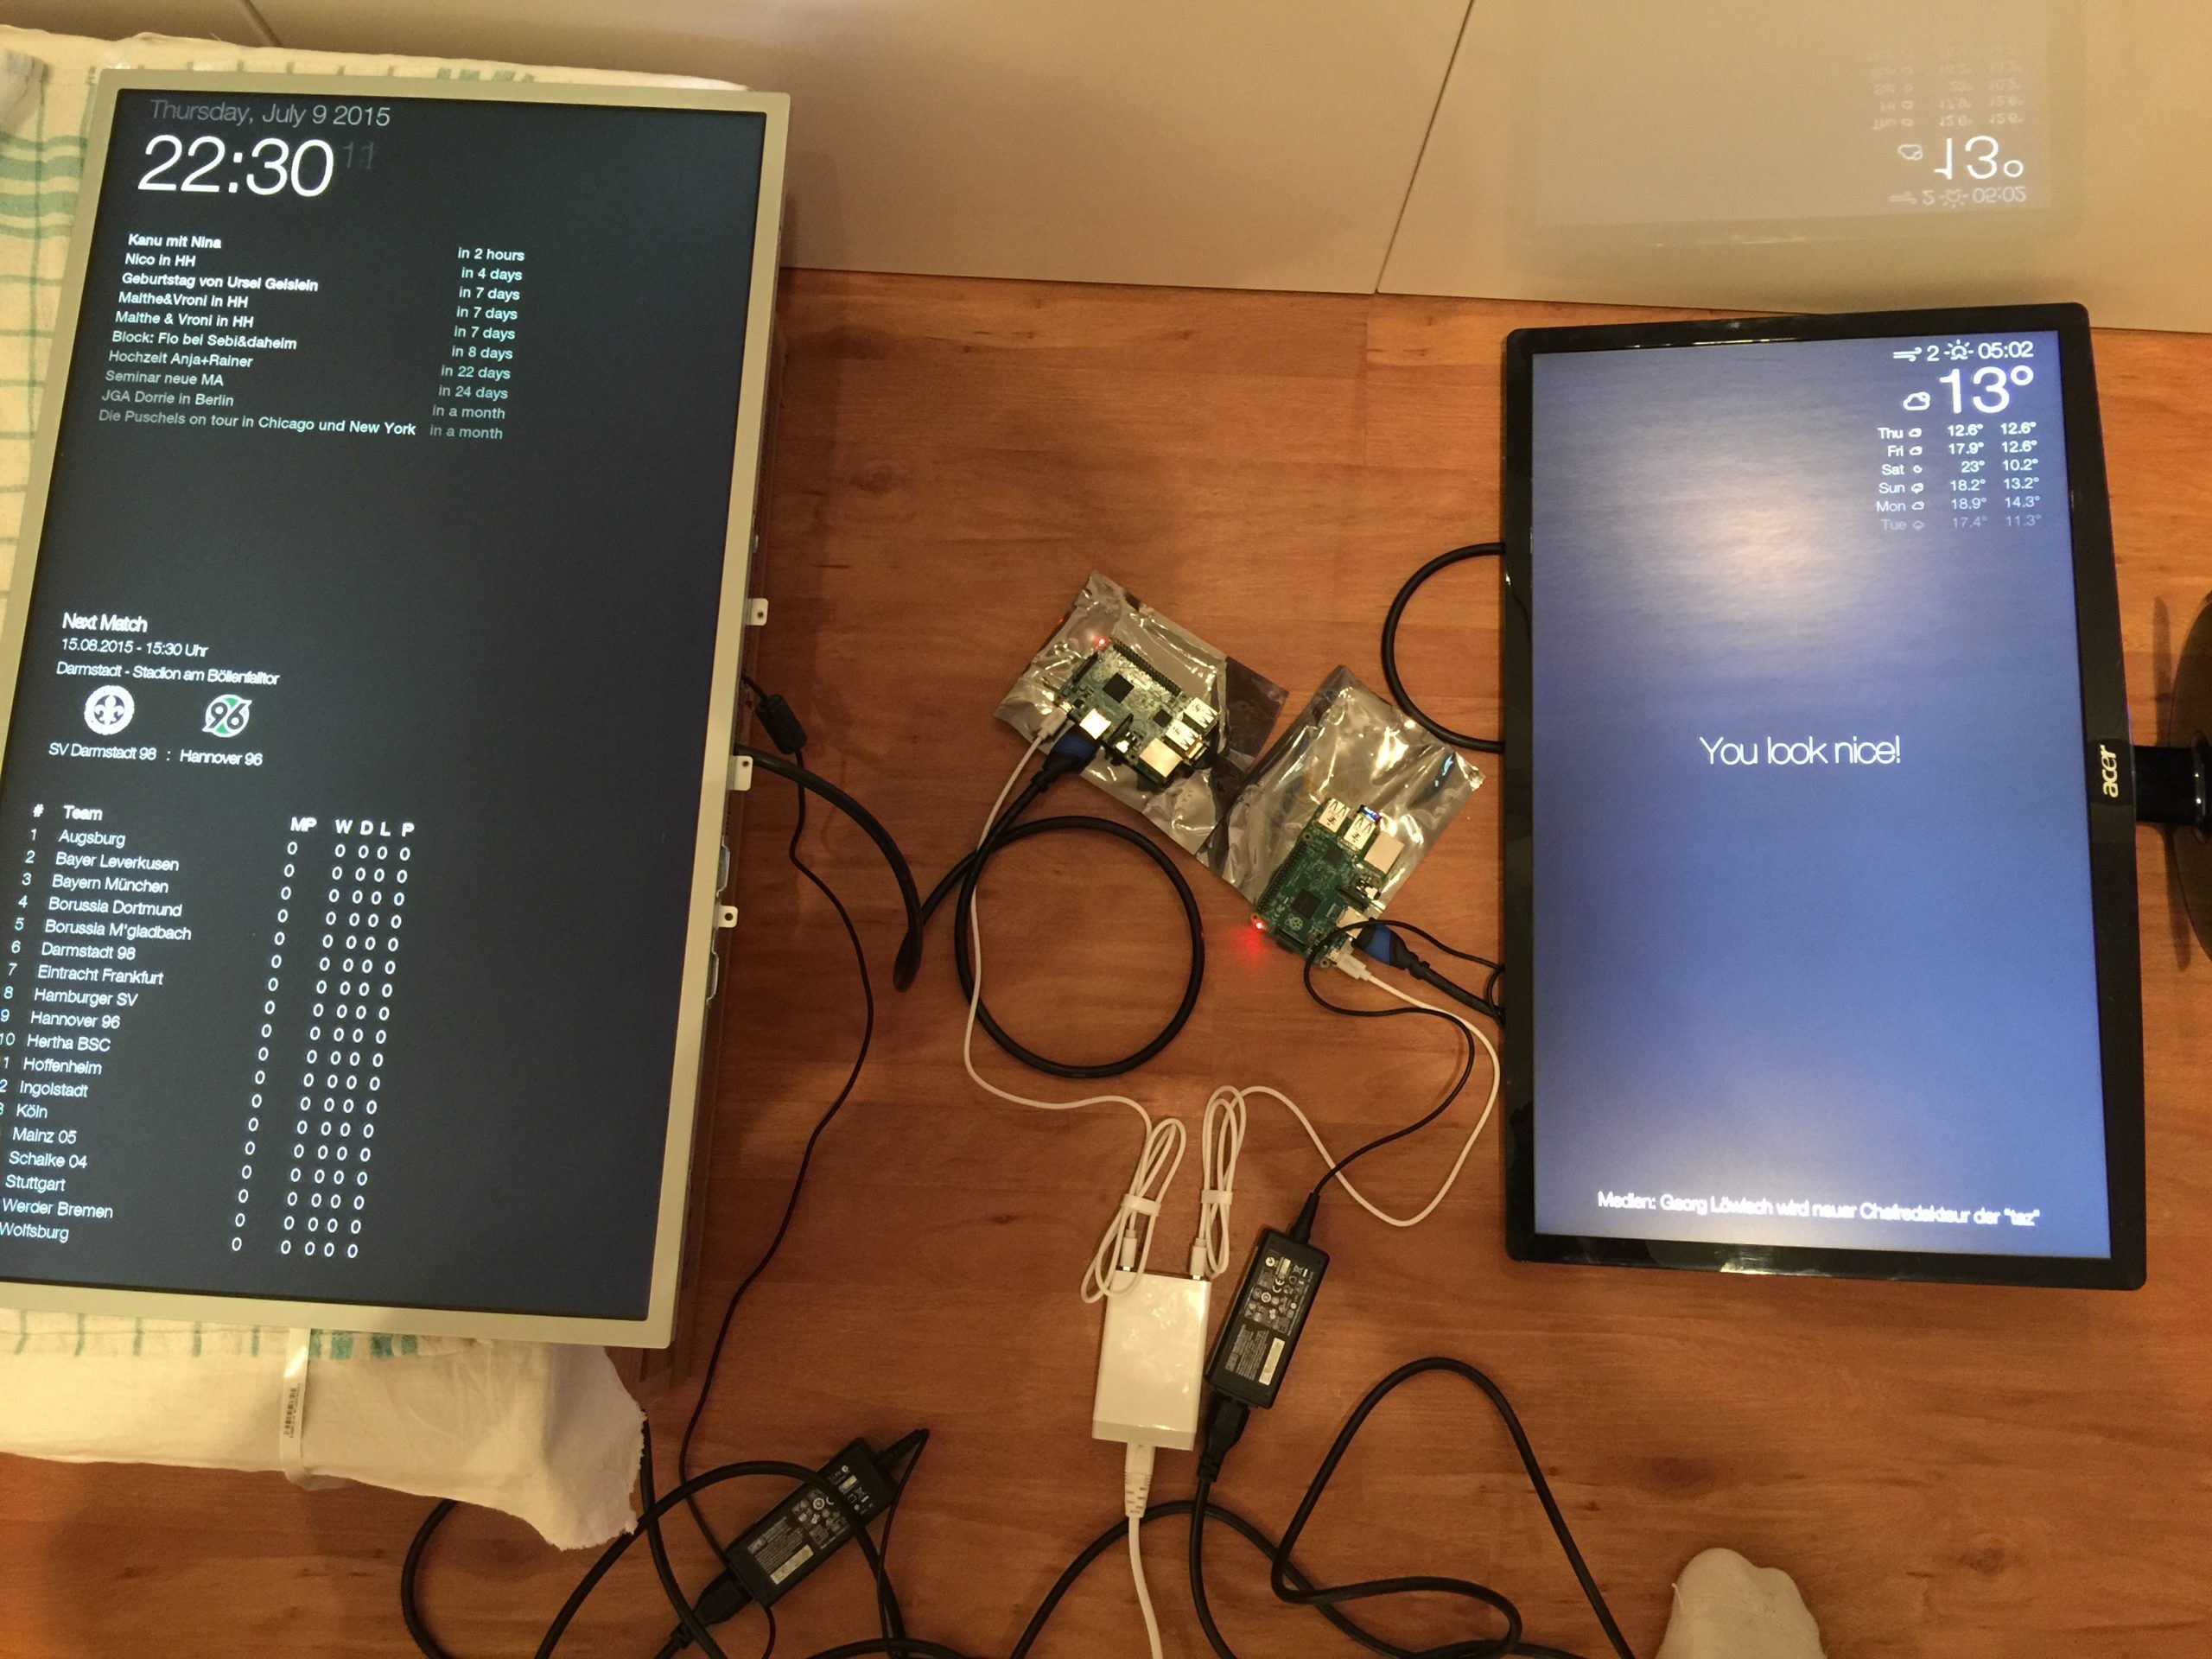
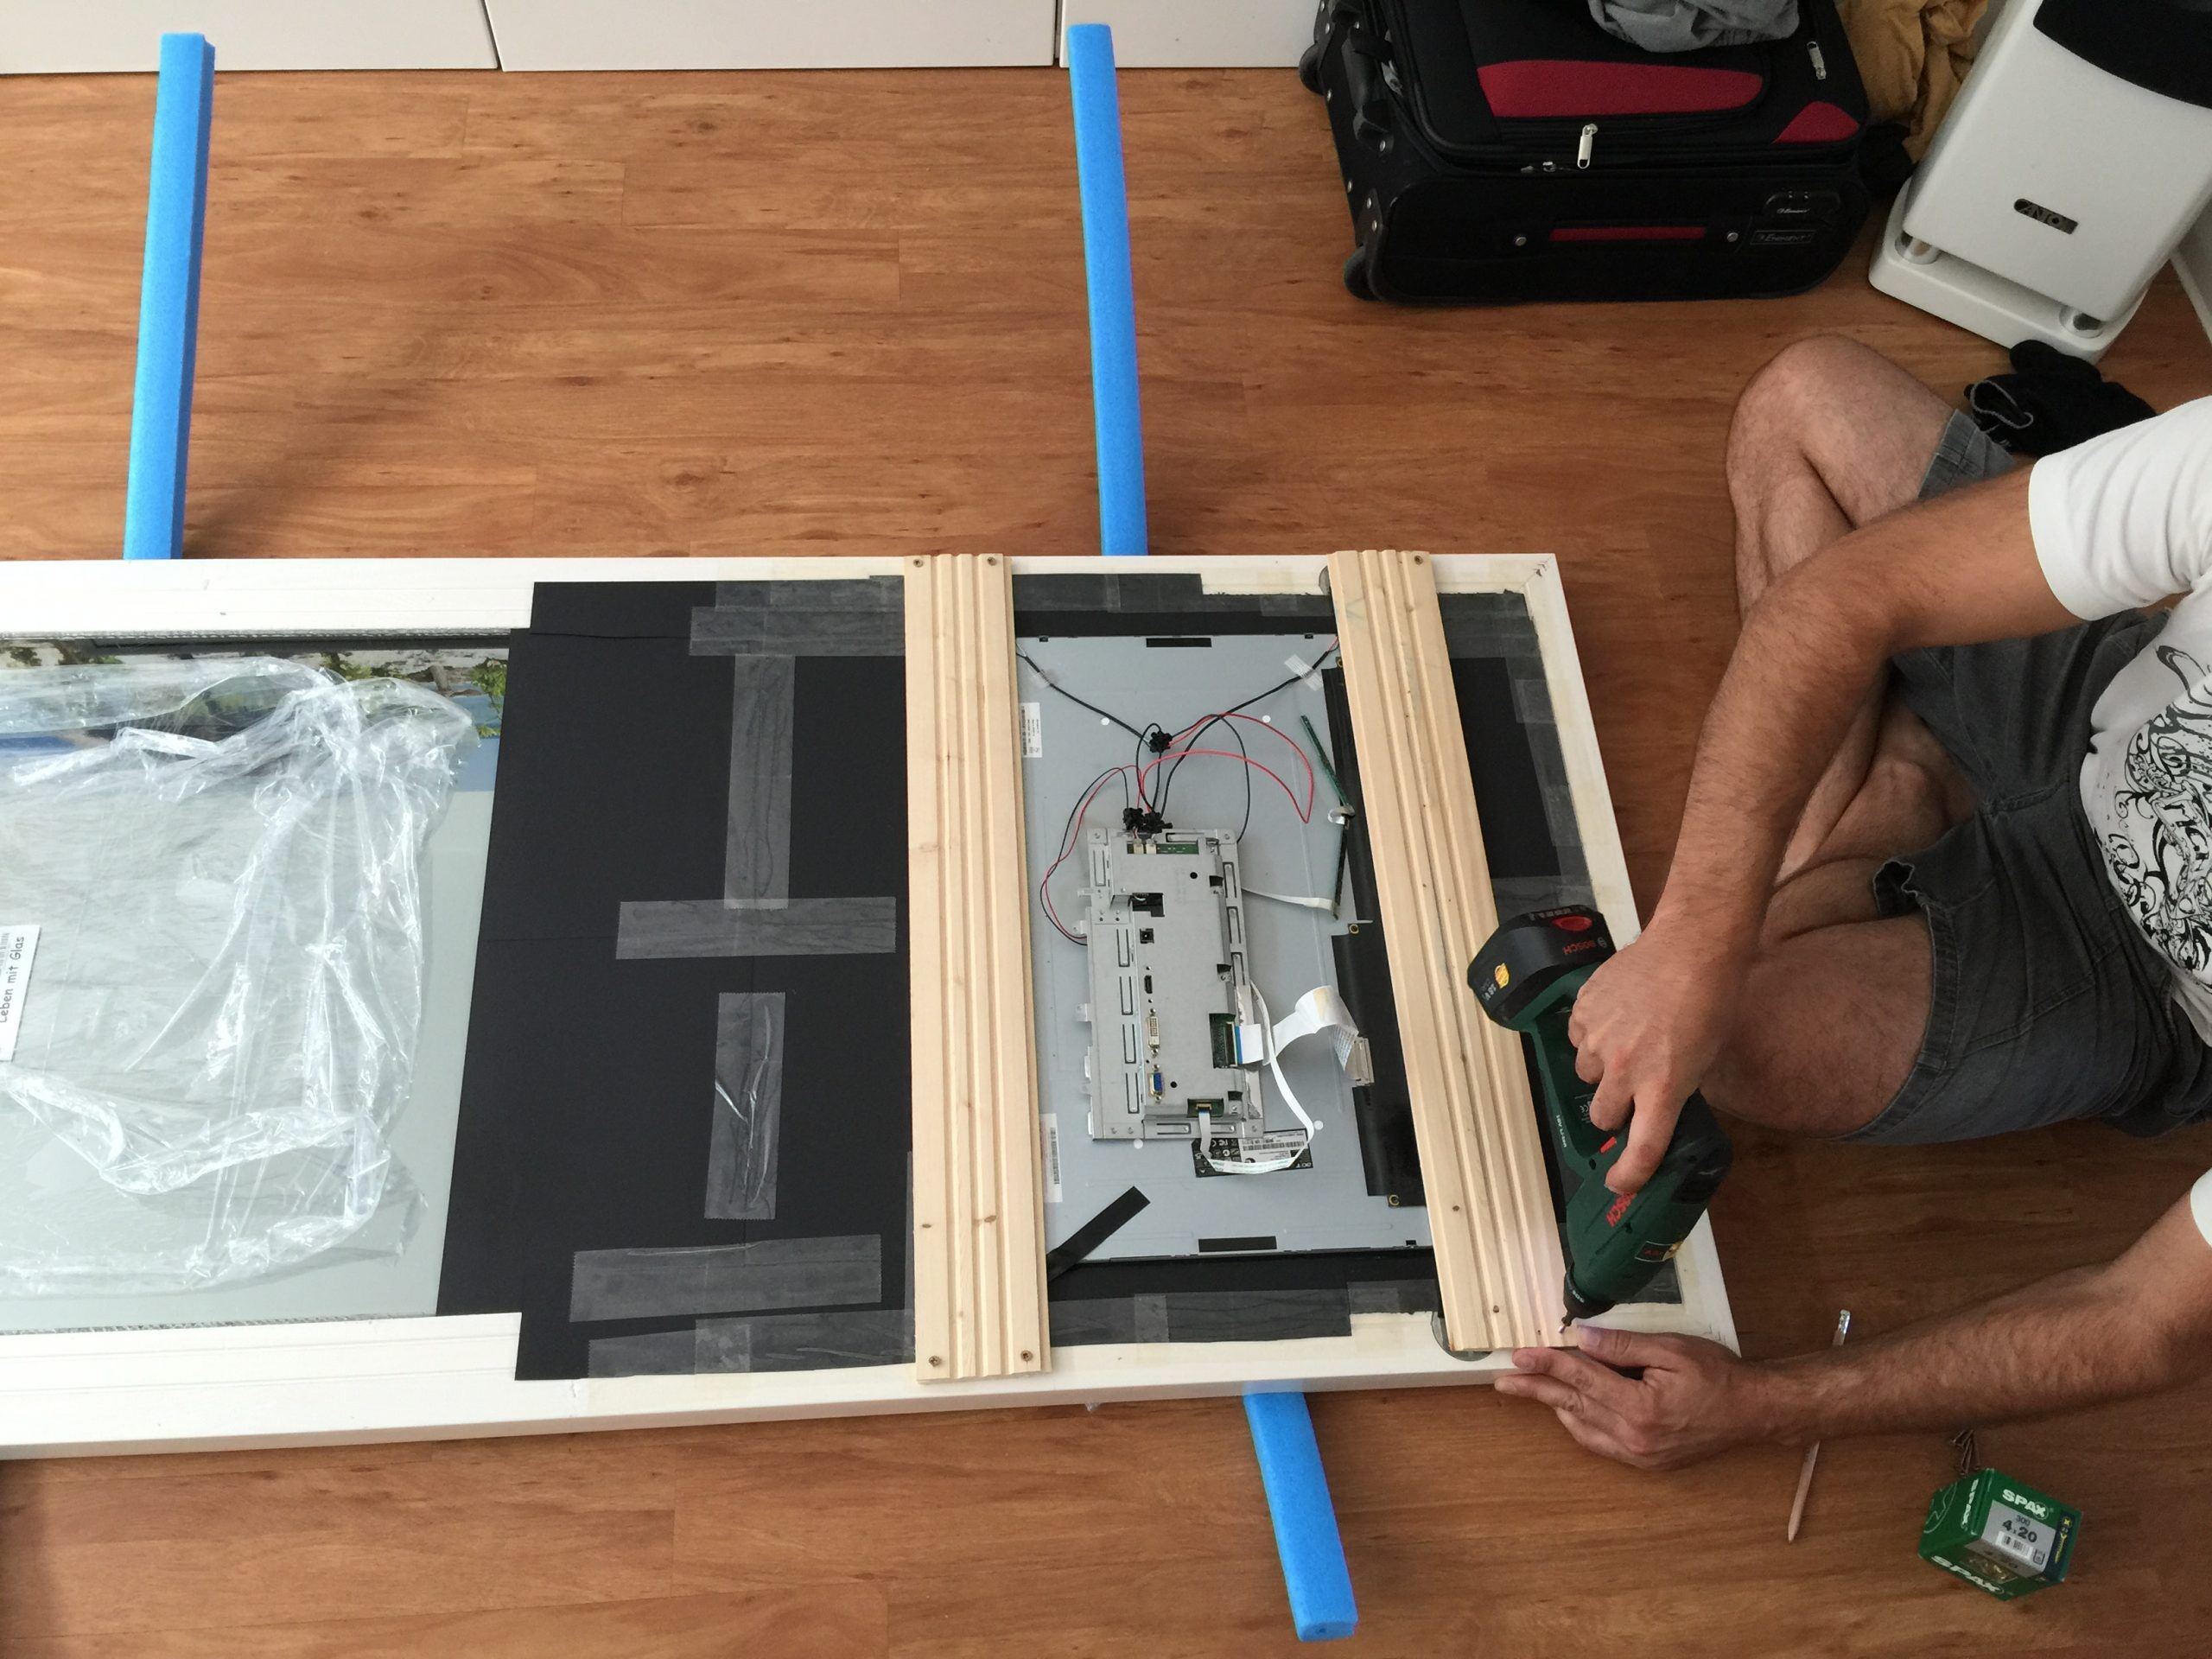
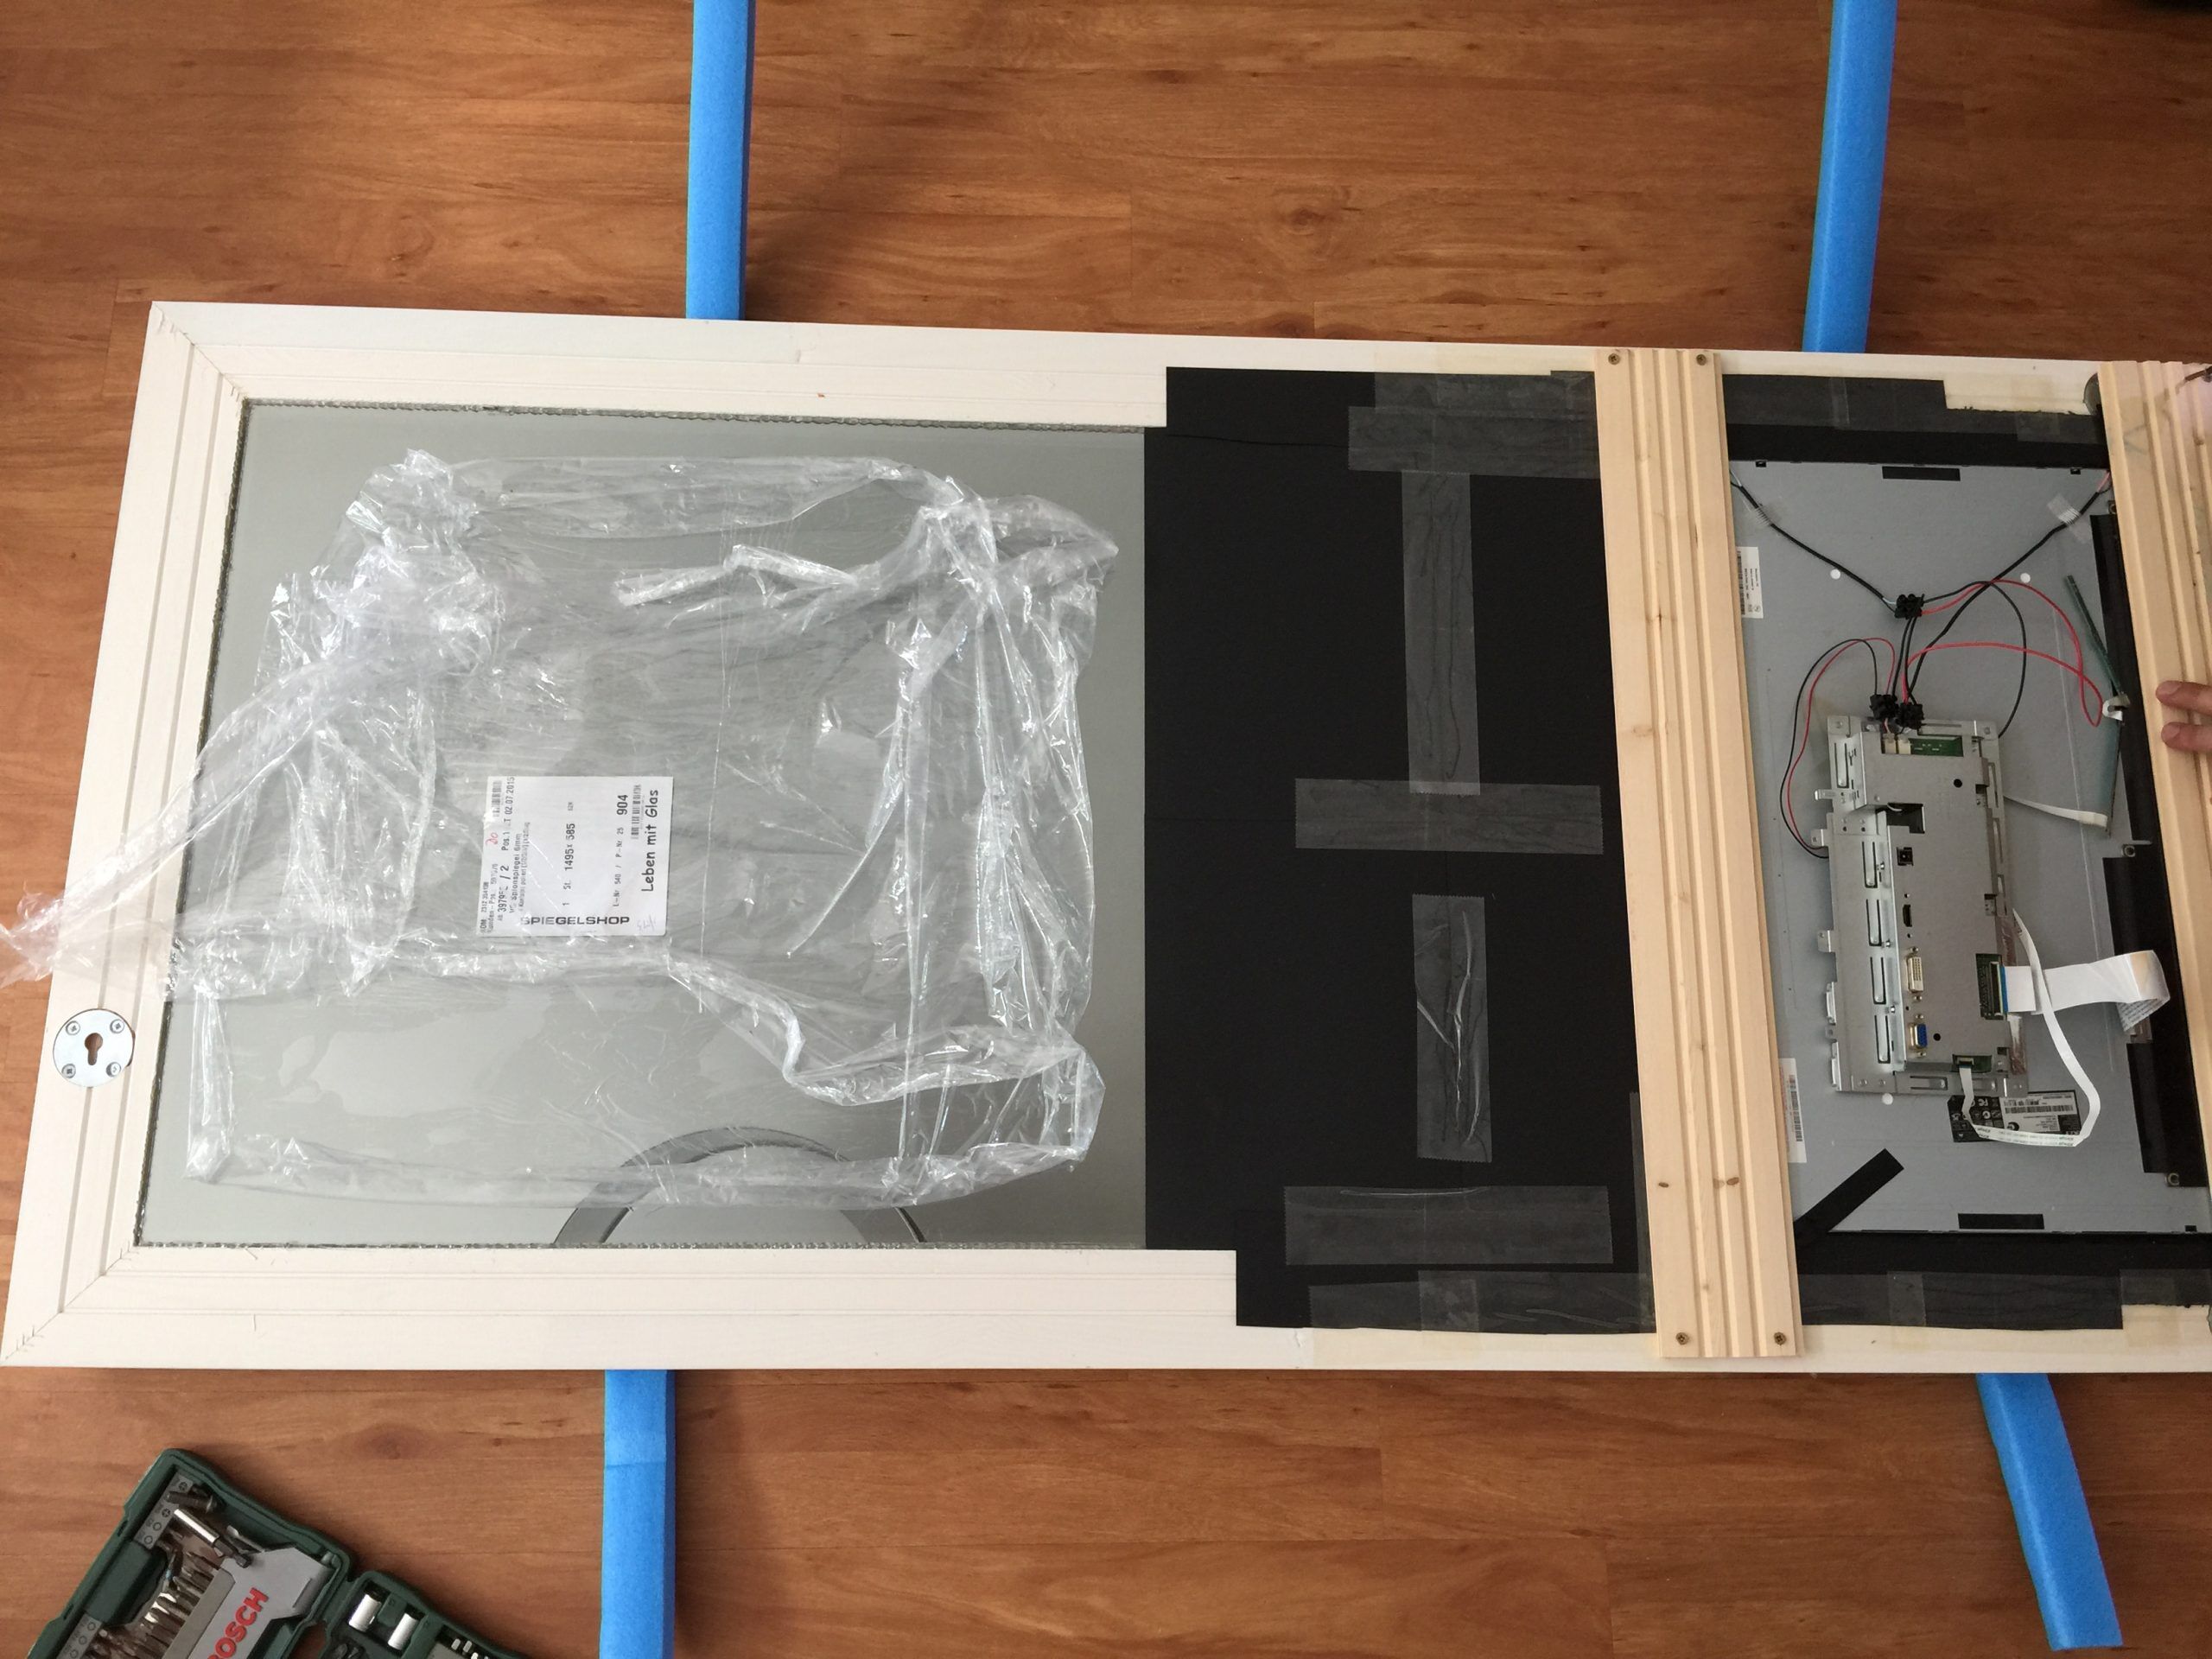
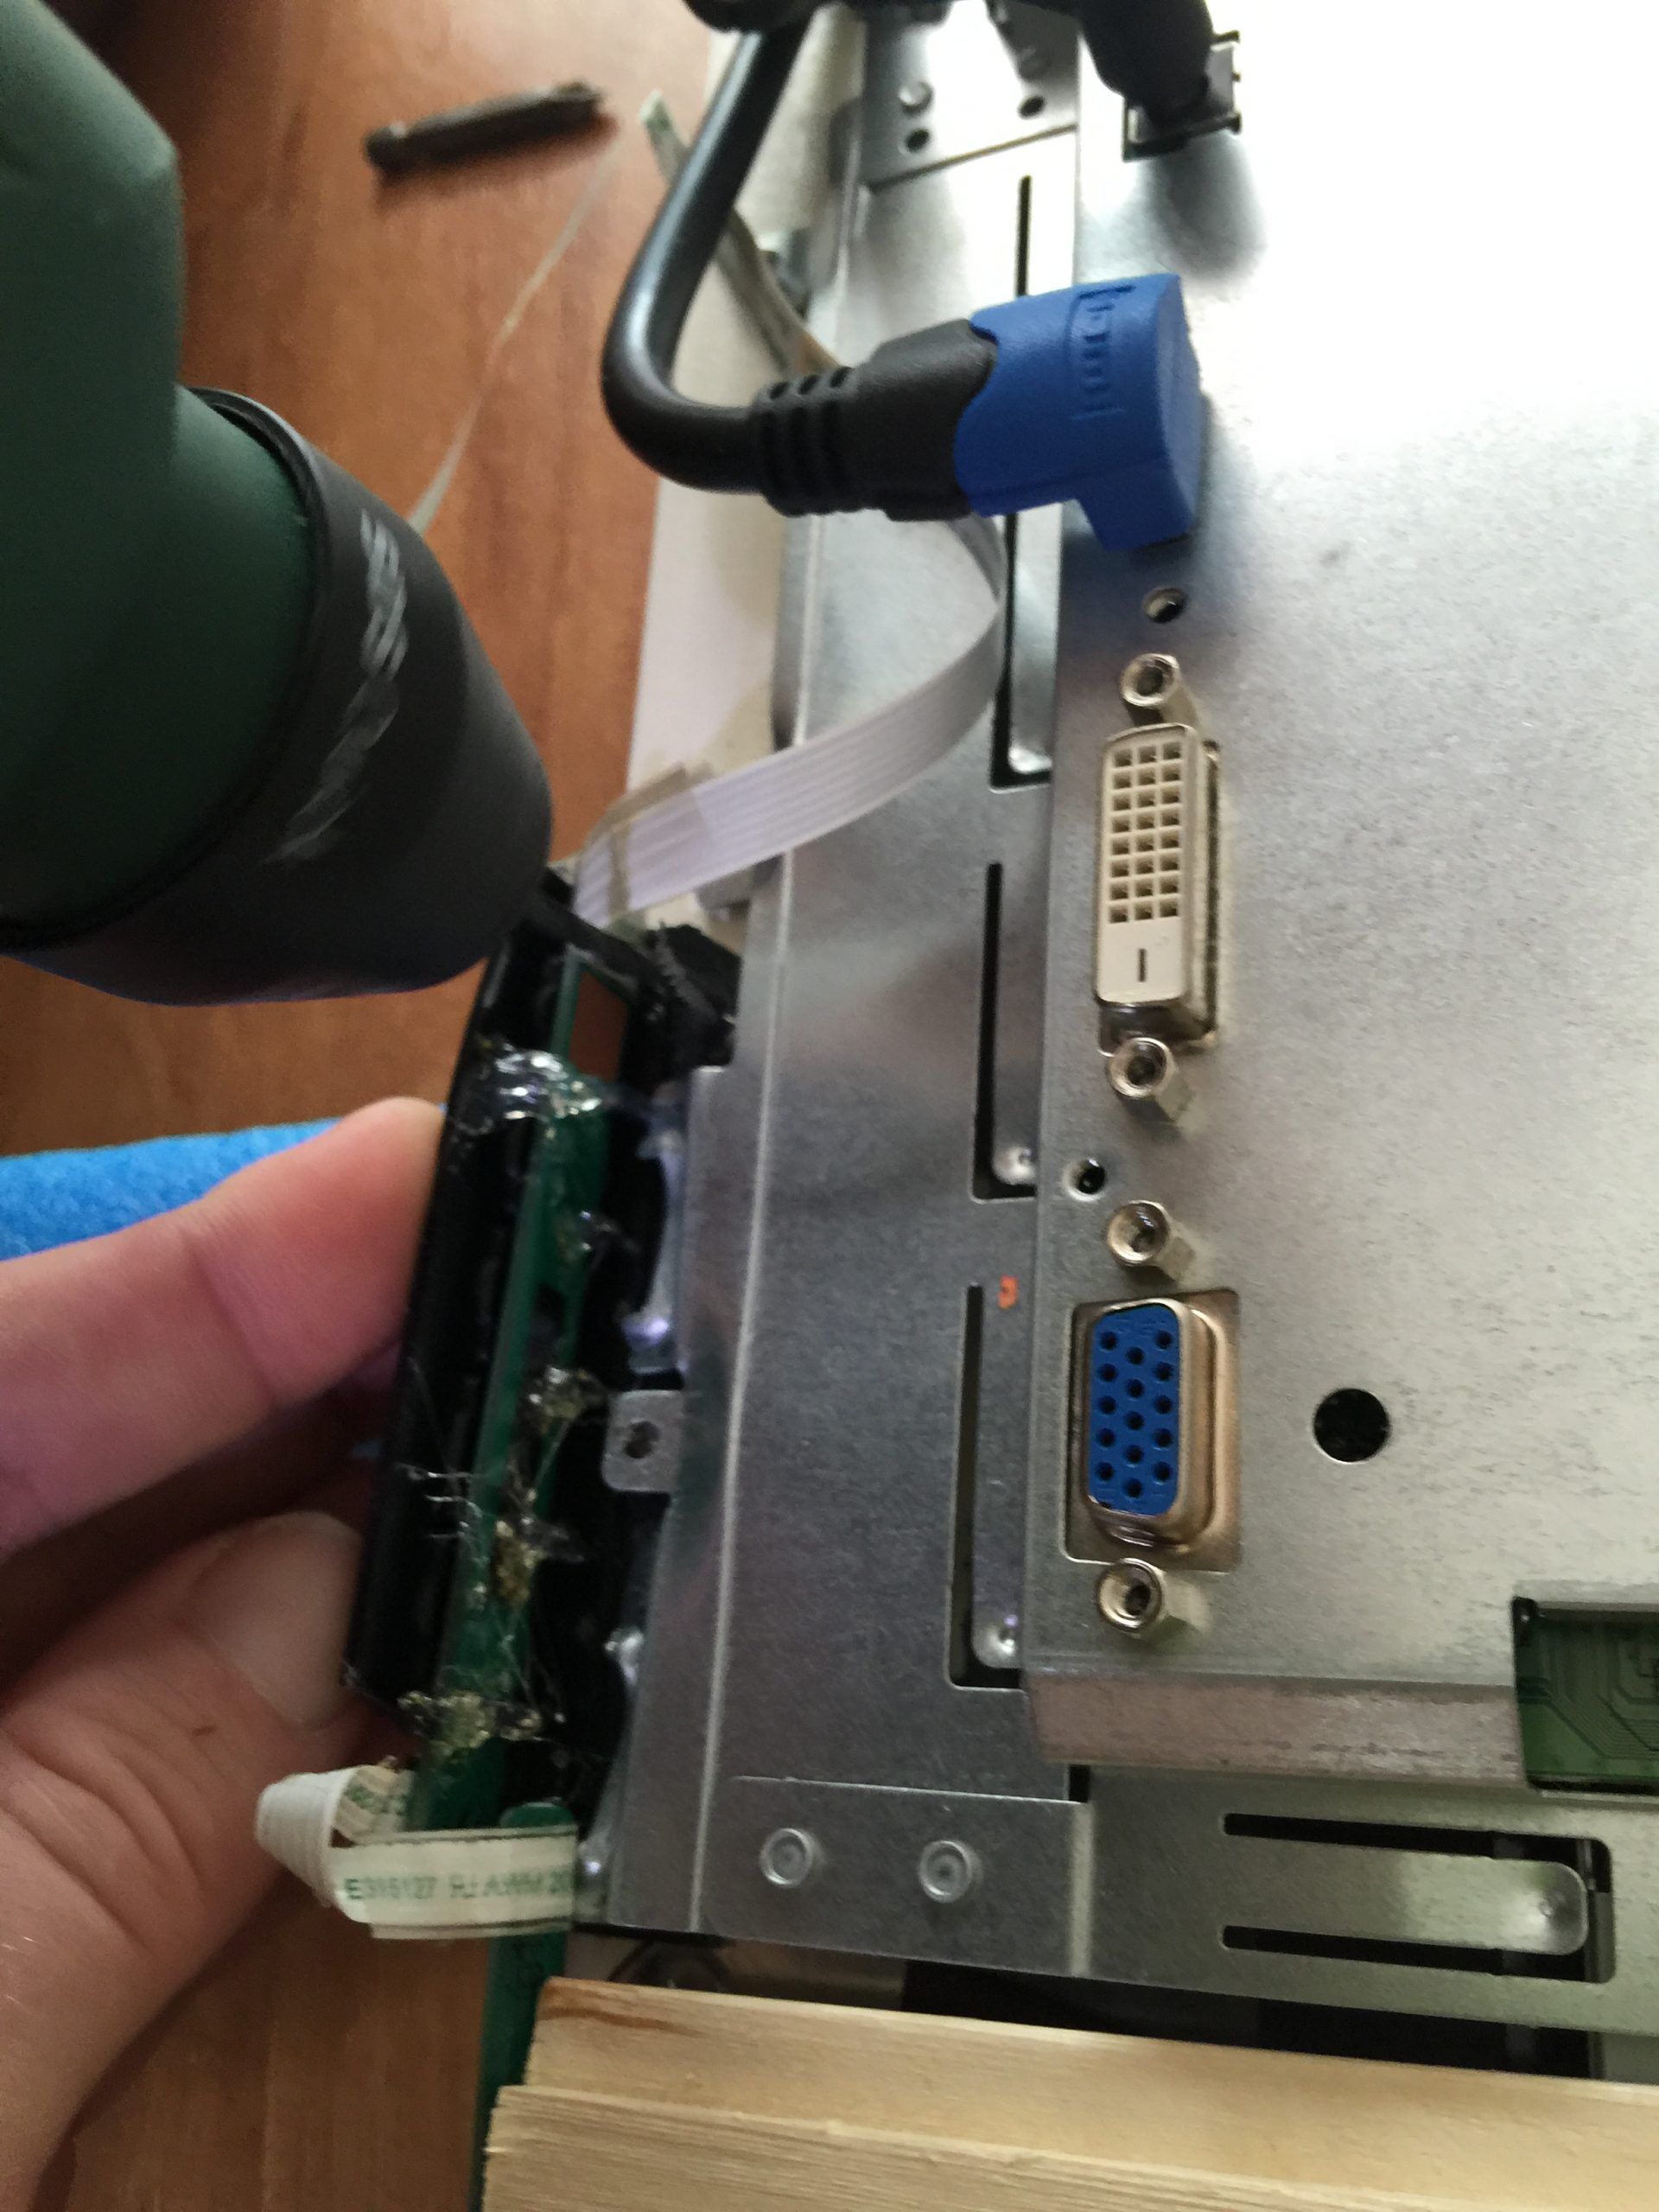
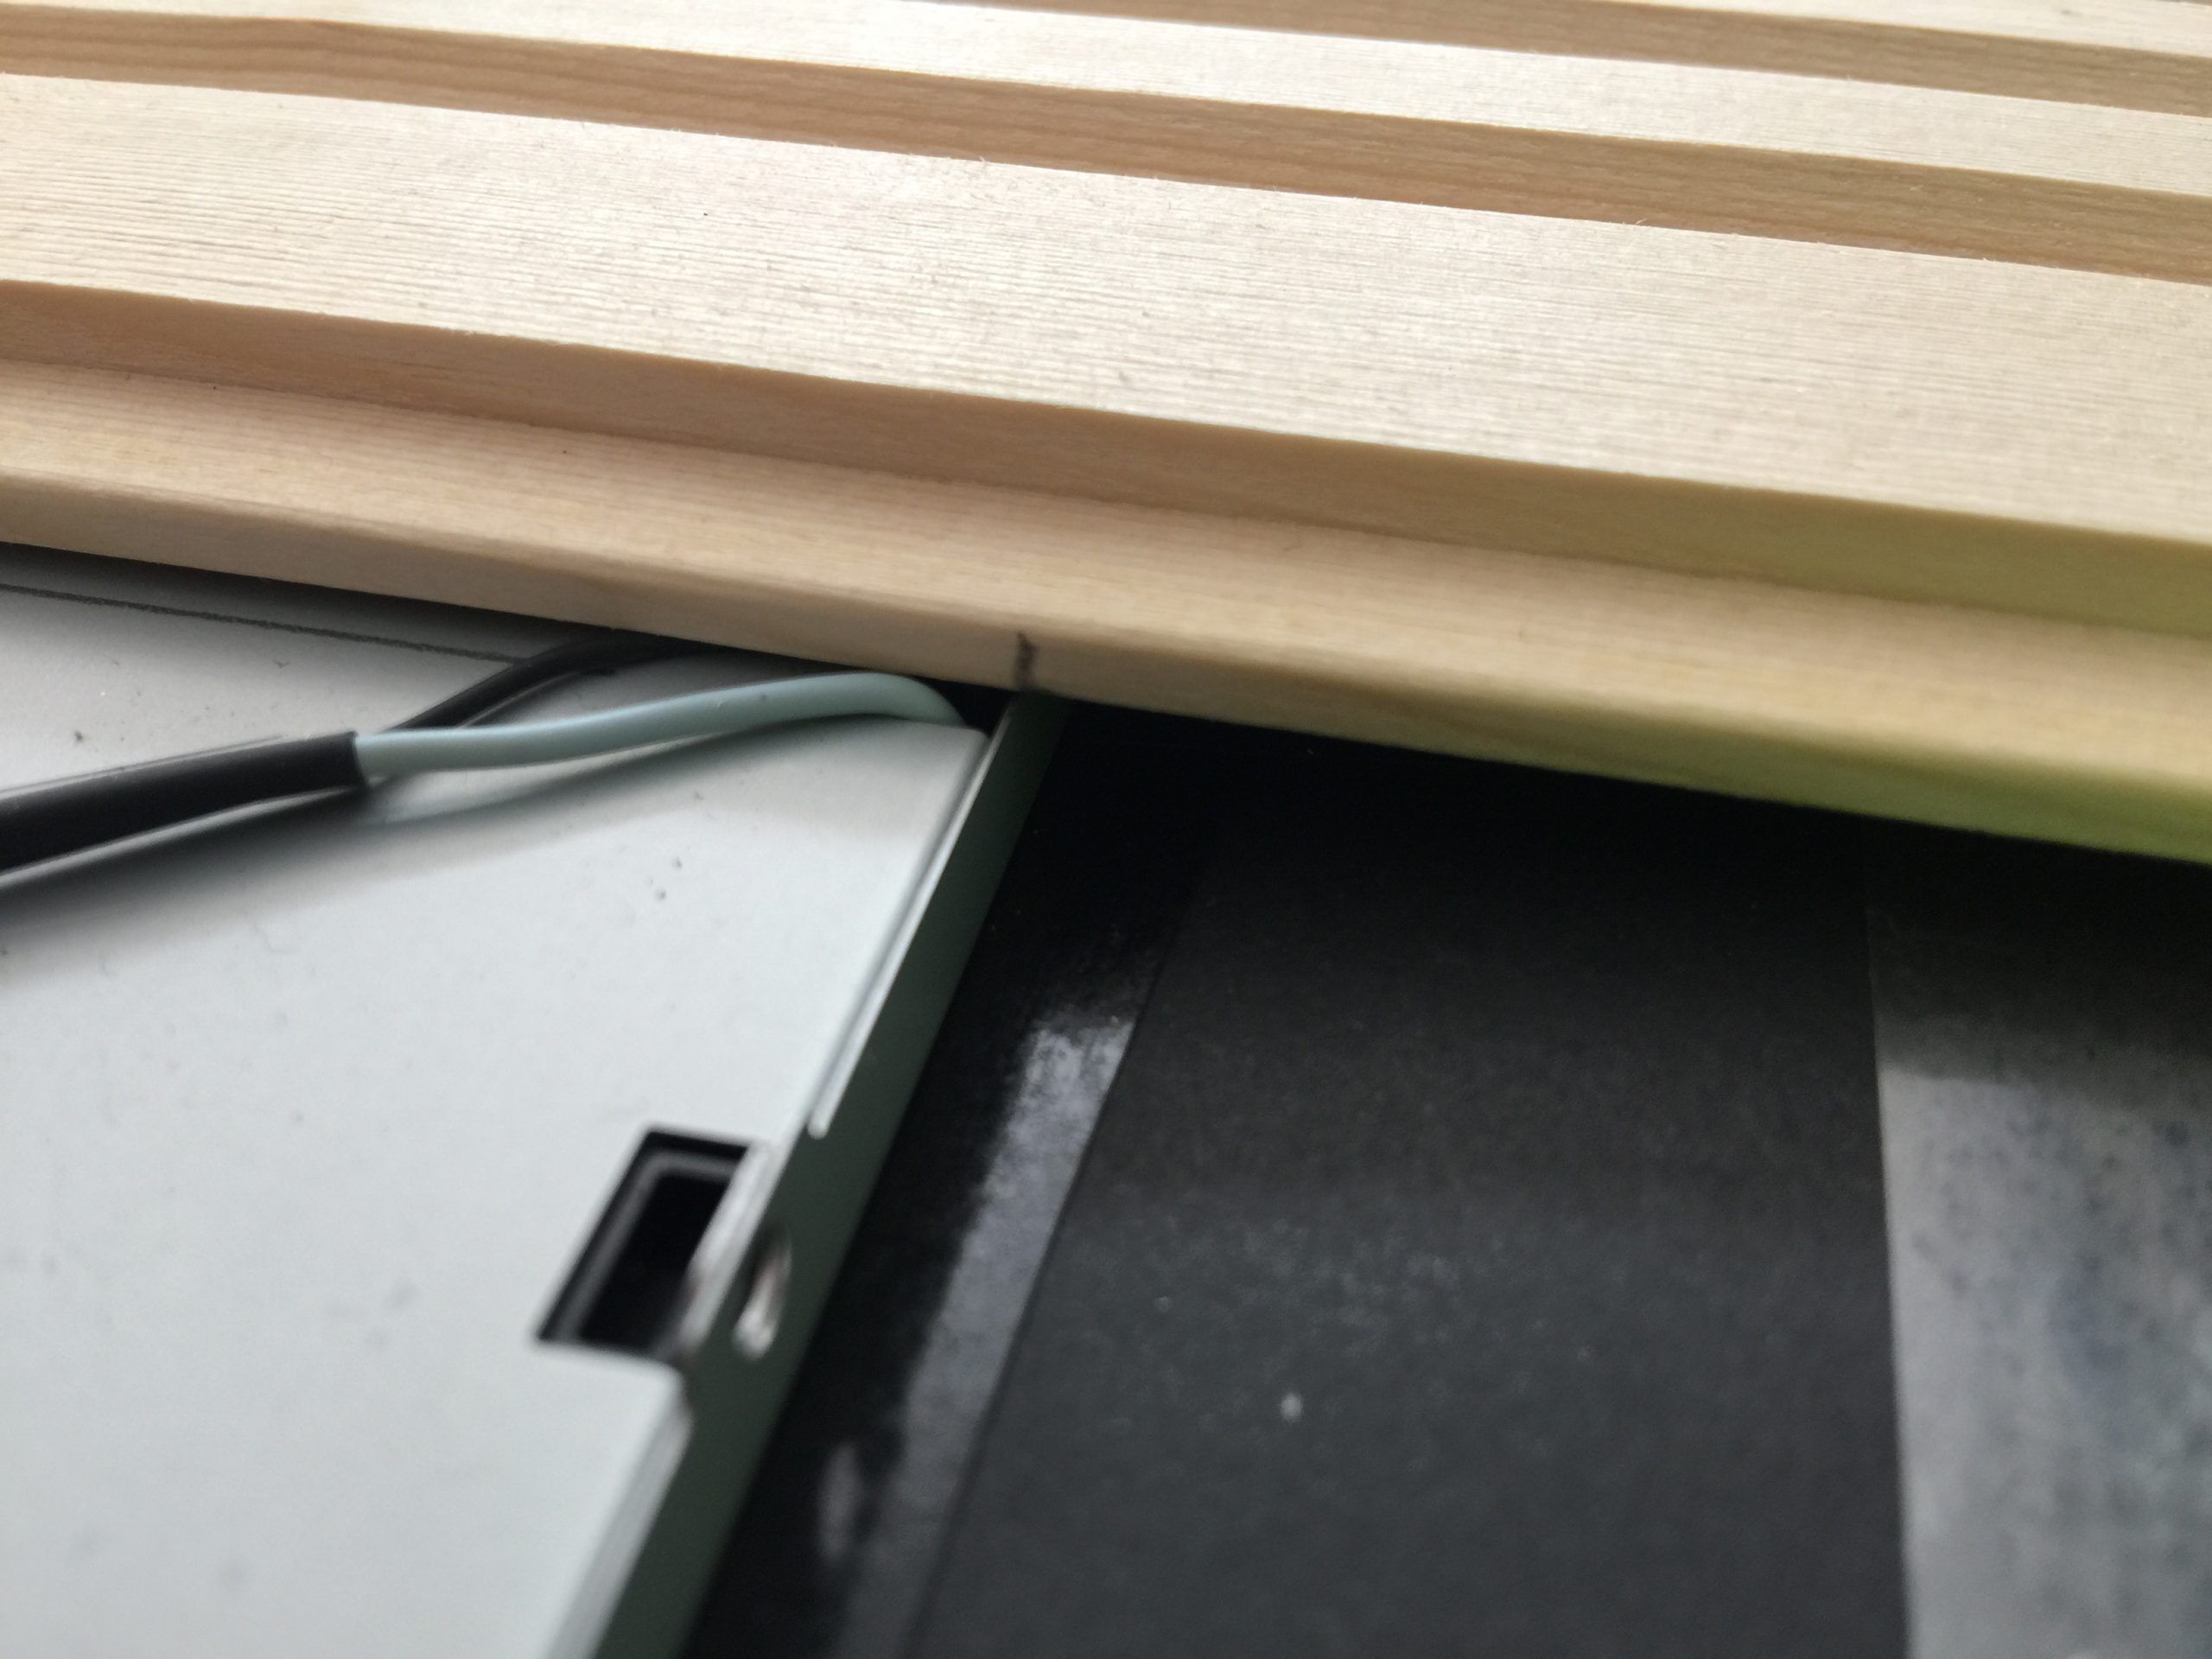
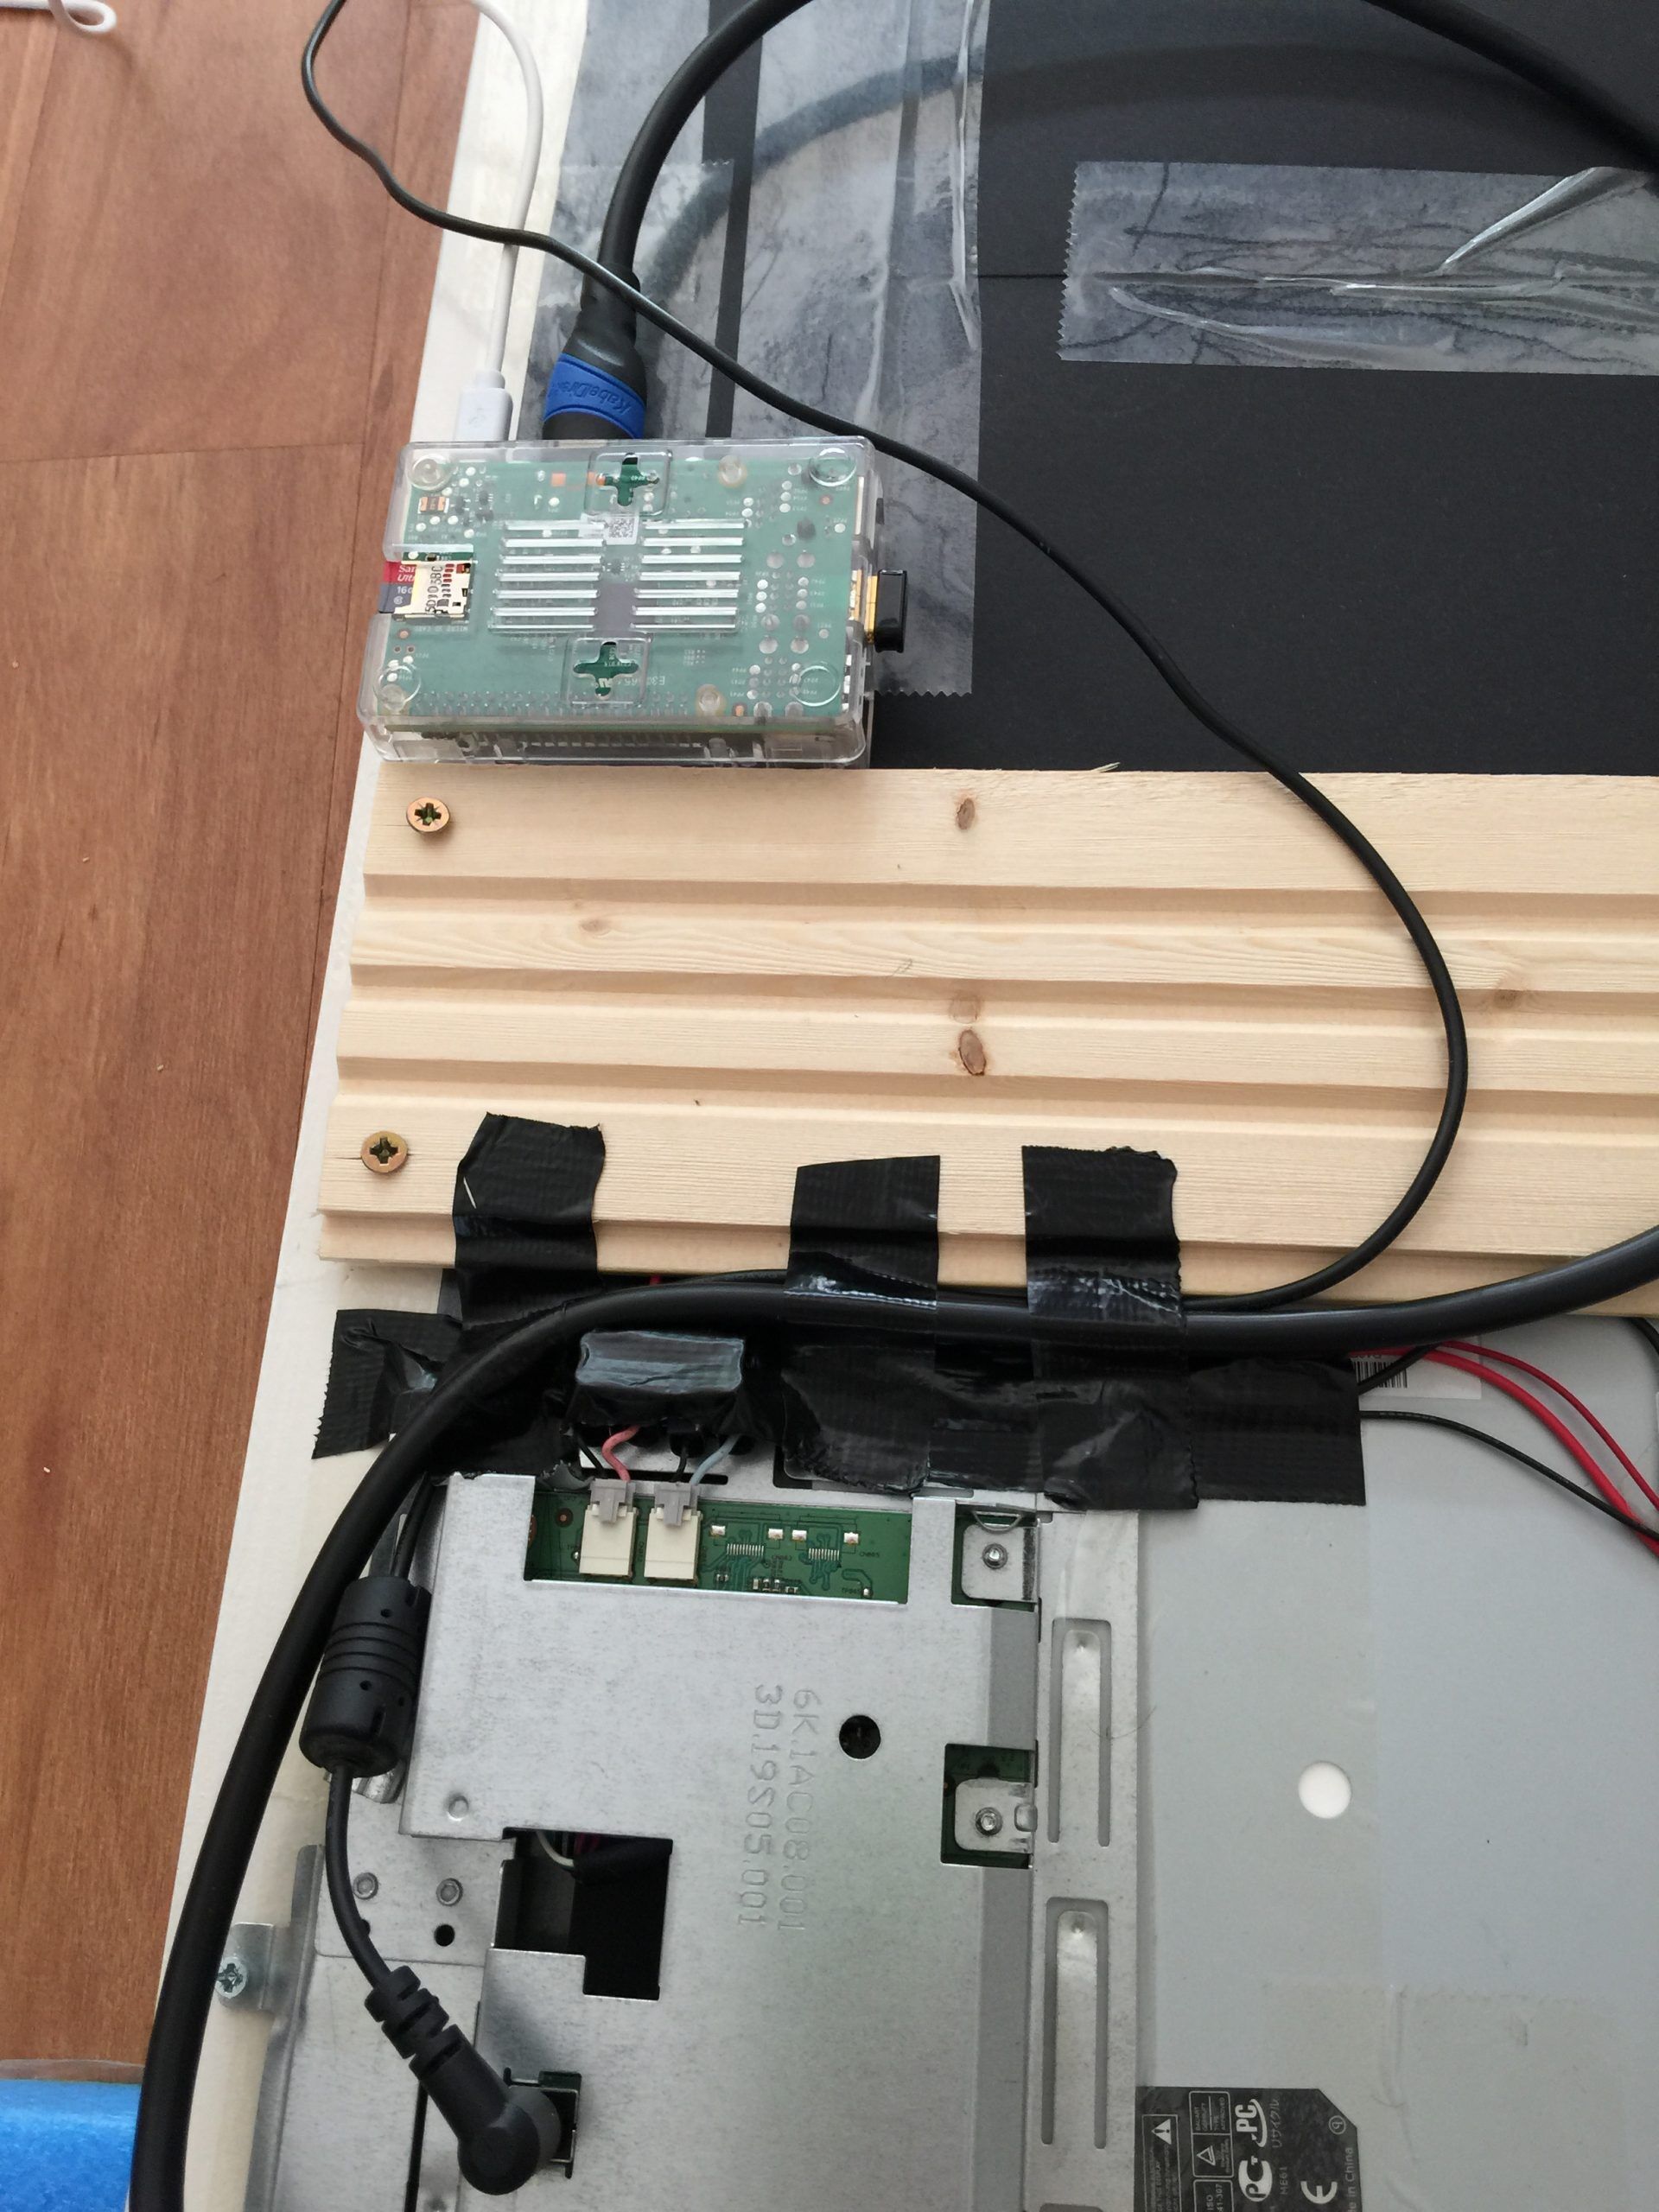
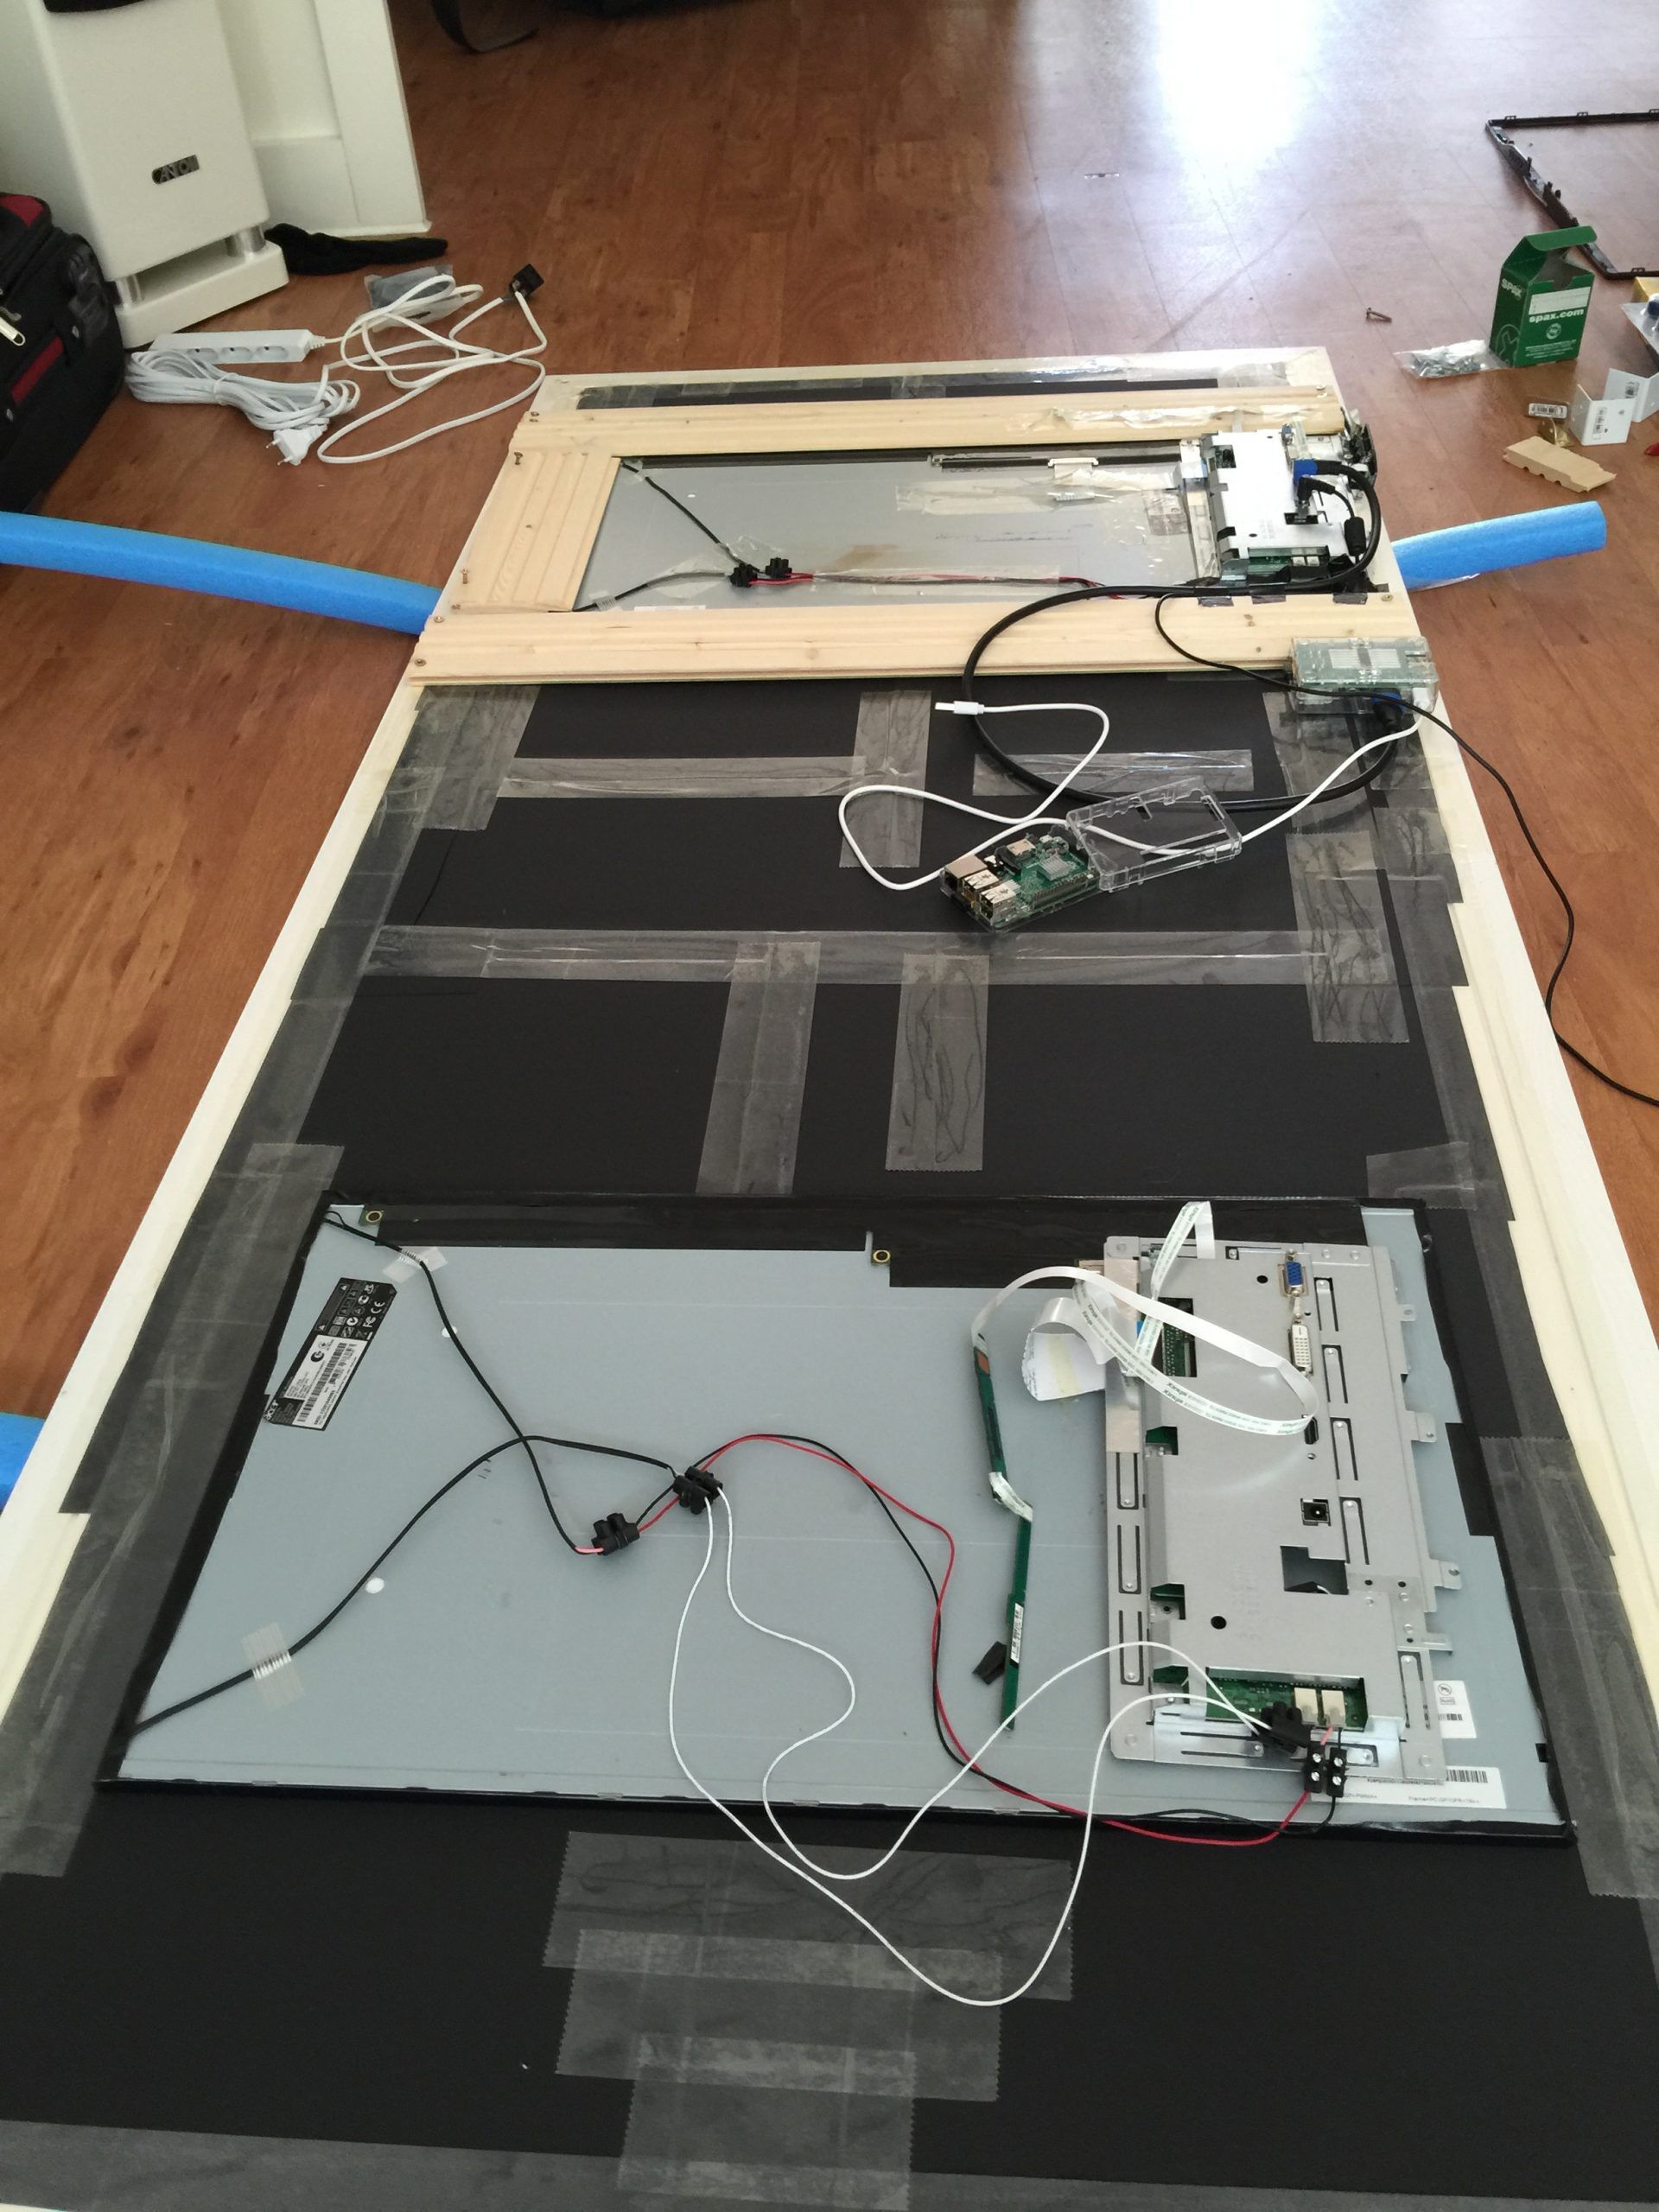
I started by removing the displays from their plastic frames and putting all the hardware together for a quick test if all components work and if the whole build make sense. The whole setup only uses 48watt. Not much more to write about, just follow through the images I took.


The software installation
Now lets start with the software part. First you have to flash your SD card of the Pi with the latest version of Raspbian OS Lite. We want to run the mirror as light as possible, so we choose no extras and no GUI with the LITE version. I recommend tools like Etcher to flash the SDcard with the initial Raspbian OS LITE image.
After the flashing was successful make sure to create a blank file called "ssh" in the boot partition to have remote ssh available when you boot. If you want, you can also place a wpa_supplicant.conf file in the same spot with your wifi credentials to connect the pi automatically on boot with your wifi.
I normally only start with the ssh file for remote access and plug the Pi to a network cable. If you are ready, plug in the SDcard and boot the raspberry. Connect to it via ssh. Standard user will be "pi", password "raspberry":
ssh pi@your-pi-ipFirst we want to be up to date. So run:
sudo apt-get update
sudo apt-get -y upgrade
sudo apt-get -y dist-upgrade
sudo apt-get -y autoremove
sudo apt-get clean
Alternatively you can also use my pi update routine script here.
Next we config the pi via:
sudo raspi-configIn the upcoming menu we change the following:
- Localisation Options: Select your preferred locale (we simply keep the default), timezone, and keyboard layout.
- Change User Password: This is important – keeping the default password means your Pi will get owned faster than you can say “botnet” as soon as you connect it to the internet. (Make sure to have selected the correct keyboard layout before typing in the new password, though)
- Network Options: Setup your hostname e.g. magicmirror
OPTIONAL: Configure WiFi as needed. Alternatively, you also configure WiFi manually usingwpa_passphraseif you don’t want your WiFi password stored on the Pi in clear text. - Boot Options: Select “Desktop / CLI” and then “Console Autologin”
- Interfacing Options: Enable SSH access if needed
- Advanced Options: Disable “Overscan” if the Pi’s output does not fill your screen completely
Save, exit & reboot with:
sudo rebootYour pi should login automatically now into the console after the reboot.
Setup the display config
As we run our 2 screen in portrait mode, we need to edit the boot config of each Rasspberry:
sudo nano /boot/config.txtadd as the last line:
display_rotate=3
avoid_warnings=1
disable_splash=1
disable_overscan=1
Save and exit with STRG+X and confirm overwriting the file with Y. Next time you boot, your display is rotated bei 270 degree.
Install X with openbox for kiosk mode
For running the web application interface later on the SmartMirror screen, we need a bare minimum of graphical interface components and libraries. Lets install X (x11) as our minimal display framework and openbox as our window manager:
sudo apt-get install --no-install-recommends xserver-xorg x11-xserver-utils xinit openboxNext we configure openbox:
sudo nano /etc/xdg/openbox/autostartwrite this in the config:
# Disable any form of screen saver / screen blanking / power management
xset s off
xset s noblank
xset -dpms

# Allow quitting the X server with CTRL-ATL-Backspace
setxkbmap -option terminate:ctrl_alt_bksp

# Start MM mirror
bash /home/pi/mm.sh
First we disable screen blanking and power management (we don’t want our screen to go blank or even turn off completely after some time).
Then we allow to quit the X server by pressing Ctrl-Alt-Backspace. (Because we didn’t install a desktop environment there won’t be a “Log out” button or the like.)
Finally we tell Openbox to start our custom mm.sh startup script (which we create in the next step) in kiosk mode. Exit and save with STRG + X, confirm the saving with Y.
Now we need to create our mm.sh startup script that Openbox is launching for us on the screen:
sudo nano /home/pi/mm.shPaste this lauch code for MagicMirror in there:
cd /home/pi/MagicMirror
DISPLAY=:0 npm start
Exit and save the file with STRG + X, confirm the saving with Y.
Now make the script executable:
sudo chmod +X /home/pi/mm.shNormally that is all you need. Anyway I was running into some issues and needed these additional steps to make it run properly. Edit:
sudo nano /etc/X11/Xwrapper.configThe file should be empty so place in the first line just this:
allowed_users = anybodyExit and save with STRG + X, confirm the saving with Y.
Also set the rights of Xorg differently and add user pi to the tty group:
sudo chmod u+s /usr/bin/Xorg
sudo usermod -a -G tty pi
Install MagicMirror
No its time to install the MagicMirror application with the official install script. First go to your home dir:
cd /home/pi/then install via:
bash -c "$(curl -sL https://raw.githubusercontent.com/sdetweil/MagicMirror_scripts/master/raspberry.sh)"follow the onscreen instructions, you will get two prompts, first if you want to install pm2, say NO, second if you want to disable the screensaver, say YES. Instead of pm2 we will use a much lighter start up script for the mirror.
After the install is completed, try out if the MagicMirror application works:
cd /home/pi/MagicMirror
DISPLAY=:0 npm start
IMPORTANT ERROR HANDLING: I got a strange error when I installed MagicMirror the second time on the same system: suddenly some "libnss3.so" liberaries and others where missing: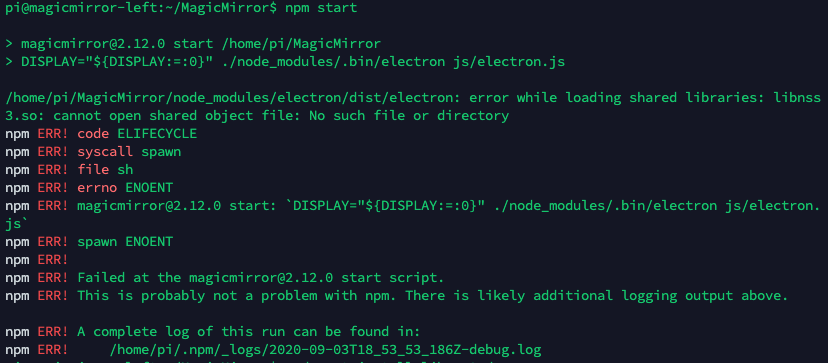
to fix it just install:sudo apt install libnss3-dev libgtk-3-dev libxss1 -y
As a last step of the basic setup we want to start MagicMirror with X automatically on boot by adding it to our users bash profile:
sudo nano /home/pi/.bash_profileadd this single line there:
[[ -z $DISPLAY && $XDG_VTNR -eq 1 ]] && startx -- -nocursorExit and save with STRG + X, confirm the saving with Y.
sudo rebootReboot and the Openbox autostart should launch after a few seconds the MagicMirror application. Done 🙂
Install 3rd Party Modules for MagicMirror
MagicMirror has a great 3rd party module liberary that extends its function to so much more. Check out the official link for 3rd party modules to find the ones you want, and then you install them like in my example for MMM-AVStock, just replace the git URL in line 2 and the cd folder in line 3 with the module you choose.
All modules are placed in ~/MagicMirror/modules and follow the same install procedure: got to modules folder, clone module from git, cd into it and install with npm:
cd ~/MagicMirror/modules
git clone https://github.com/lavolp3/MMM-AVStock
cd MMM-AVStock
npm install
To activate, configure and display your newly installed module, you always need to add its config paramters in MagicMirrors main config file. Edit:
sudo nano ~/MagicMirror/config/config.jsIn there you have to edit and add the following config block, in this case for AVStock:
{
  //disabled:true,
  module: "MMM-AVStock",
  position: "top_left",
  config: {
    apiKey : "YOUR_ALPHAVANTAGE_KEY",
    symbols : ["AAPL", "GOOGL", "TSLA"],
    alias: ["APPLE", "GOOGLE", "TESLA"],
  }
},
For more details you have to refer to the instructions for your individual module and its related instructions.
Create your custom css and config
If you want, you can also edit the style of the MagicMirror by opening the custom.css file:
sudo nano ~/MagicMirror/css/custom.cssHere you can add whatever custom css you like for your mirror. It also helps to provide custom classes in the above mentioned config.js for every module, so that you can directly speak to the individual modules with this class. For this just add to every module this config line:
classes: 'custom-mmm-stock',Now you can modify with the custom-mmm-stock class in the custom.css file.
Polish the experience
Disable graphical outputs on boot
The following is a quick run through of my more detailed post about polishing a Raspberry Pi. Read it for more details.
WARNING: Editing cmdline.txt wrong will break your Raspberrys boot up. Always ensure that you have everything in line 1. nothing should be split up into two lines and all parameters split by just 1 space!
sudo nano /boot/cmdline.txtadd:
consoleblank=1 logo.nologo quiet loglevel=0 plymouth.enable=0 vt.global_cursor_default=0 plymouth.ignore-serial-consoles splash fastboot noatime nodiratime noramSave and exit with STRG+X and confirm overwriting the file with Y.
Boot with a video as splashscreen
We use omxplayer for that. So first we need to install it by:
sudo apt-get update
sudo apt-get install omxplayer
Get boot videos:
cd /home/pi/
git clone https://github.com/florianmueller/Raspbian-OS-Bootscreen-Splash-Videos.git
mv ./Raspbian-OS-Bootscreen-Splash-Videos/videos/ ./bootvideos/
sudo rm -R ./Raspbian-OS-Bootscreen-Splash-Videos/
Next we tell the pi in the rc.local to play our video on boot:
sudo nano /etc/rc.localadd before exit 0 these two lines:
dmesg --console-off
omxplayer /home/pi/bootvideos/pi_bootscreen_constant_41sek.mp4 &
Save and exit with STRG+X and confirm overwriting the file with Y. Now reboot and see the effects:
sudo rebootCreate the ZRAM swap
Last step we enable and create the ZRAM:
cd /home/pi/
git clone https://github.com/foundObjects/zram-swap.git
cd zram-swap && sudo ./install.sh
When the script is successfully done, edit systemctl.conf:
sudo nano /etc/sysctl.confadd at the very end of the file:
vm.vfs_cache_pressure=500
vm.swappiness=100
vm.dirty_background_ratio=1
vm.dirty_ratio=50
Save and exit with STRG+X and confirm overwriting the file with Y. Now reboot and your ZRAM is all set successfully!
sudo rebootCongratulations, thats all, your MagicMirror is now all set and done!
Good to know...
MagicMirror update script
To update run this:
bash -c "$(curl -sL https://raw.githubusercontent.com/sdetweil/MagicMirror_scripts/master/upgrade-script.sh)"Backup your MagicMirror automatically to a synology