Most owners of a Unifi Dream Machine (Pro) know about the automatic backup feature Ubiquti offers in their UDM(P) interface. The feature creates automatic backups of all your config settings and stores it locally on the device. So you can manually download it from there before you change something. But what if you forgot about that or something went unexpectedly wrong? Then the local backup is just gone.
Therefore you should always have a backup of your latest Unifiziertes configuration on a different remote destination.
In this guide we setup a script that pulls the config files automatically from a Synology server or any other UNIX based device.
1. Getting started
First we need to setup the remote access to our UDM(P). We use ssh with key based only login. But to achieve this, we need to install a little helper tool. Reason is, that Ubiquiti wipes every changes in the base system upon restart, and as we are needing to place a authorized_key persistent on the UDM we need that tool to make the key "persistent". Actually we are not really making it persistent, as we can't (and don't want) prevent the build in wipe on restart, but we are creating a boot script, that will always write our authorized key in the necessary location, ensuring it is always there.
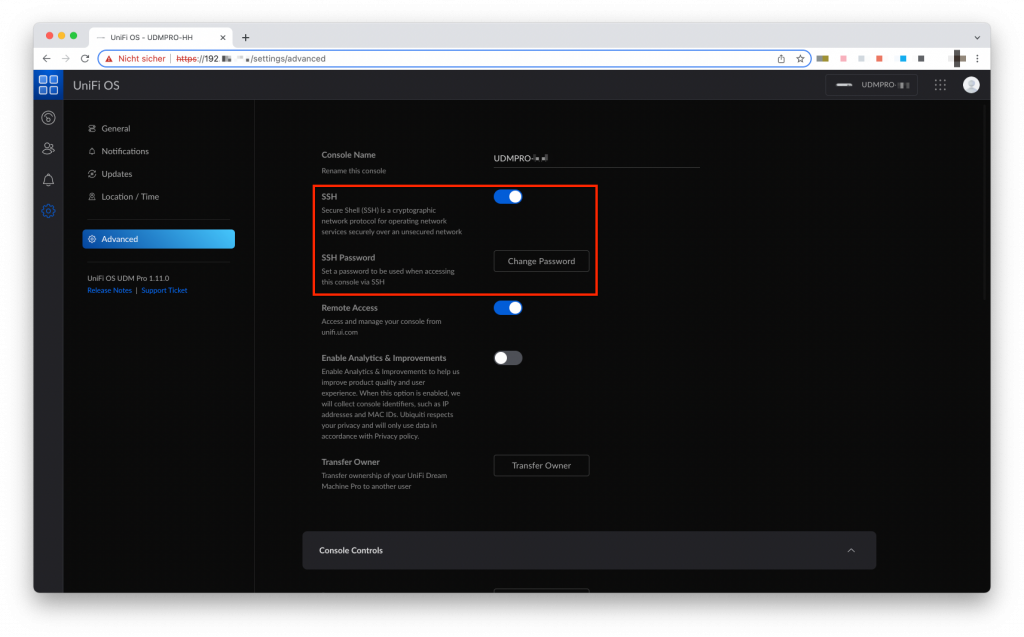
So to achieve this we are using a github script by boostchicken that enables us to autorun any script on boot. To install the script we have to ssh into our UDM(P). Make sure you have activated and set your ssh password in the UDM device settings:
Now connect with your favorite Terminal to:
ssh root@<IP-of-UDM>When asked for a password enter the one you set just earlier in your UDM(P) device settings. Once you logged in successfully switch into the unifi-os shell mode by entering in the console:
unifi-os shellIn the unifi-os shell mode download the latest udm-boot_1.x.x_all.deb release and install it:
cd /home/
curl -L https://udm-boot.boostchicken.dev -o udm-boot_1.0.5_all.deb
dpkg -i udm-boot_1.0.5_all.deb
Cool, now we can run scripts automatically on boot.
2. Generate ssh keys your destination device
If you don't have a public key for your Synology (or UNIX server) yet, you need to create one first. Best is to ssh into your Synology server and check for a public user key with:
cat ~/.ssh/id_rsa.pubIf you get a key in return, great! If not, you need to generate a id_rsa and id_rsa.pub key file in your /home/.ssh user directory. You can read more and follow this guide about generating the keys it in the Synology Forum.
Once you have obtained your public key from your device, return to your UDM(P) ssh session and make sure you are in the unifios-shell mode:
unifi-os shellNow create the following script that gets executed on boot:
nano /mnt/persistent/15-add-synology-ssh-key.shNow we need to copy & paste the commandline into the script that is run upon every UDM(P) boot.
IMPORTANT: Make sure you replace the "<YOUR-SUPER-LONG-PUBLIC-KEY>" (also remove the brackets) with your public ssh key from your Synologys id_rsa.pub key file:
#!/bin/sh
echo "ssh-rsa <YOUR-SUPER-LONG-PUBLIC-KEY> username@SynologyServer" >> /root/.ssh/authorized_keys
Save and exit the file with STRG+X and confirm saving with Y.
Now we need to return to the UDM core shell with:
exitOnce you are back on the core shell we move our created script file into our autostart directory. This is part of the tool we installed on our UDM(P) and it runs every script or code on boot we place in this folder.
mv /mnt/persistent/15-add-synology-ssh-key.sh /mnt/data/on_boot.d/15-add-synology-ssh-key.sh...and make sure its executable:
chmod +x /mnt/data/on_boot.d/15-add-synology-ssh-key.shNow we have a new auto execute folder in /mnt/data/on_boot.d with a script that automatically writes our Synology ssh public key into the right place every time we boot our UDM(P). Pretty cool 🙂
3. Setup the auto backup script on your Synology / Server
With our UDM(P) ready to accept connections from our Synology / Server, the last step is now to setup the auto backup script that will pull the backup files from our UDM(P).
This is the script I use, make sure you change the variables first to your needs before you execute. You should change the following variables to your system needs:
CONTROLLER= IP or FQDN of your UDM(P)
TARGETPATH= path where you want your backup stored on the synology
LOGPATH= path where you want your logfiles stored on the synology
#!/bin/bash

CONTROLLER=10.10.10.1
TARGETPATH=/volume1/backup/Unifi/Unifi.Controller
LOGPATH=/volume1/logs/unifi-backup

NOW=$(date +"%Y-%m-%d_%H-%M-%S")
DATUM=$(date +"%Y-%m-%d")
STARTTIME=$(date +"%H:%M:%S")
CERT=~/.ssh/id_rsa
REMOTEUSER=root
BACKUPPATH=/data/unifi/data/backup/autobackup/
FIRMWAREPATH=/srv/unifi/data/firmware
CONFIGFILE=/srv/unifi/data/sites/default/config.gateway.json
LOGFILE=${NOW}_LogFile.log
LOGGING=${LOGPATH}/${LOGFILE}
STOREPATH=

echo Variables:
echo LogFile: ___________ $LOGGING
echo CertFile: __________ $CERT
echo CloudKey-User: _____ $REMOTEUSER
echo Controller: ________ $CONTROLLER
echo Backup-Source: _____ $BACKUPPATH
echo Firmware-Path: _____ $FIRMWAREPATH
echo Config-File: _______ $CONFIGFILE
echo Store-Path: ________ $TARGETPATH
echo " "

([ -d $LOGPATH ] || (echo "Folder ${LOGPATH} doesn't exists." && mkdir -p $LOGPATH && echo "Folder ${LOGPATH} created."))
([ -d $TARGETPATH ] || (echo "Folder $TARGETPATH doesn't exists." && mkdir -p $TARGETPATH && echo "Folder $TARGETPATH created."))
echo "Backup started on $DATUM at $STARTTIME."
echo "Backup started on $DATUM at $STARTTIME." > $LOGGING
echo ""
echo "Copy $BACKUPPATH from $CONTROLLER to $STOREPATH/$TARGETPATH."
echo "" >> $LOGGING
echo "Copy $BACKUPPATH from $CONTROLLER to $STOREPATH/$TARGETPATH." >> $LOGGING
scp -prvi $CERT $REMOTEUSER@$CONTROLLER:$BACKUPPATH $TARGETPATH 2>&1 >> $LOGGING
scpbackup=$?
if [ $scpbackup -eq 0 ]; then
    echo "    Done."
    echo "Done." >> $LOGGING
else
    echo "    Error!"
    echo "Error!" >> $LOGGING
fi
# remove eXecute from all autobackup_*-files
find $TARGETPATH -type f -name autobackup_* -exec chmod -x {} \;
ENDTIME=$(date +"%H:%M:%S")
echo ""
echo "Backup finished on $DATUM at $ENDTIME."
echo "" >> $LOGGING
echo "Backup finished on $DATUM at $ENDTIME." >> $LOGGING
grep "volume1/homes" $LOGGING > /dev/null 2>&1
modifylog=$?
echo $modifylog
if [ $modifylog -eq 0 ]; then
    echo "" >> $LOGGING && echo "Script has been executed by Synology task manager." >> $LOGGING
fi
If you set all necessary variables in the above script, we need to include and save it in our Synology Task Scheduler. Log into your Synology and enter the System Settings:
(If you are running another Linux machine, you are finish and can use and save the above bash script to run with your favorite cron job tool.)
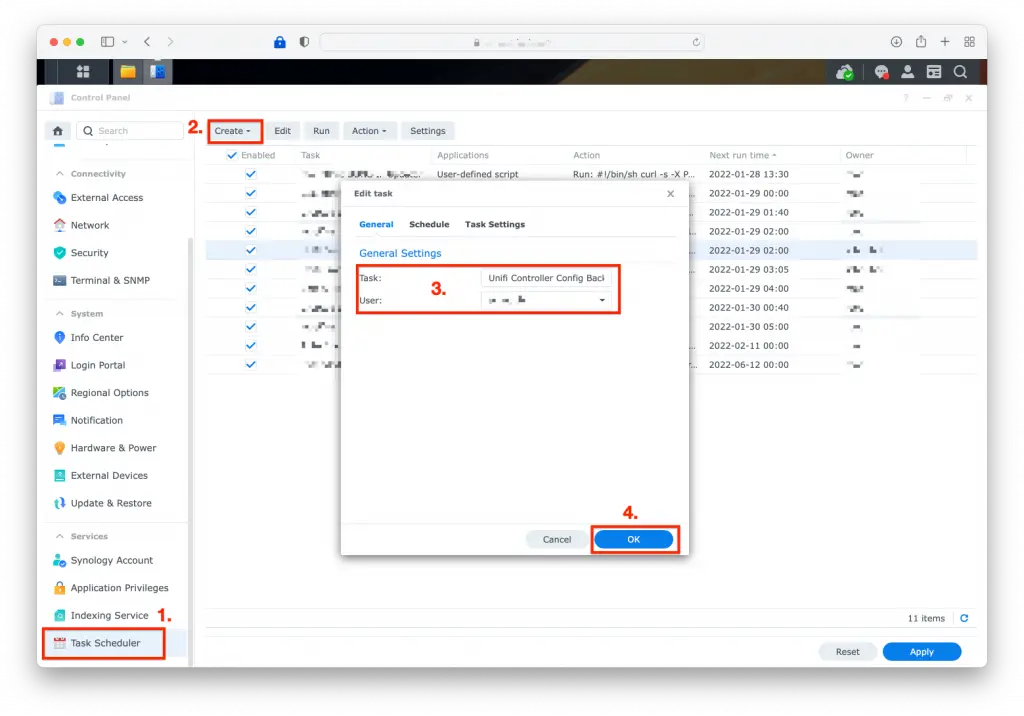
In DSM select your Task Scheduler and click on "create" for creating a new task. In the poped up window you give it a name, like "unifi config auto backup" and assign a user. Important: you need to select the same user you used with your above ssh keys! Then hit OK.
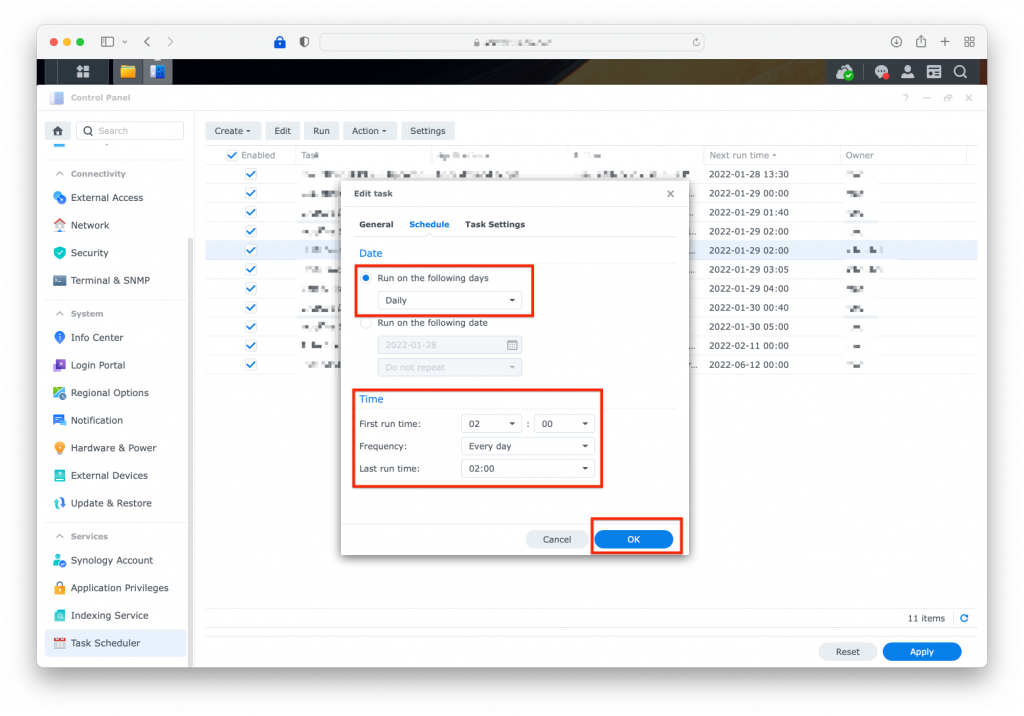
Next step is to set a time and schedule for the task to run. Here feel free to select whatever you need. Hit OK.
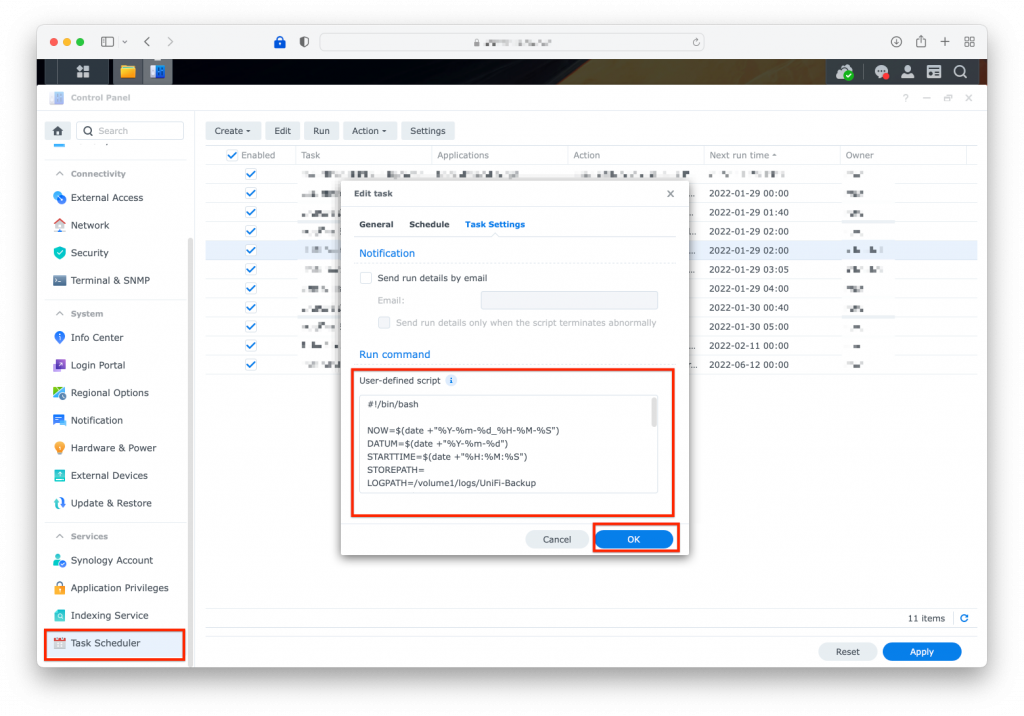
In the last step you need to copy & paste the above script with your own variables filled in, into the "Run command" box. Than hit OK and your task is set and saved.
Now as a last step you can test your task by marking it in the list, so it is with a light blue background and then click the "Run" button on the top menu.
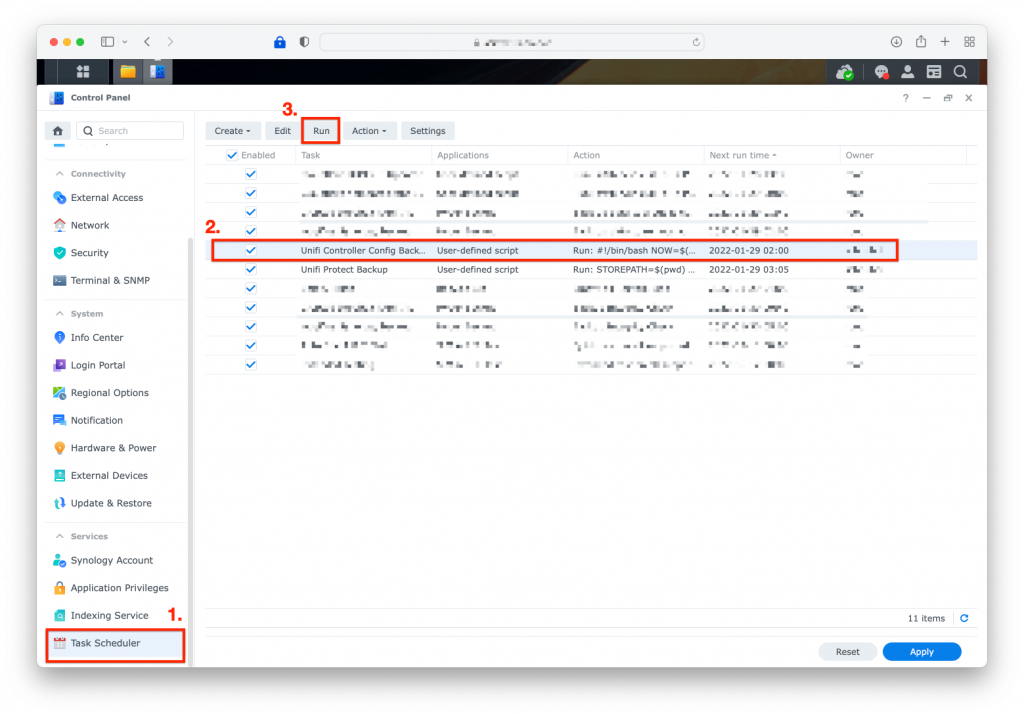
You should now see folders and files being created in your set target backup location and in your chosen log directory.
Congratulations, you successfully setup a rock solid automatic Unifi config backup script 🙂