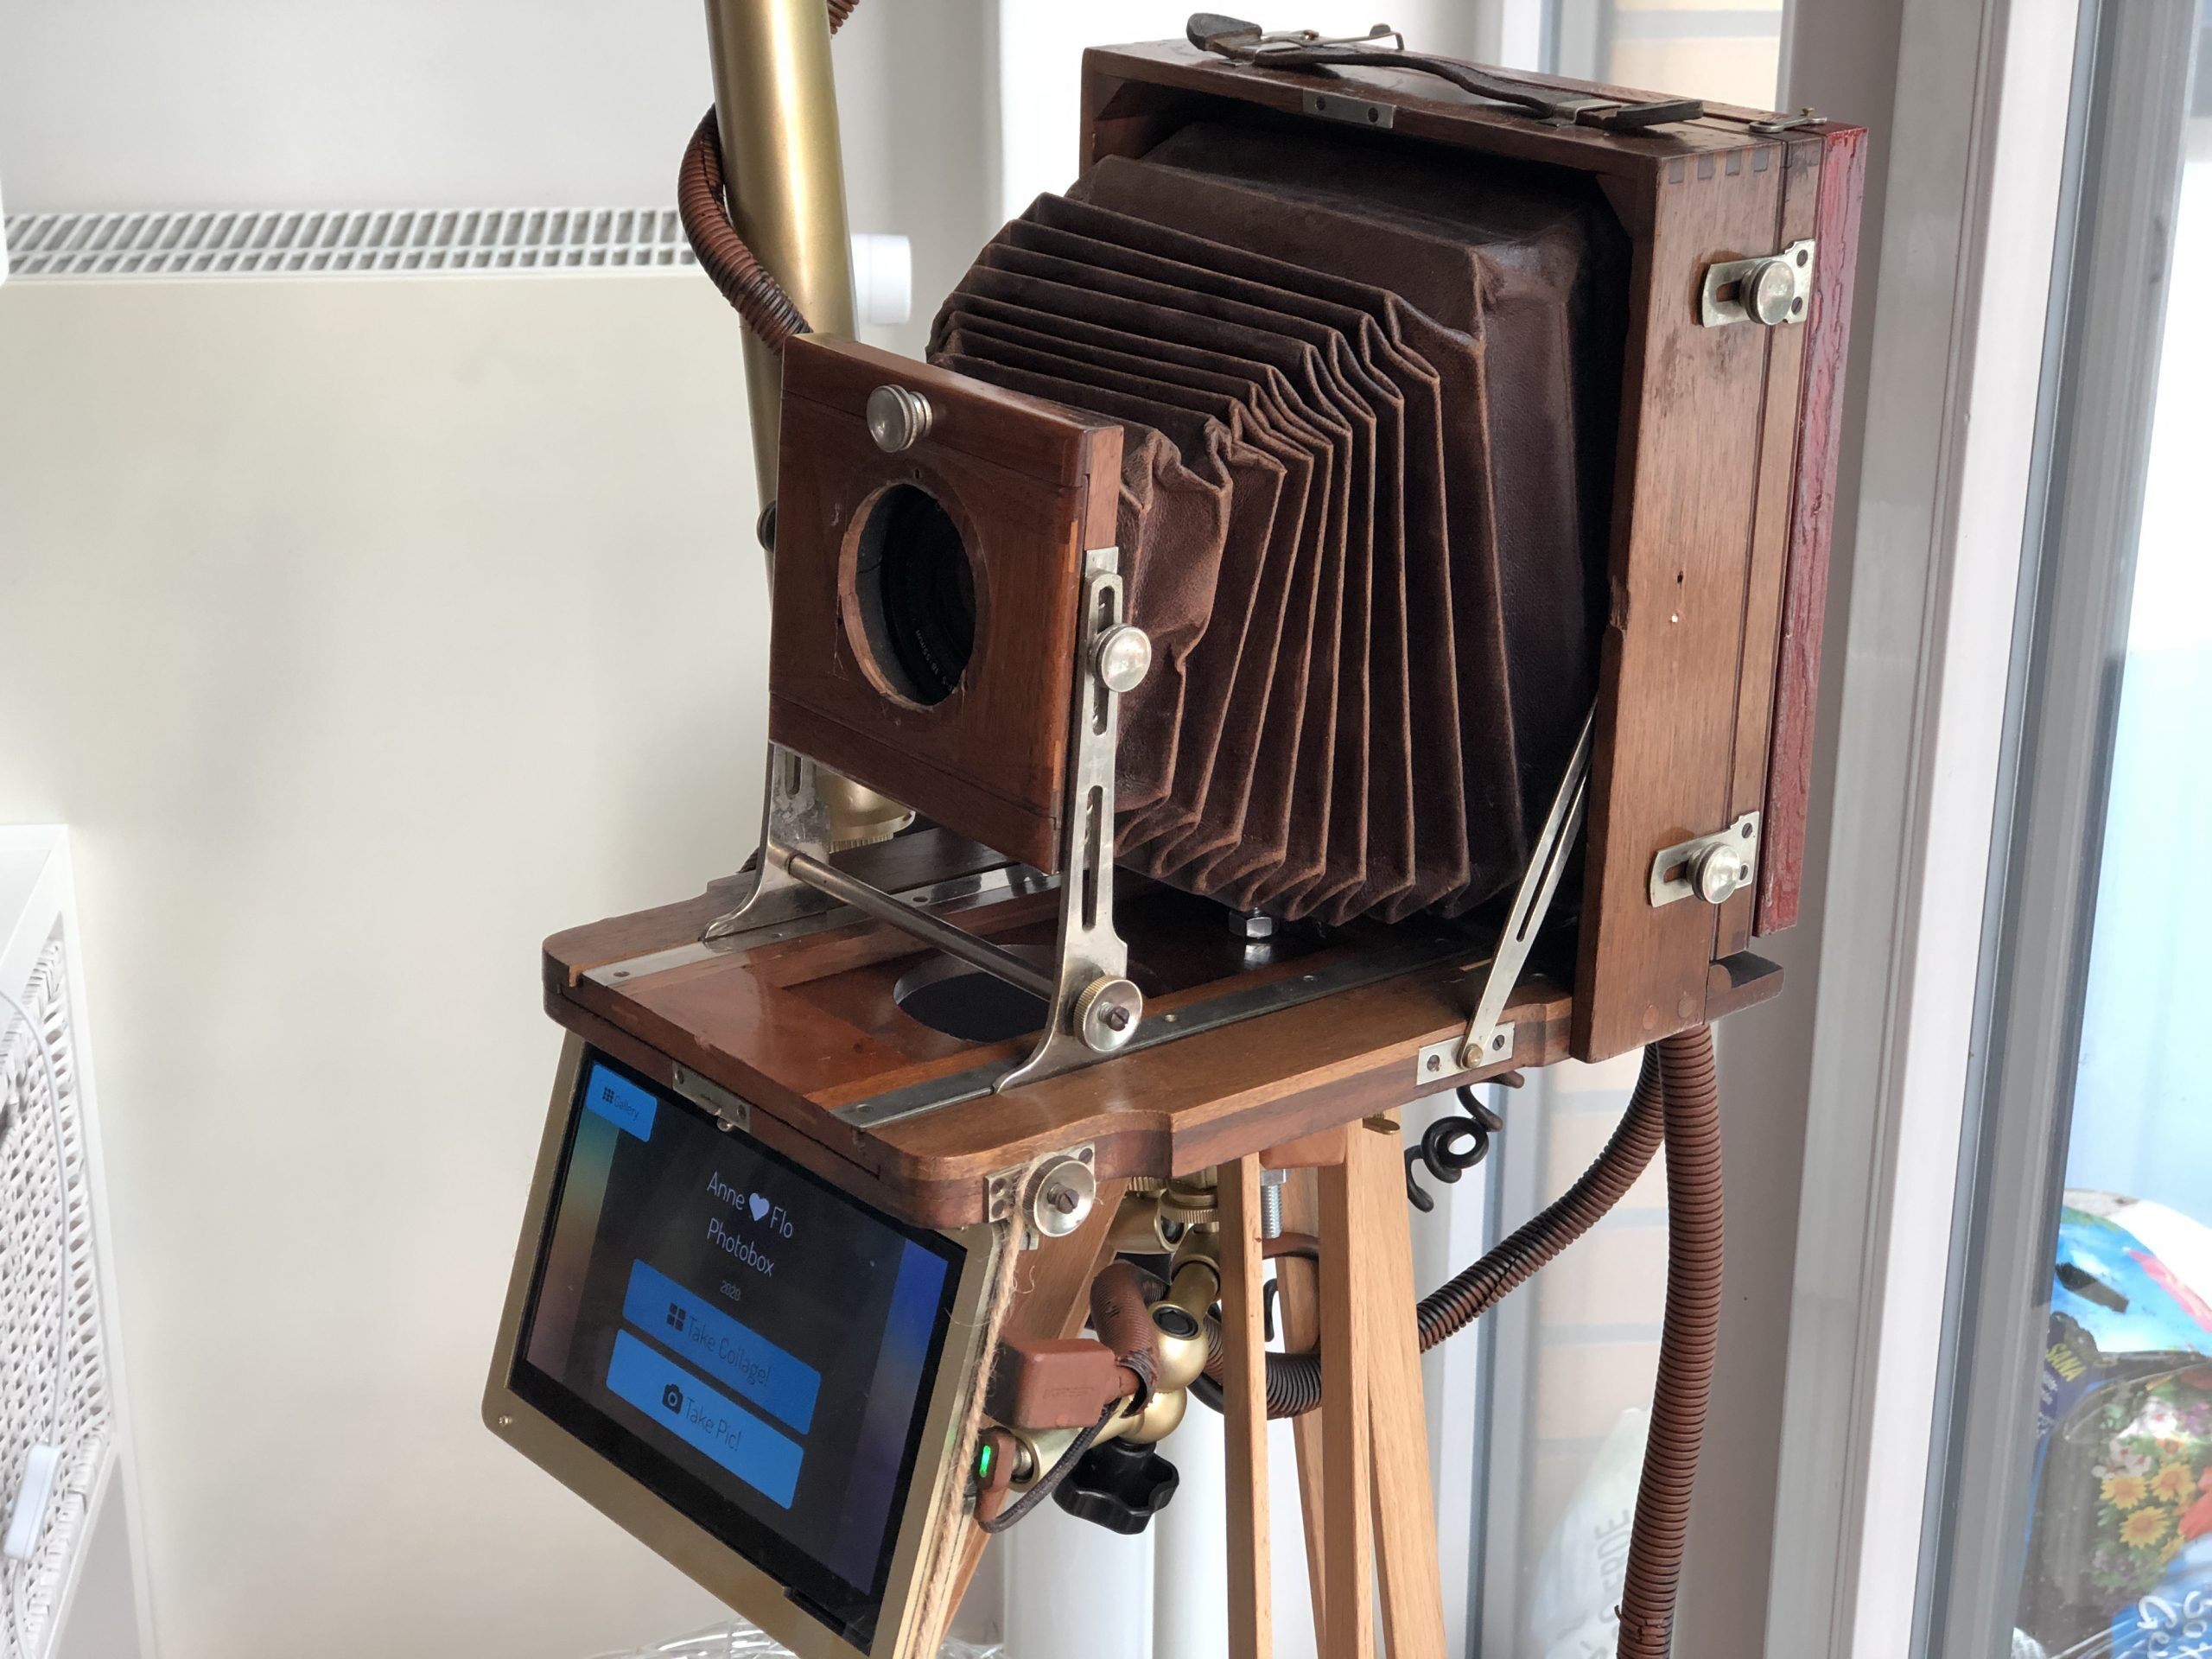
I always wanted to have an old vintage plate camera from the early times of photography in my home as kind of a decor item. Inspired by walking across old flee markets in Germany, I thought it may be cool to put more into it, than just having the plate camera as a decoration item. But I parked that idea until recently the new Raspberry Pi camera lens was announced, that brought back the idea of the old plate camera and putting something into it. I did not end up with the pi camera module anyway, but I found it worth mentioning that this was the beginning of the project "old plate camera as photobooth".
Contents of article:
List of components used
This is the list of things I used to get that build done, some of it are mandatory, some of them are up to your own taste of how you want to design the whole thing.
Main components:
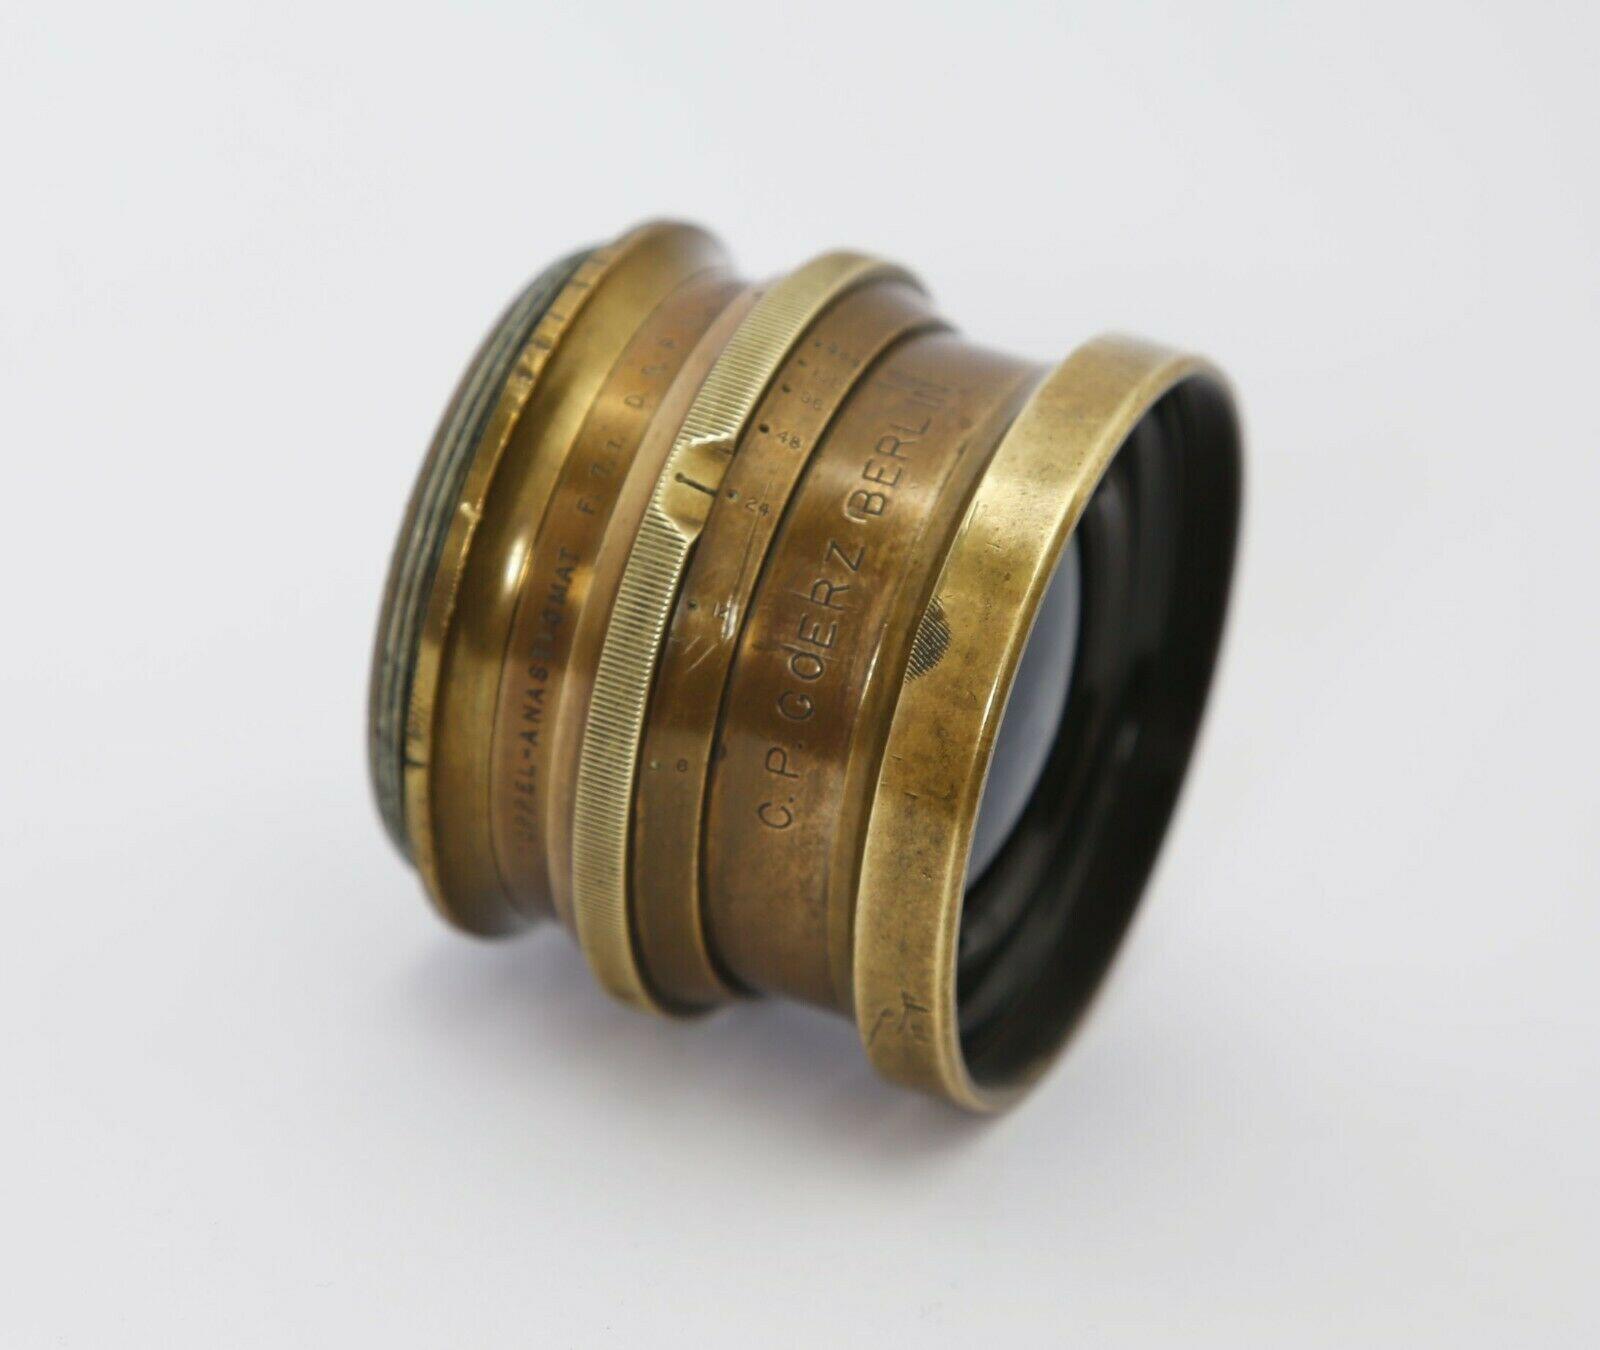
- Old plate camera that has a minimum size of 13x18 inch capturing format to have enough room to hide all the electronics. I got mine from a vintage seller on ebay, there are a lot of them out there, depending on the quality and condition, you may pay between 50 and 300 Euro. Just search for "plate camera" or "Plattenkamera".
- Raspberry Pi 4 with original USB C power brick
- 64GB micro SD Card: you can take a smaller one, as I was not sure how much space all the pictures would take in the beginning. Though I would recommend a Samsung Endurance sd card as we will have quite some I/O on the card.
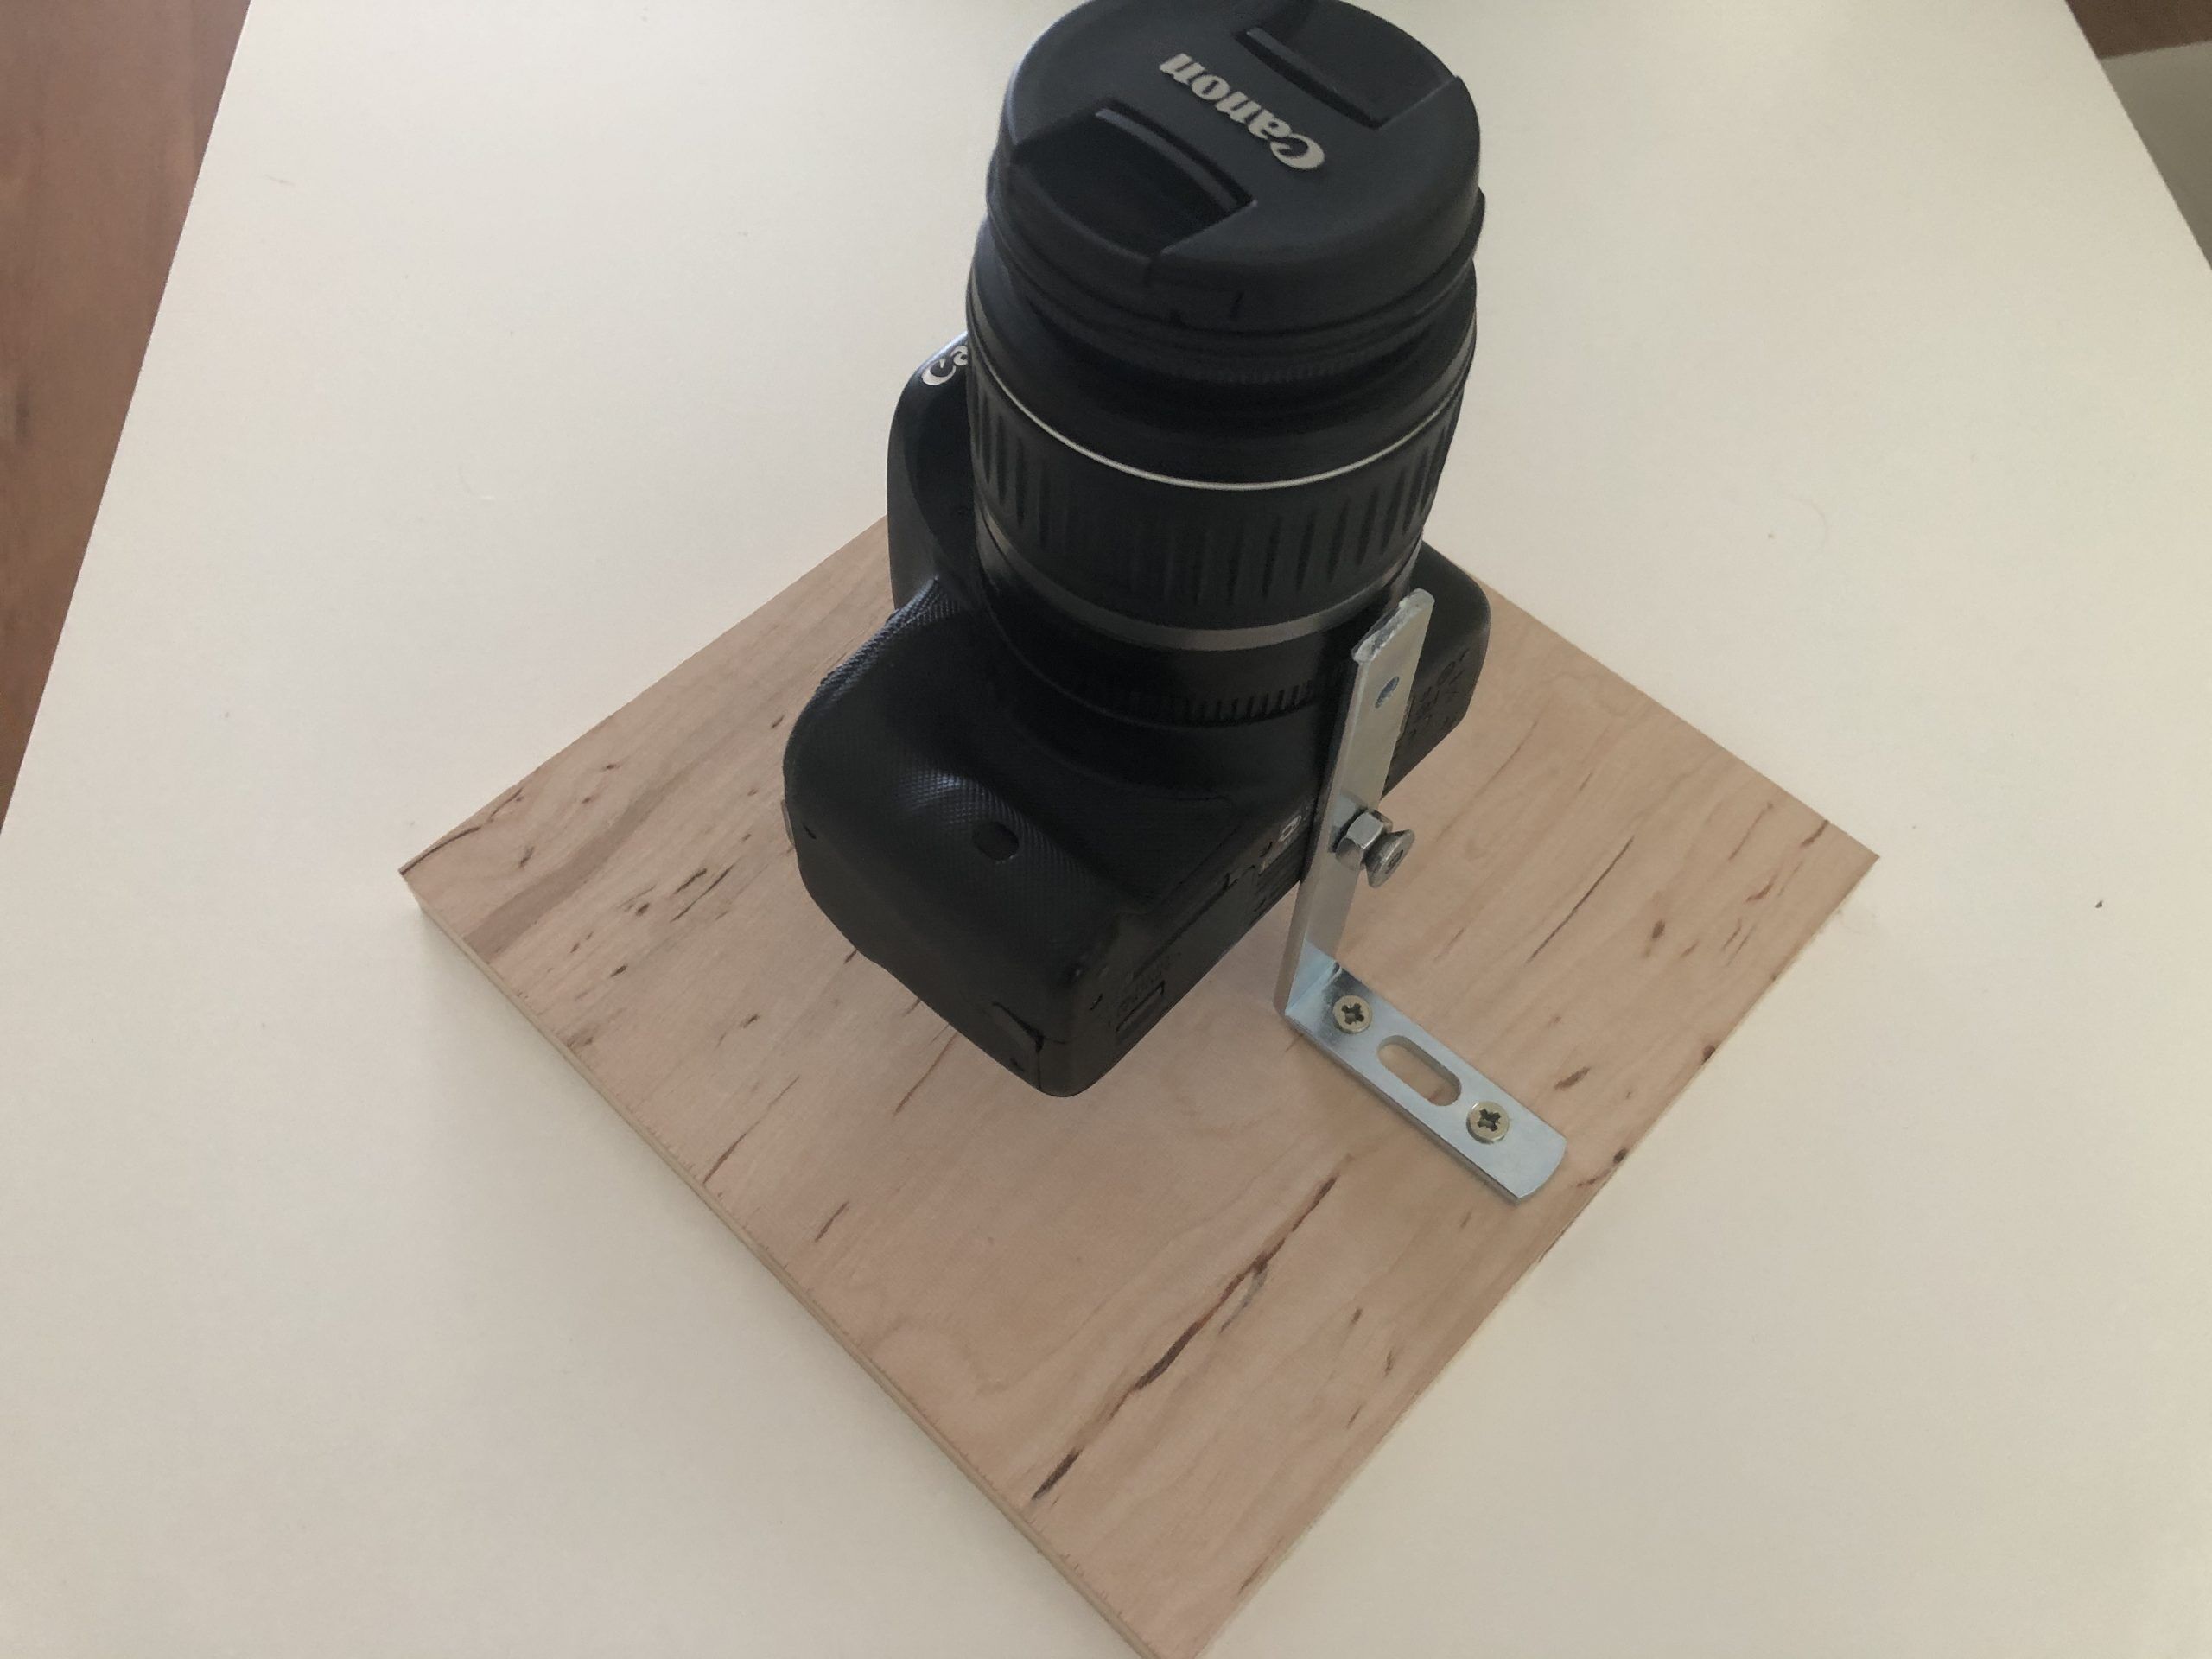
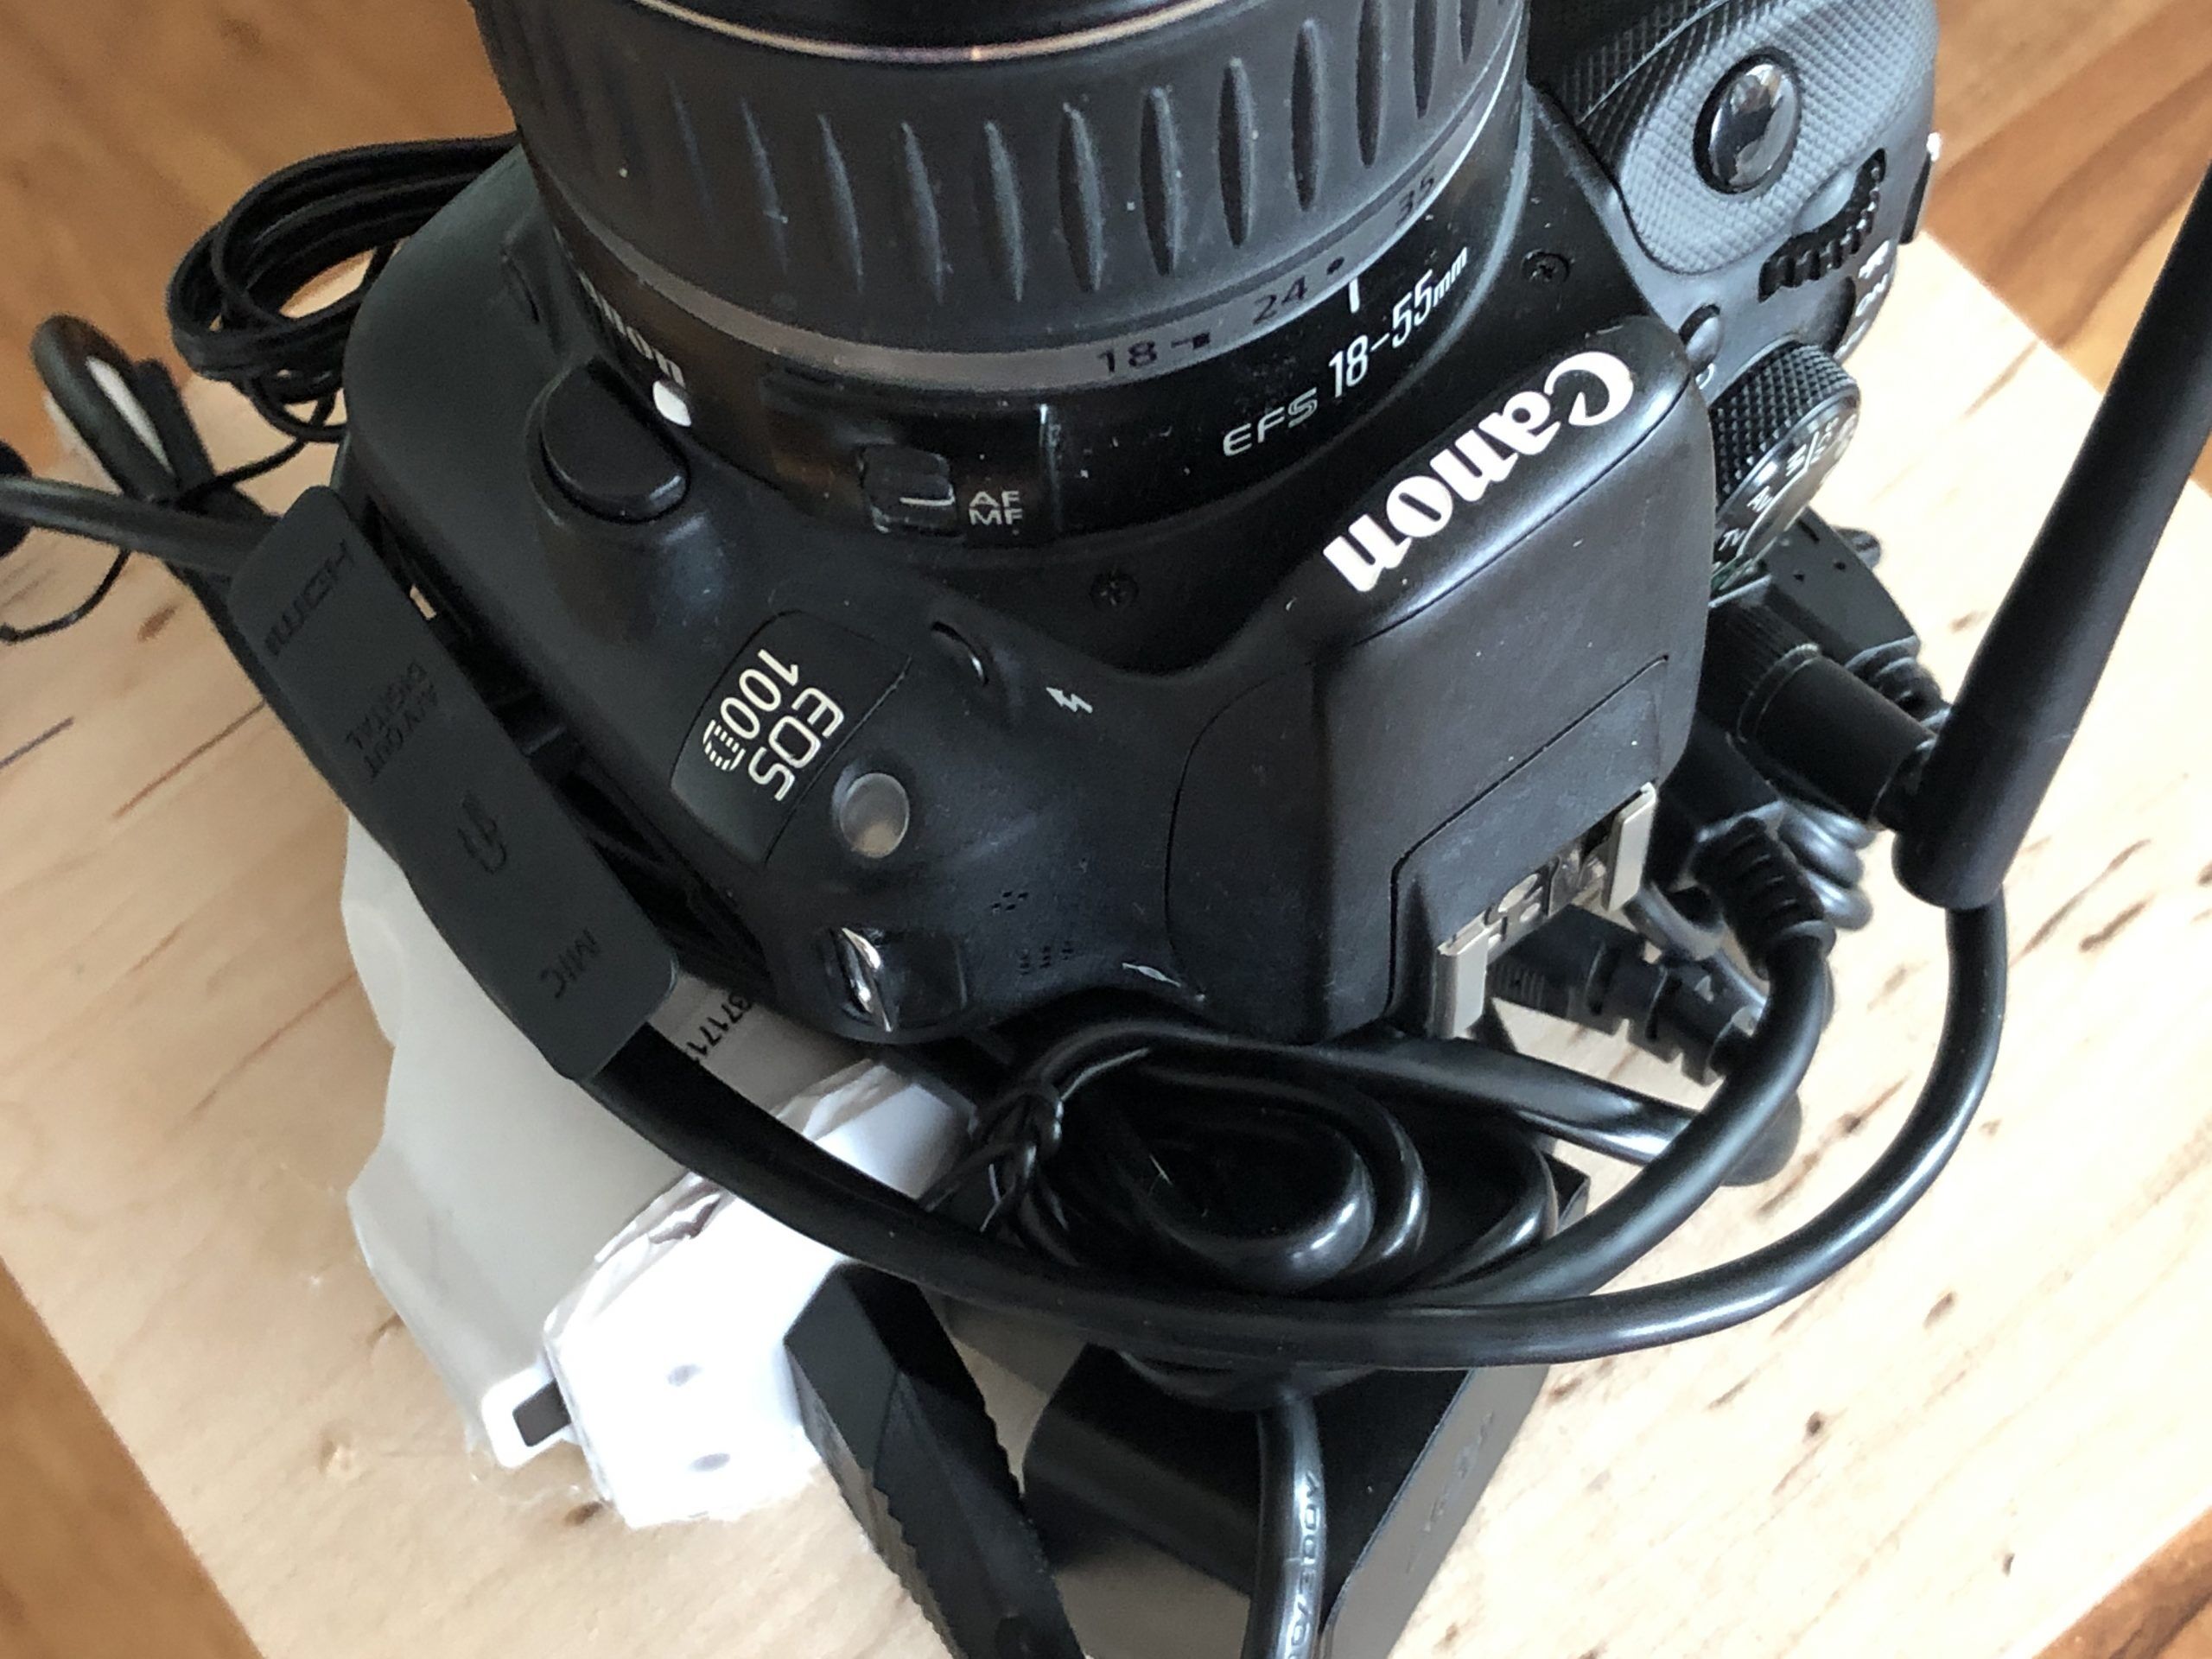
- Used Canon EOS 100d DSLR camera. I got mine for 90 Euro with the stock 18-42mm lens from ebay. But this is a critical point: I tried several models and also the pi camera module....in the end a used older DSLR model with Flashlight and gphoto2 support was the best option. I choose the EOS 100d, as it has full gphoto2 support and is very small, so it still fit in my case.
- kj-vertrieb Power brick with adapter for Canon EOS 100D
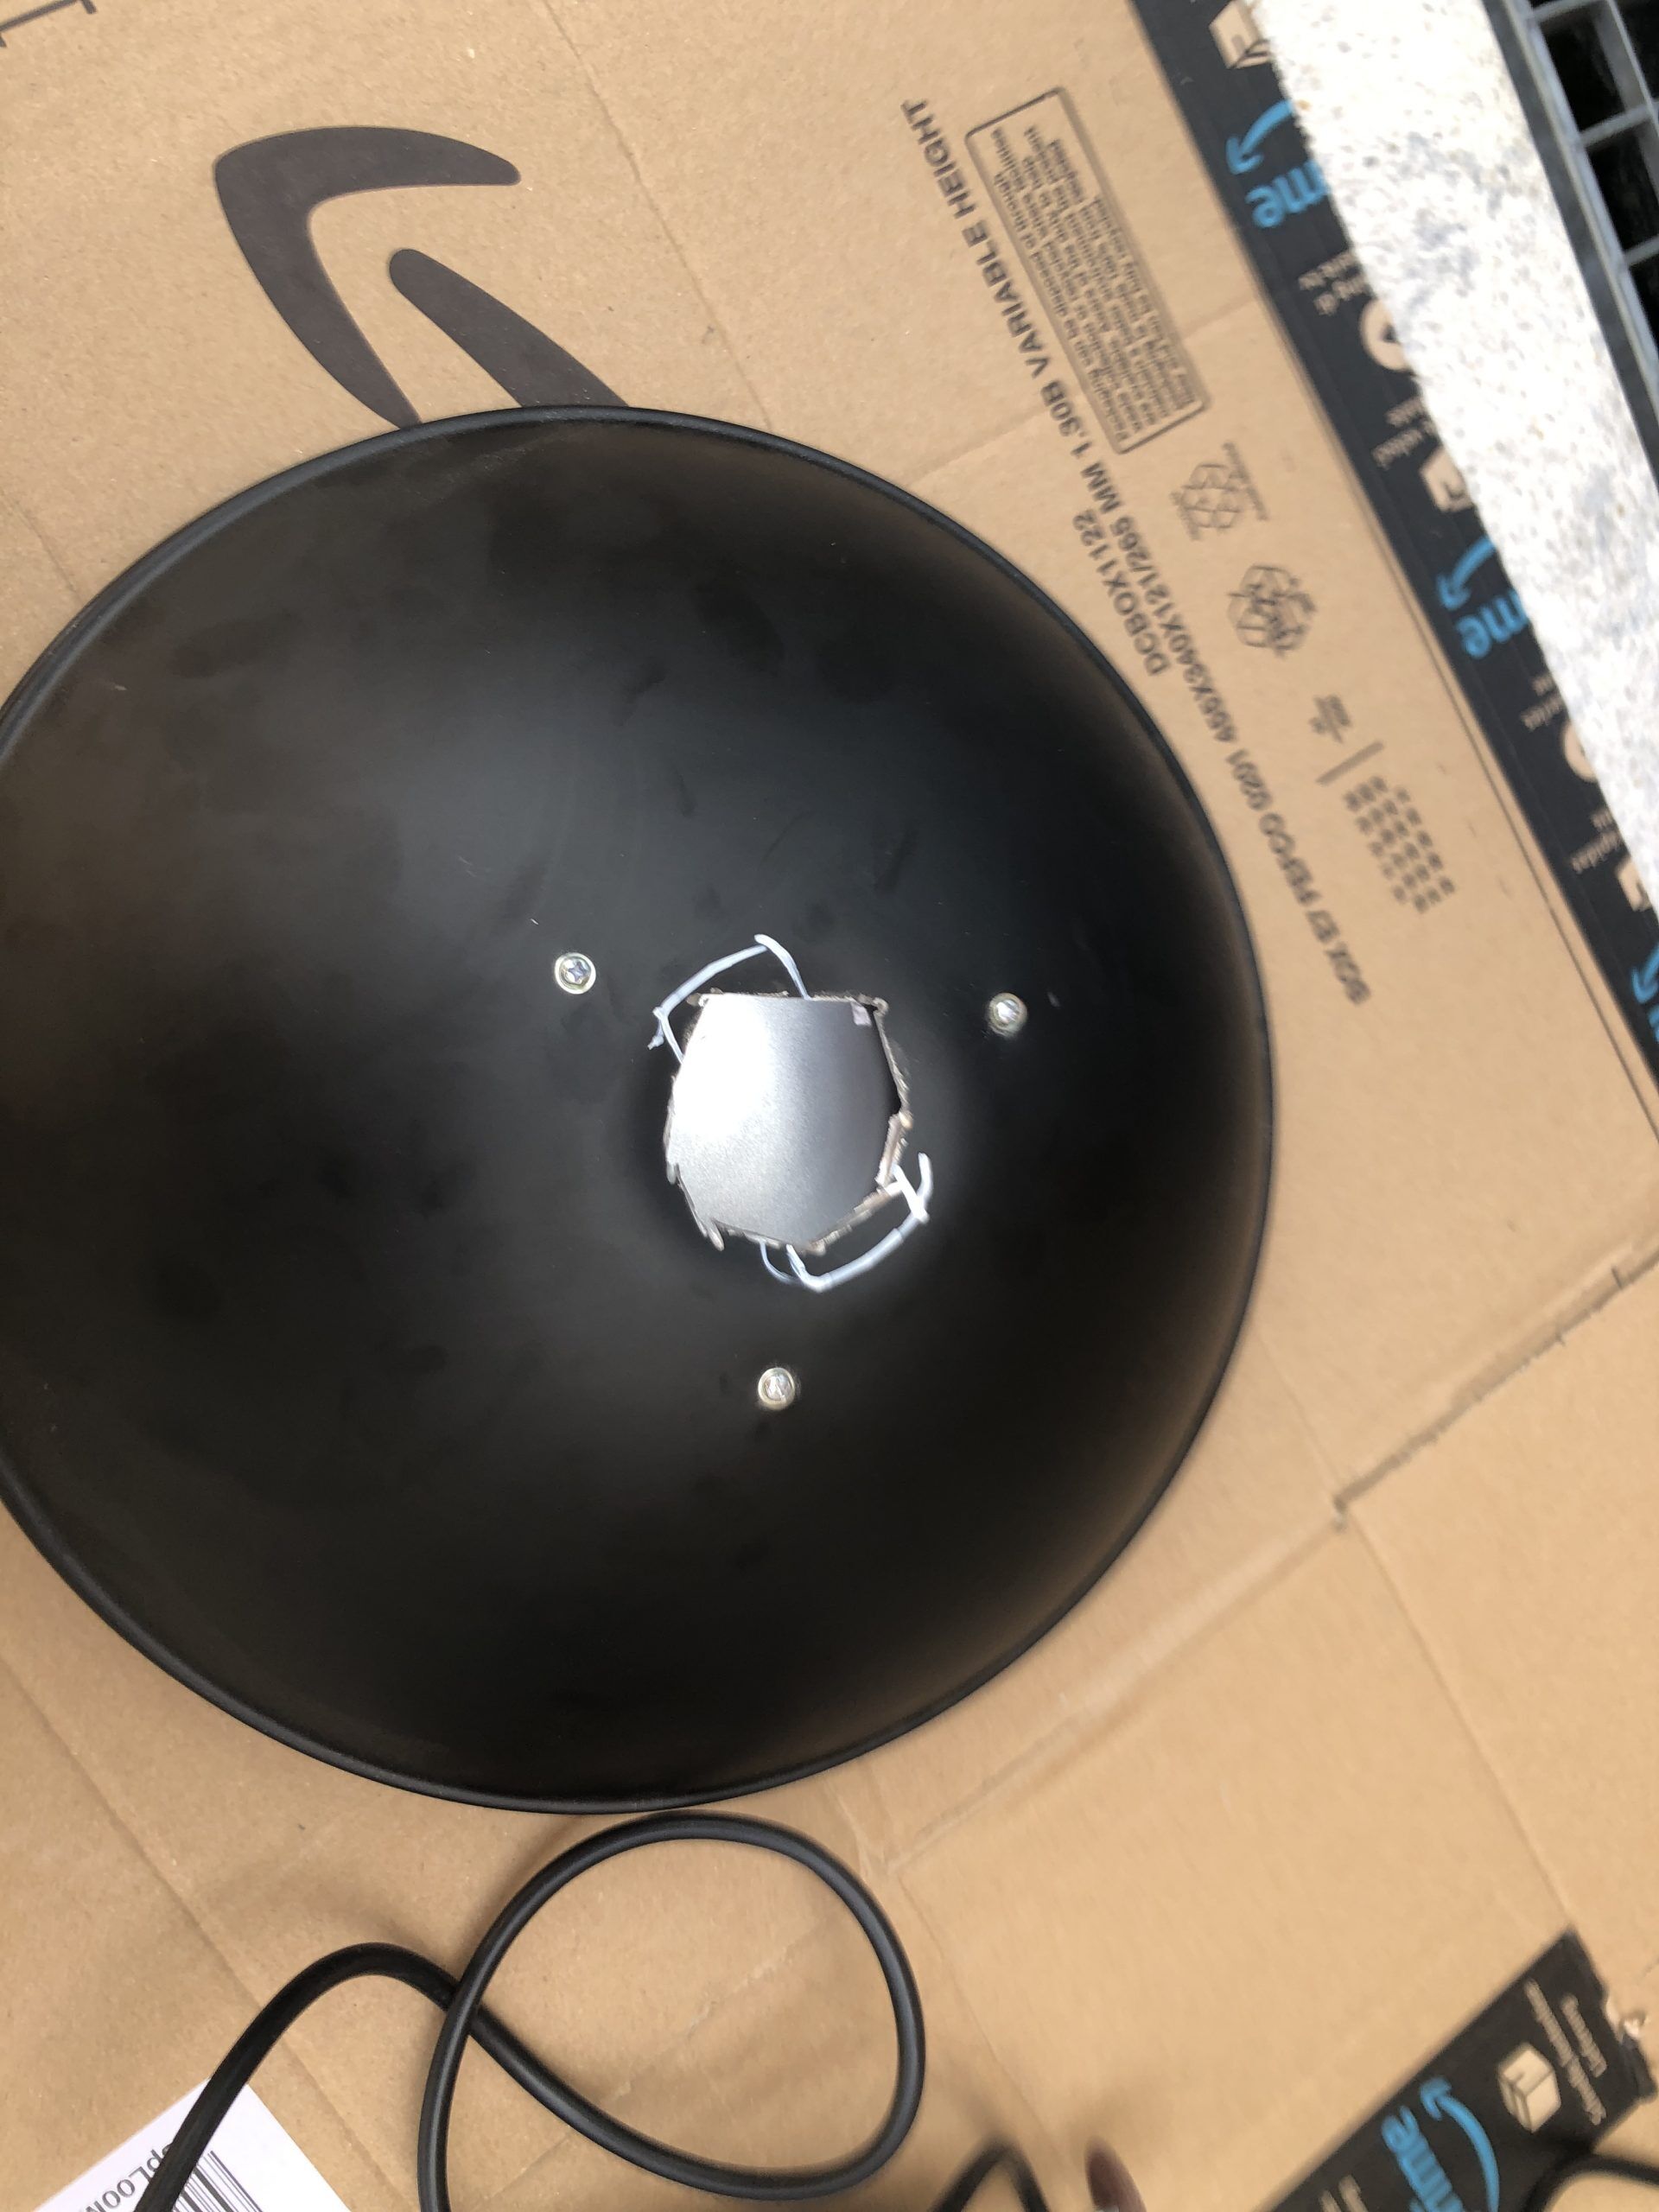
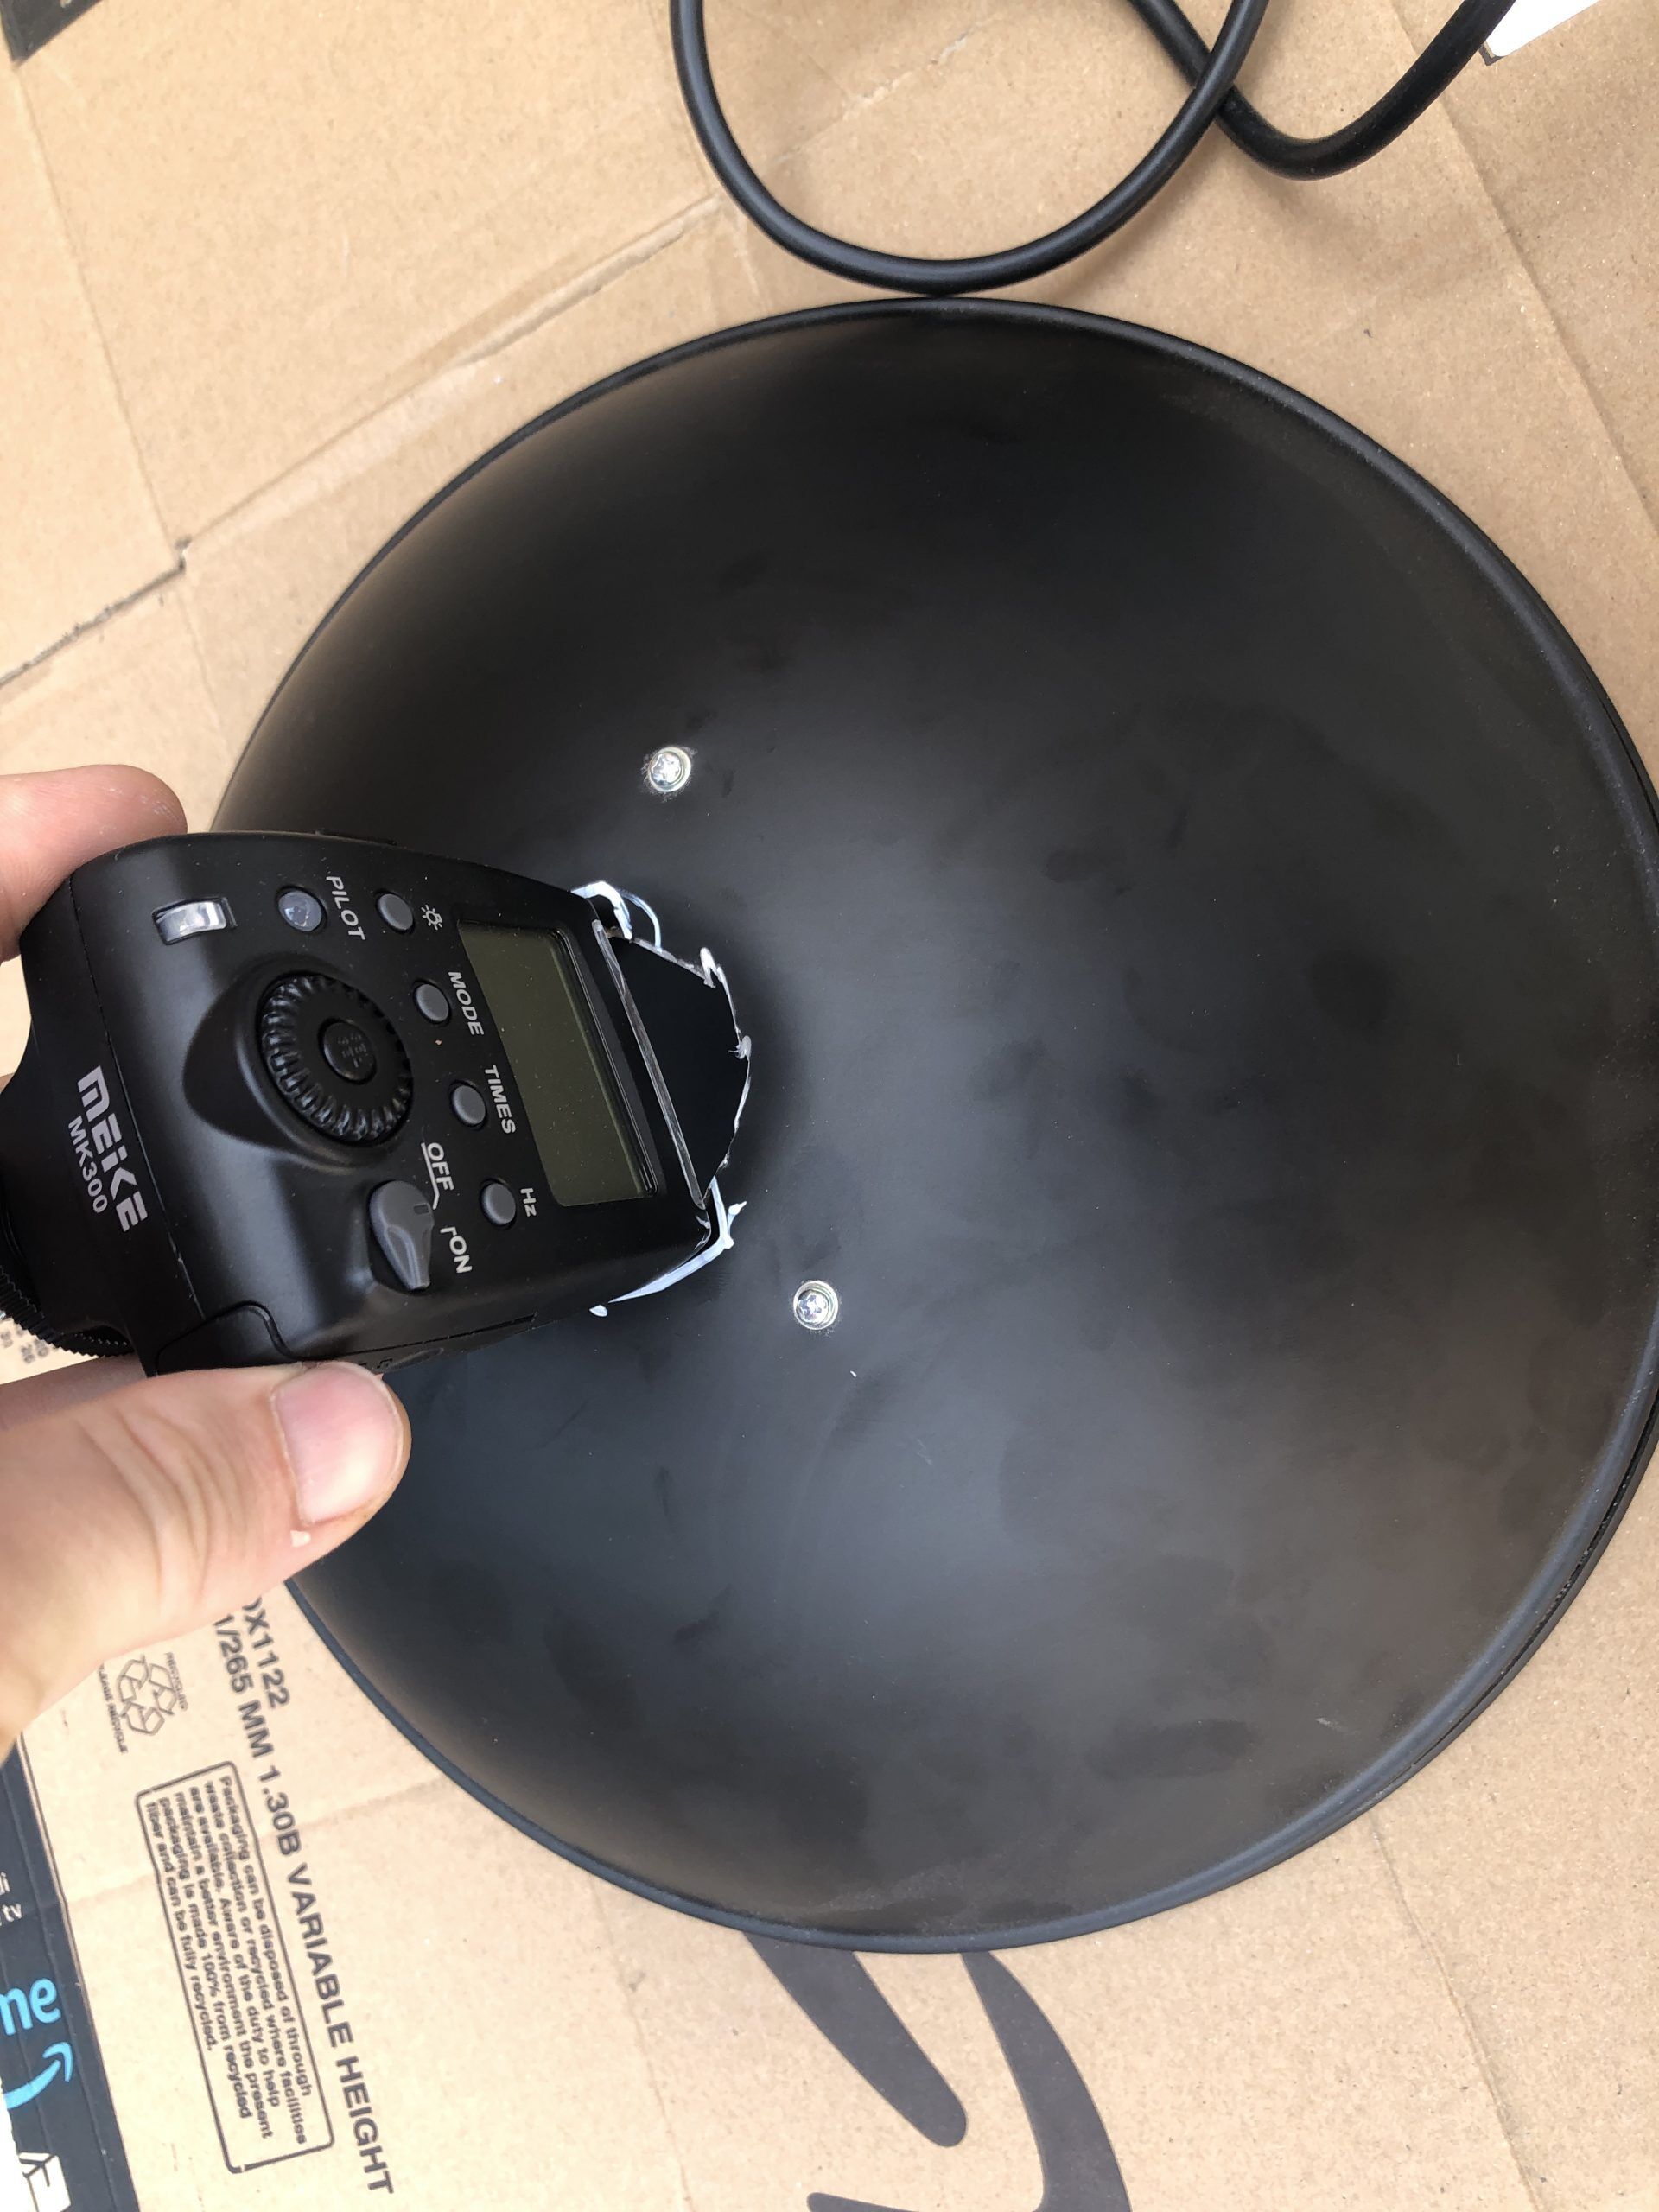
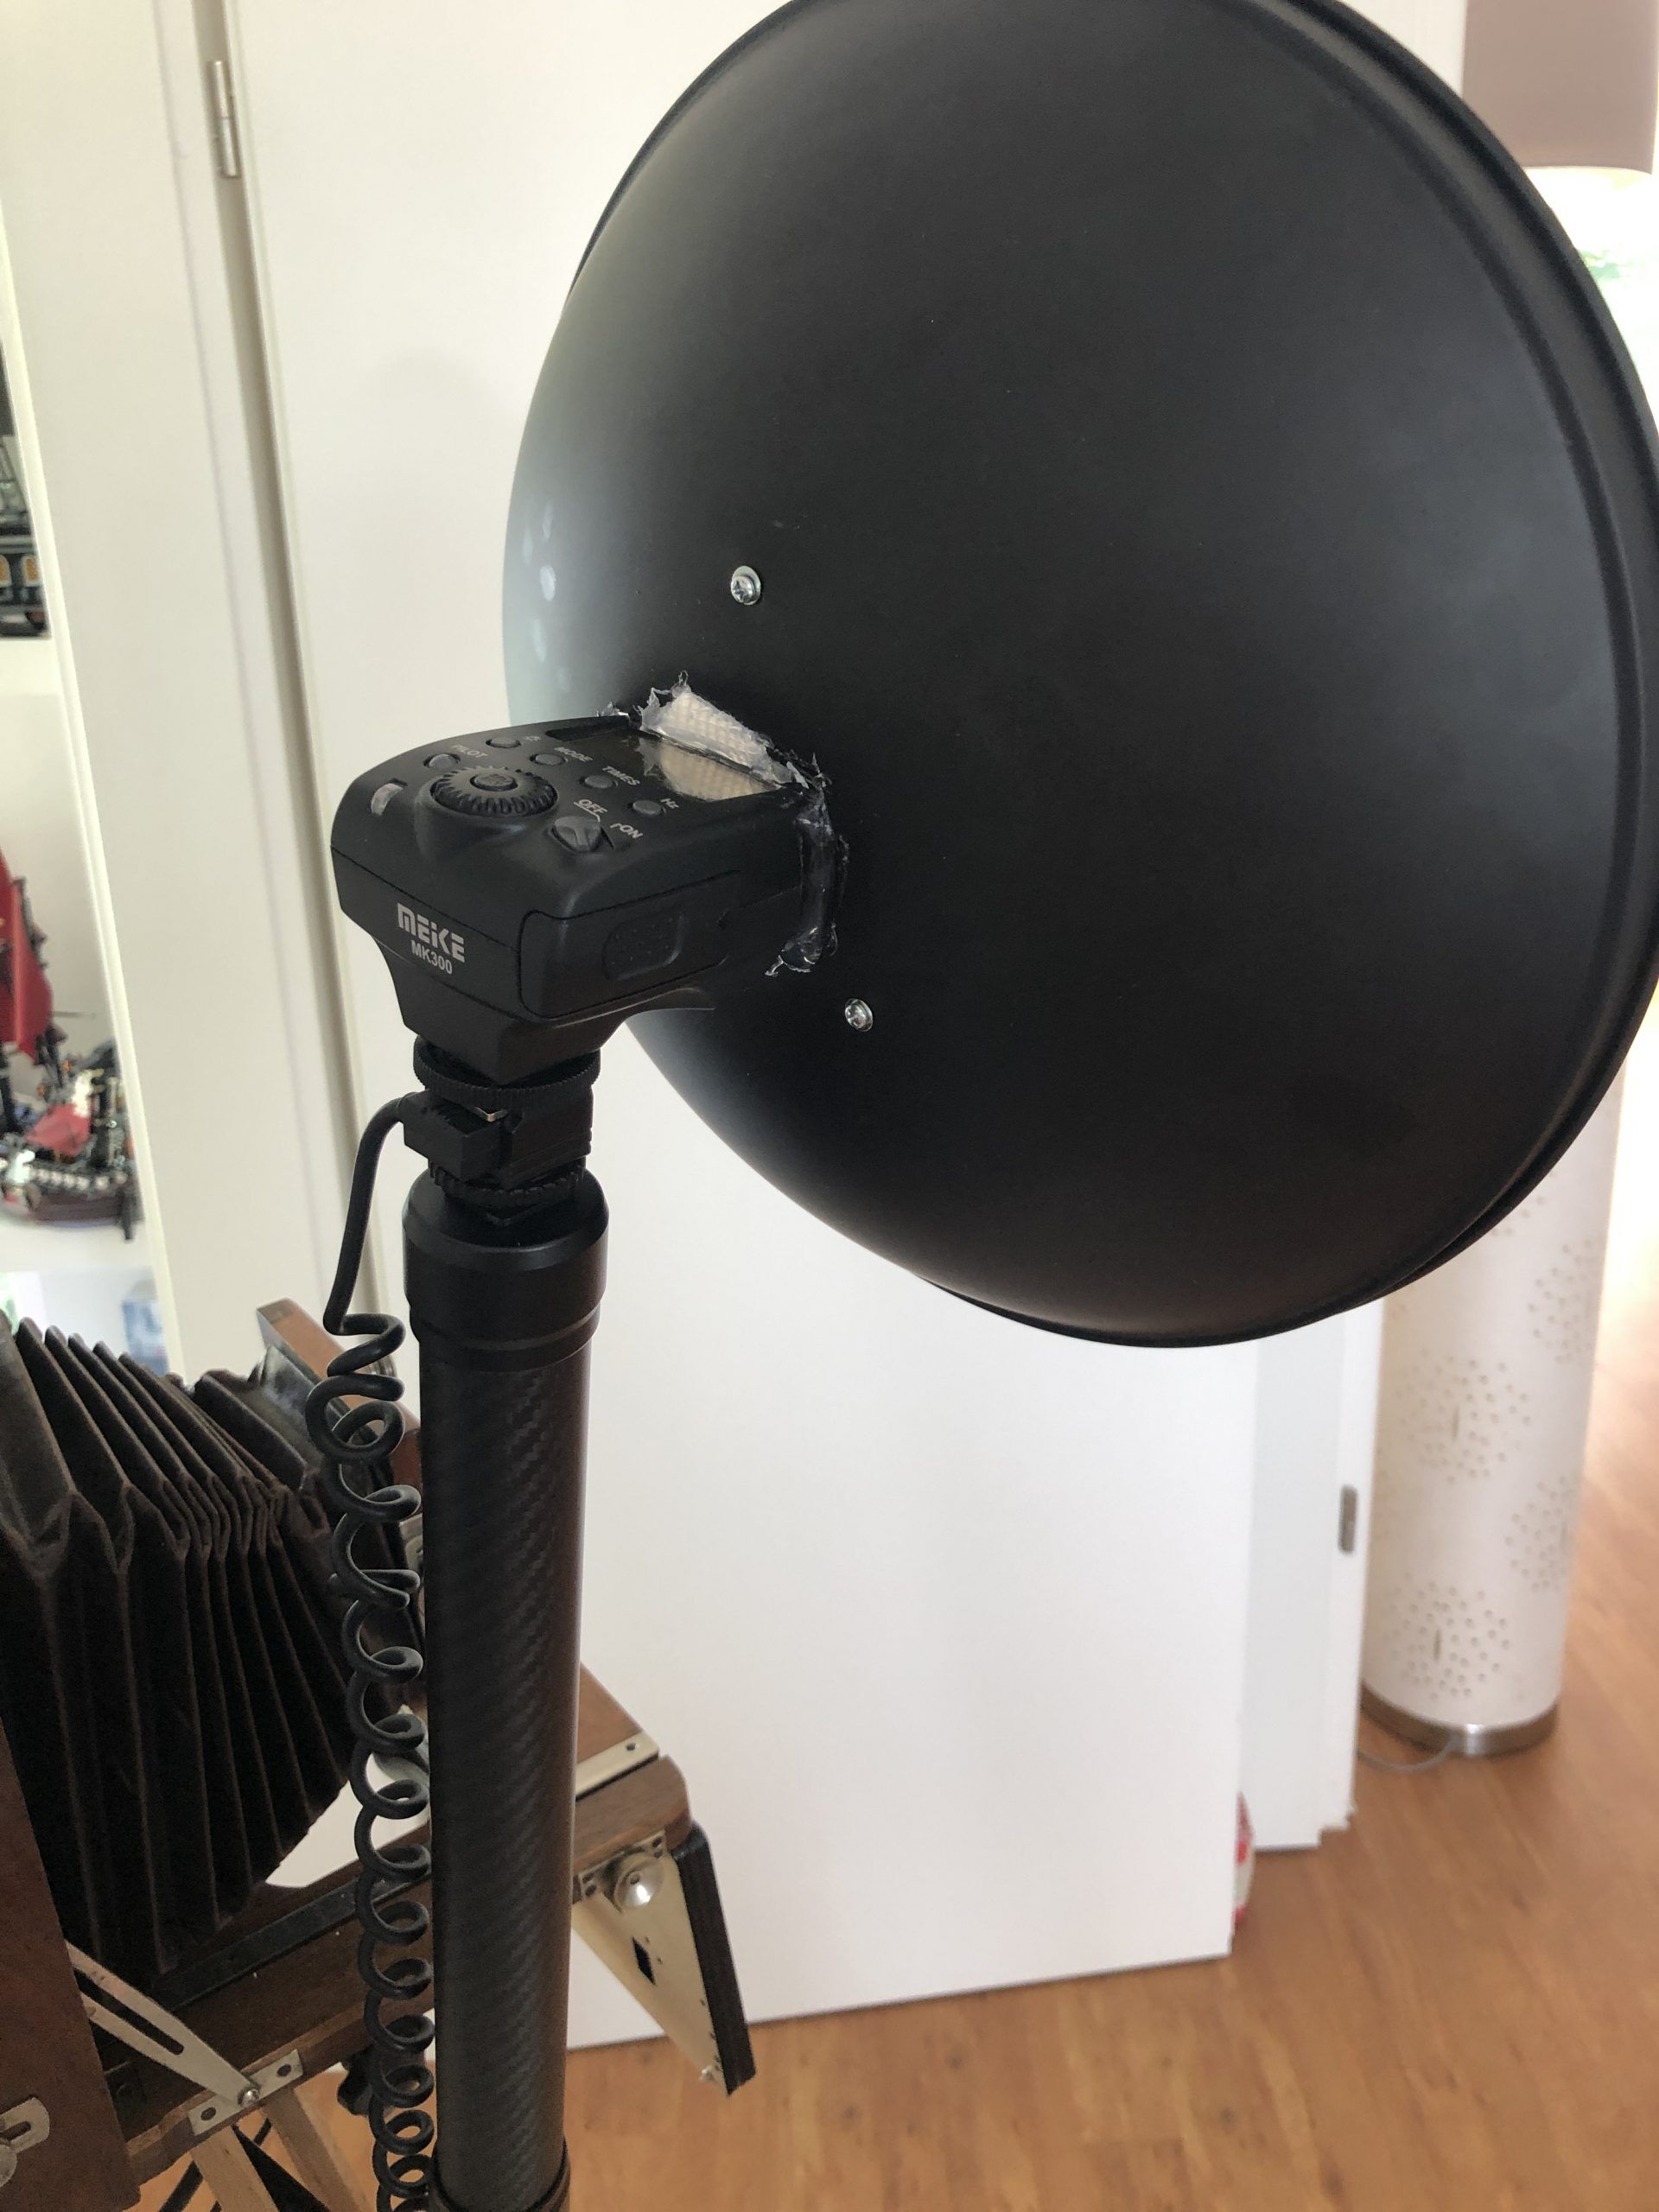
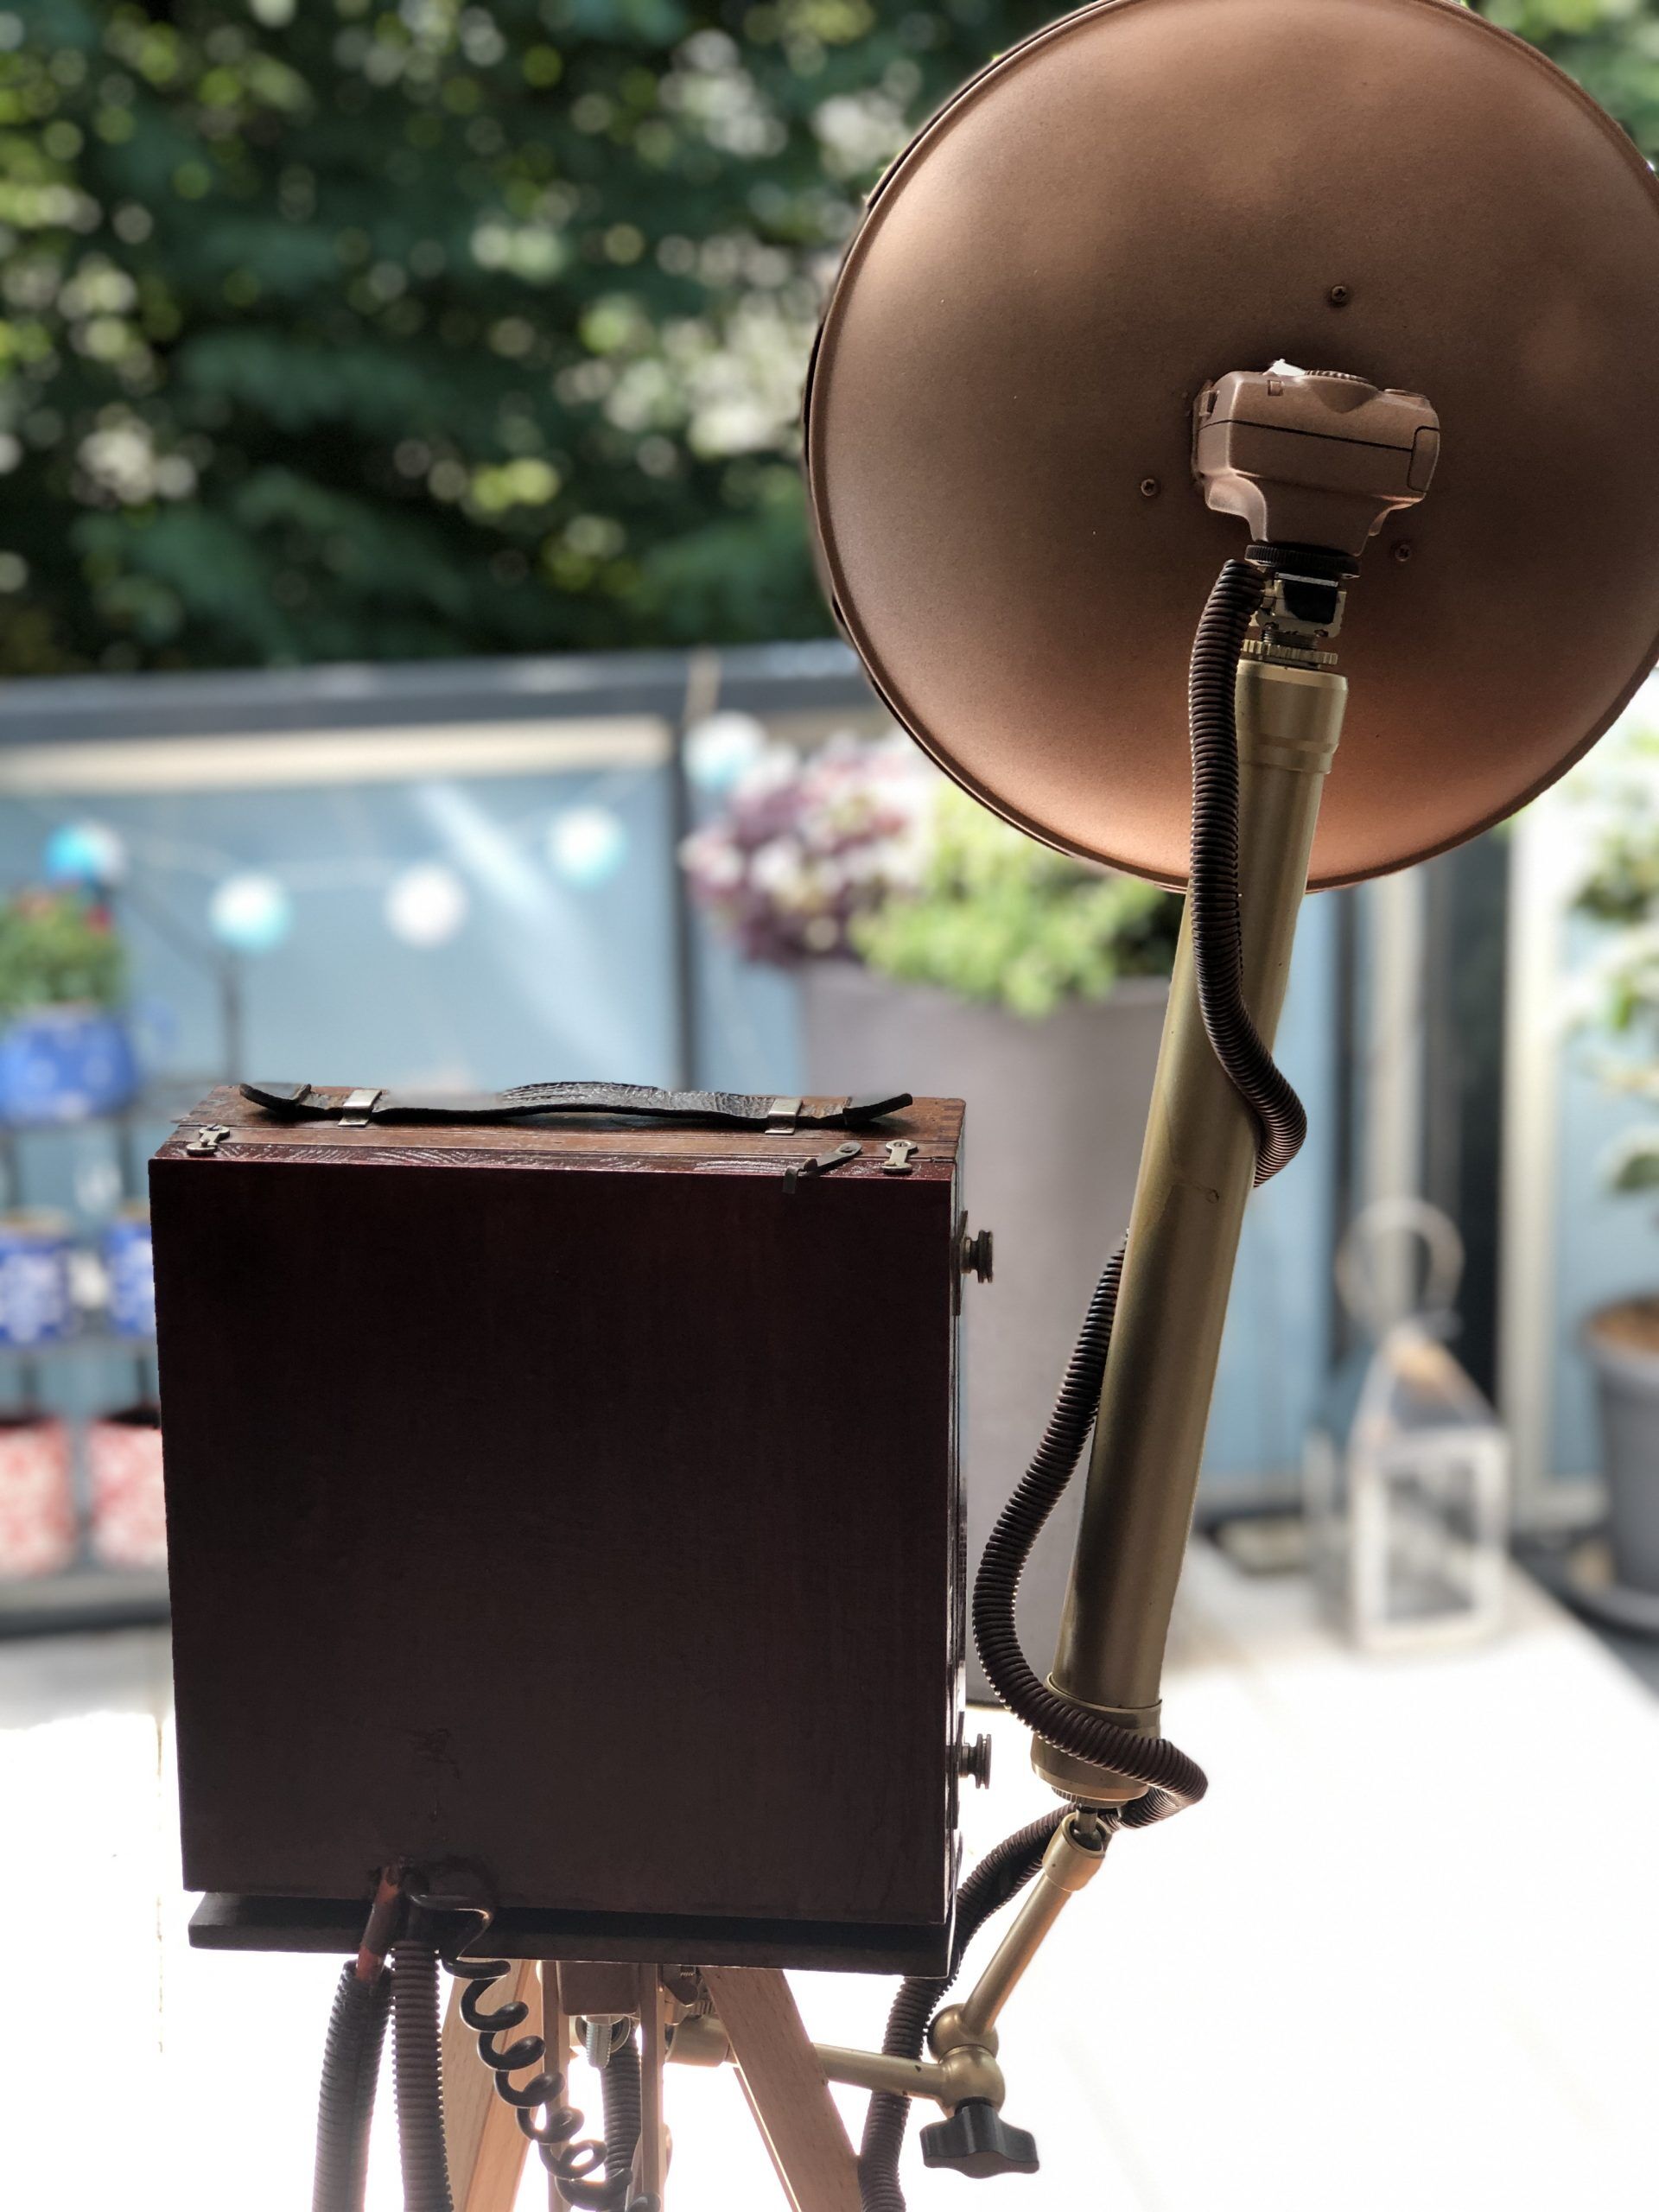
- Godox Beauty Dish for Flashlight retro look
- SoundFounder 7-inch Touchscreen HDMI USB
- Case 7 inch Raspberry Pi Touch Screen
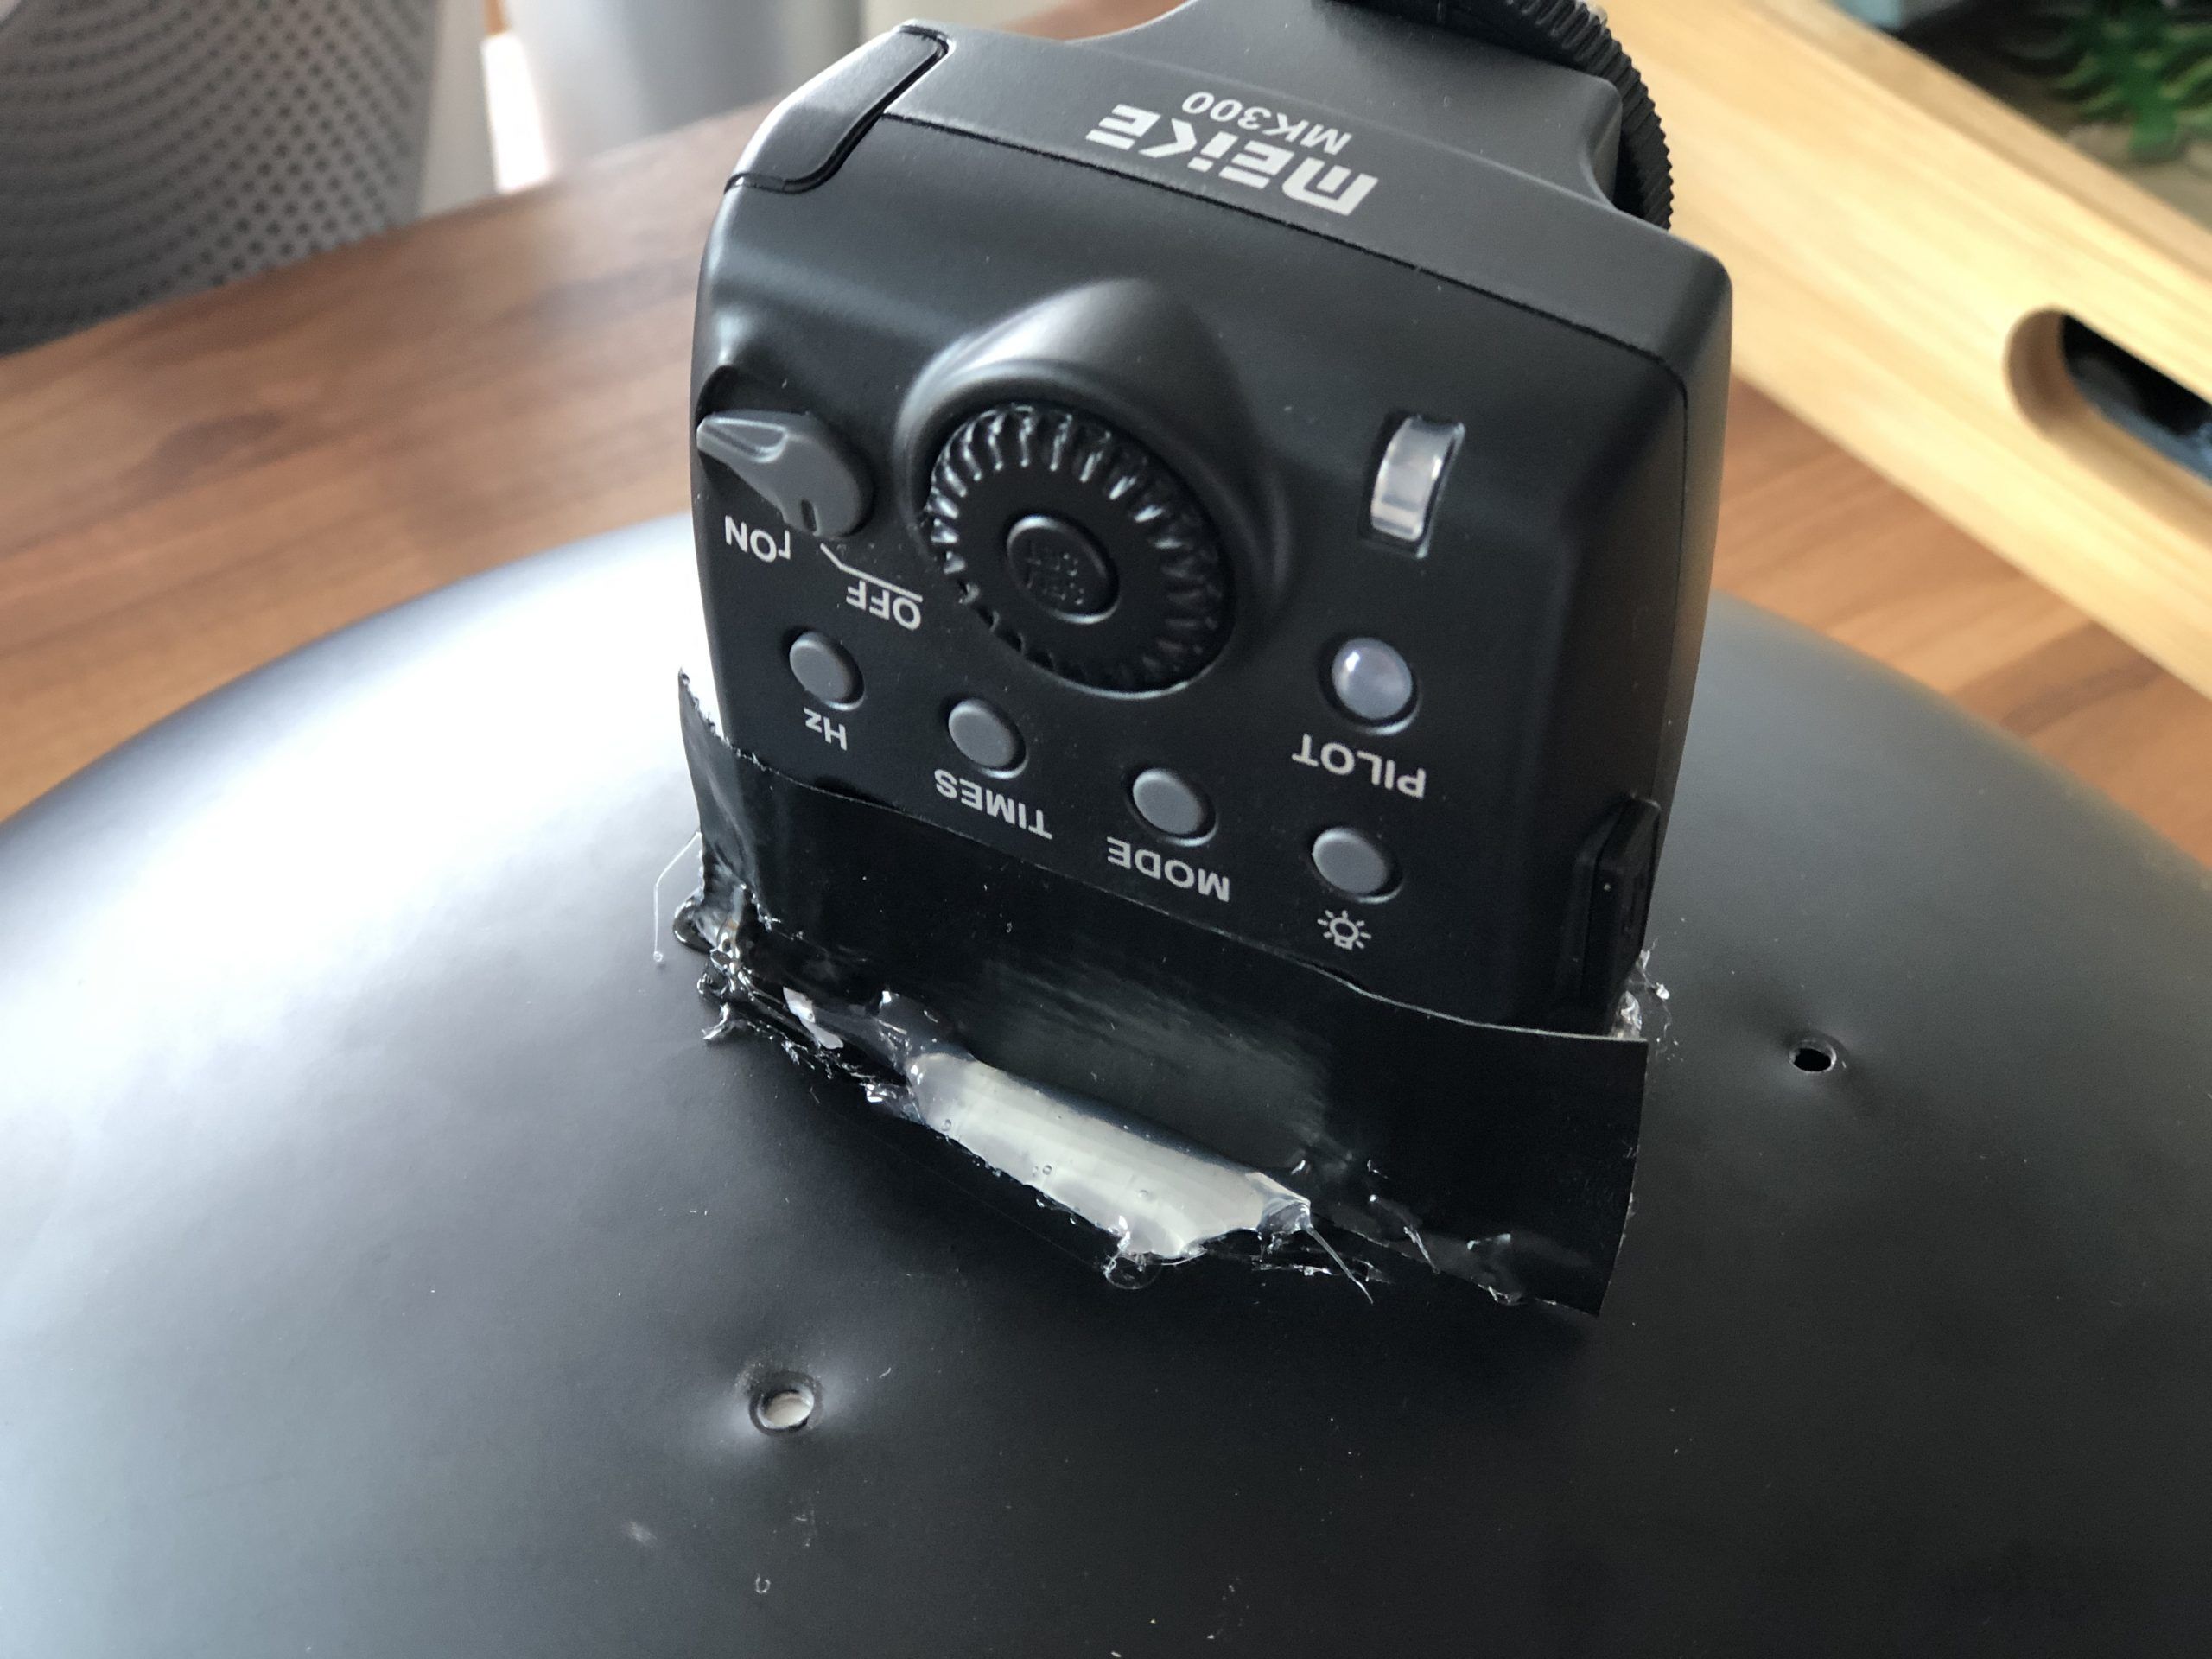
- TTL Flash Khalia-Foto Meike for Canon EOS
- E-TTL extension cable
- USB Wireless Adapter MediaTek Ralink RT5370N 150Mbps 2dBi for Hotspot usage
- Optional: Photo Printer. I got a good deal on a DNP 620a thermo printer. You can use any printer you want that is supported by CUPS, but I would recommend something like the DNP 620 where you don't need to refill every 20 picture or need to maintain a lot.
Support structure & mounts:
- SMALLRIG cheese plate for DJI Ronin
- Elerose 7-inch Magic Mount Arm for touchscreen
- SMALLRIG Magic Arm 10 inch
- Linghuang Carbon Stabilisator Extension Rod Stick 1/4" and 3/8"
Cable & Adapters:
- Kopp 174902005 Power Adapter 3-times for Europlug, super flat, 250v
- Power cord 5m EMOS Schuko, IP20, H05VV-F3G 1,5 mm2
- UGREEN HDMI cable 1m angled connector for Touchscreen
- Afunta 90 degree Micro-HDMI adapter
- DeLock cable USB 2.0-A Stecker > USB Mini-B 5pin angled 0,5m
- Mcdodo cable 90 degree angle Micro USB with LED indicator
- AmazonBasics PC045 5m USB 2.0 printer cable
Decoration and color:
- AUPROTEC corrugated tube Ø12 mm inner, 5m)
- Color Spray - copper
- Color Spray - rust effect
- Color Spray - gold
Technical overview: connecting the components
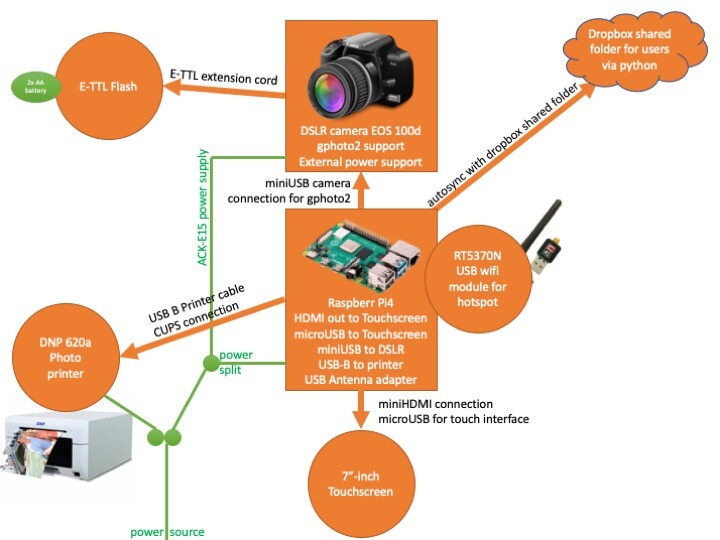
I am using the Raspberry Pi to run:
- the photobooth web application
- a python dropbox sync script to autofill a shared folder that people can access the images immediately
- a python script that uses the extra RT5370N usb module as a hotspot to connect and remote control the hardware
- gphoto2 for camera control
- CUPS & gutenprint drivers for printing
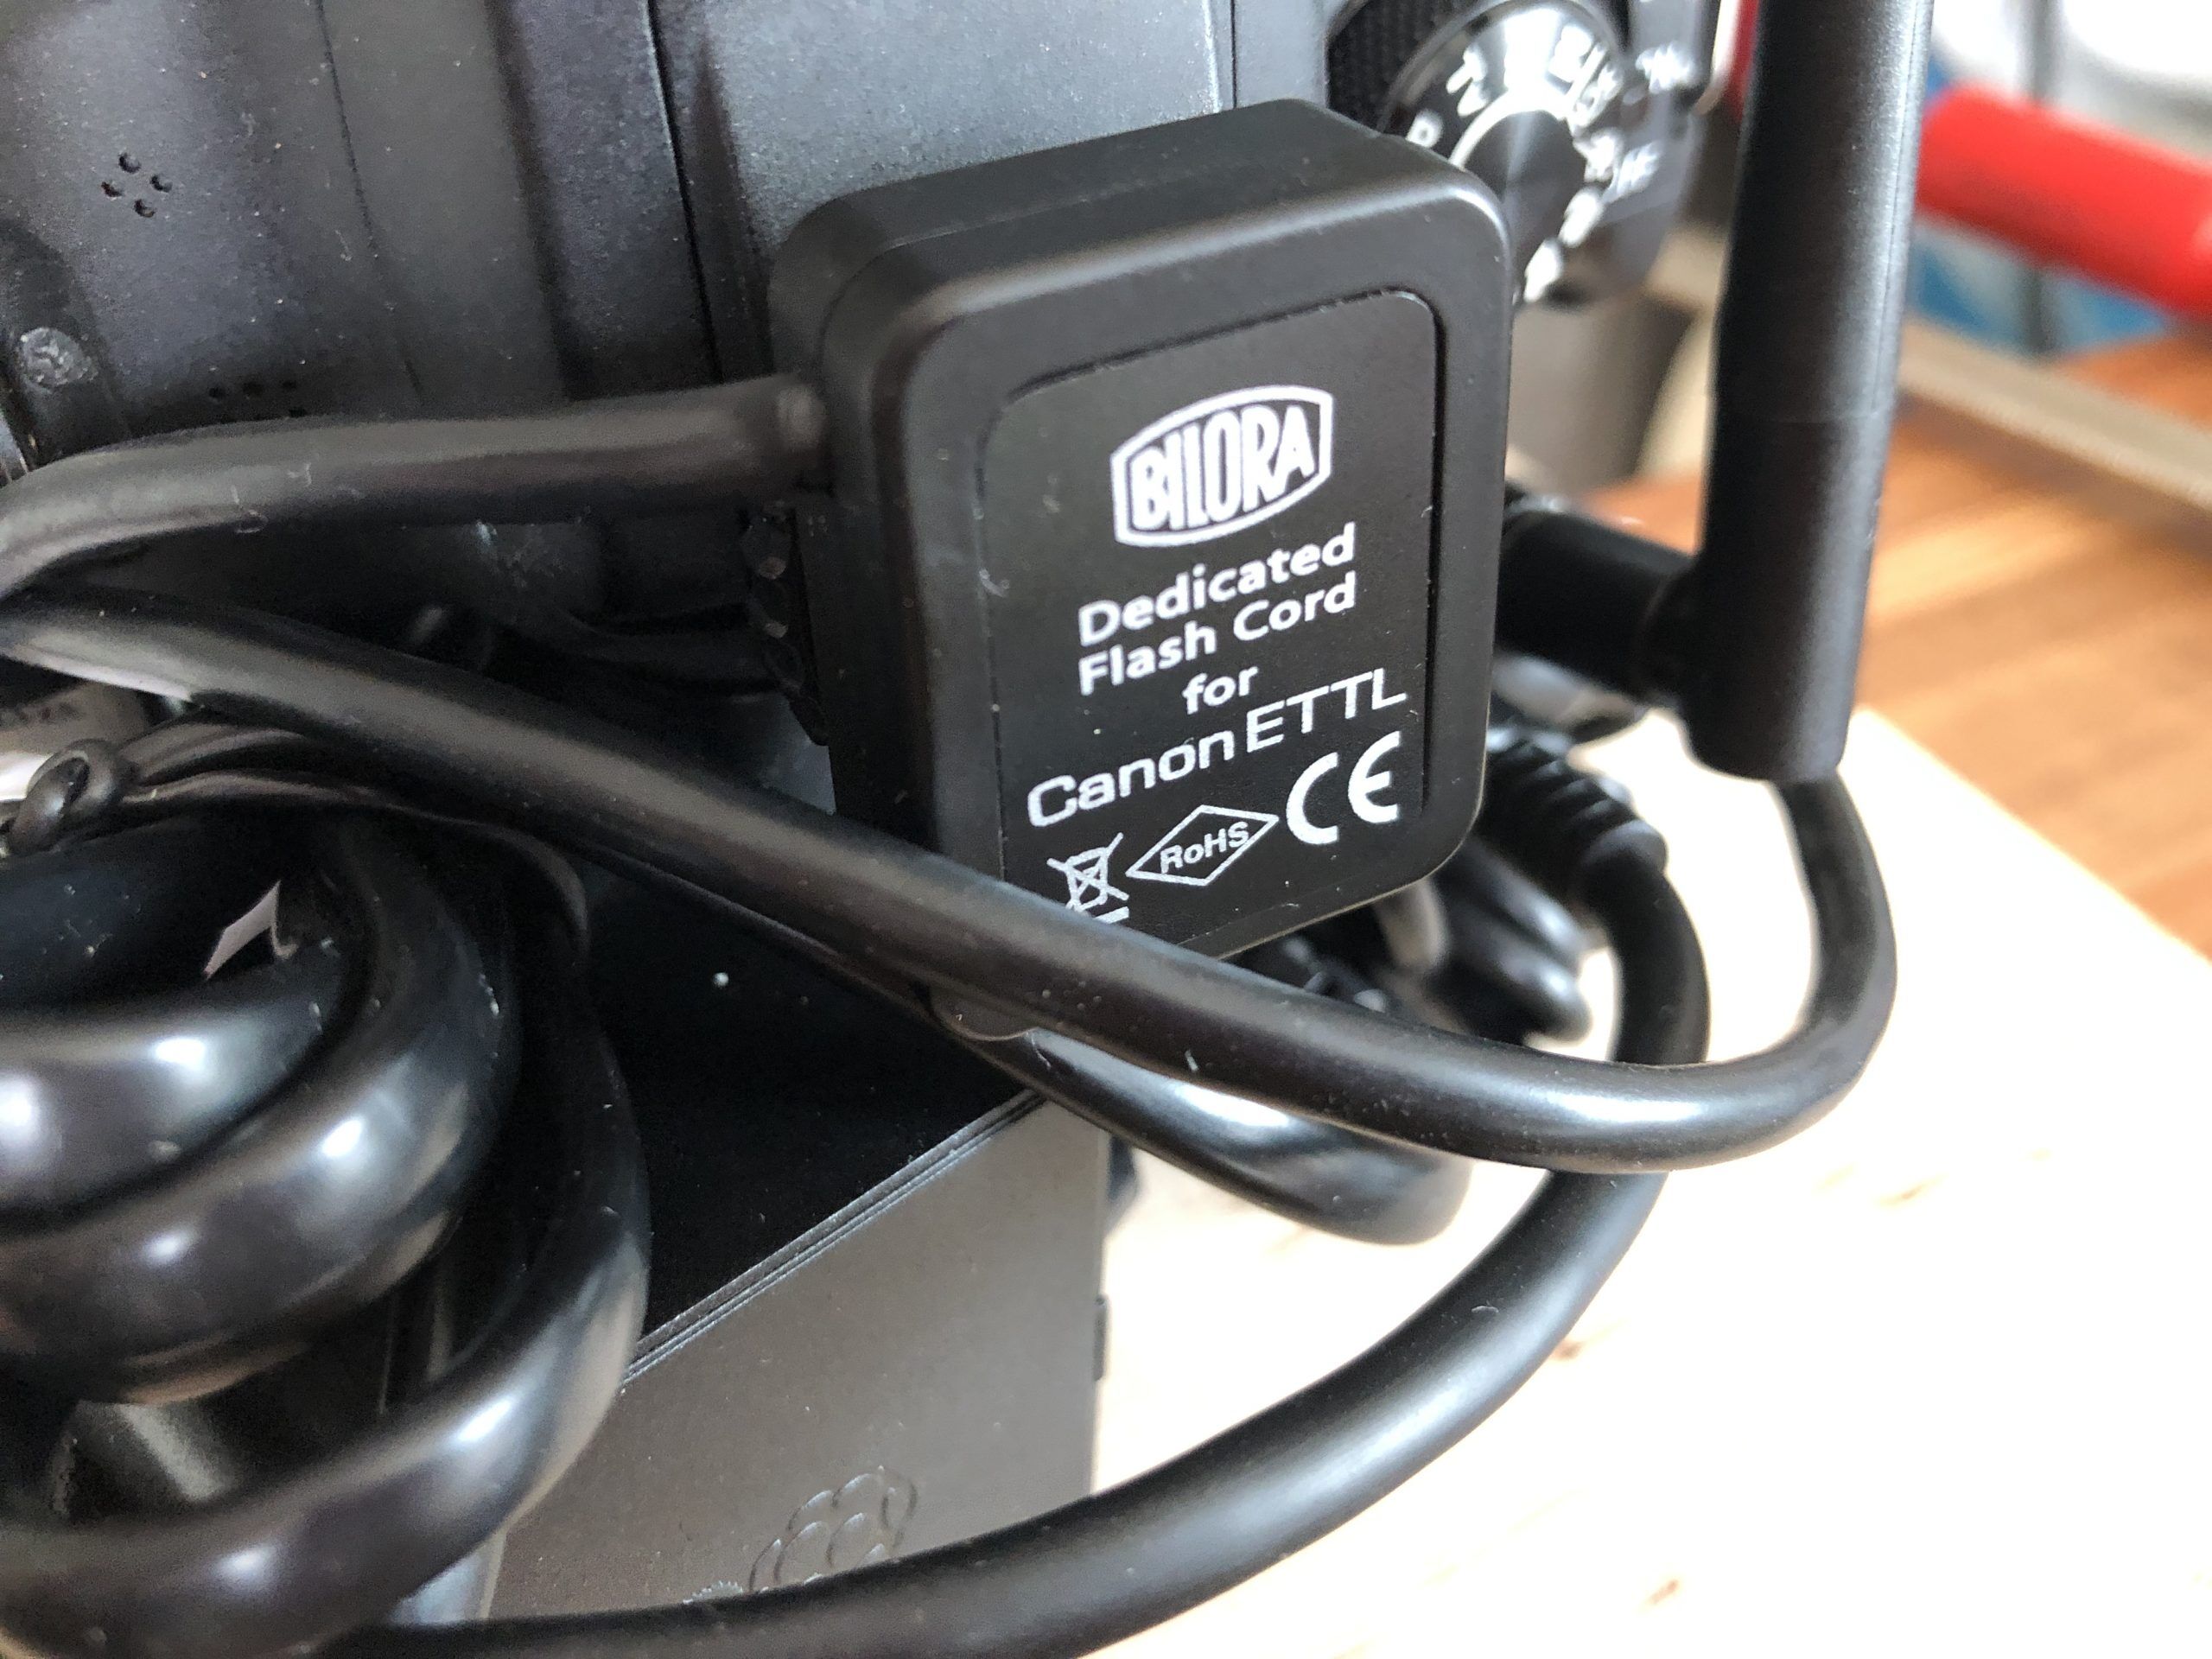
The Raspberry gets connected with the DSLR over a miniUSB cable. The camera is connected with the flash via a ETTL extension cord, as well as with the power adapter to the 3 port power plug. The Pi plugs in this as well for power. Next the USB antenna module for the hotspots is connected to the USB2 port of the pi. The printer is also connected to the USB2 port of the pi via a calssic USB-B printer cable. Last ist the Touchscreen that connects to the pi via a microHDMI to HDMI adapter and a microUSB cable with LED in the plug to see the power state of the whole thing.
The build of the hardware
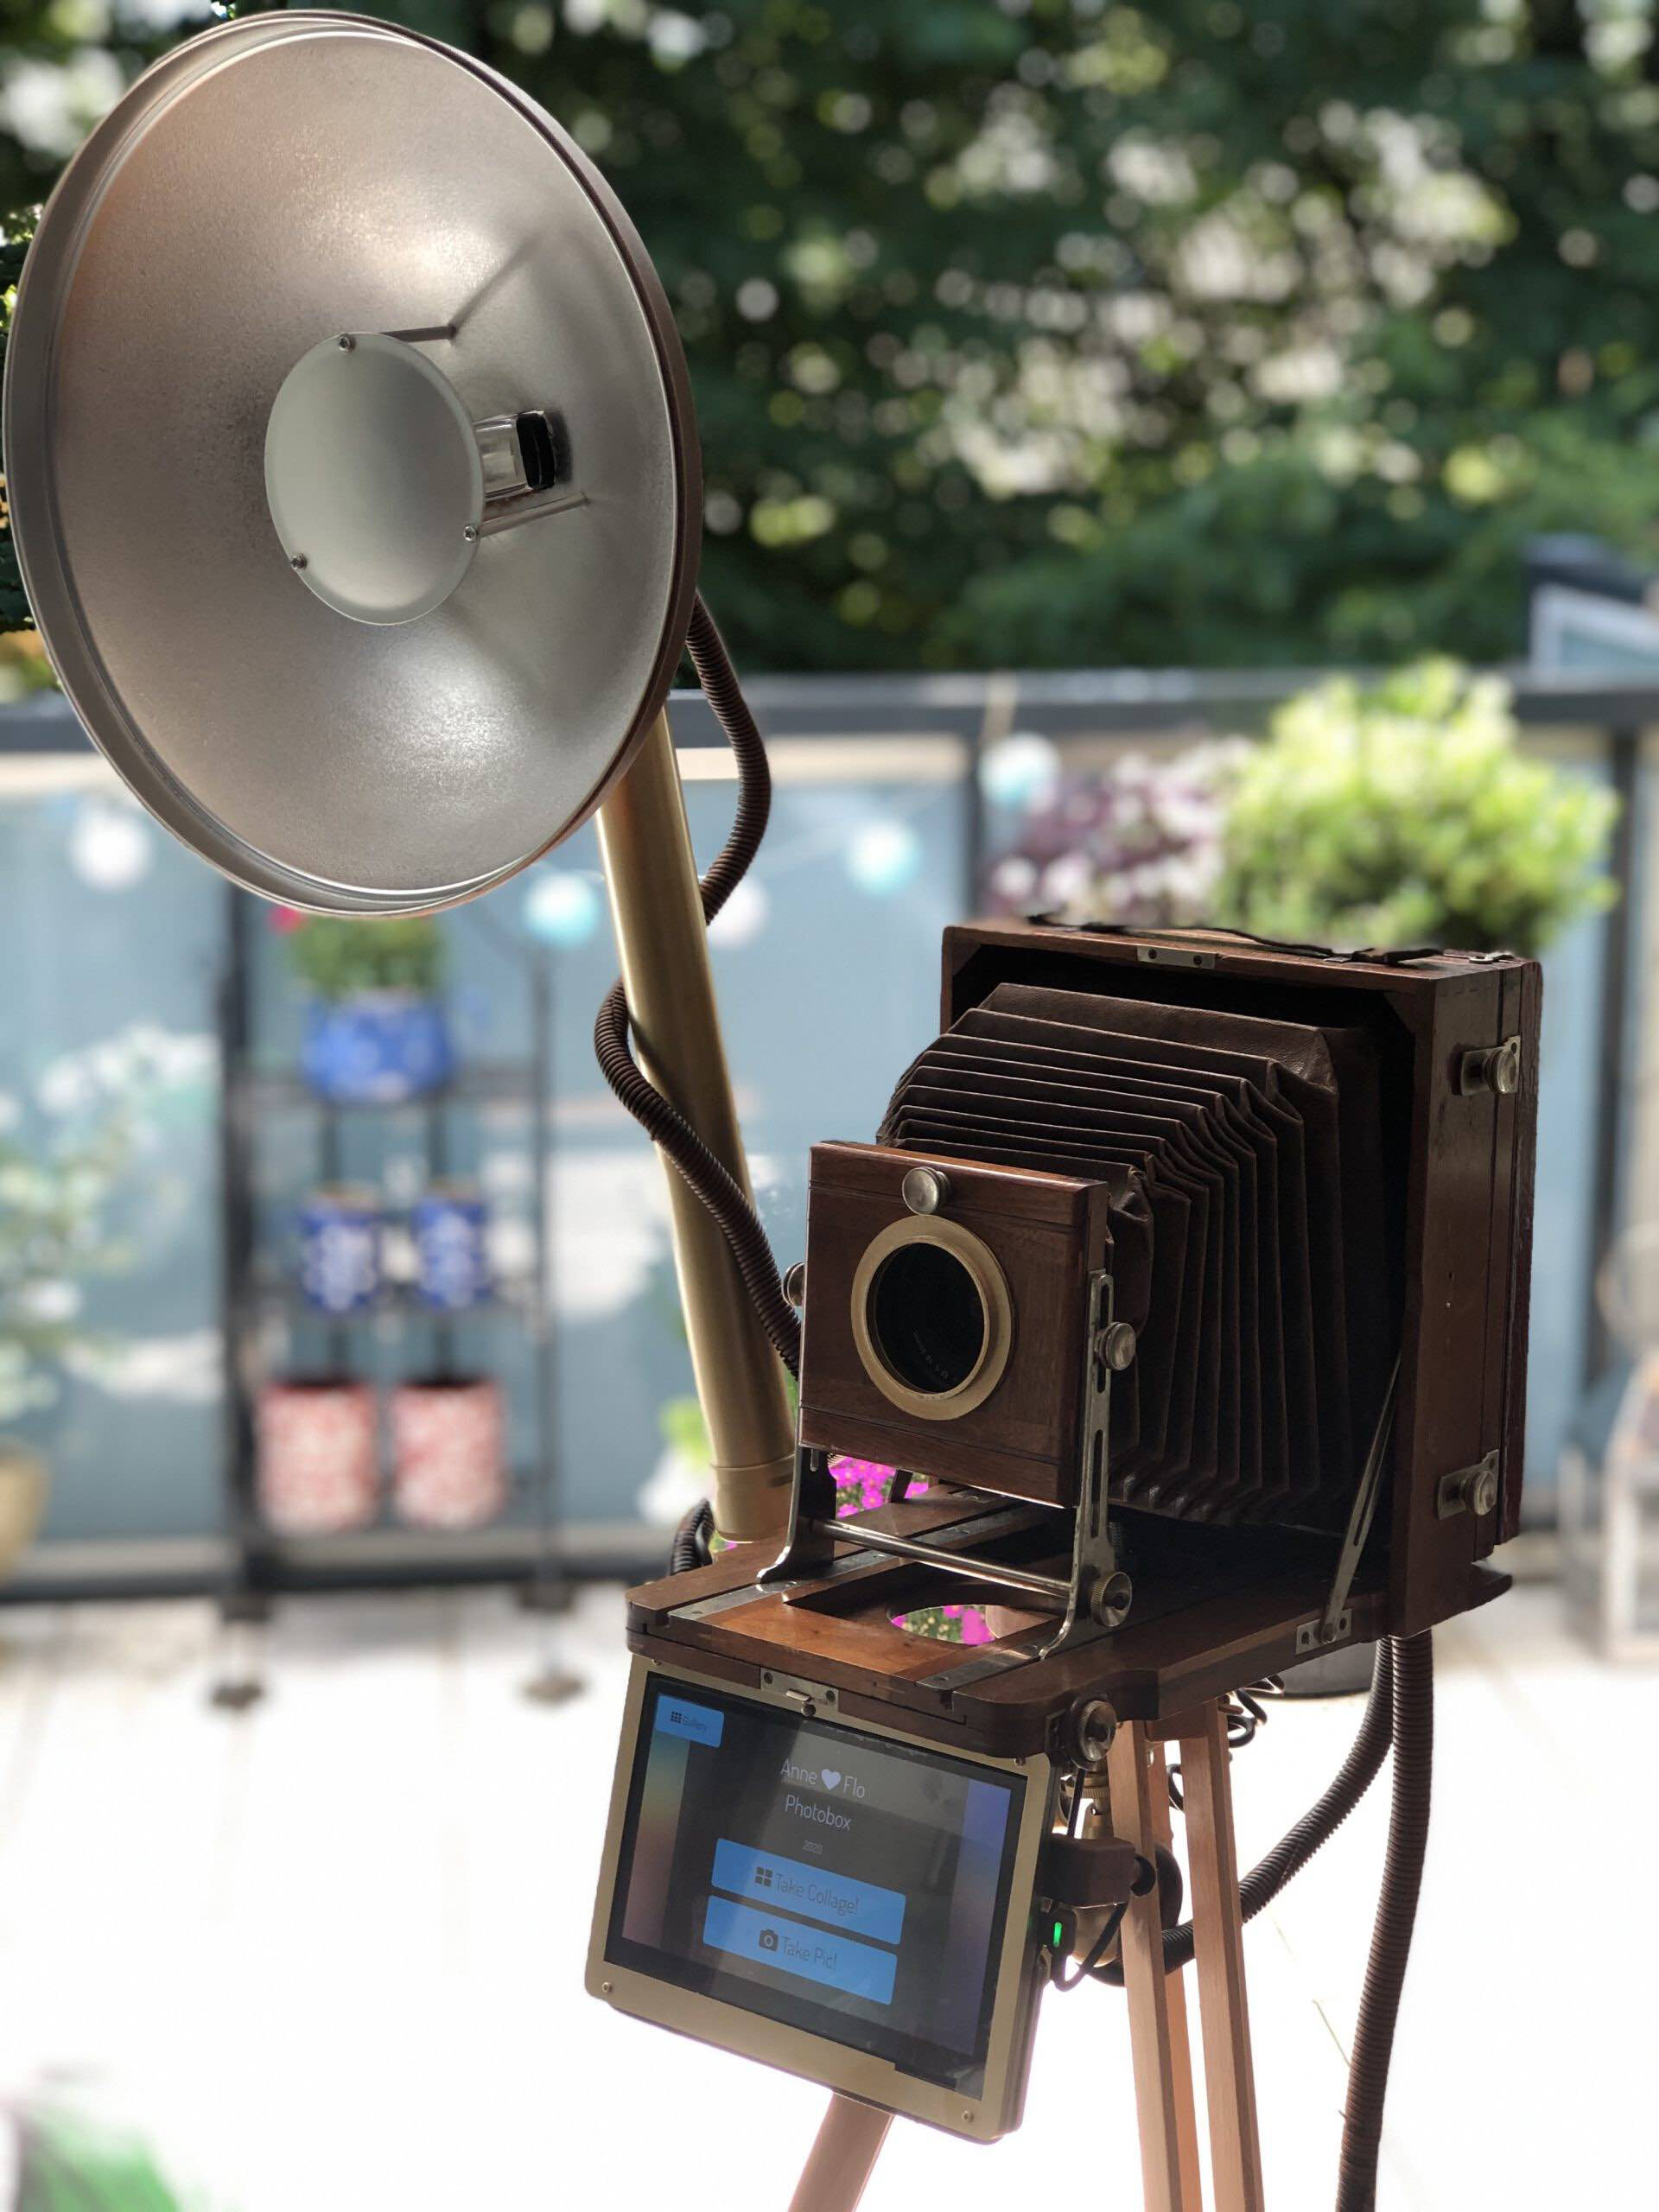
DISCLAIMER: This is a very old nice vintage camera, which made me do the whole build under one HUGE condition: NEVER EVER HURT THE ANTIQUE! Meaning a lot of things would have been easier if I would just drill into this beautiful thing. But even glue was a no go for me. So everything you see now is made with the possibility to return the camera to its vintage original state.
It all started with this beautiful vintage plate camera. Unfortunately the EOS-M, I had and which would have fit perfectly, turned out to NOT have Canons ptp gphoto2 support 🙁 Why, Canon, WHY!?. So I sold it and got for even a little less the Canon EOS 100d, which is slightly larger, but still fits, and has all features I needed.

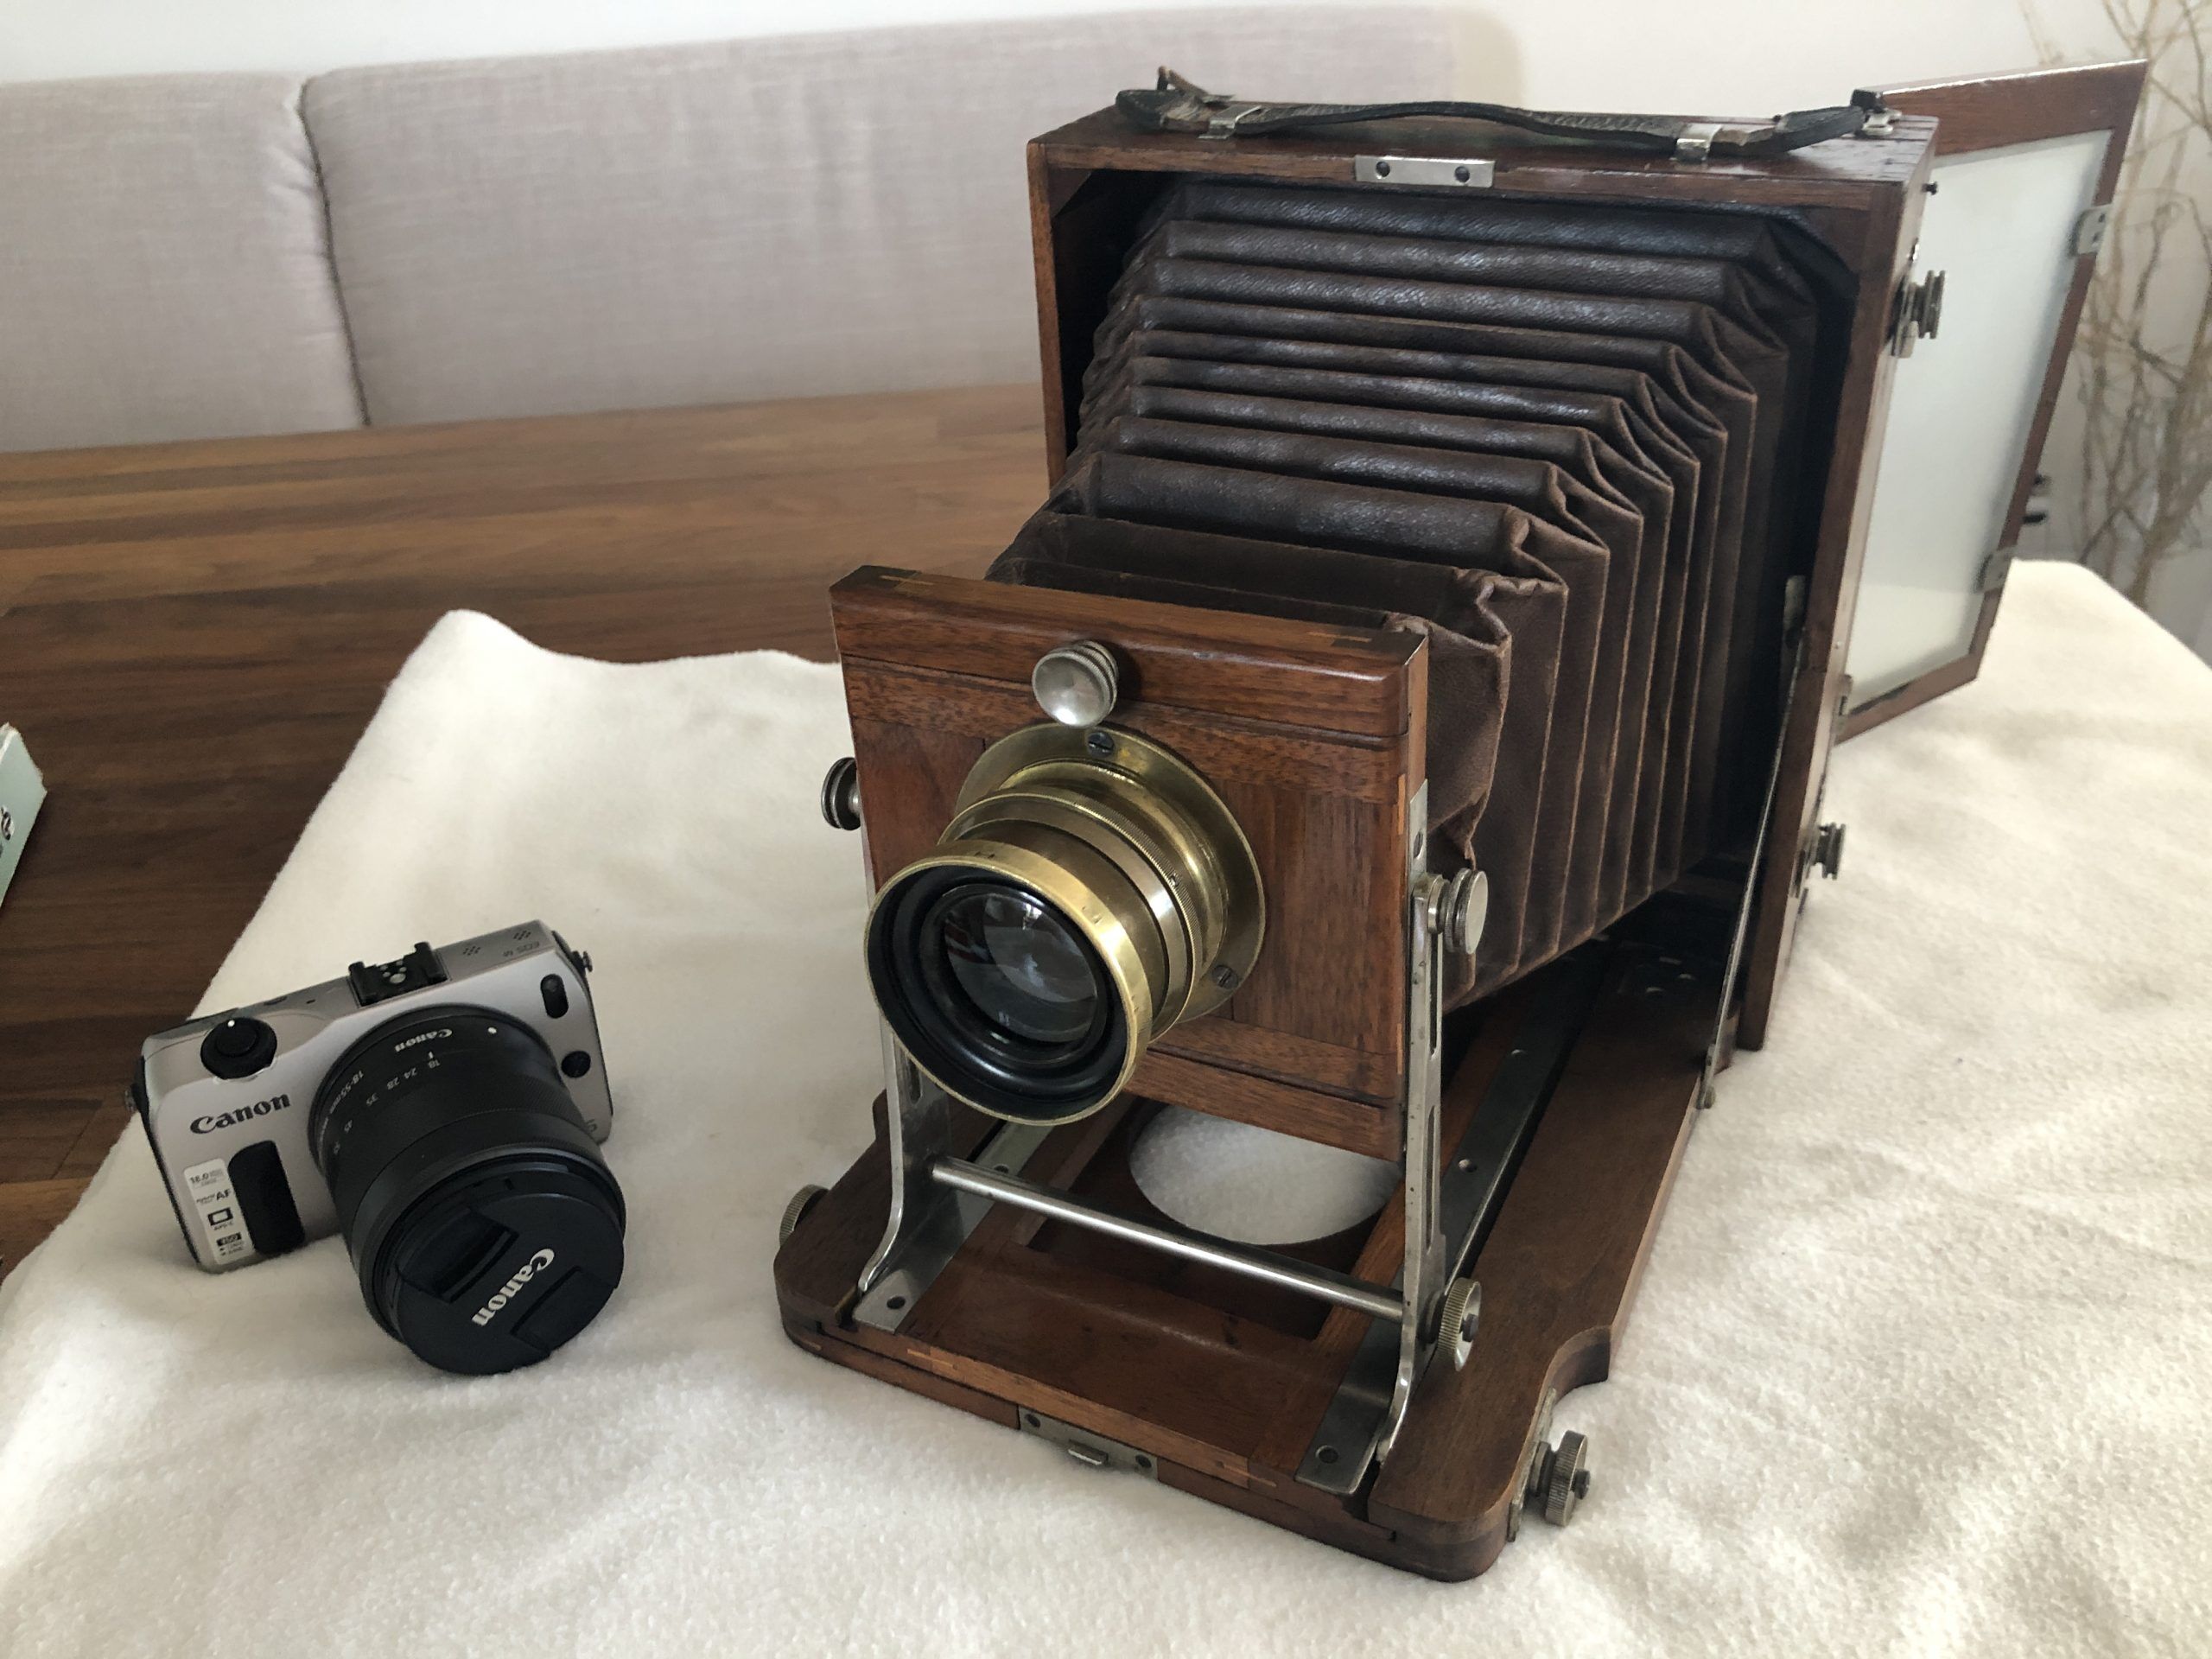
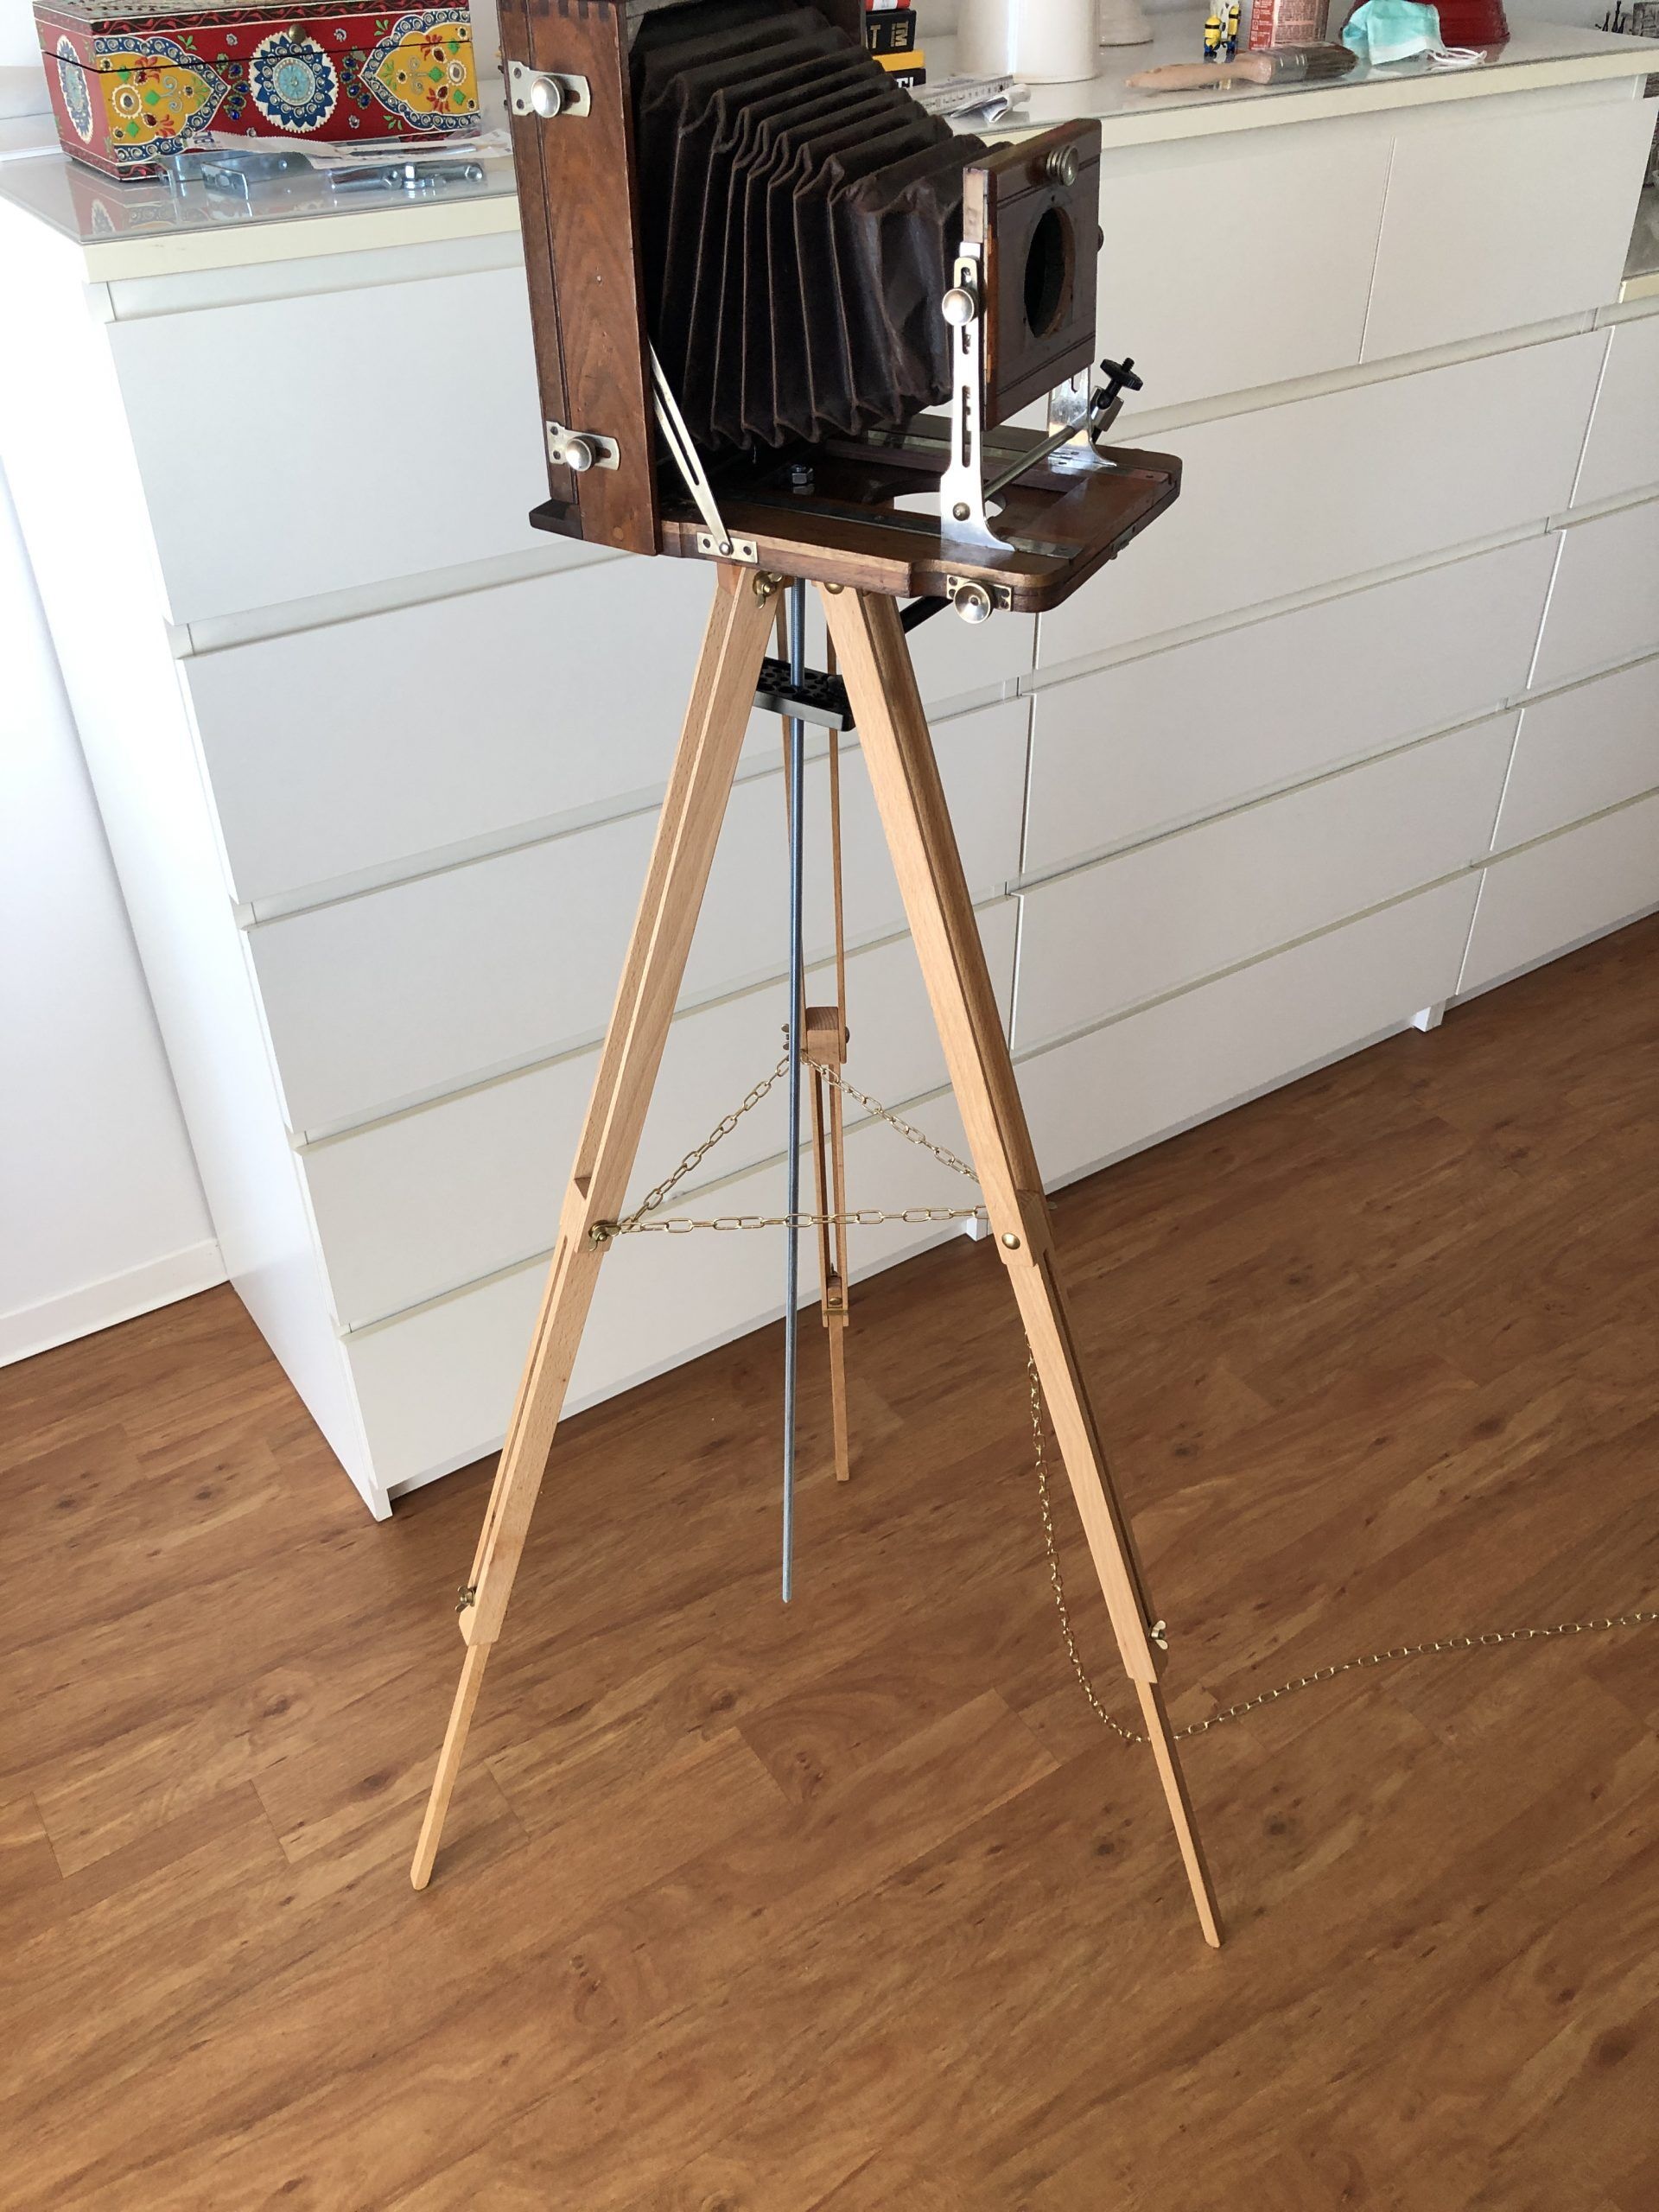
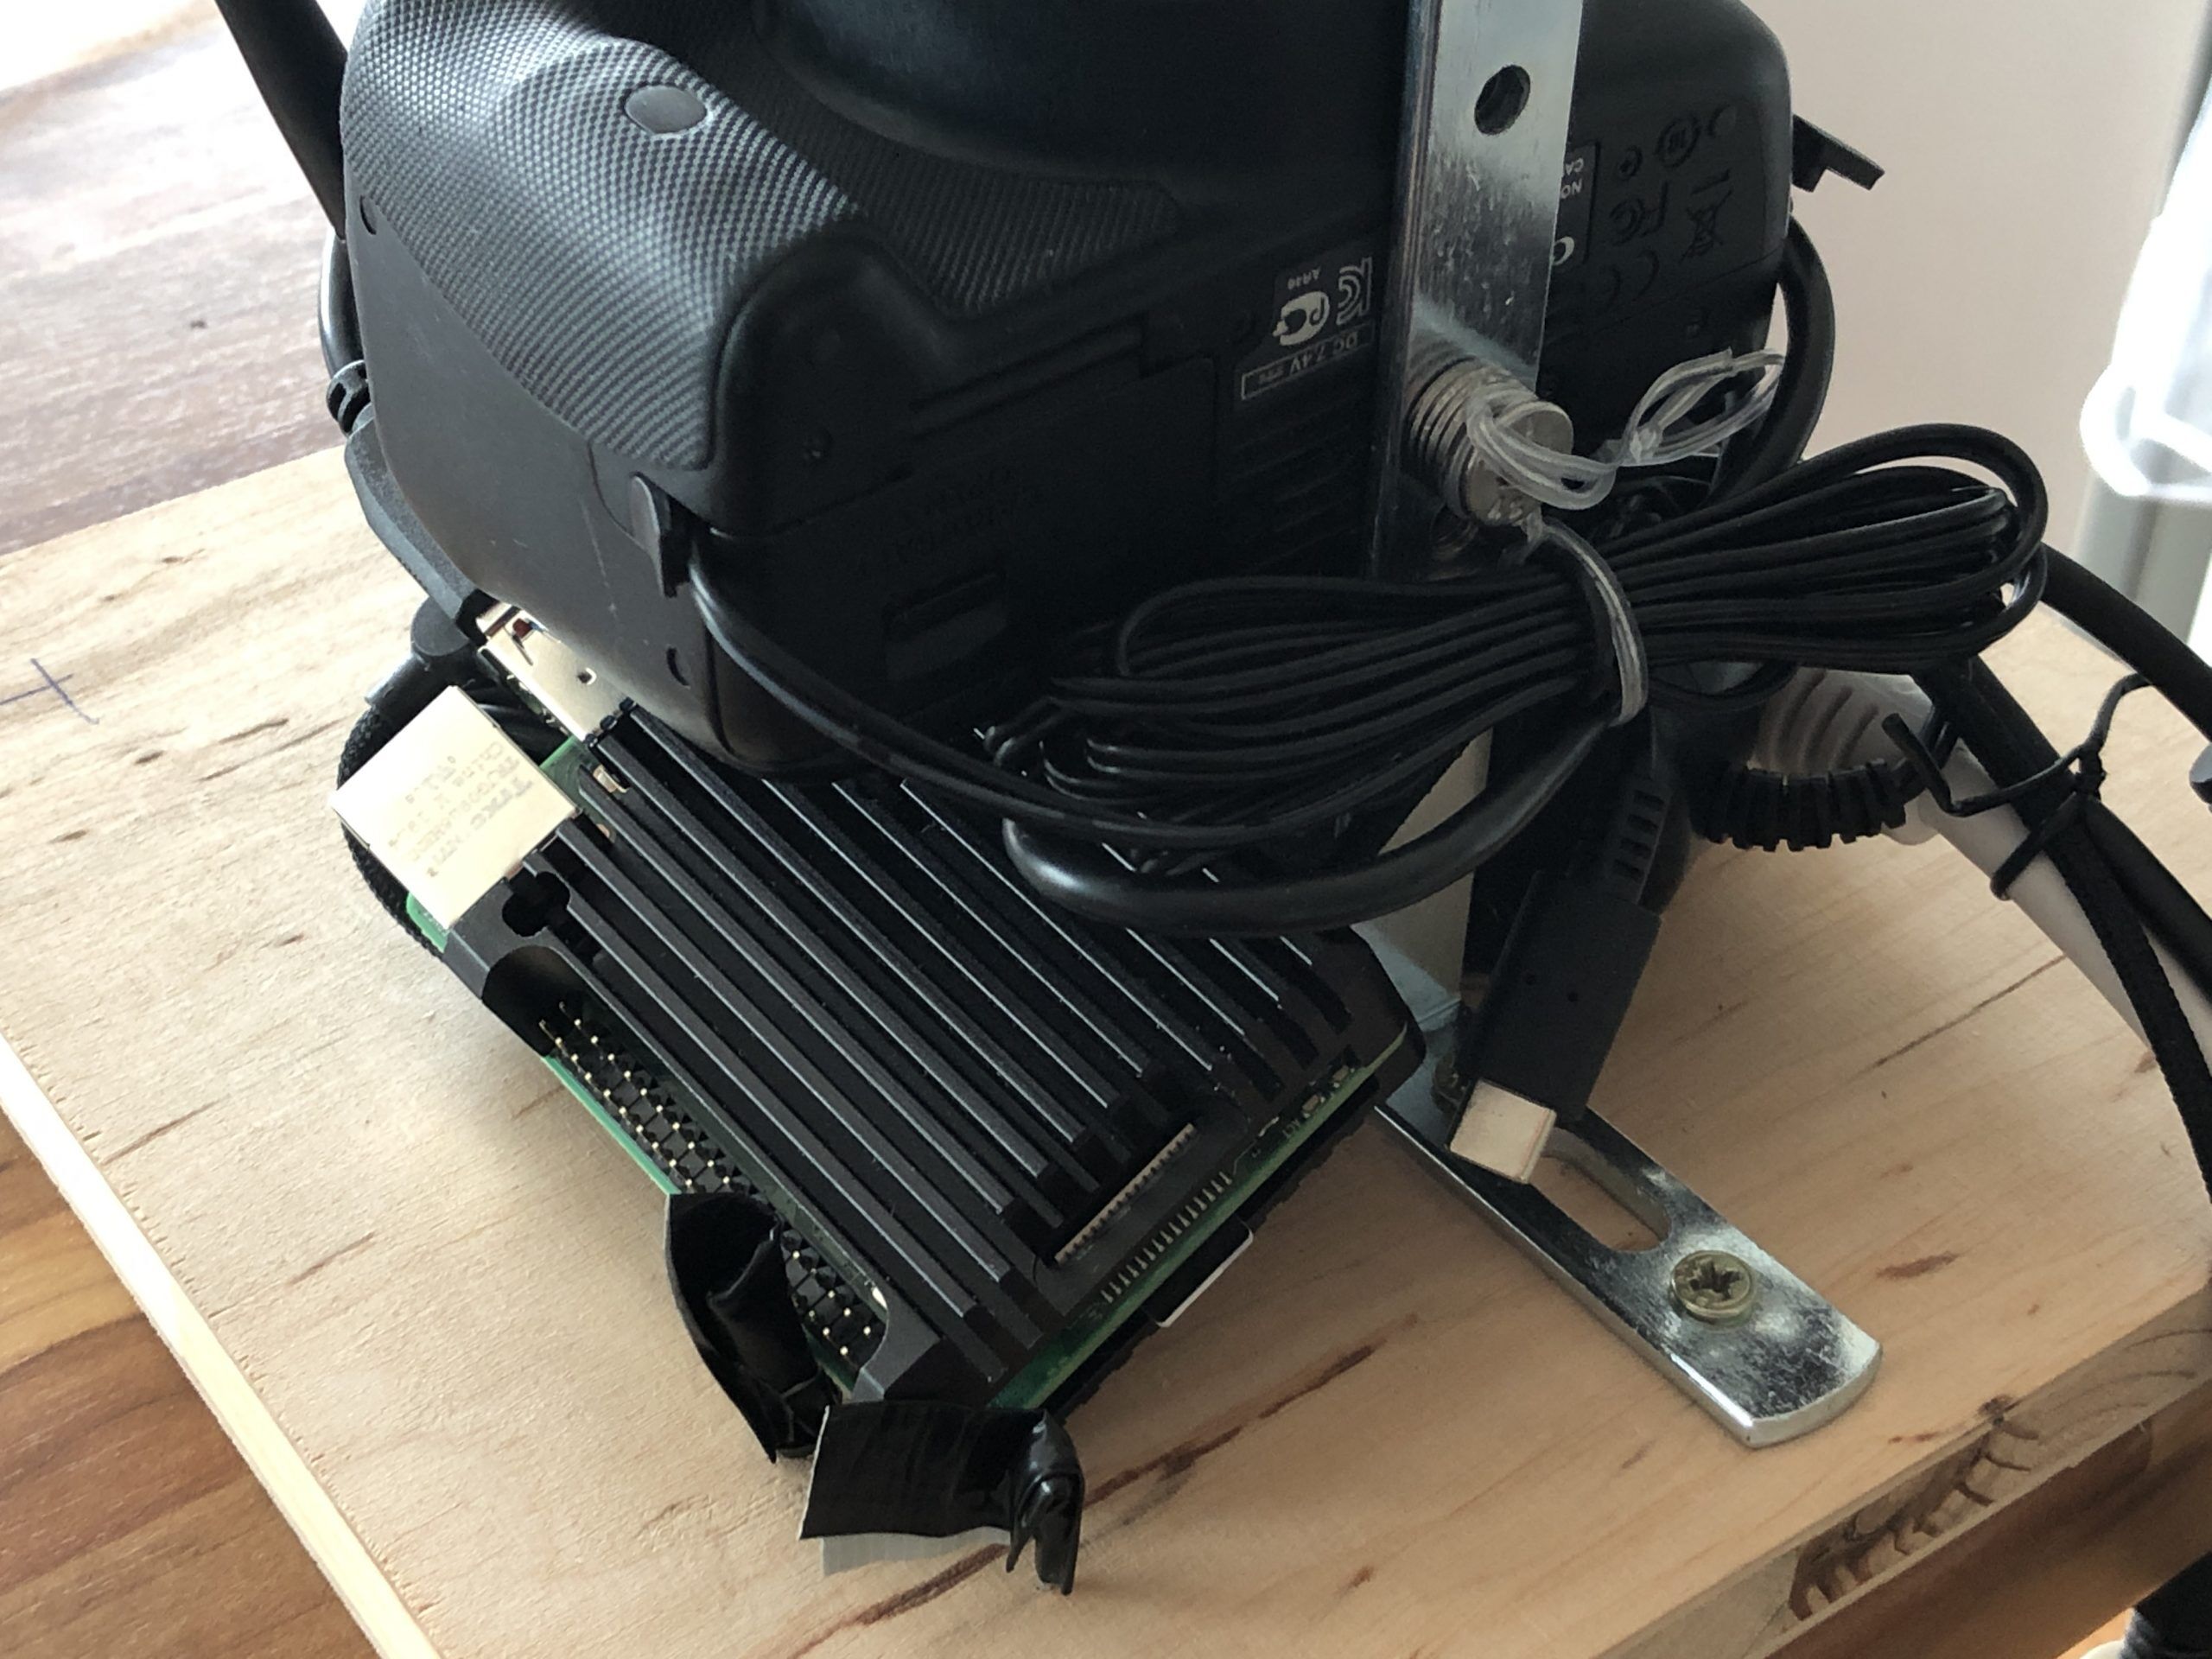
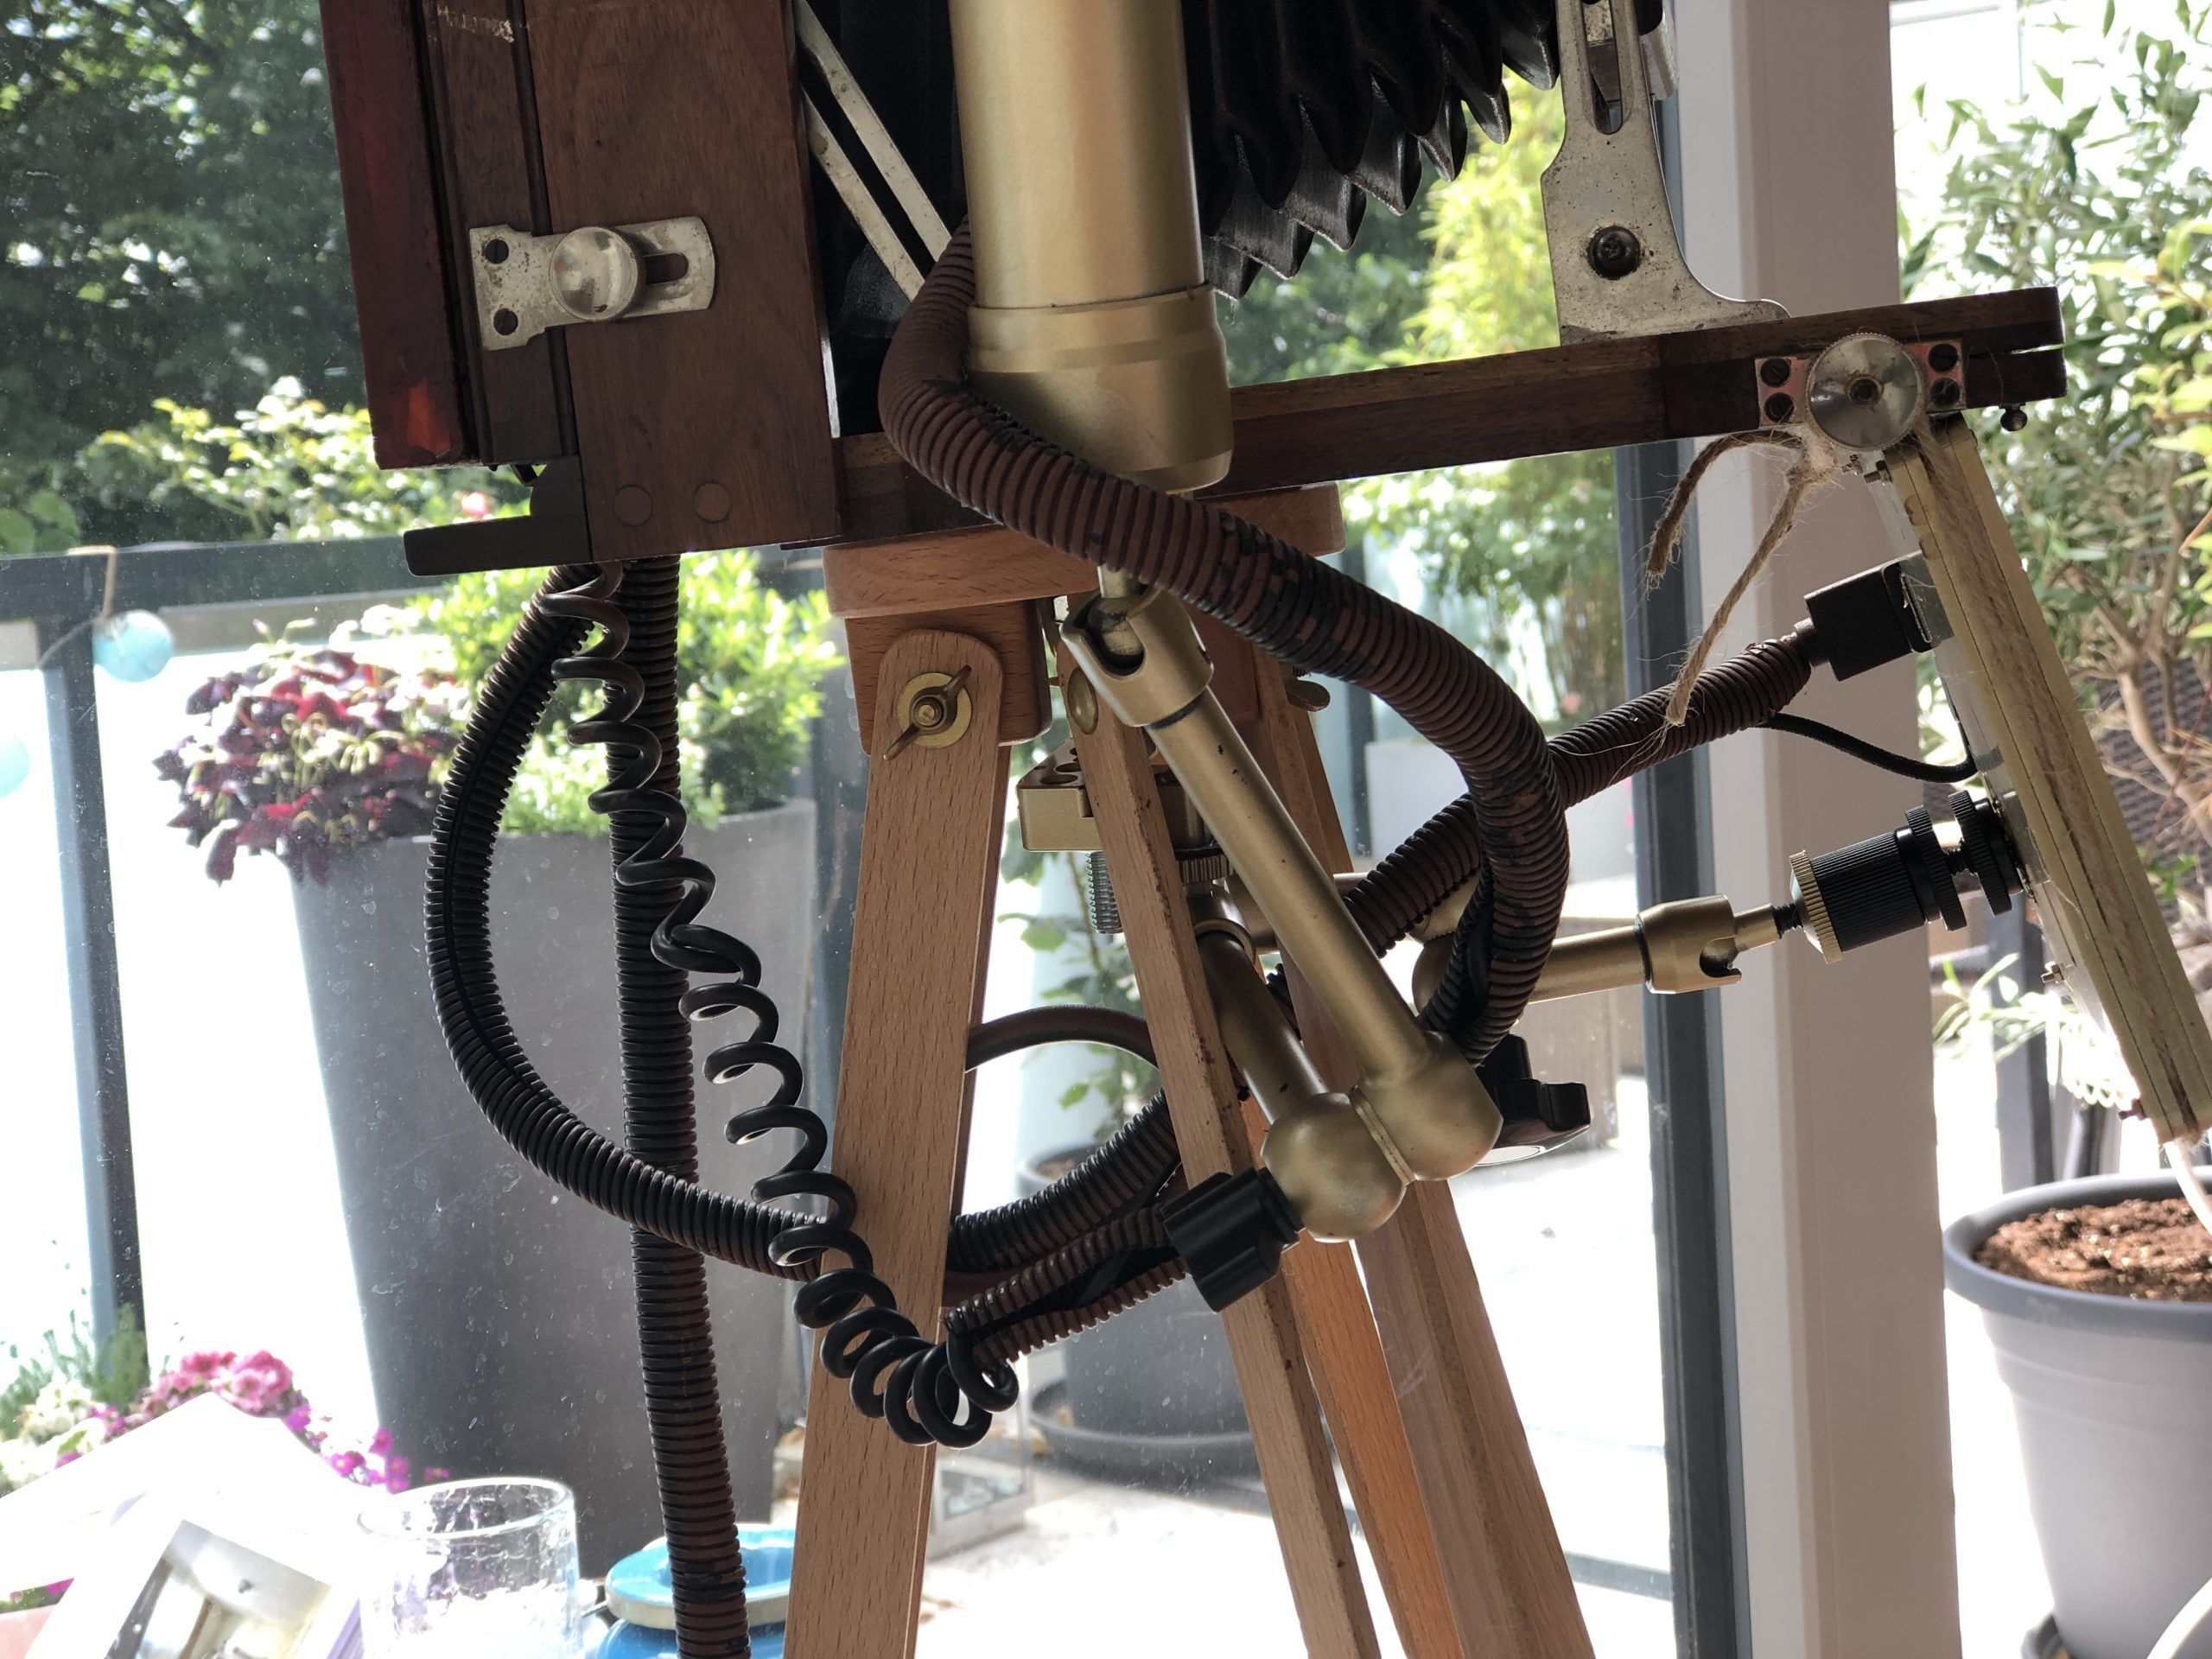
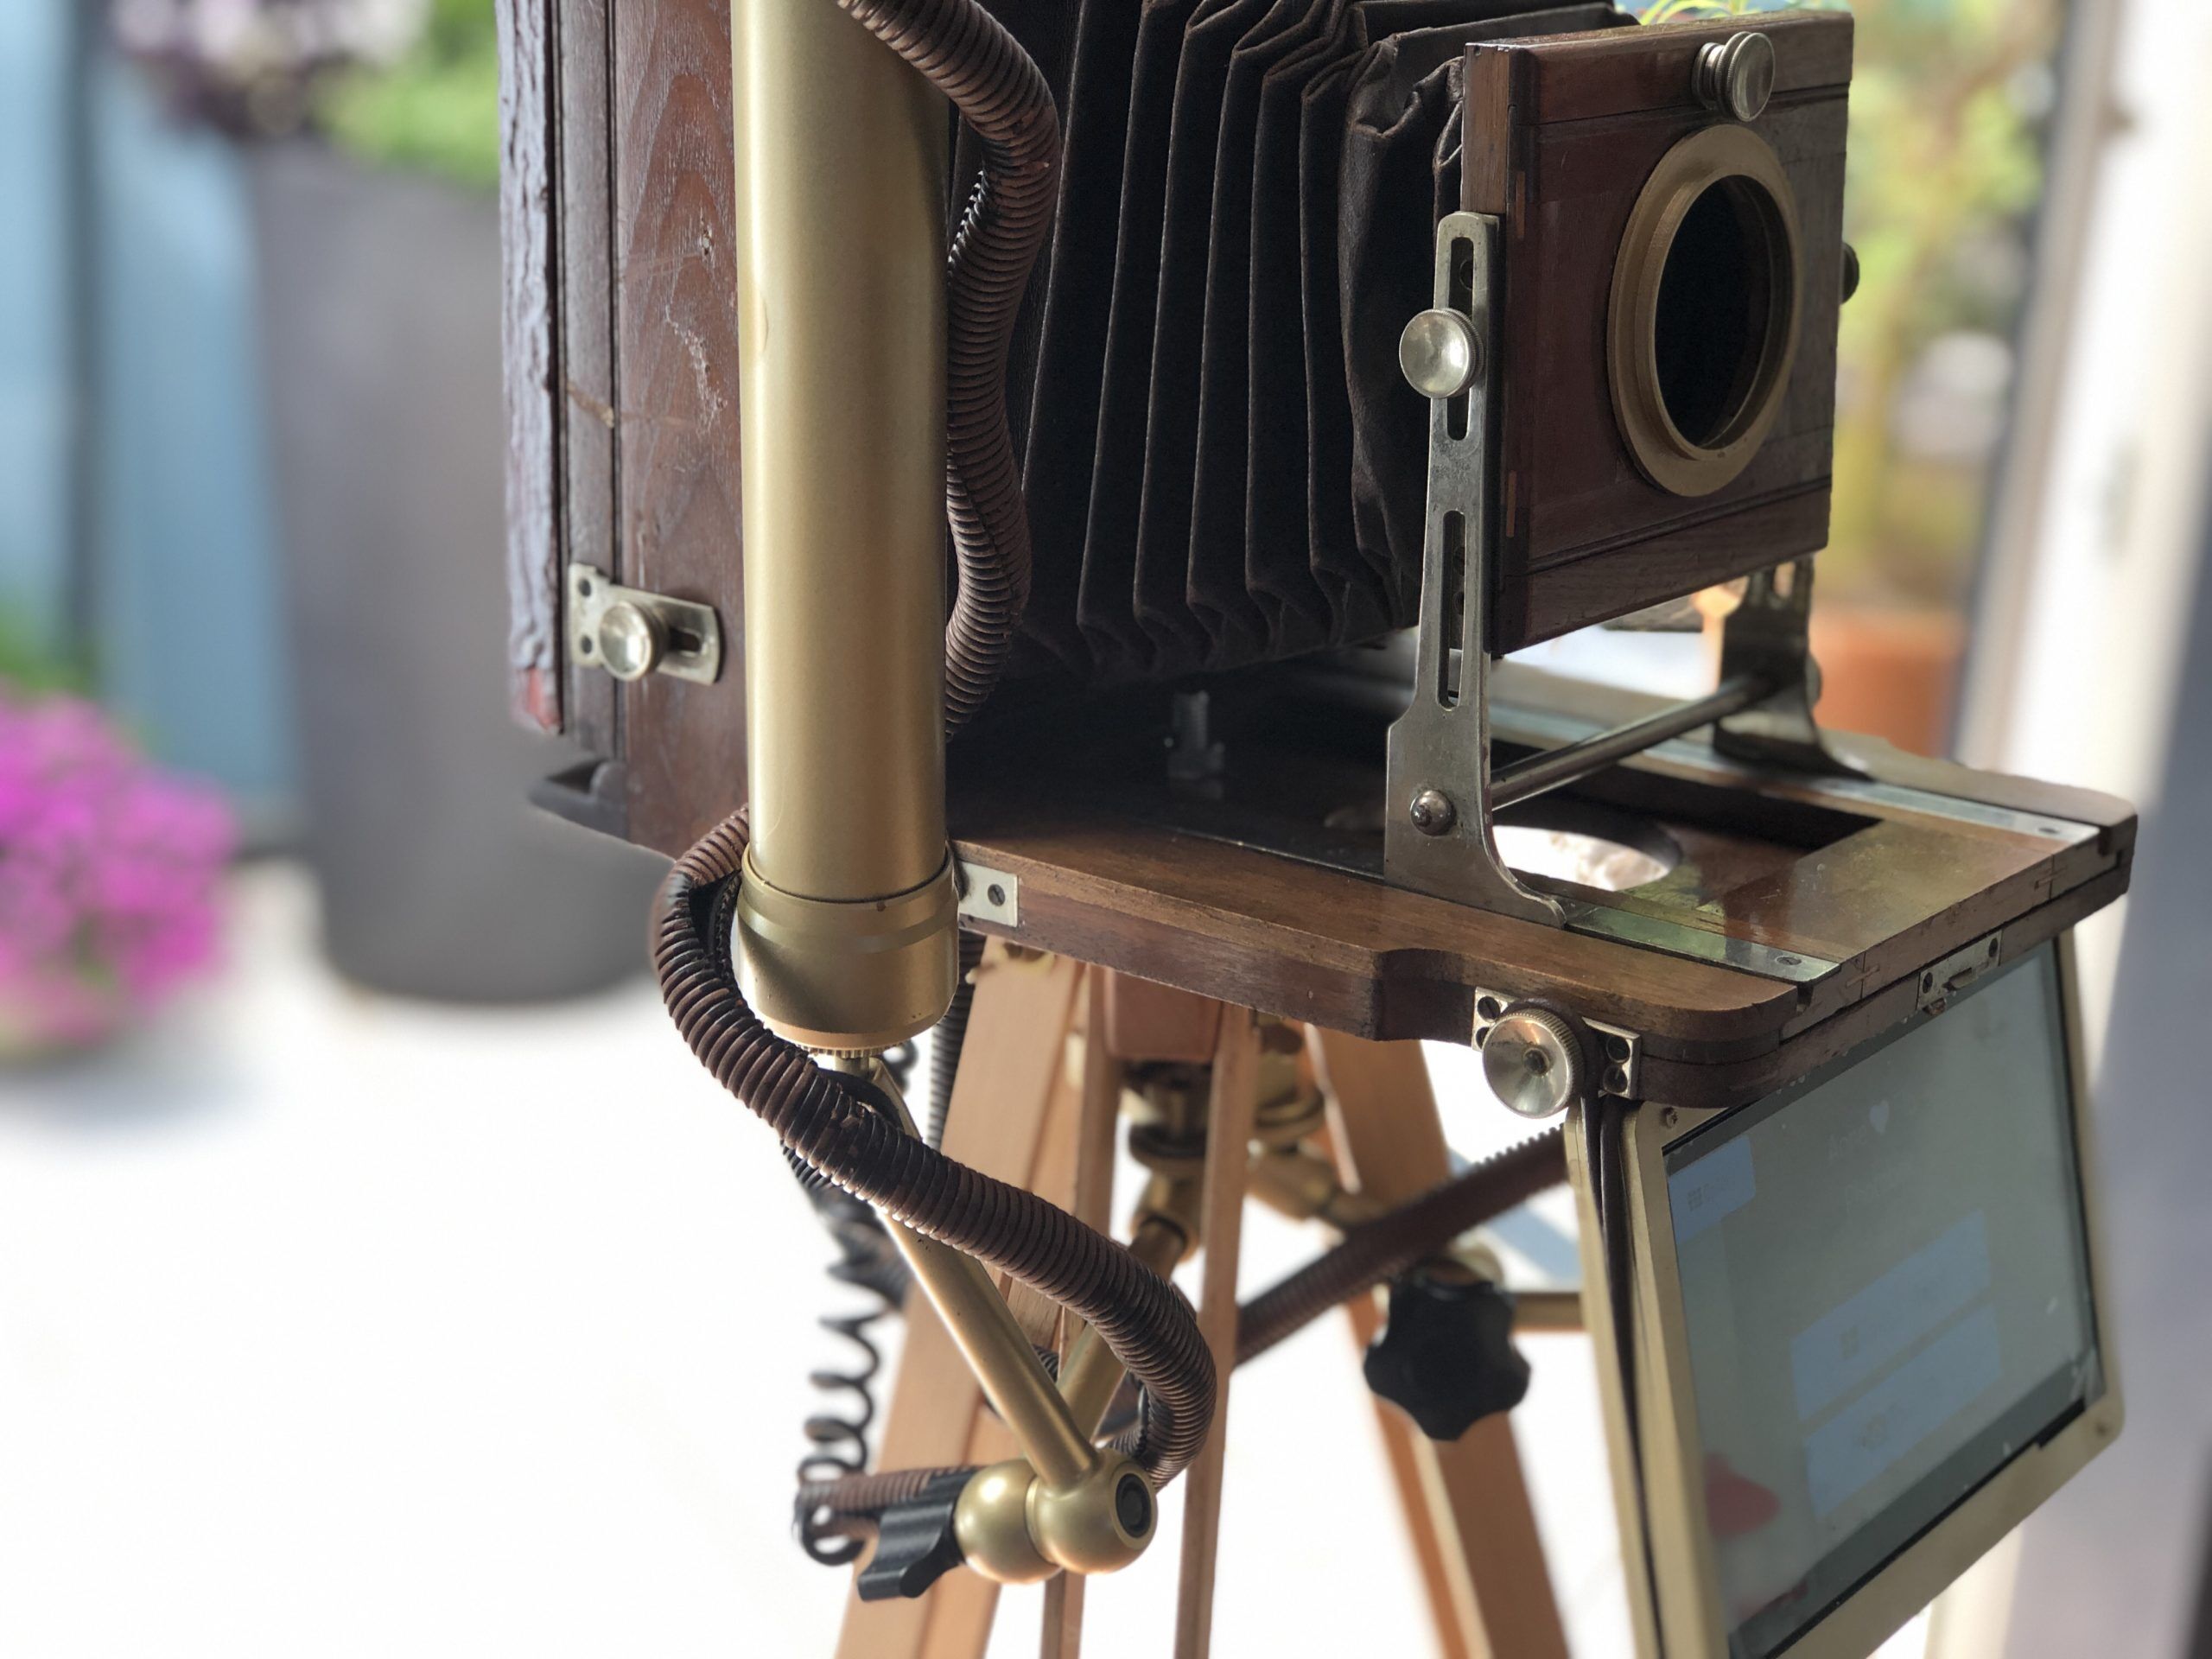
Next I tried to get the camera mounted onto a nice stative and also see how I can get the flash with its planned retro dish and the Touchscreen onto it. For sure, all WITHOUT giving this nice old vintage camera any scratch. As the camera has a build in natural screw mount, which due its age did not fit any modern standard, I simply started experimenting with a long M10 screw, locking it from the top with a soft screw nut. From there I started trying out some random rig and camera mount gear accessories, like this rigging cheese plate:
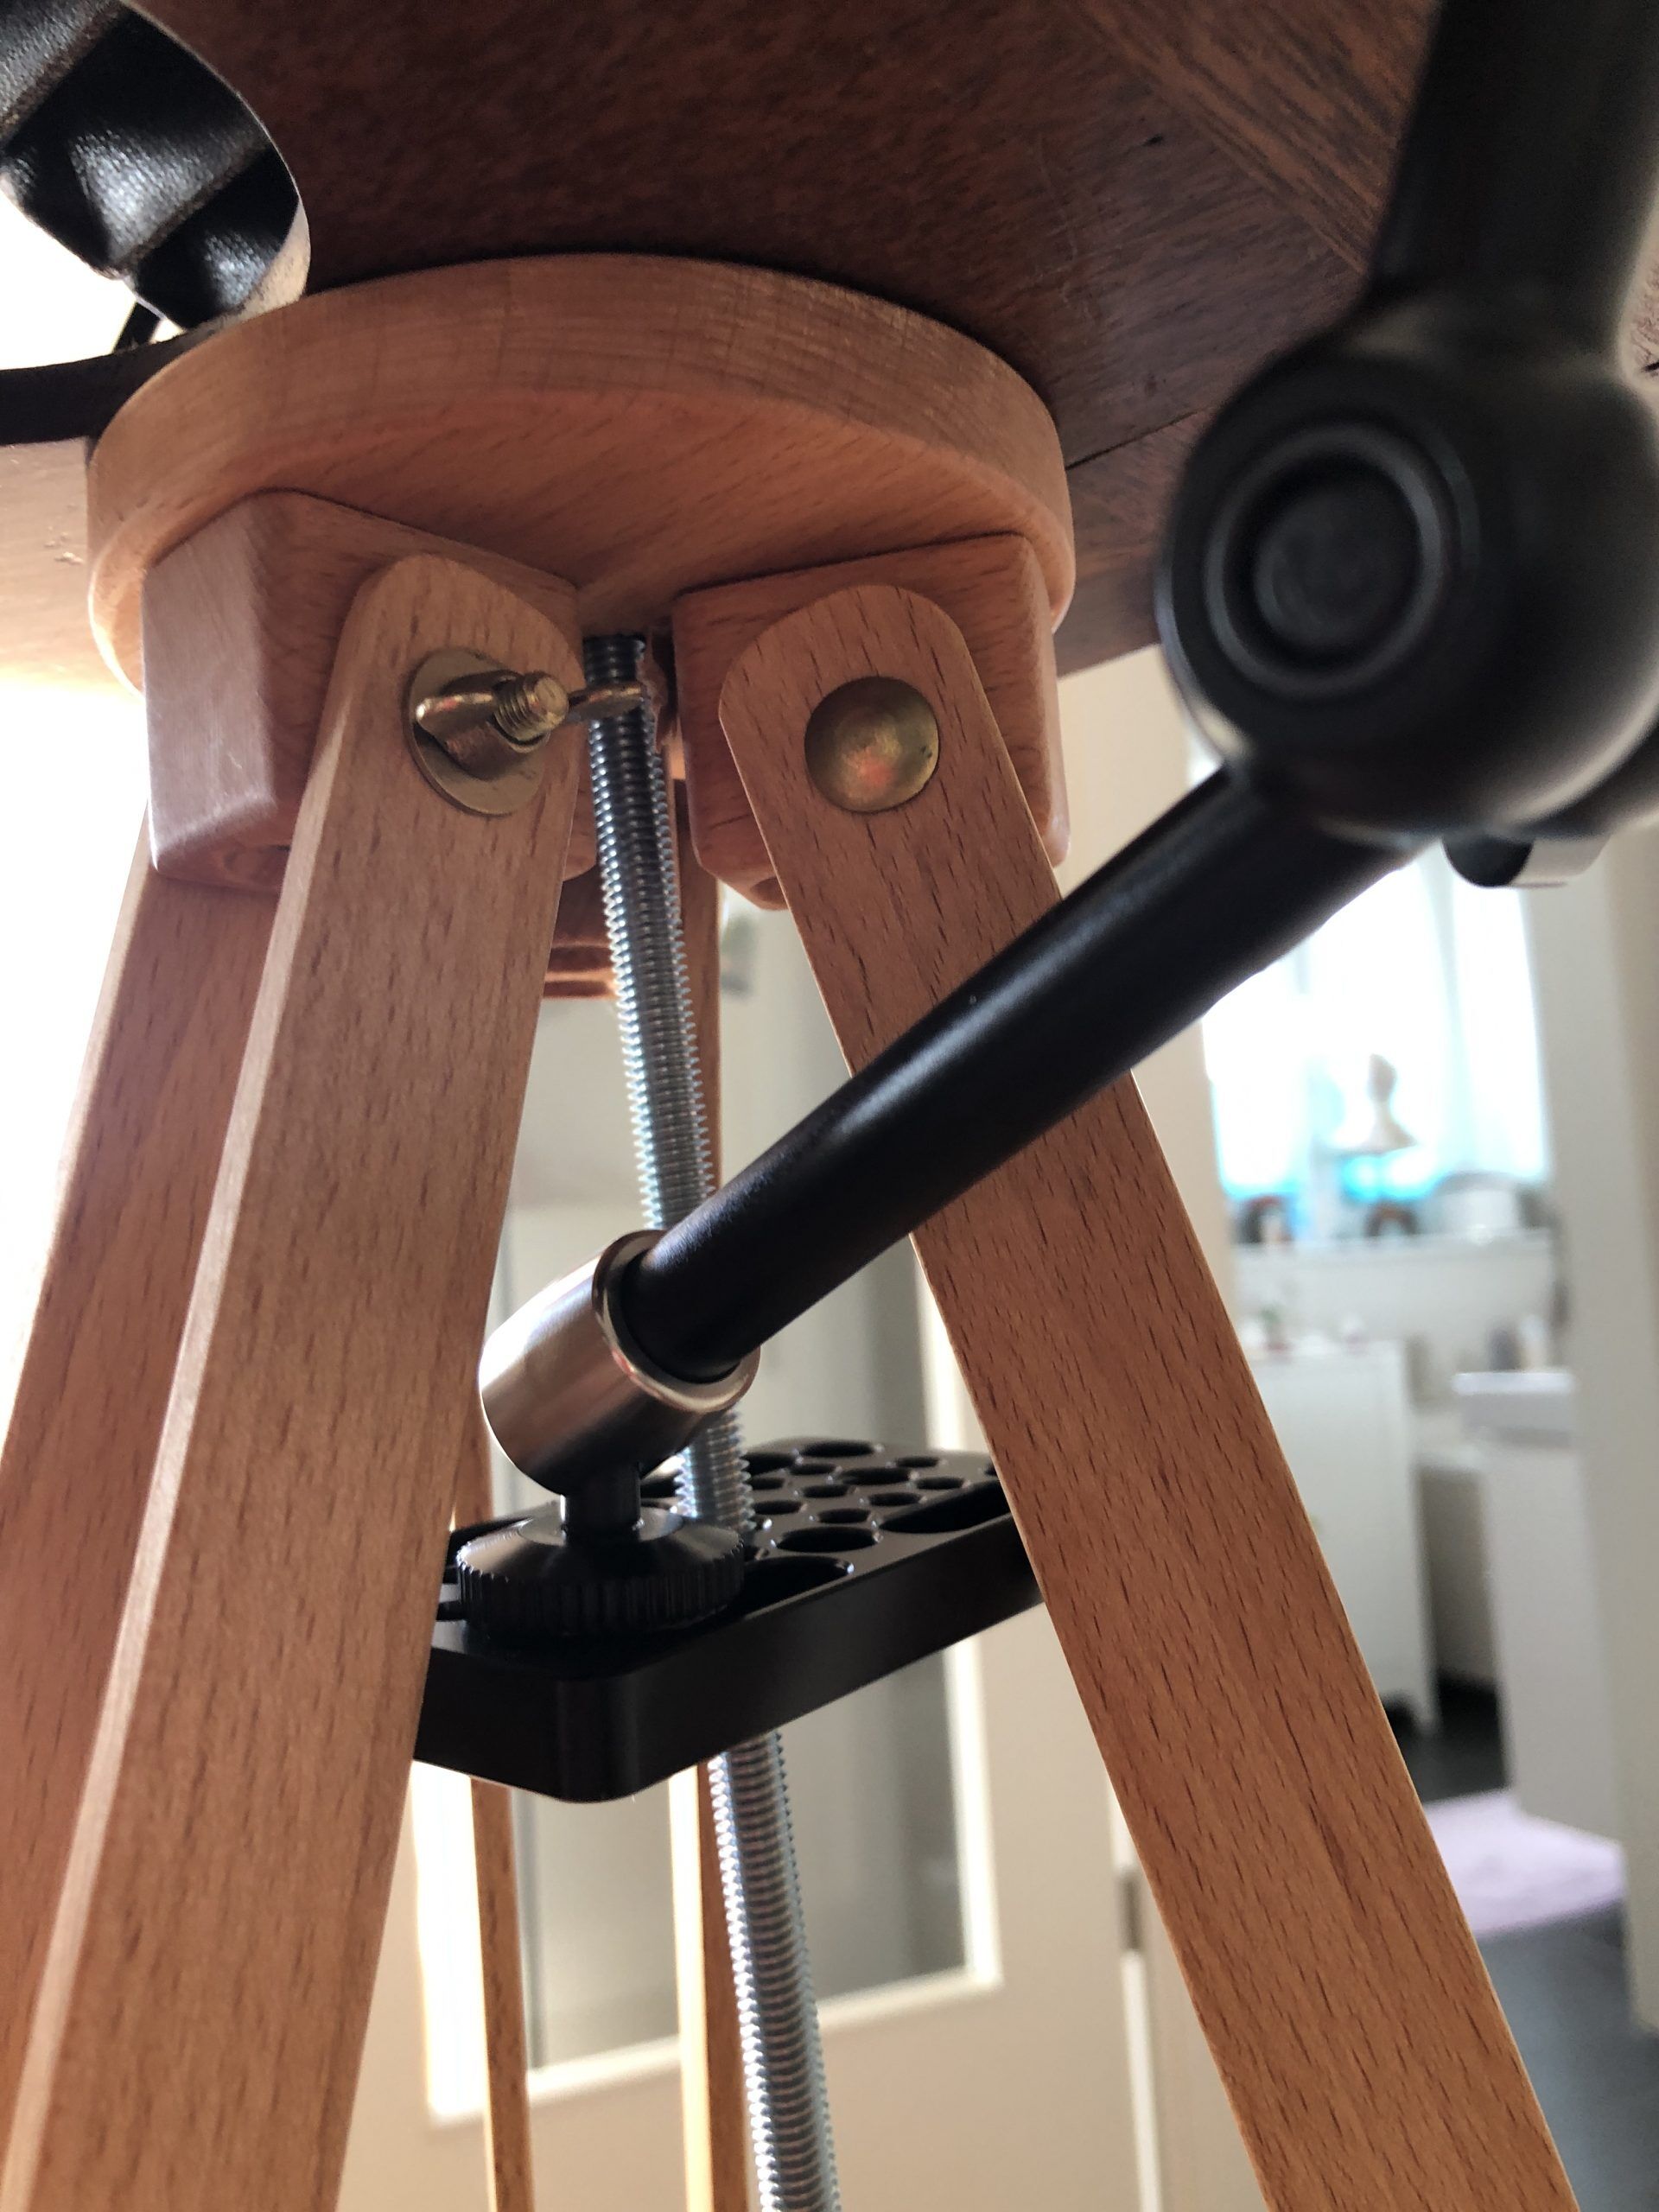
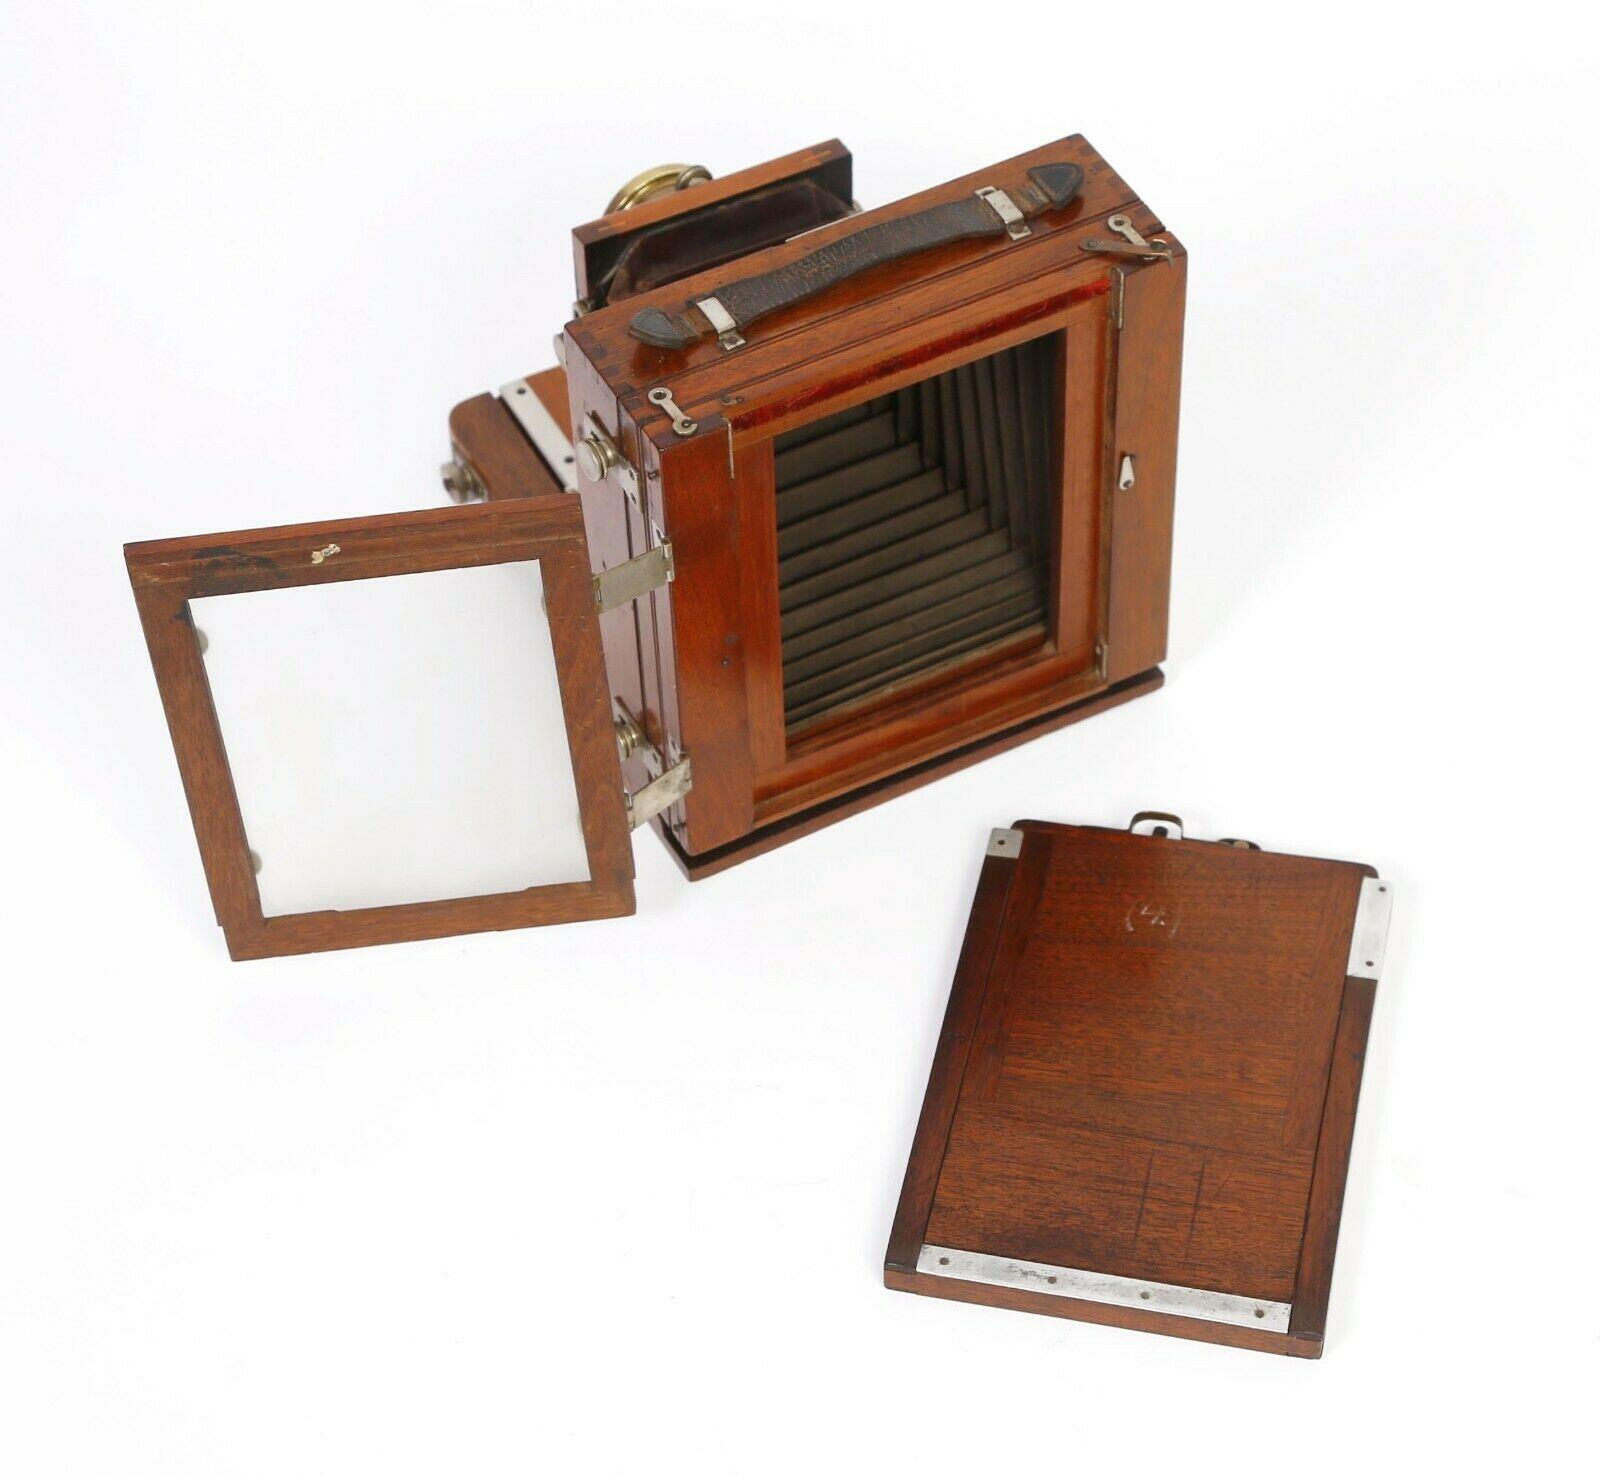
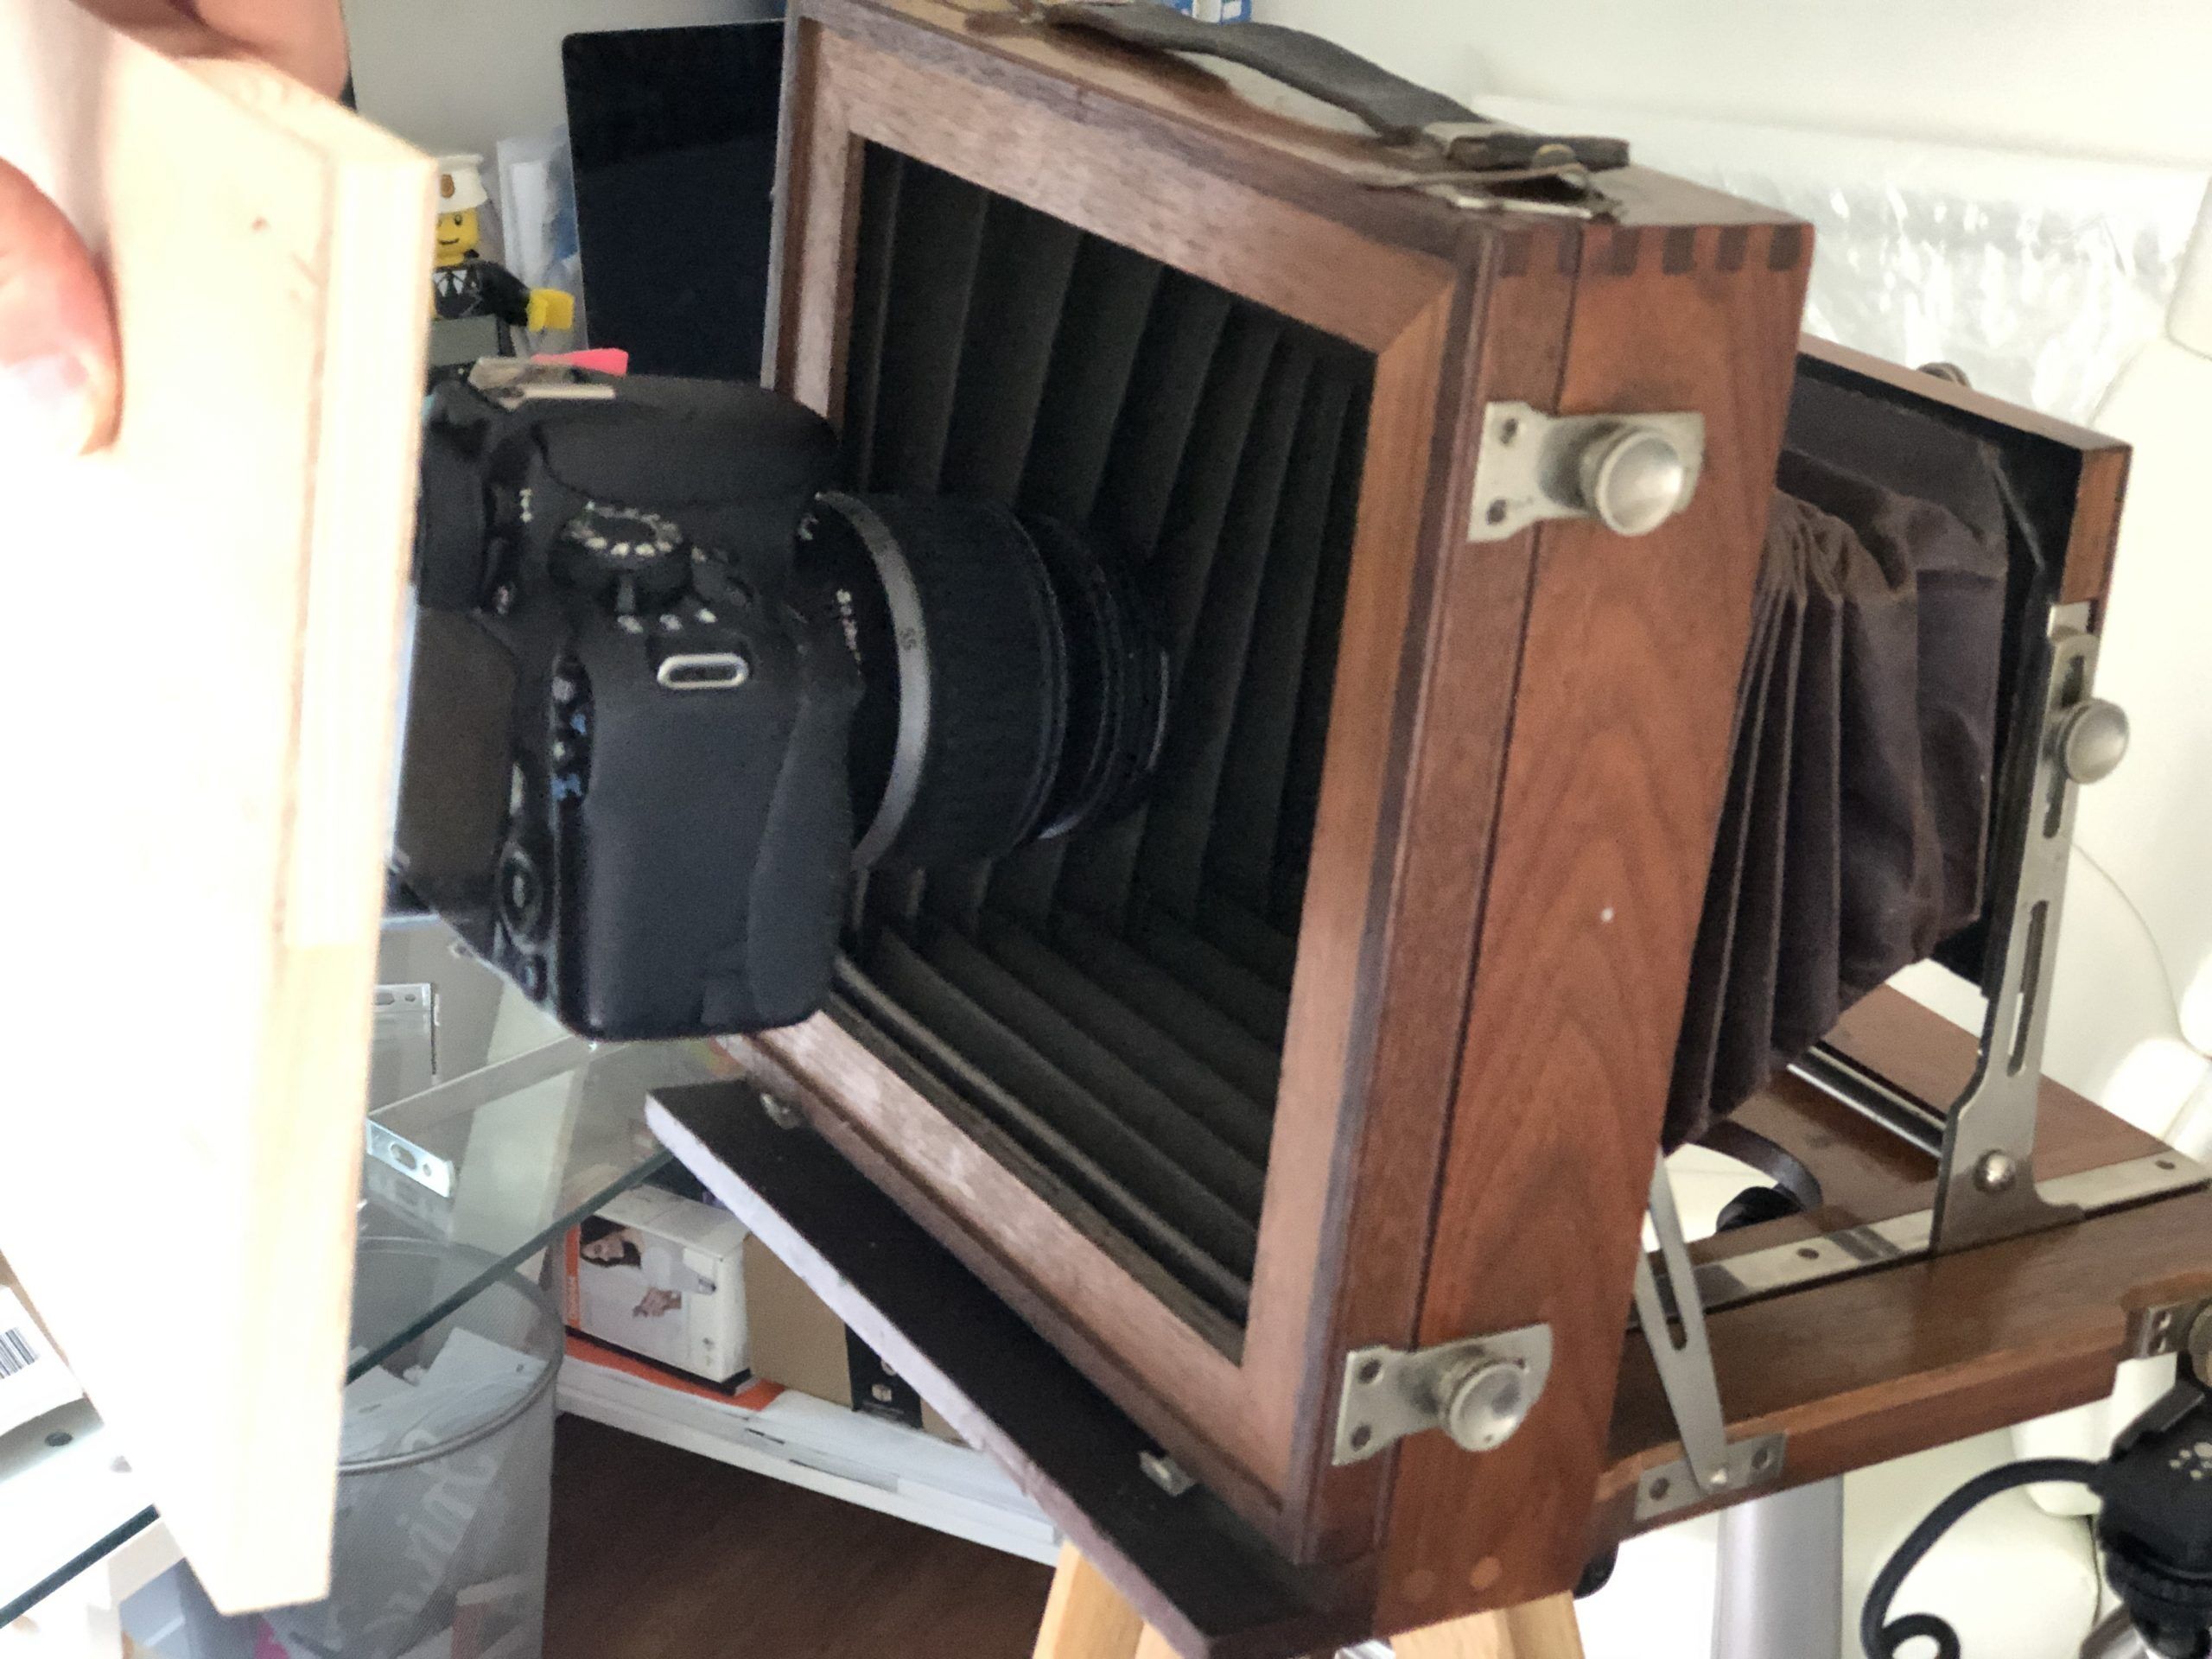
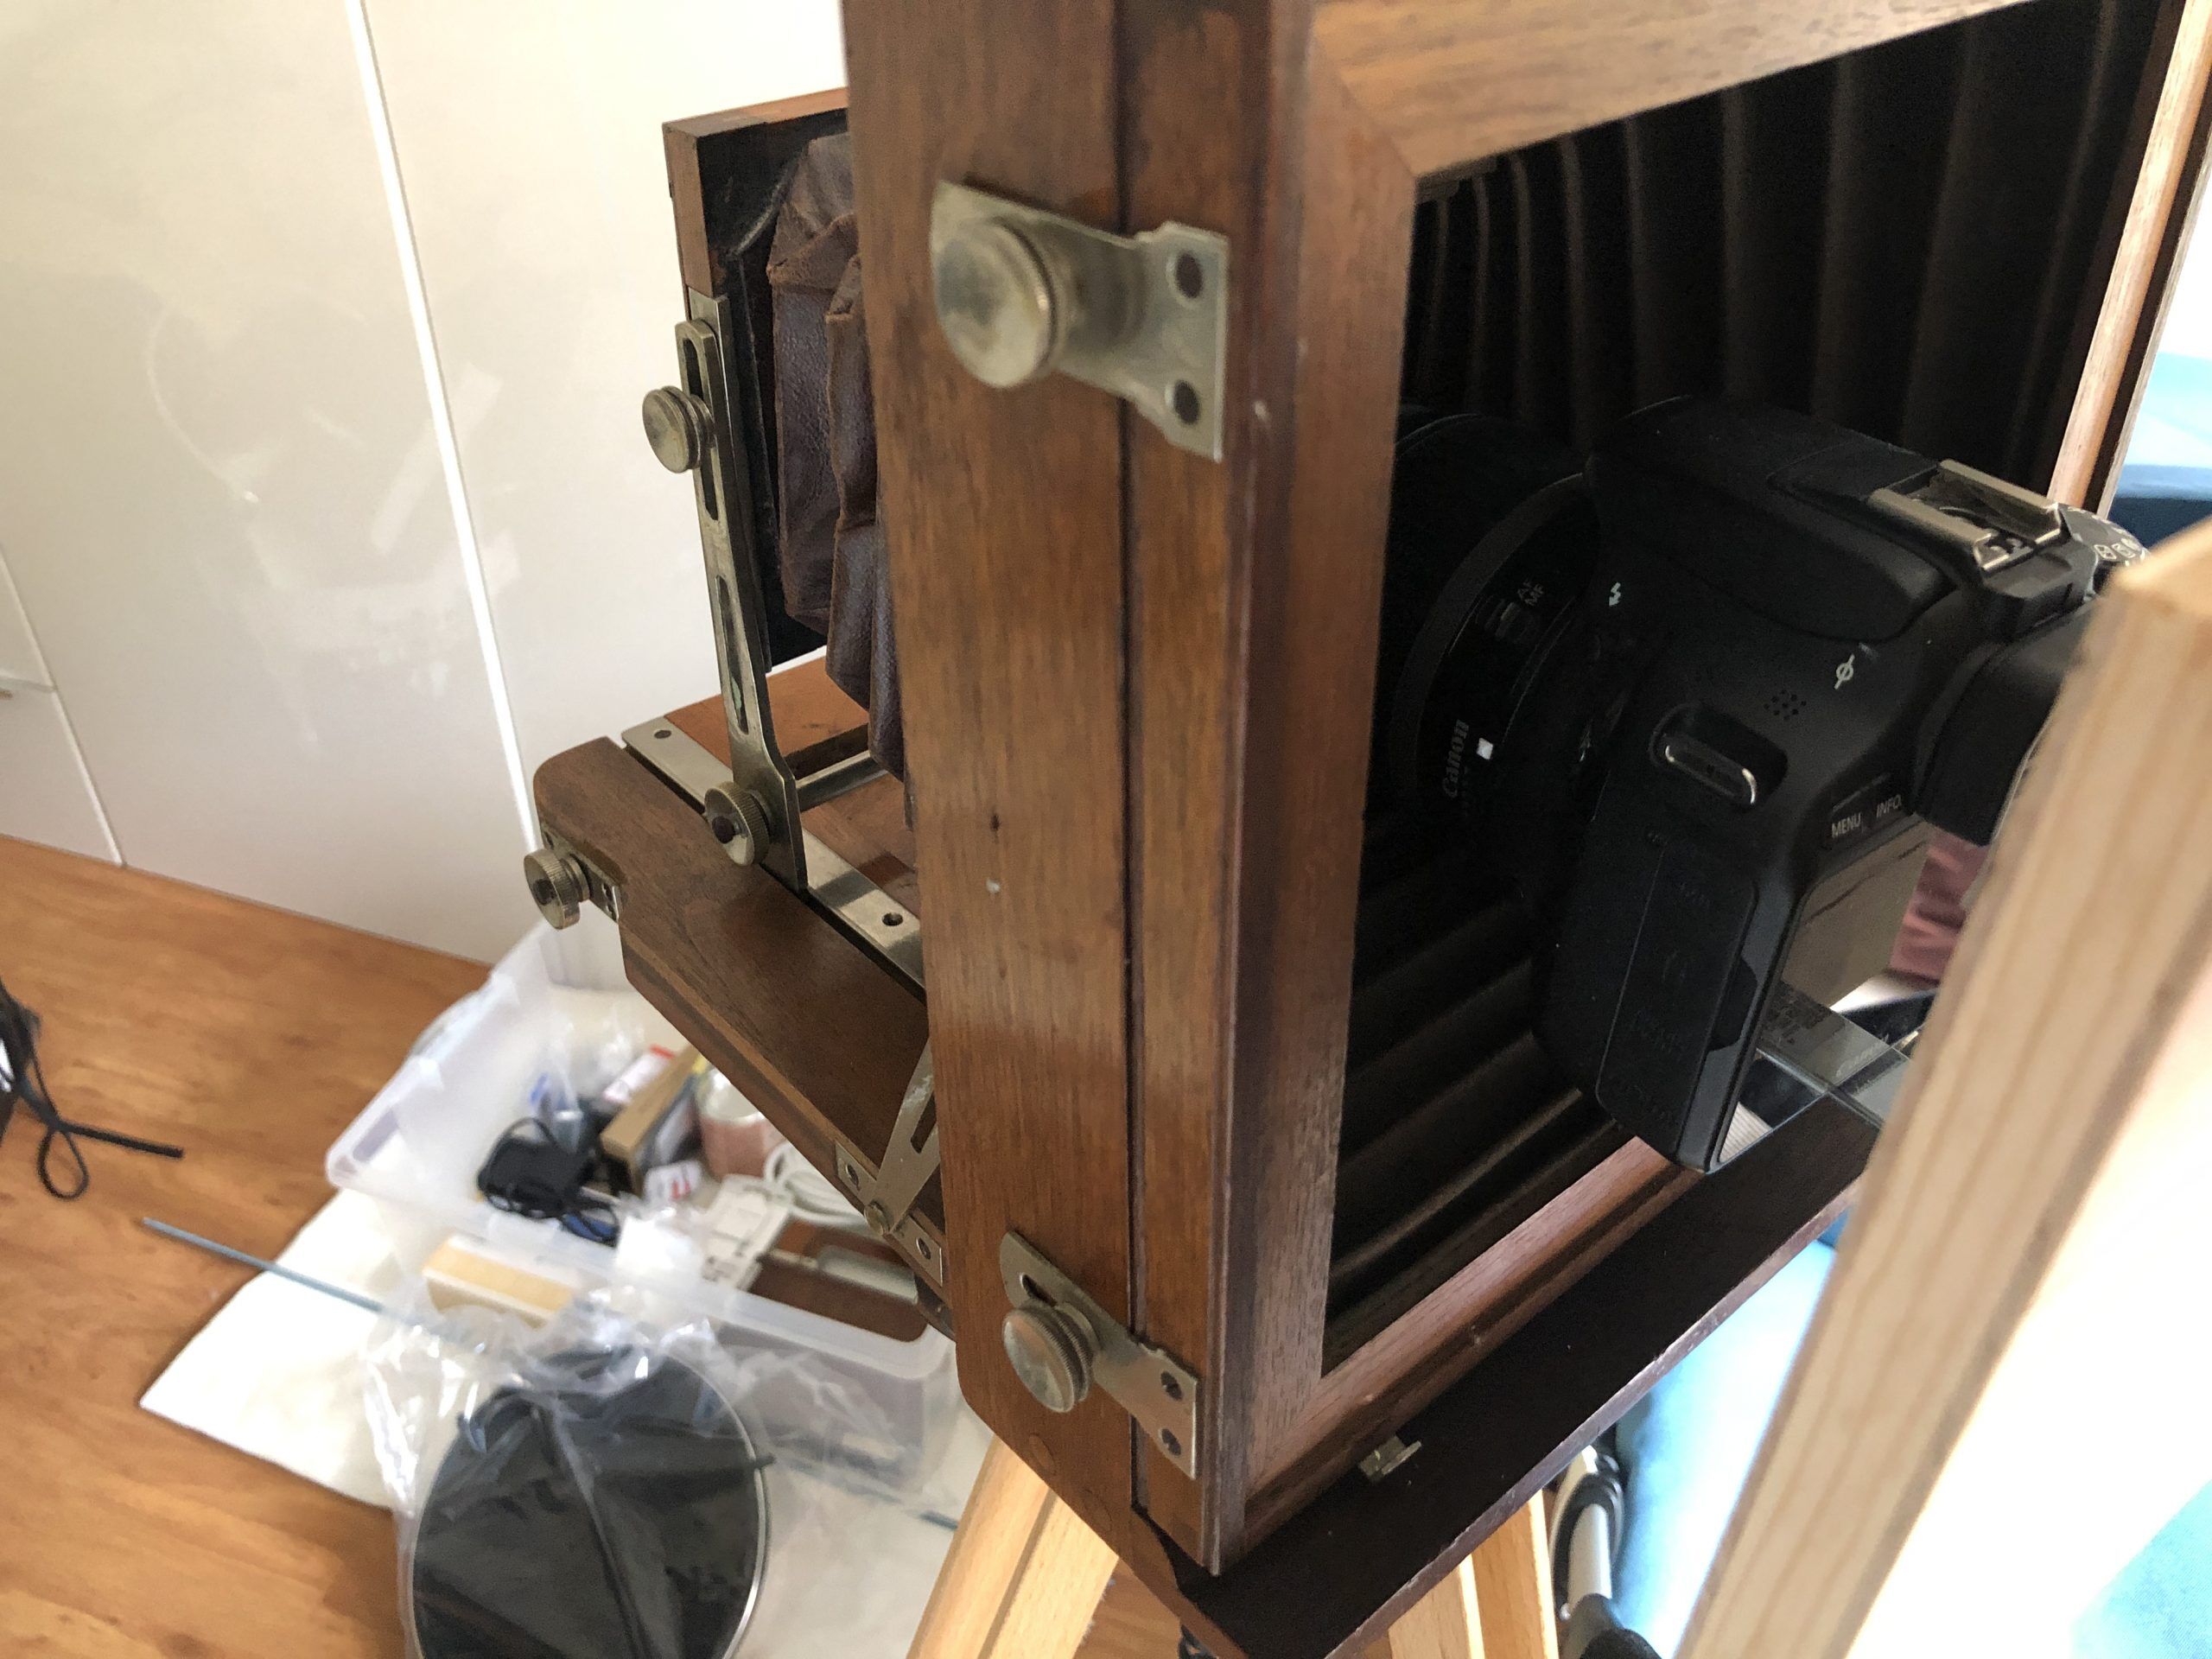
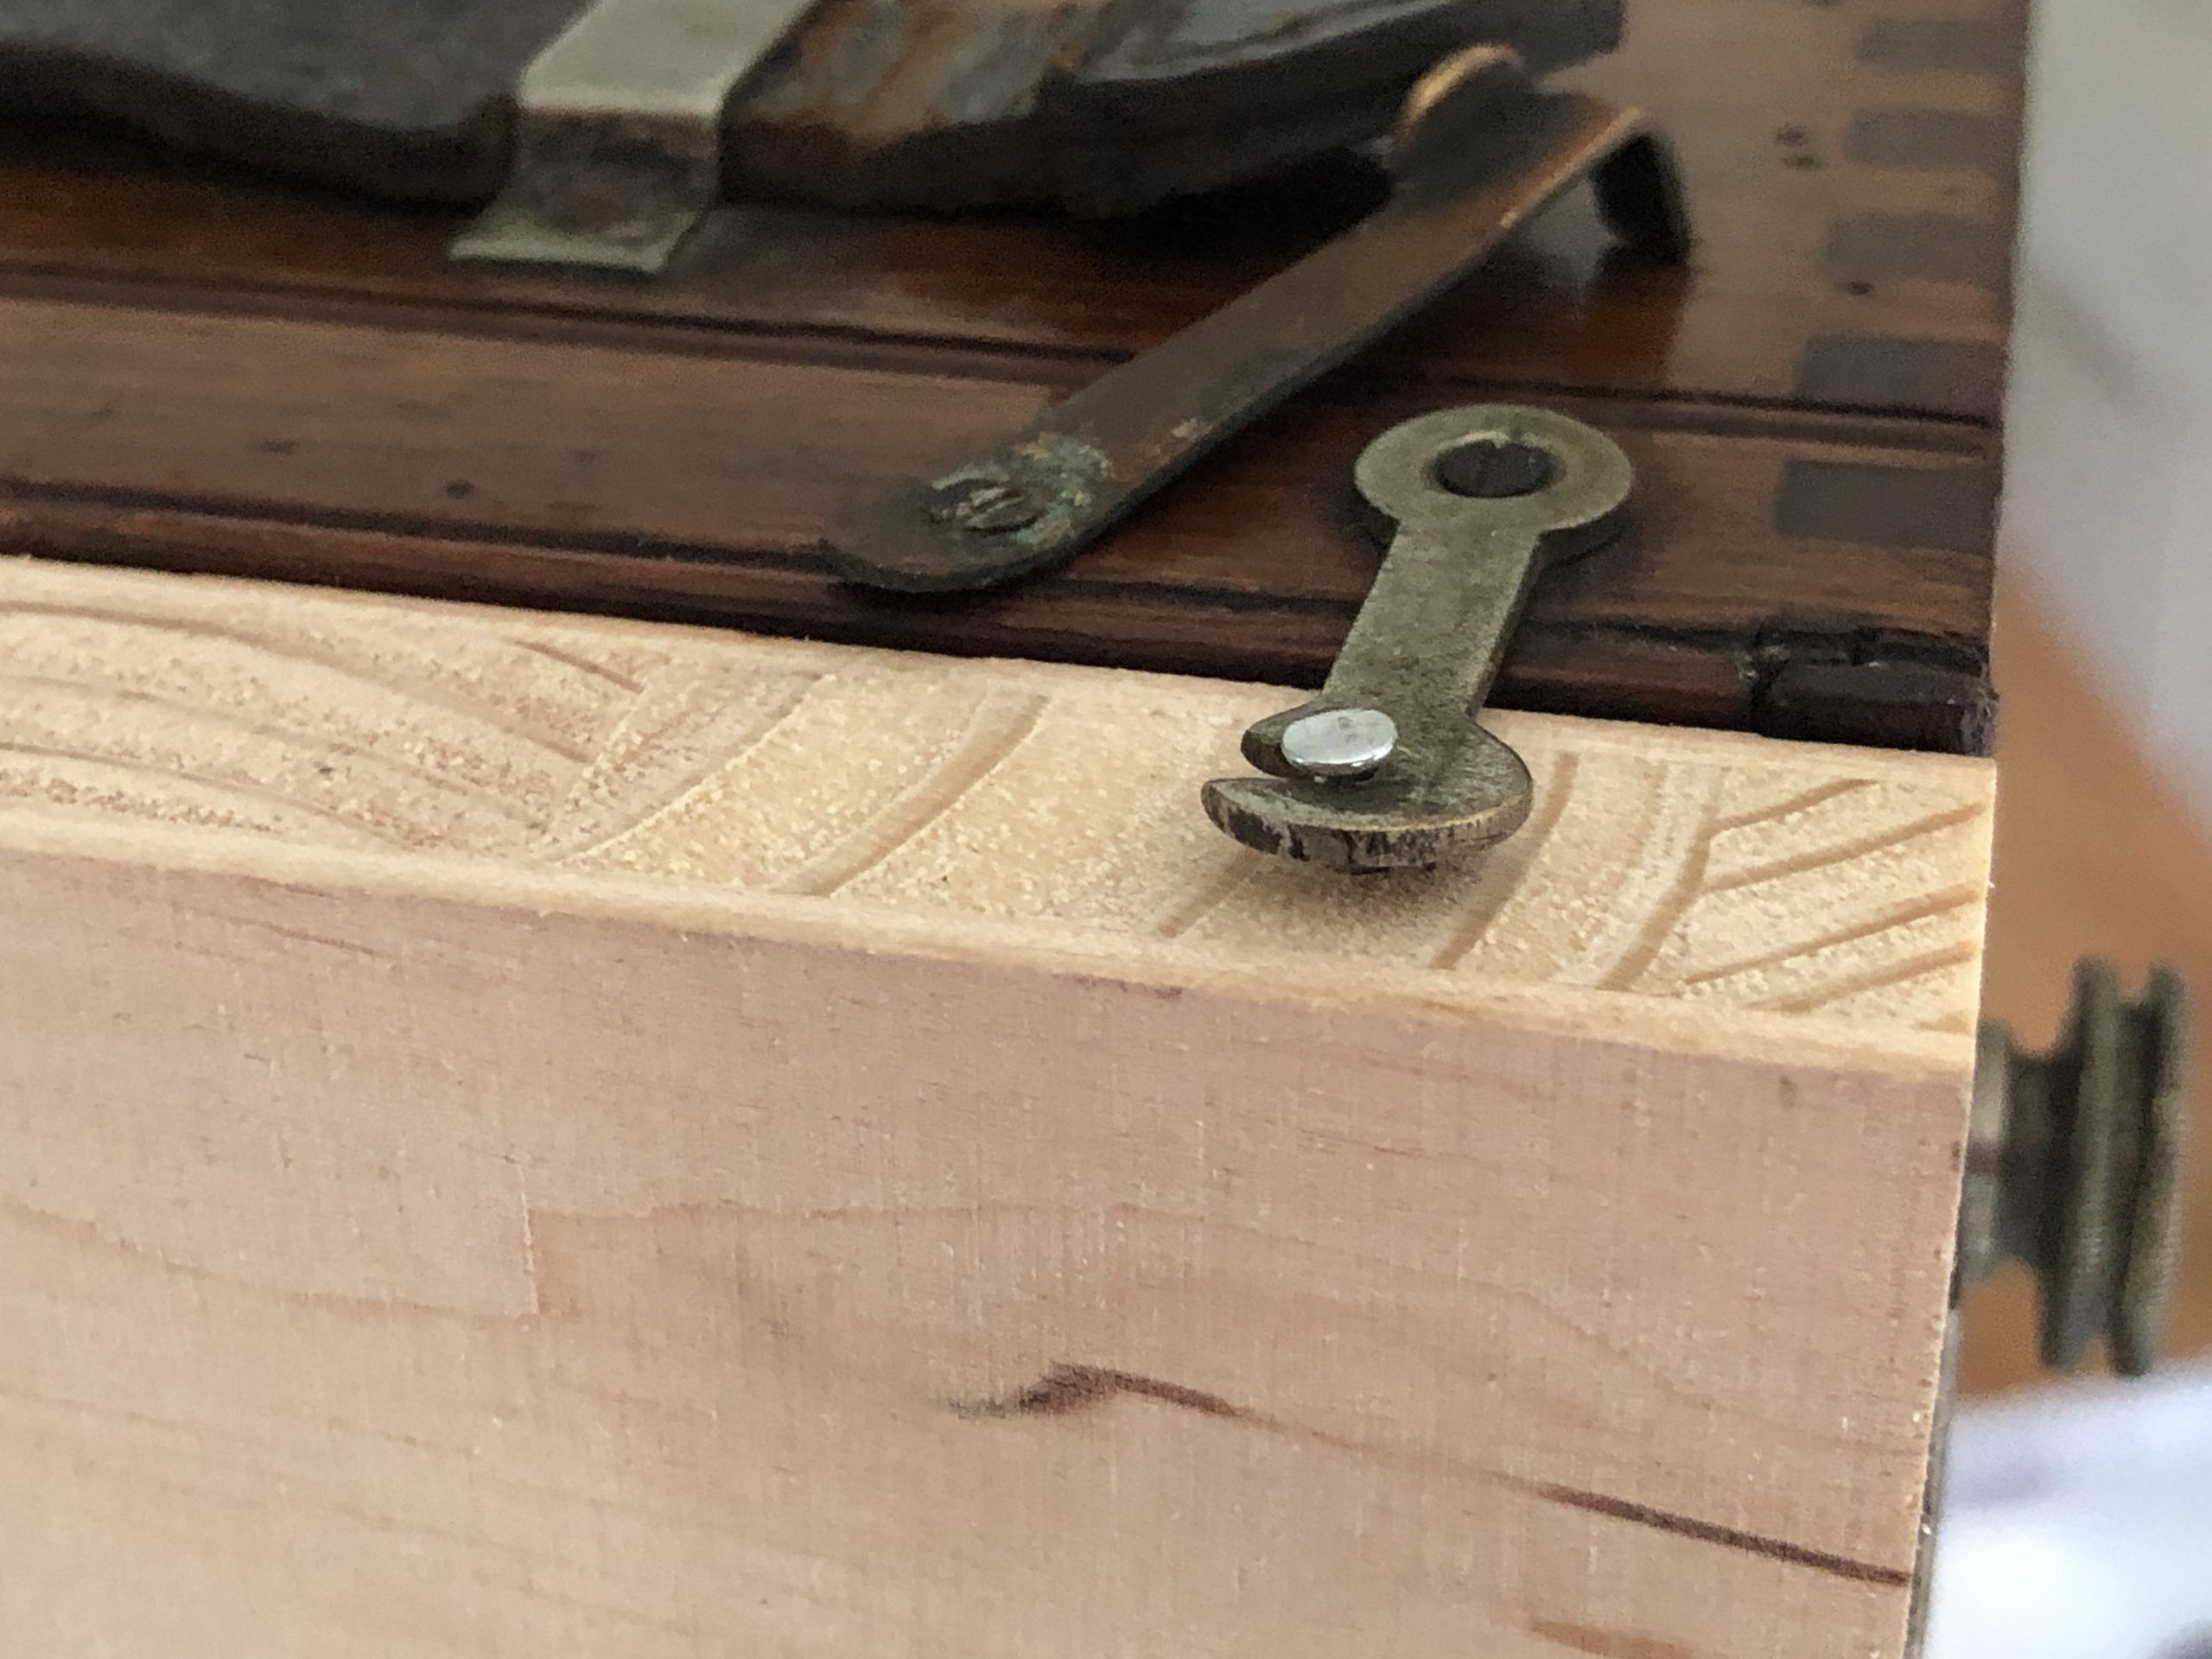
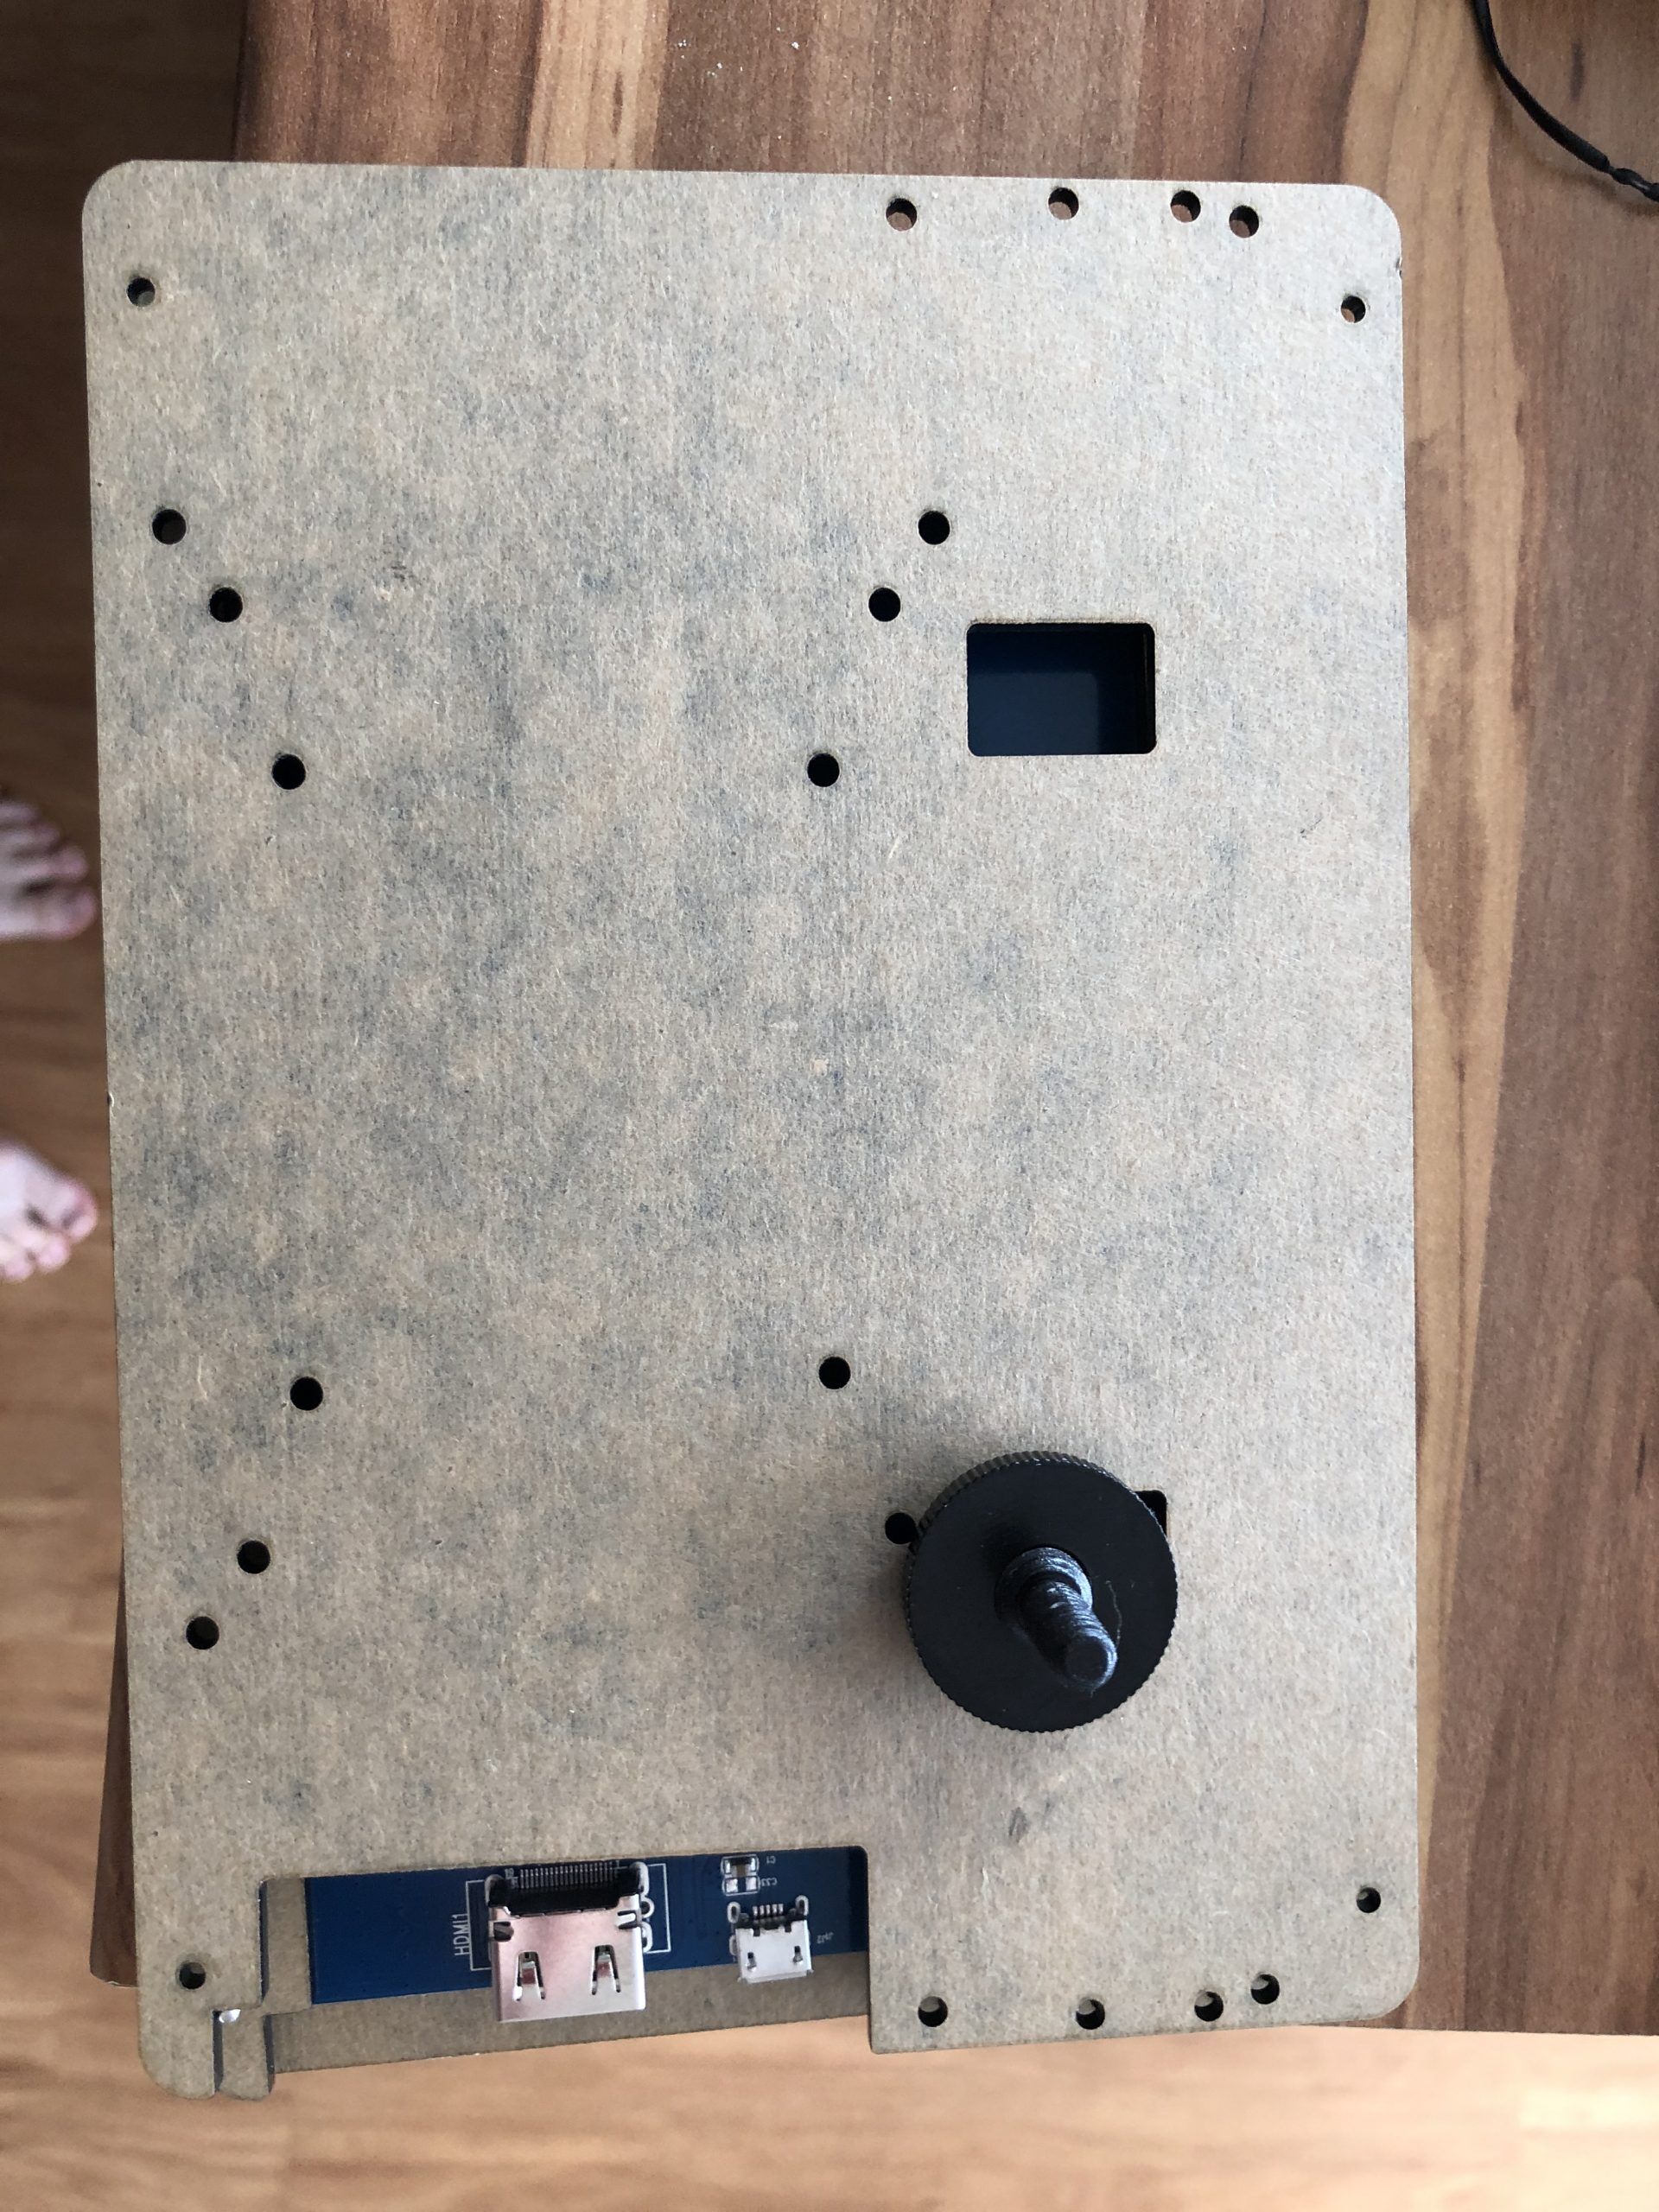
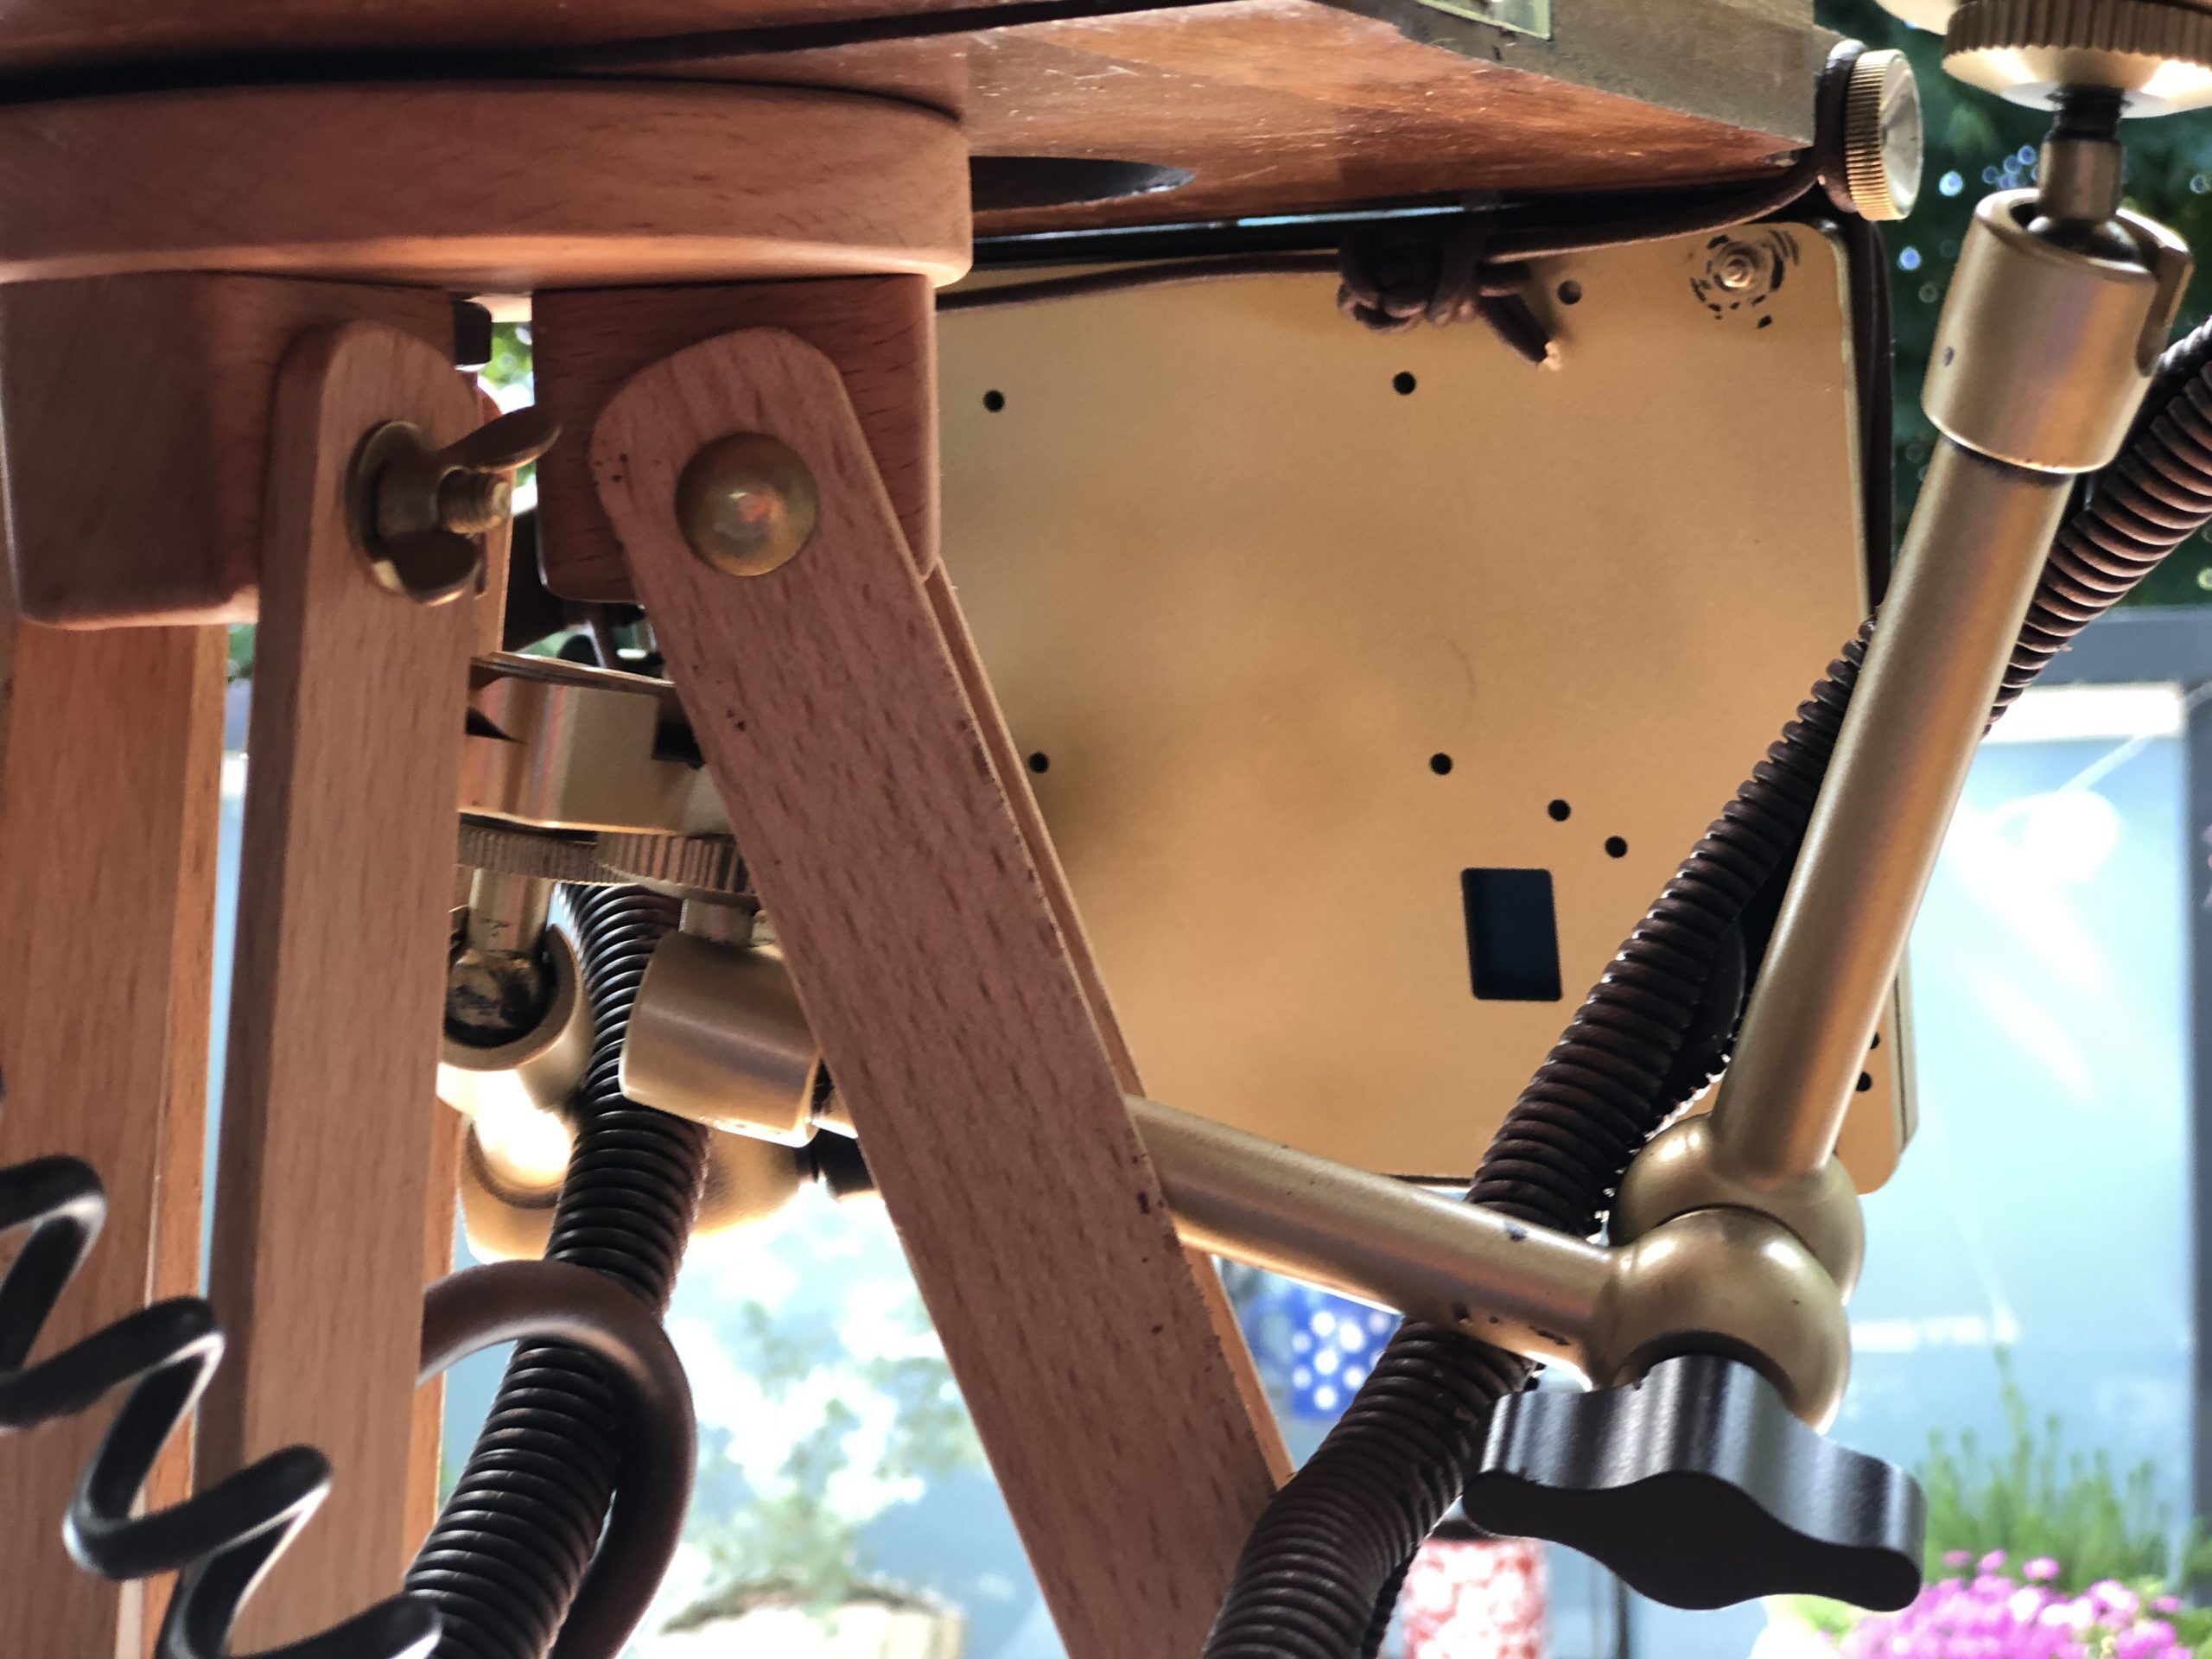
Next I noticed that the plate camera has a removable backplate, that made it possible back then to fold it together while traveling. So I got a new wooden plate in the exact same dimensions as the original backplate. Now I had something where I could glue and screw on as much as I want. The idea now was to mount literally everything in a compact package on the back of the wooden plate, and then just stick this through. After couple of tryouts a first test was successful and I also got the hooks from the old torso holding it together like in the original:


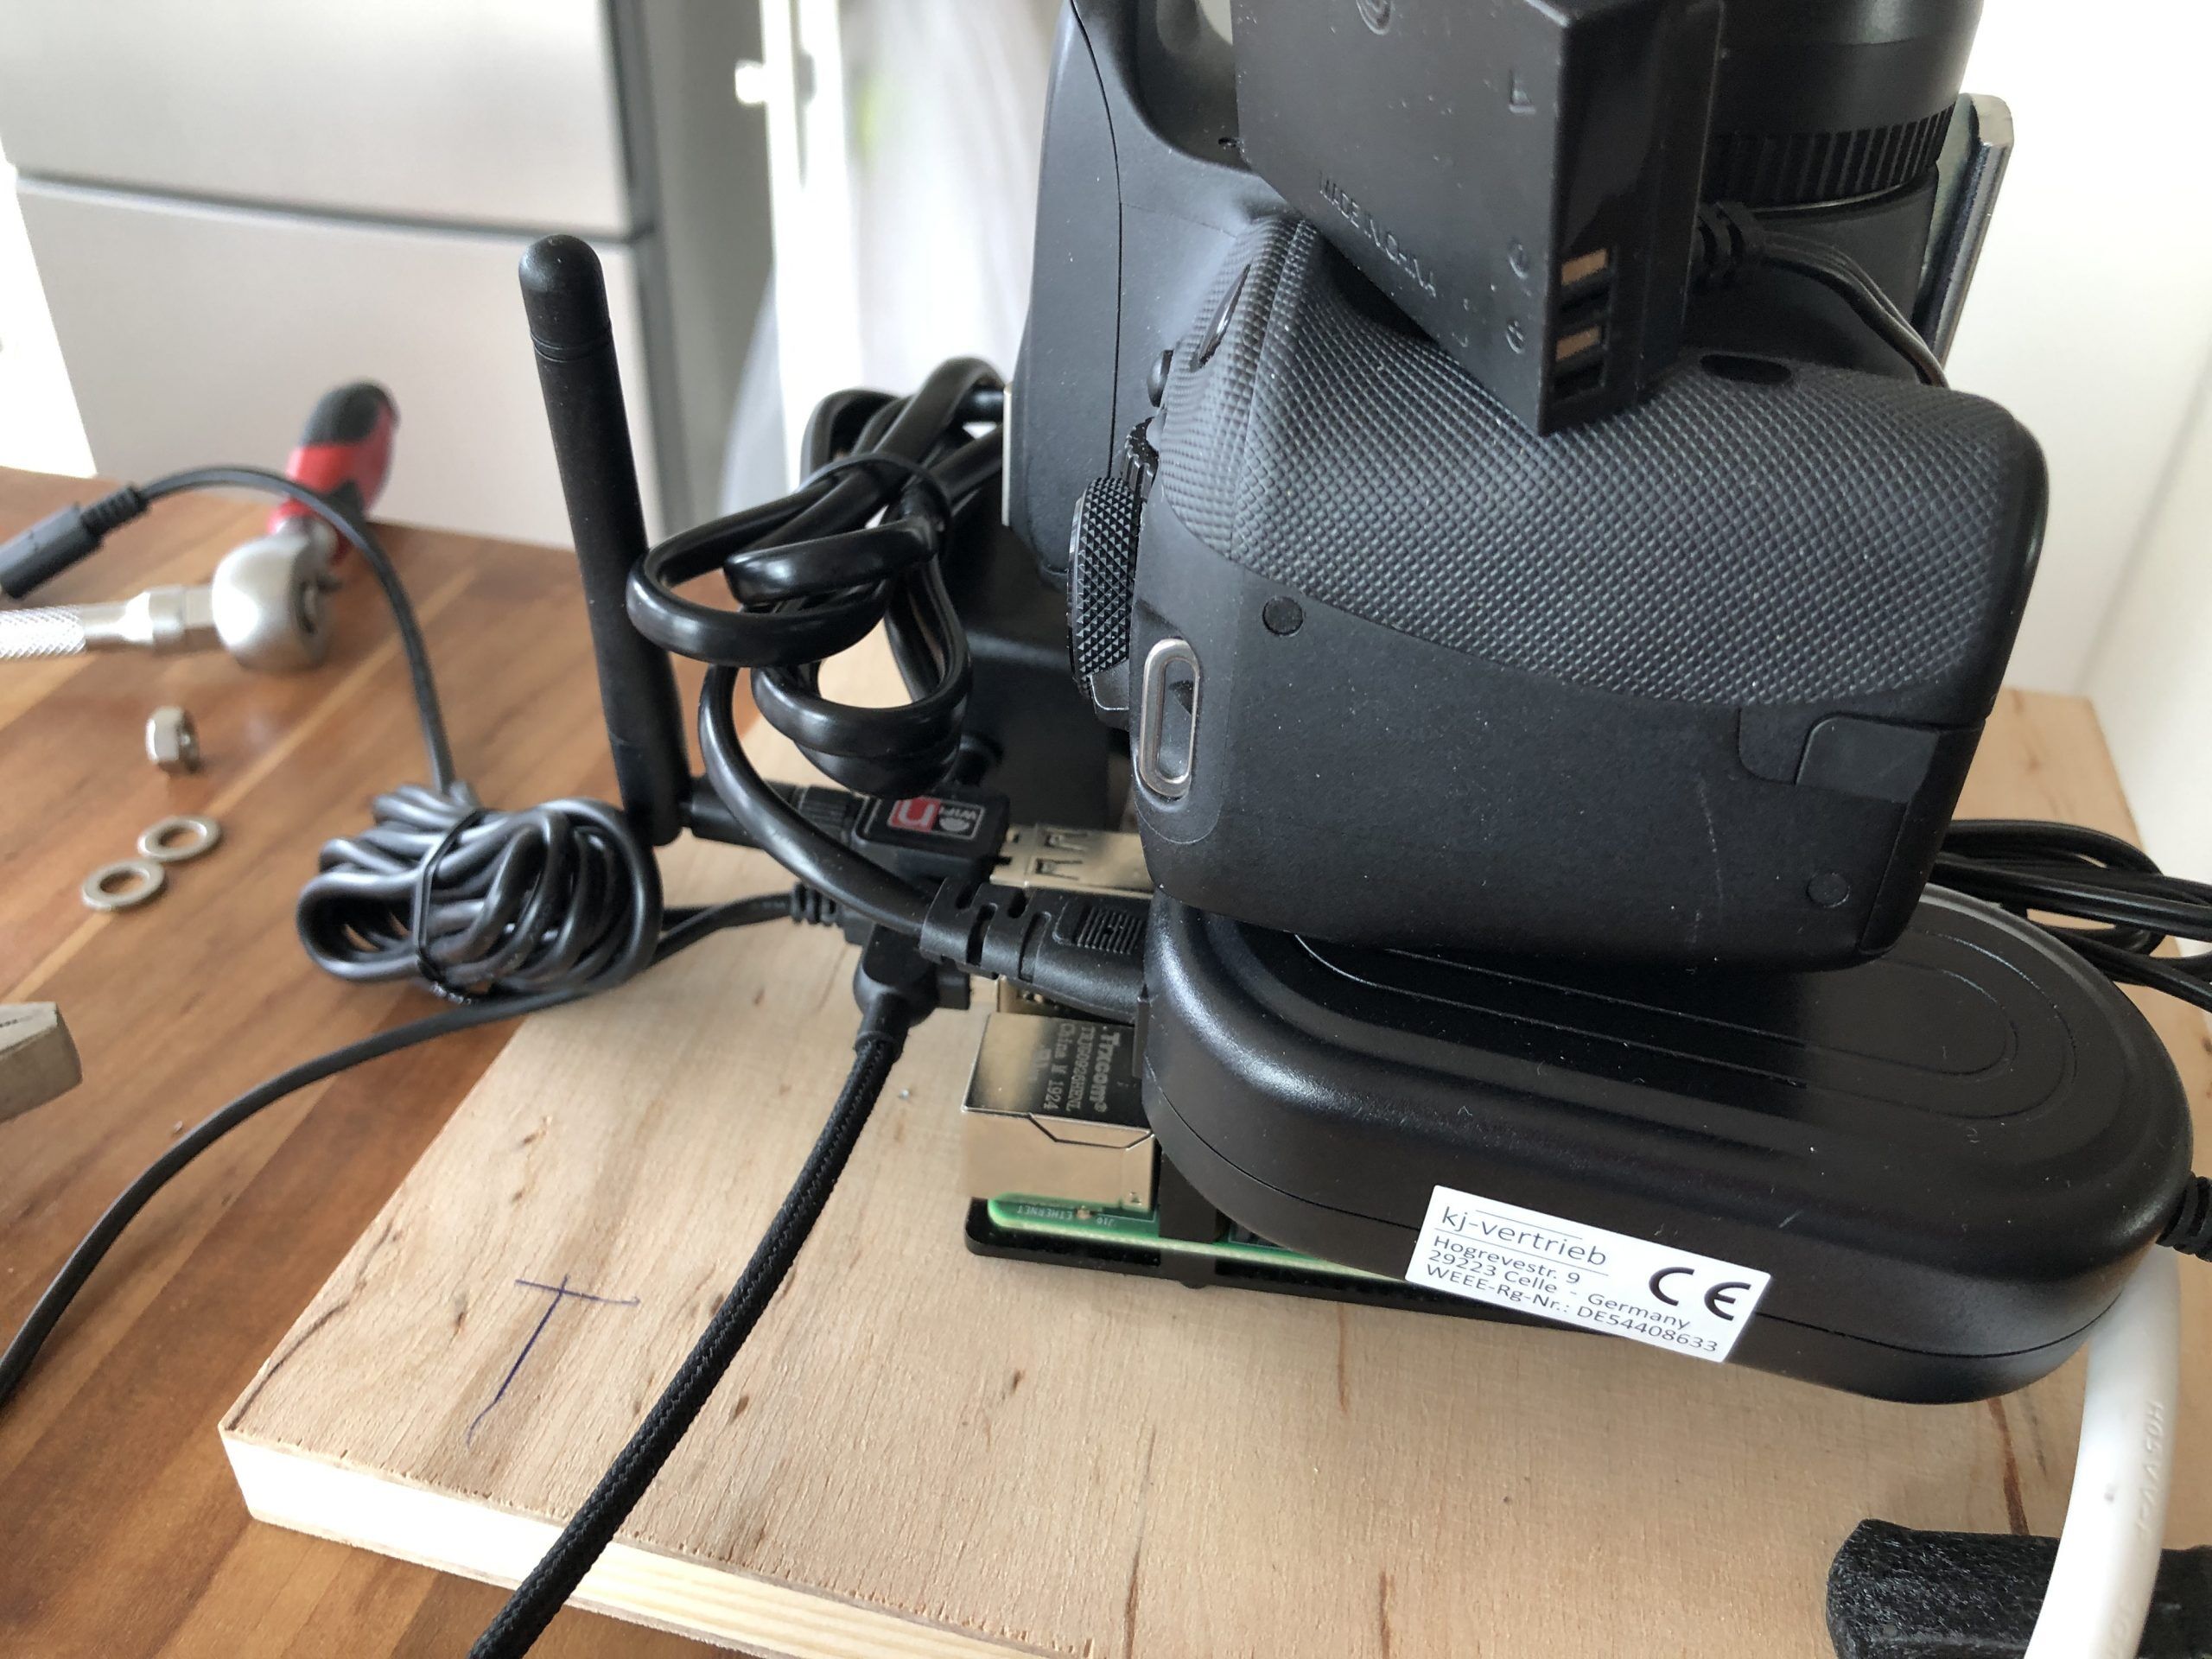
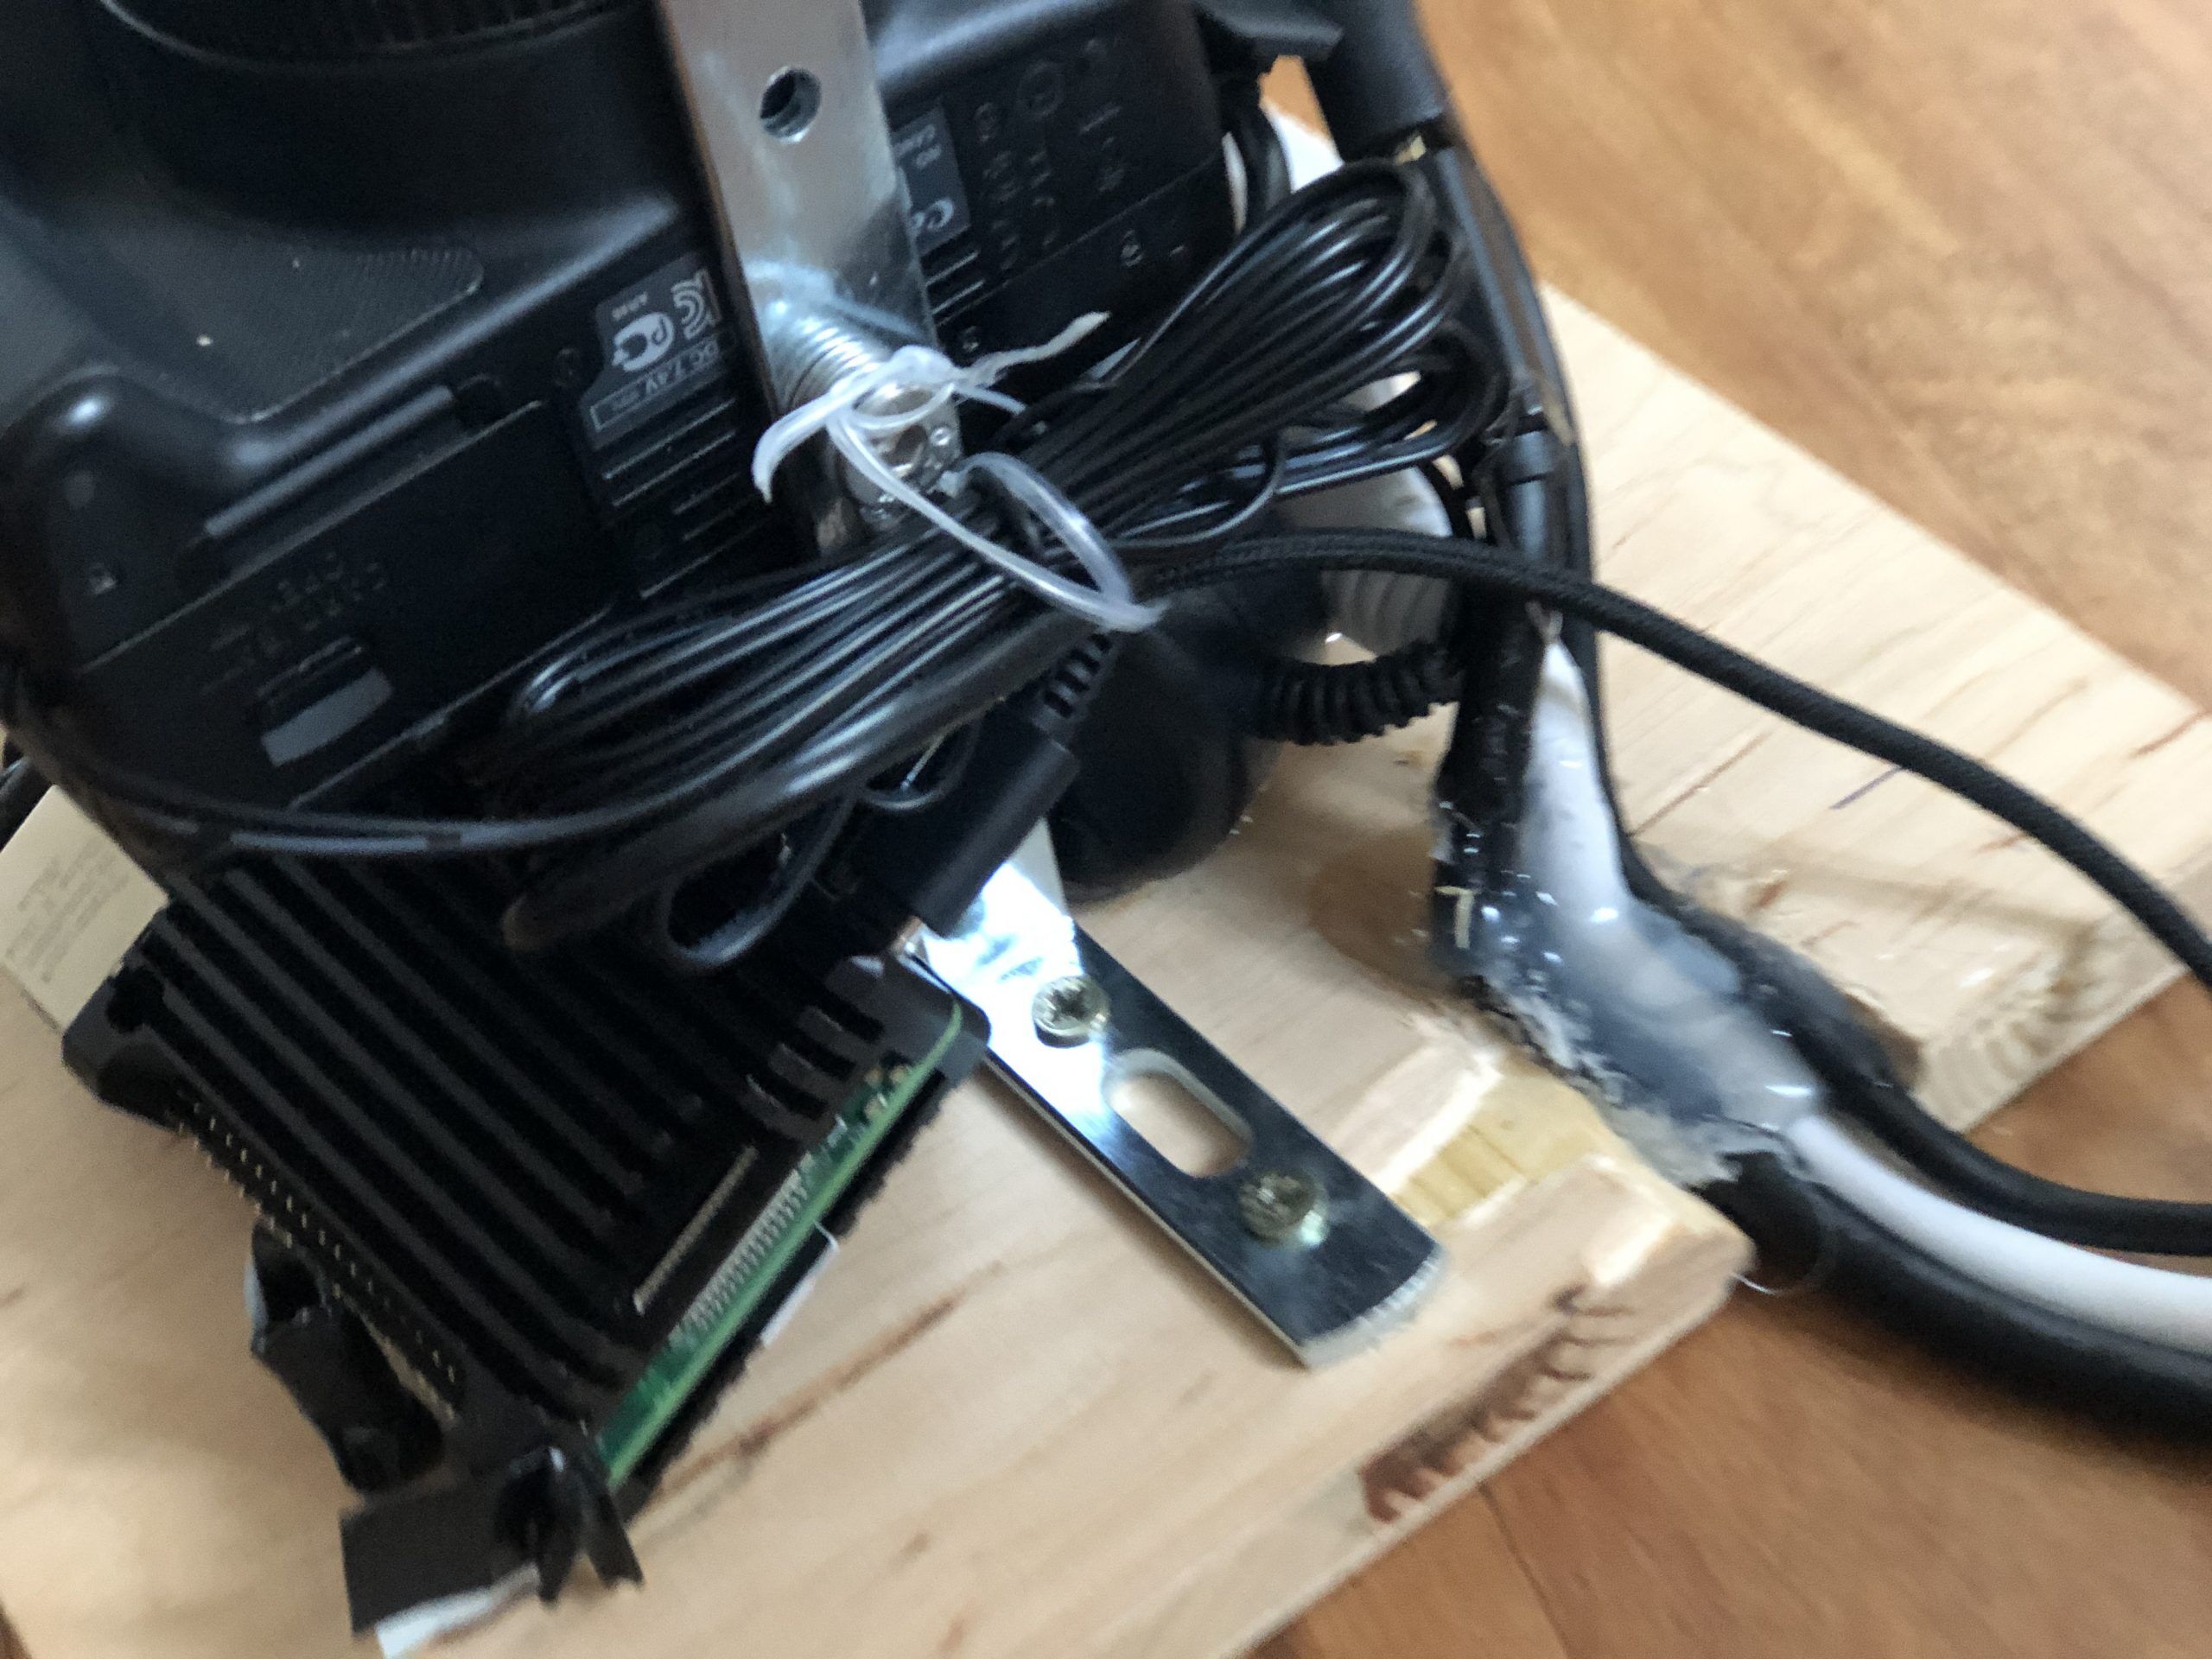
Next up was wiring everything into a tight package and glueing it with a lot of hotglue together. My biggest concern were the huge chunky power supplies, but I was surprised how tigth it was in the end to get those....and also how well the hot glue holds it all together.

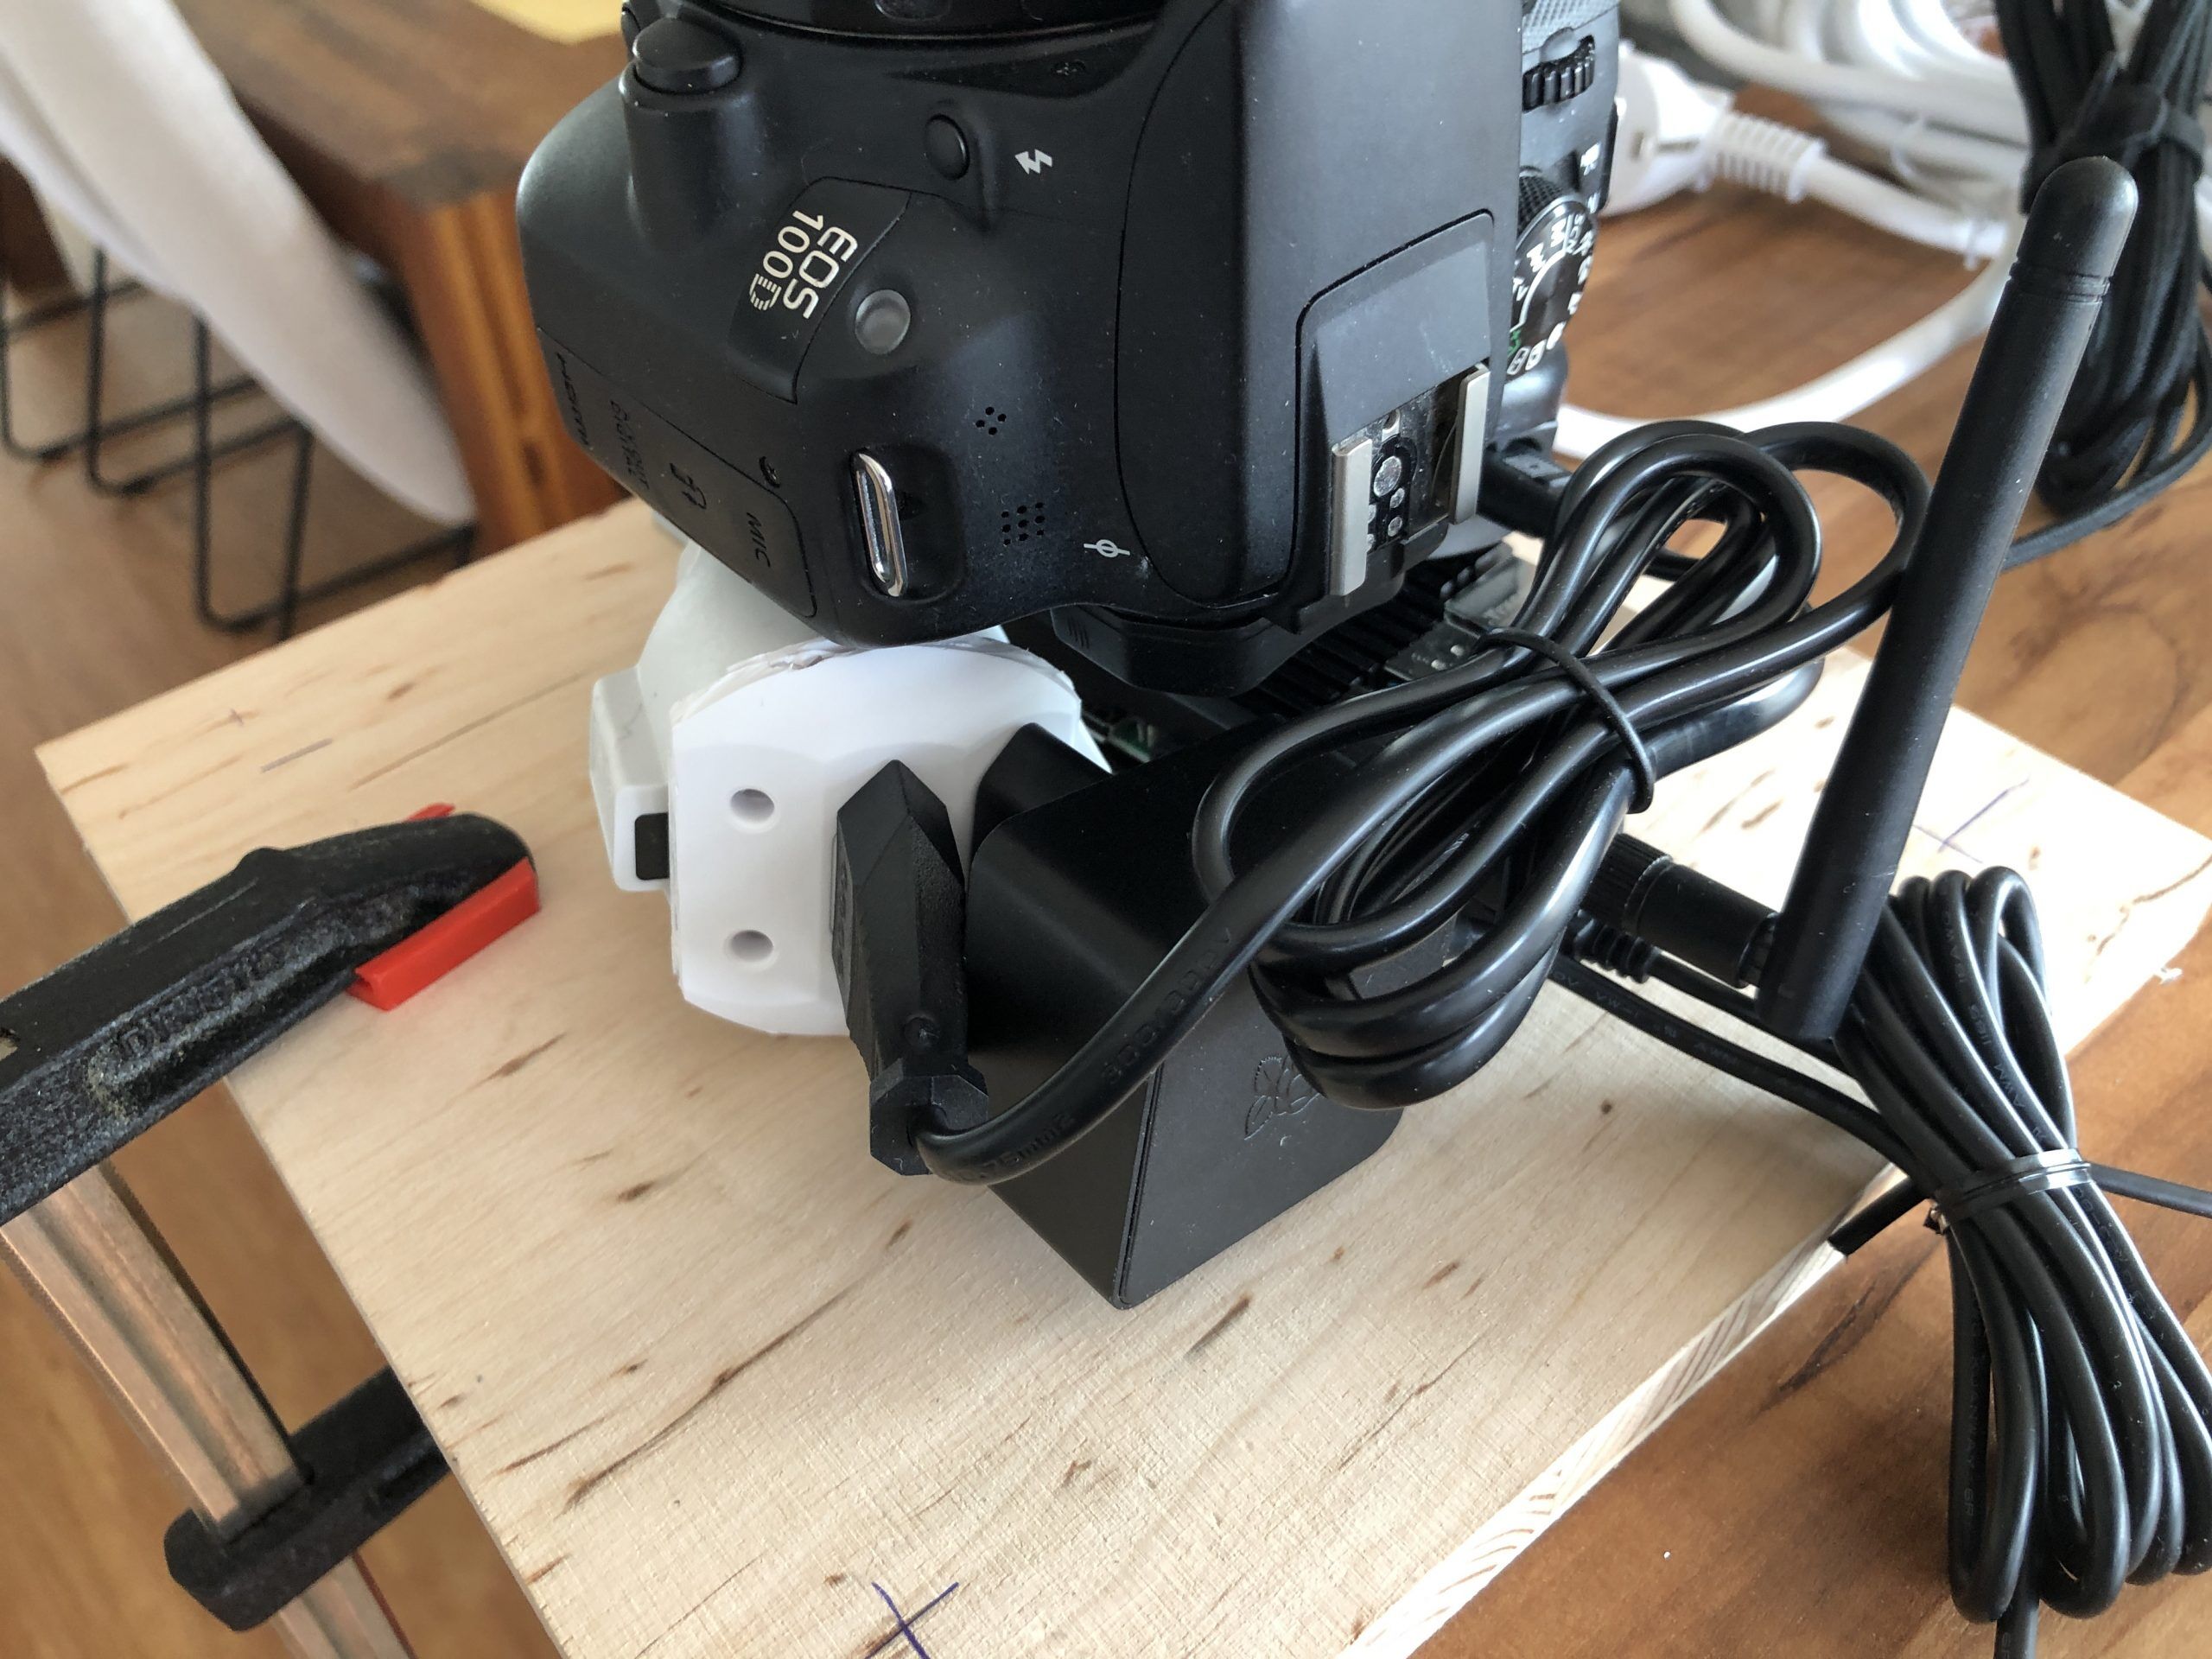
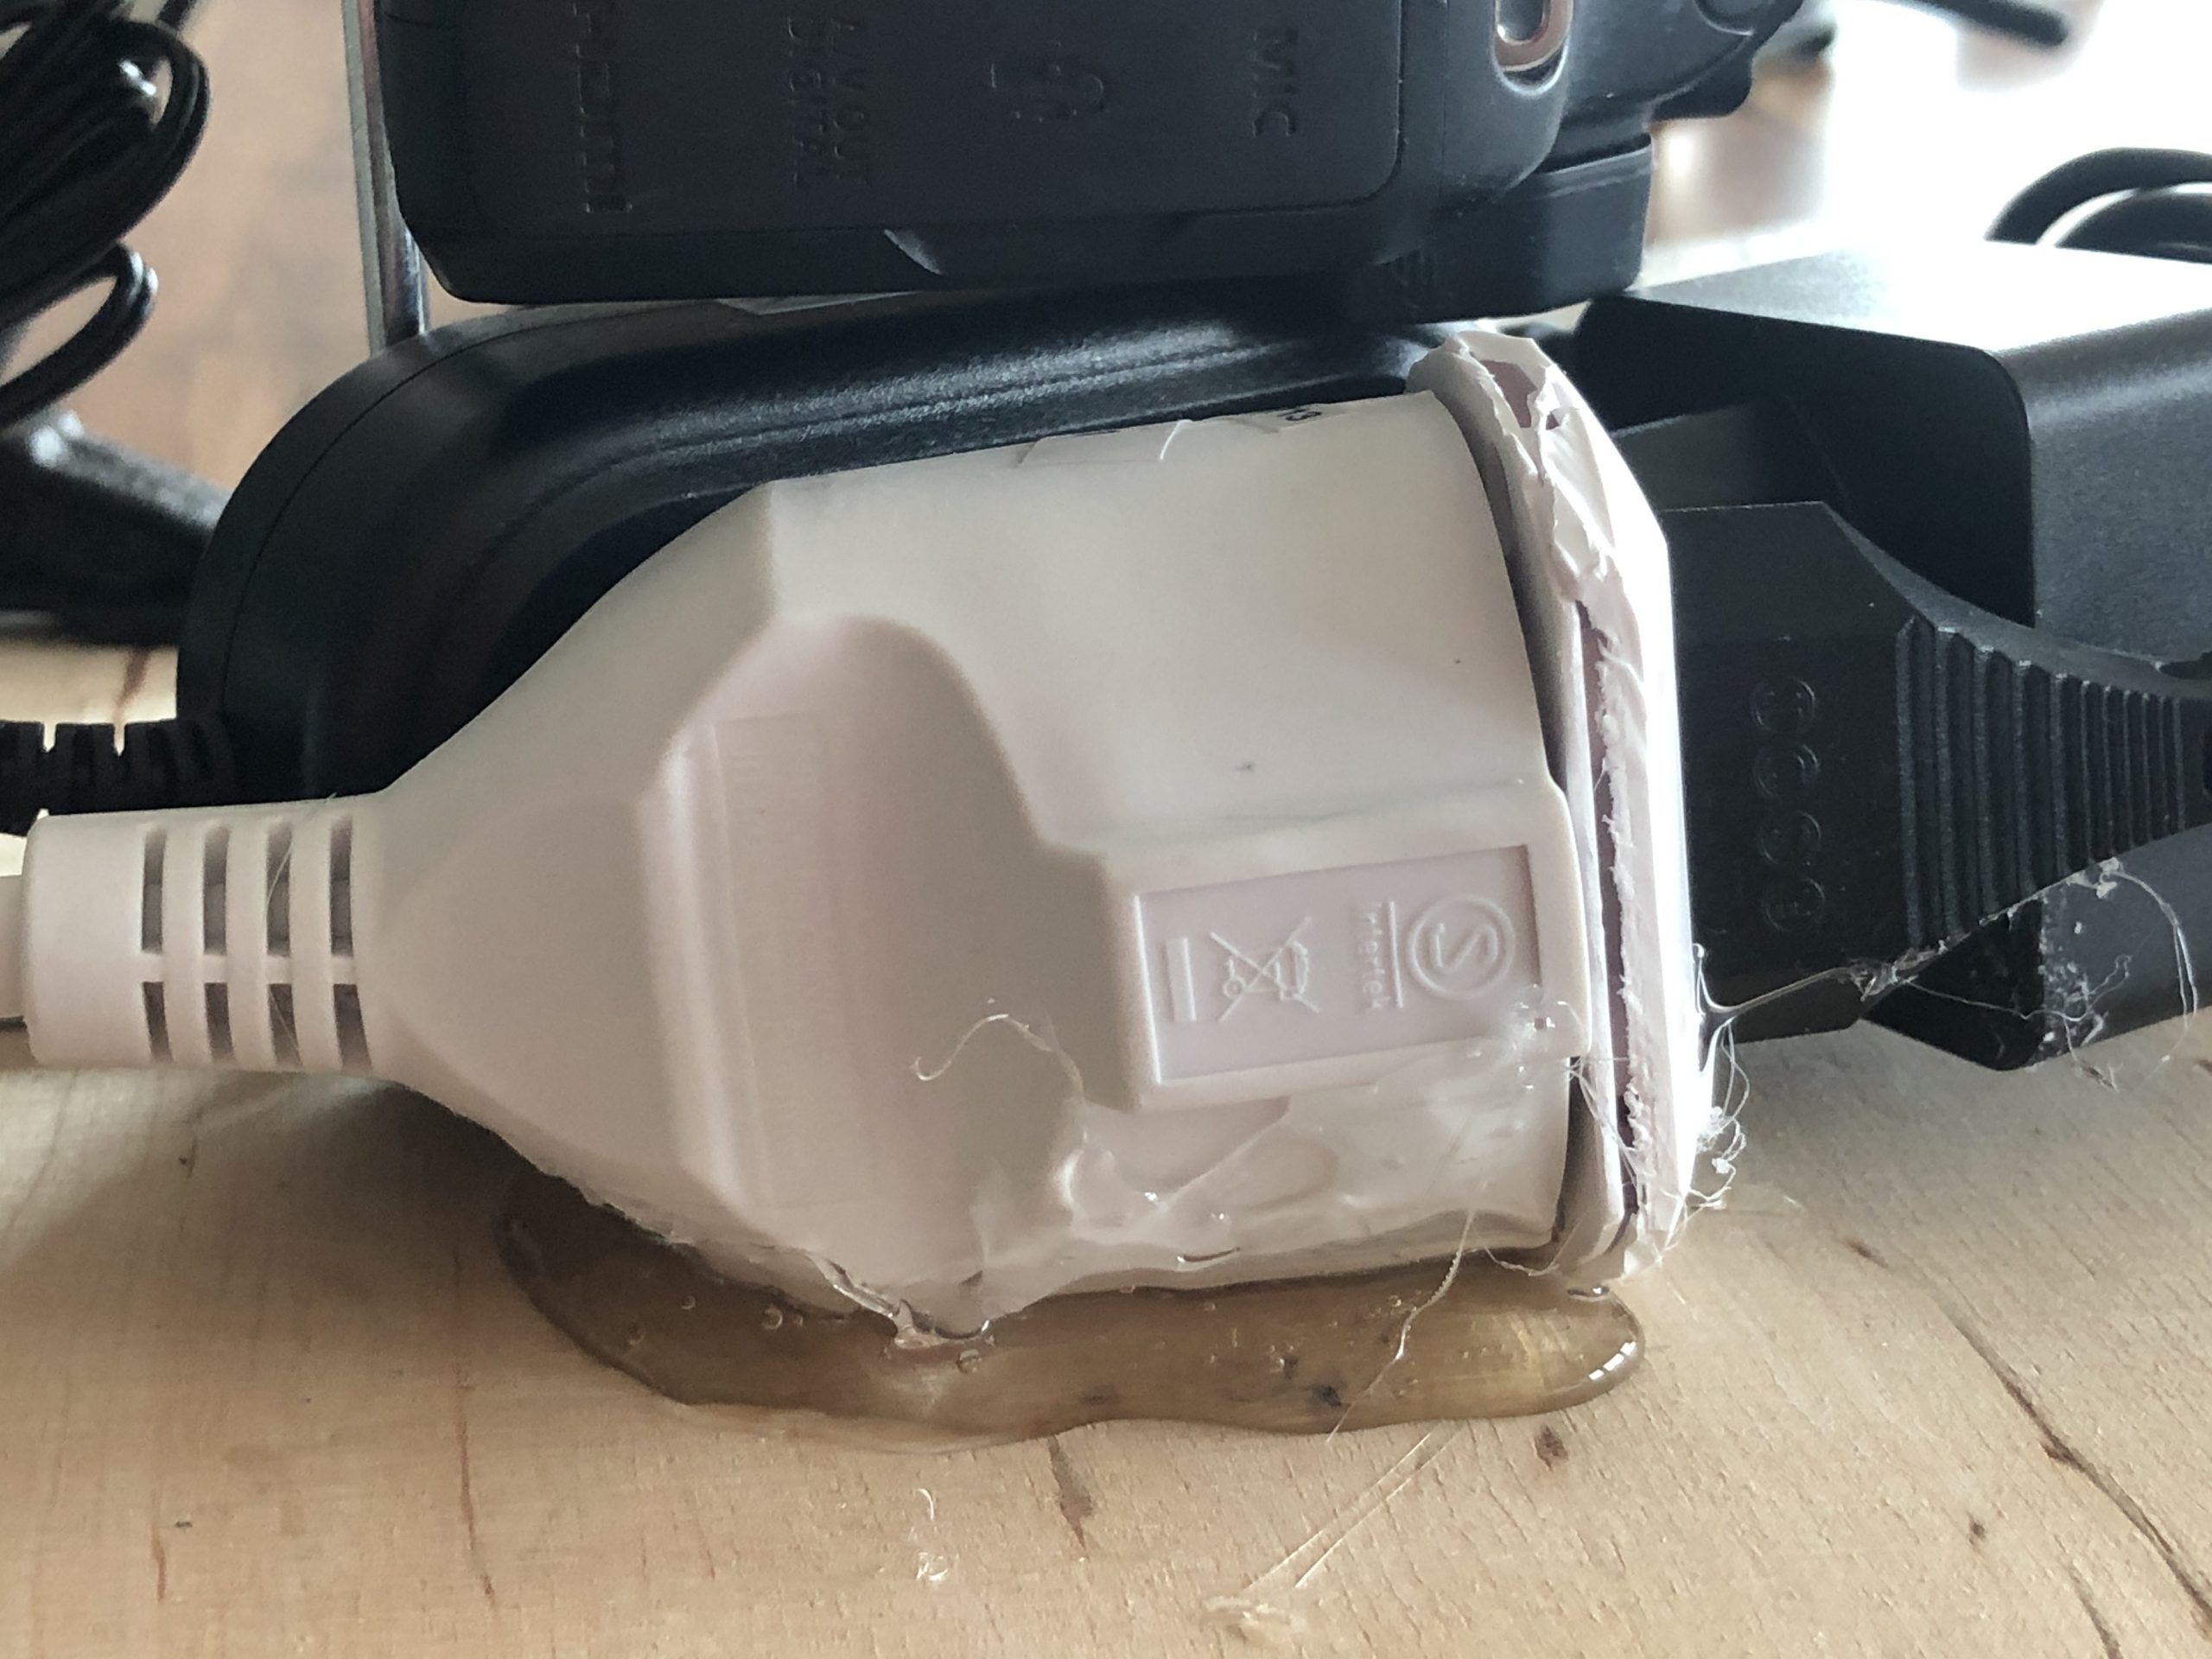

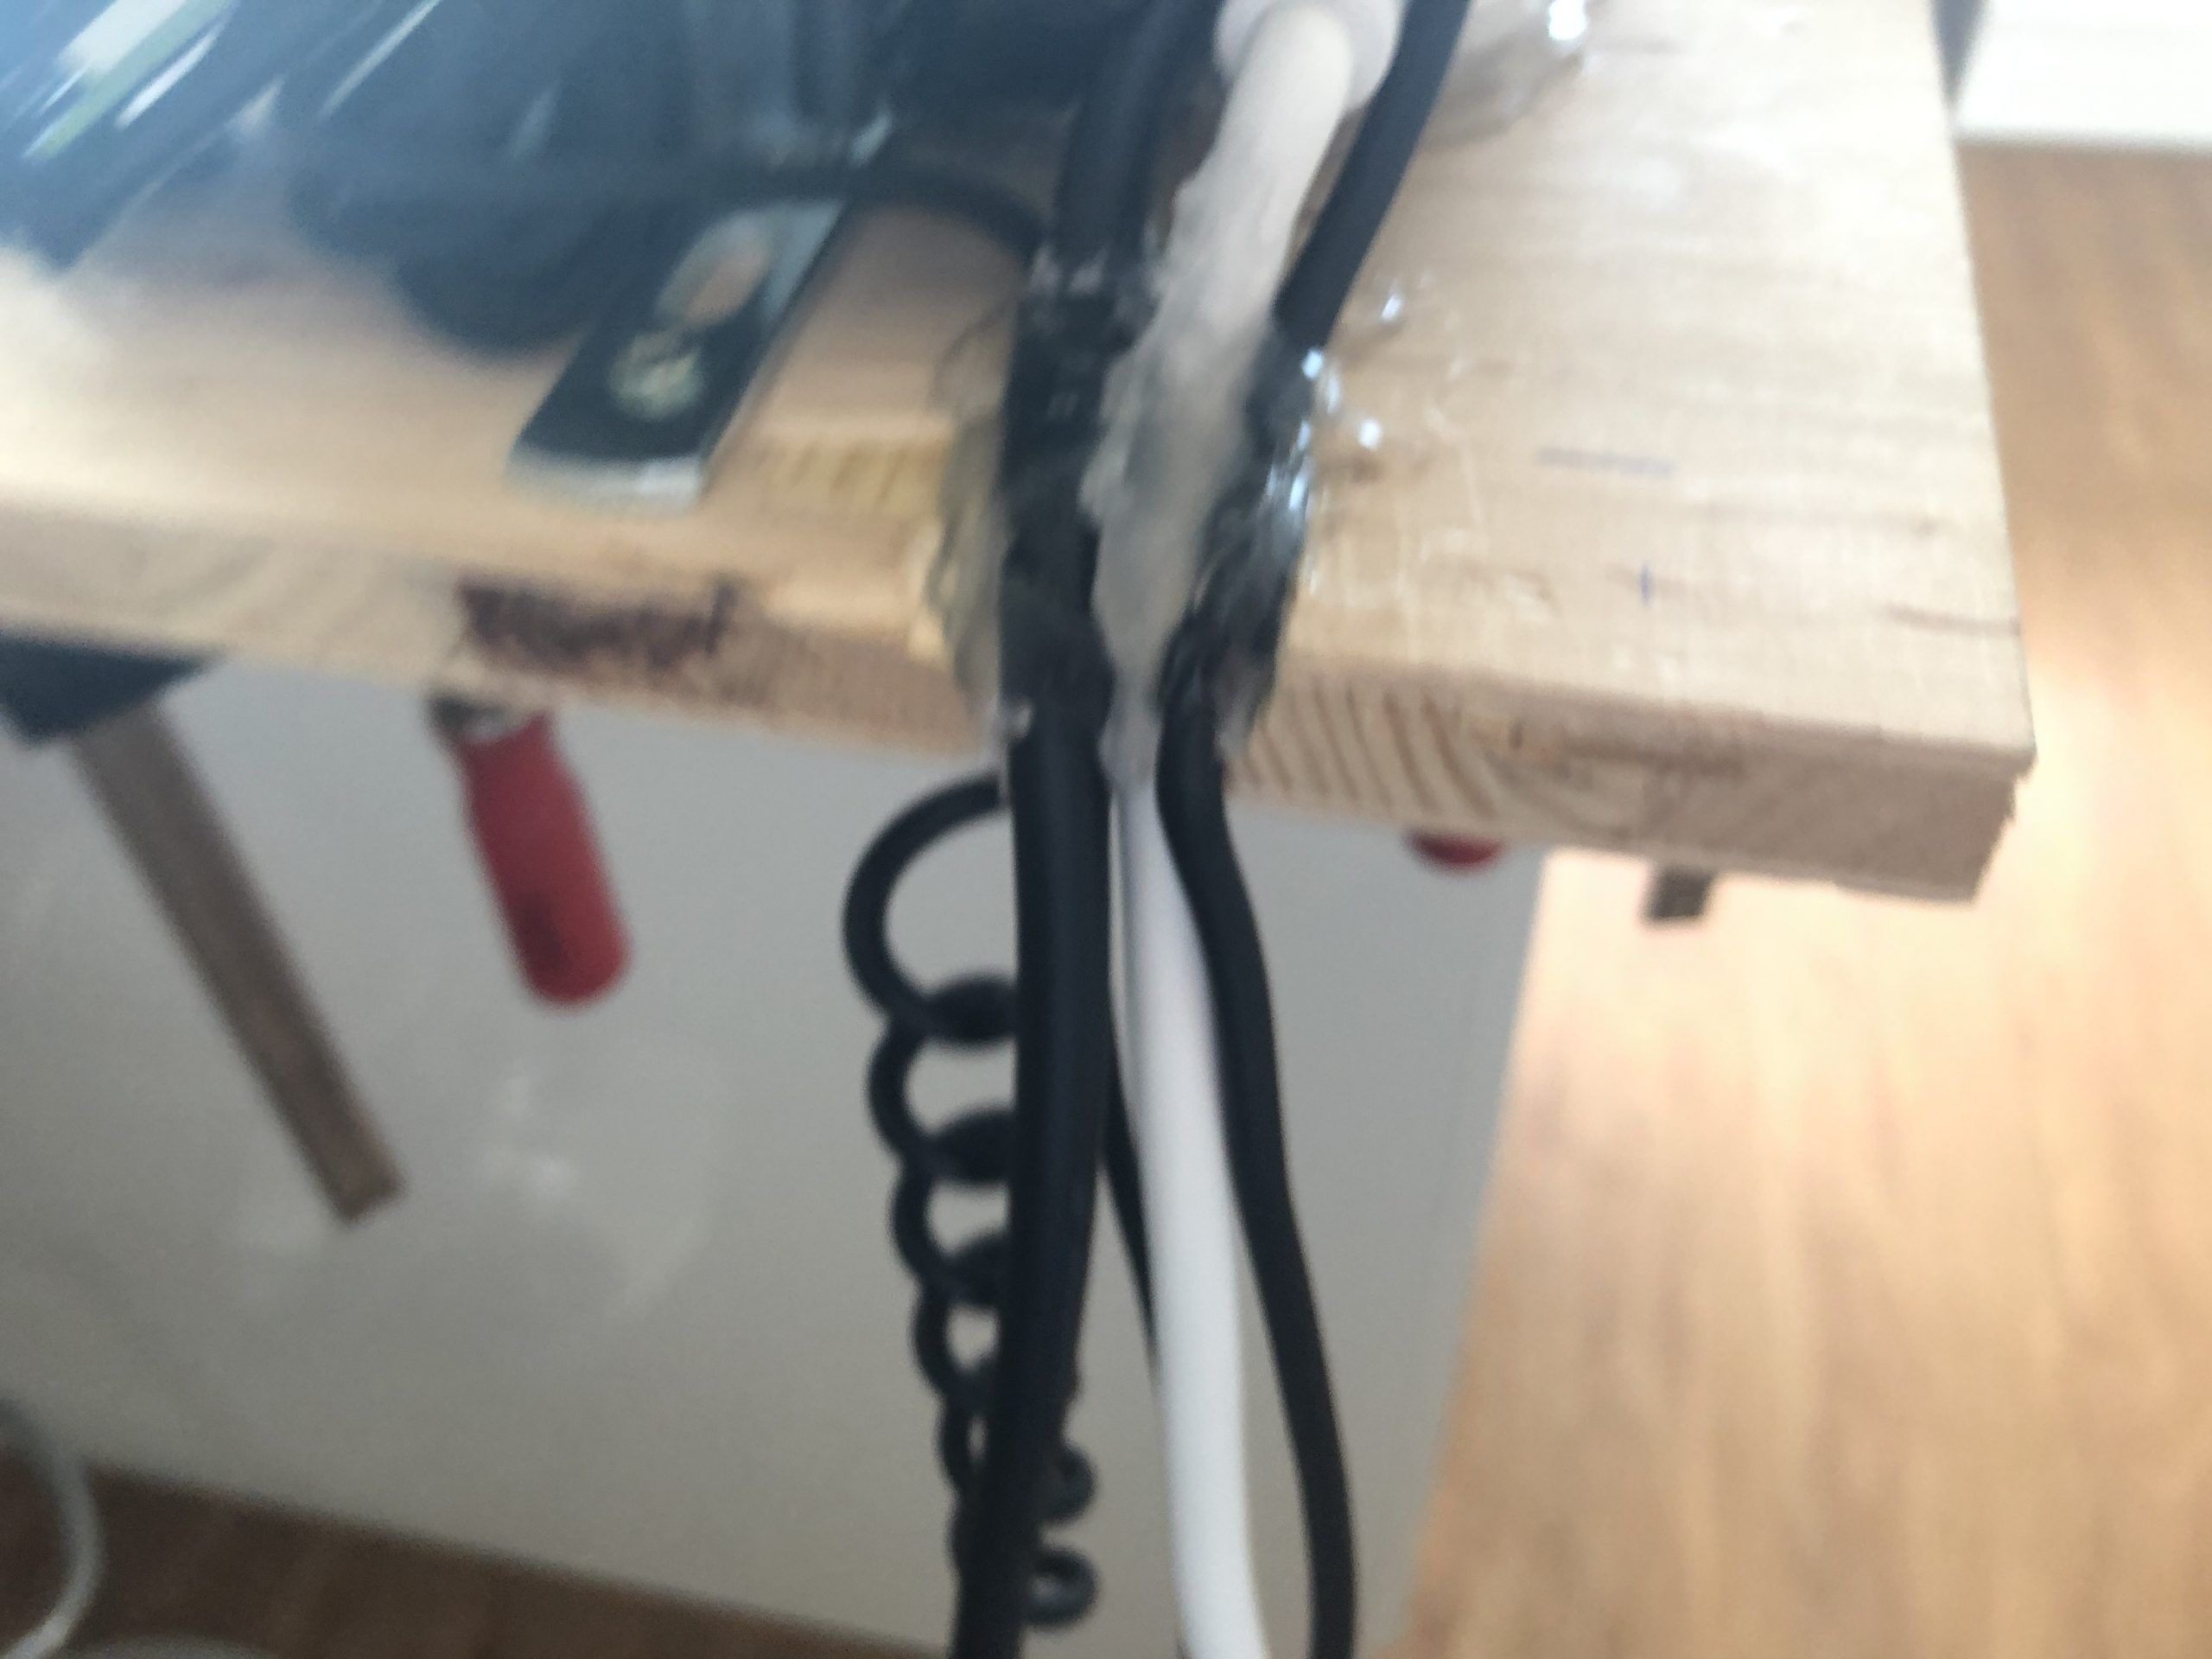
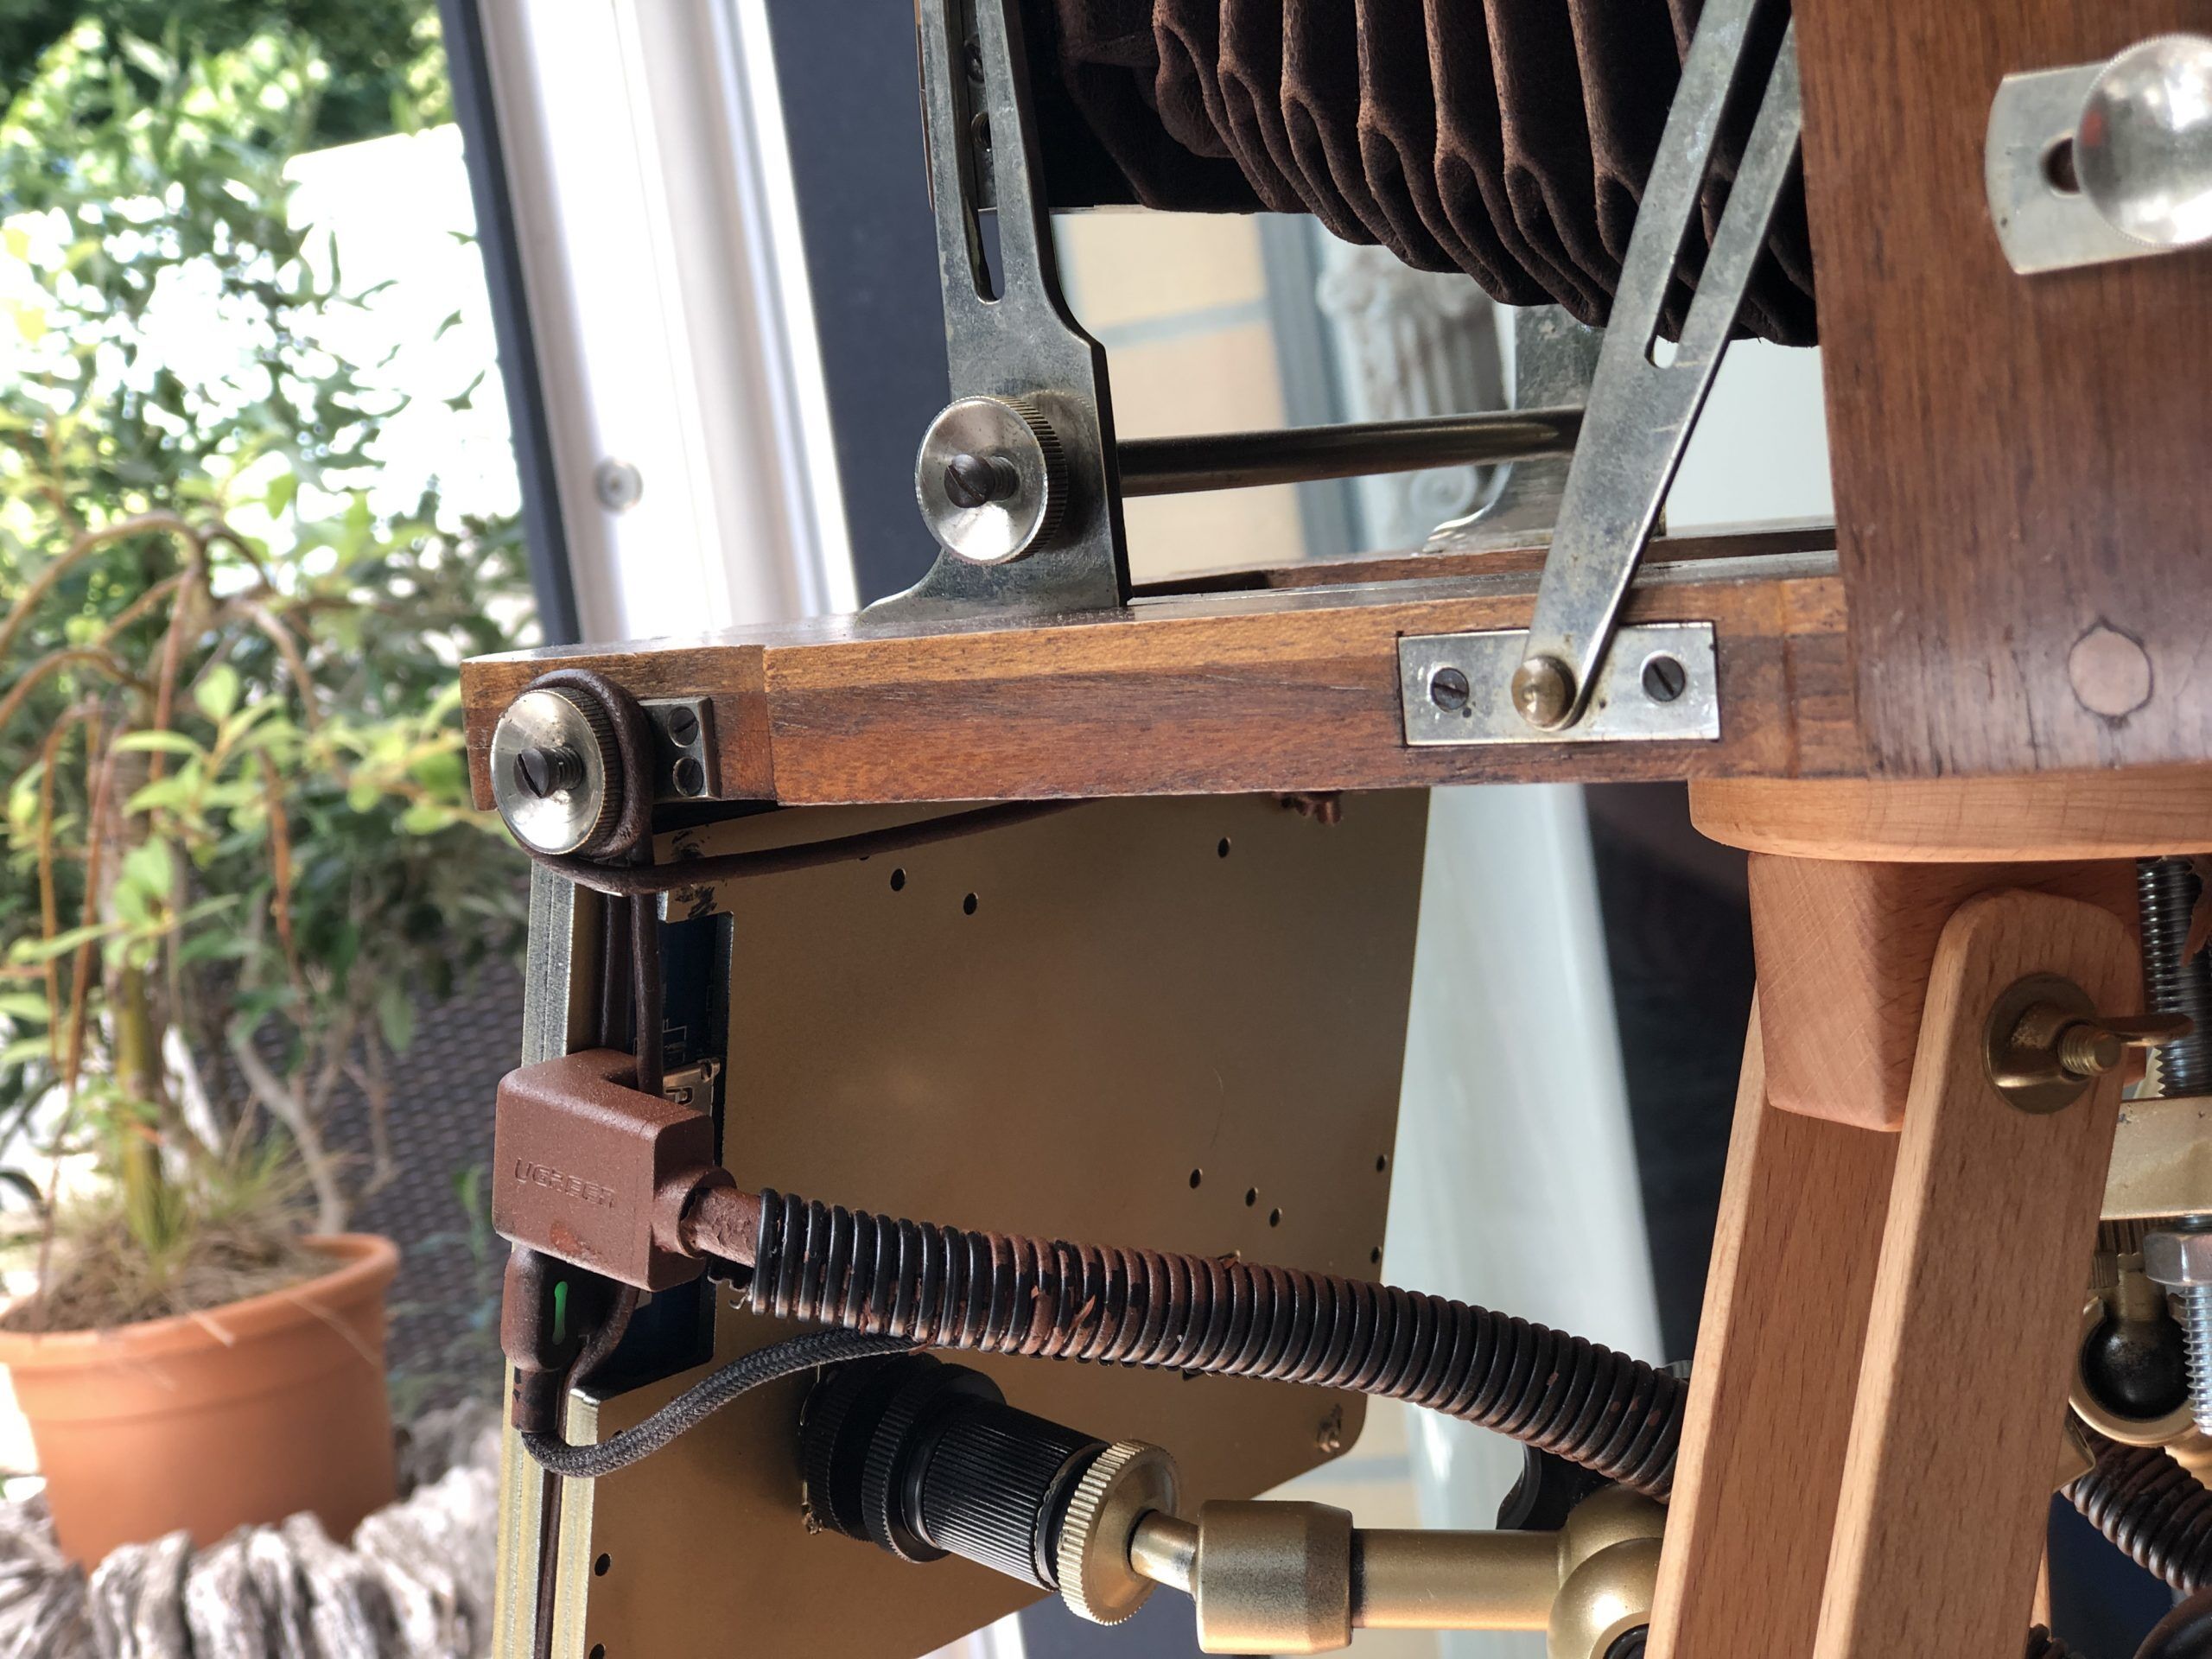
Next I had to cut out a area to sink in the cables that had to go out and glue them all in place with a massive ocean of hot glue:

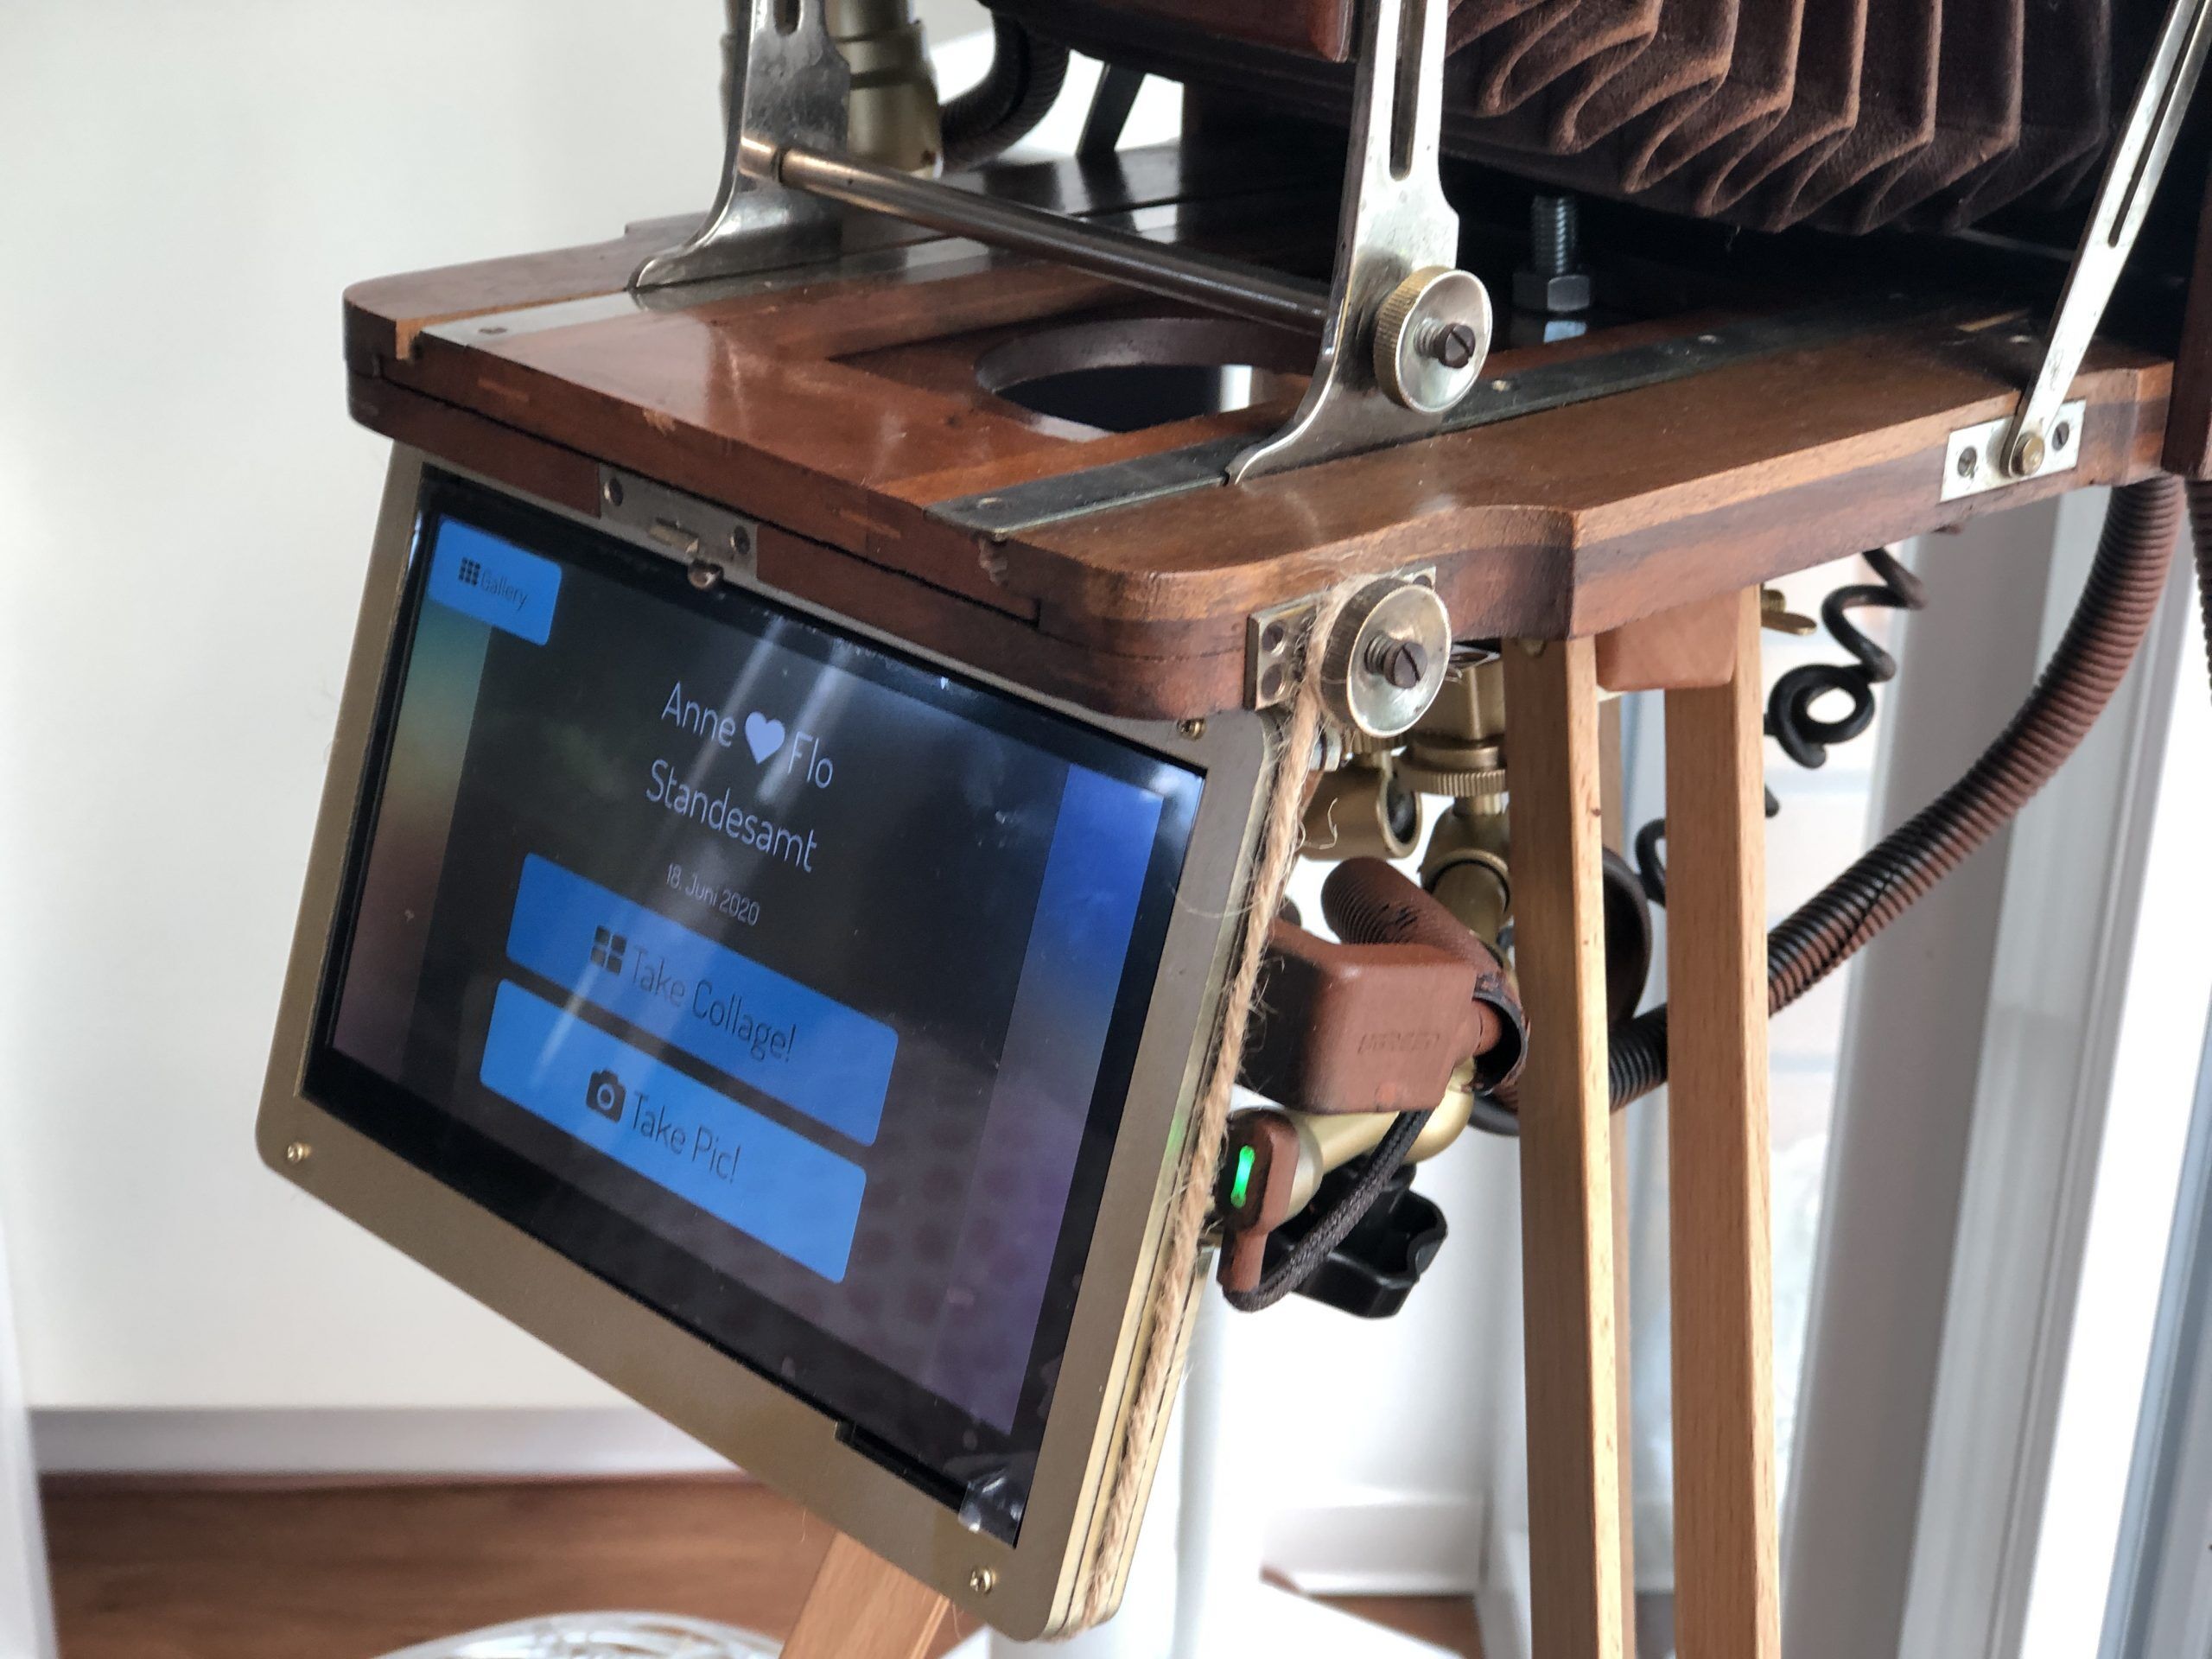
Next up was the touchscreen, that got mounted into a modular acrylic case and than with a backplate mounted on the 7-inch rig arm, which is then connected to the rig cheese plate in the middle of the camera:

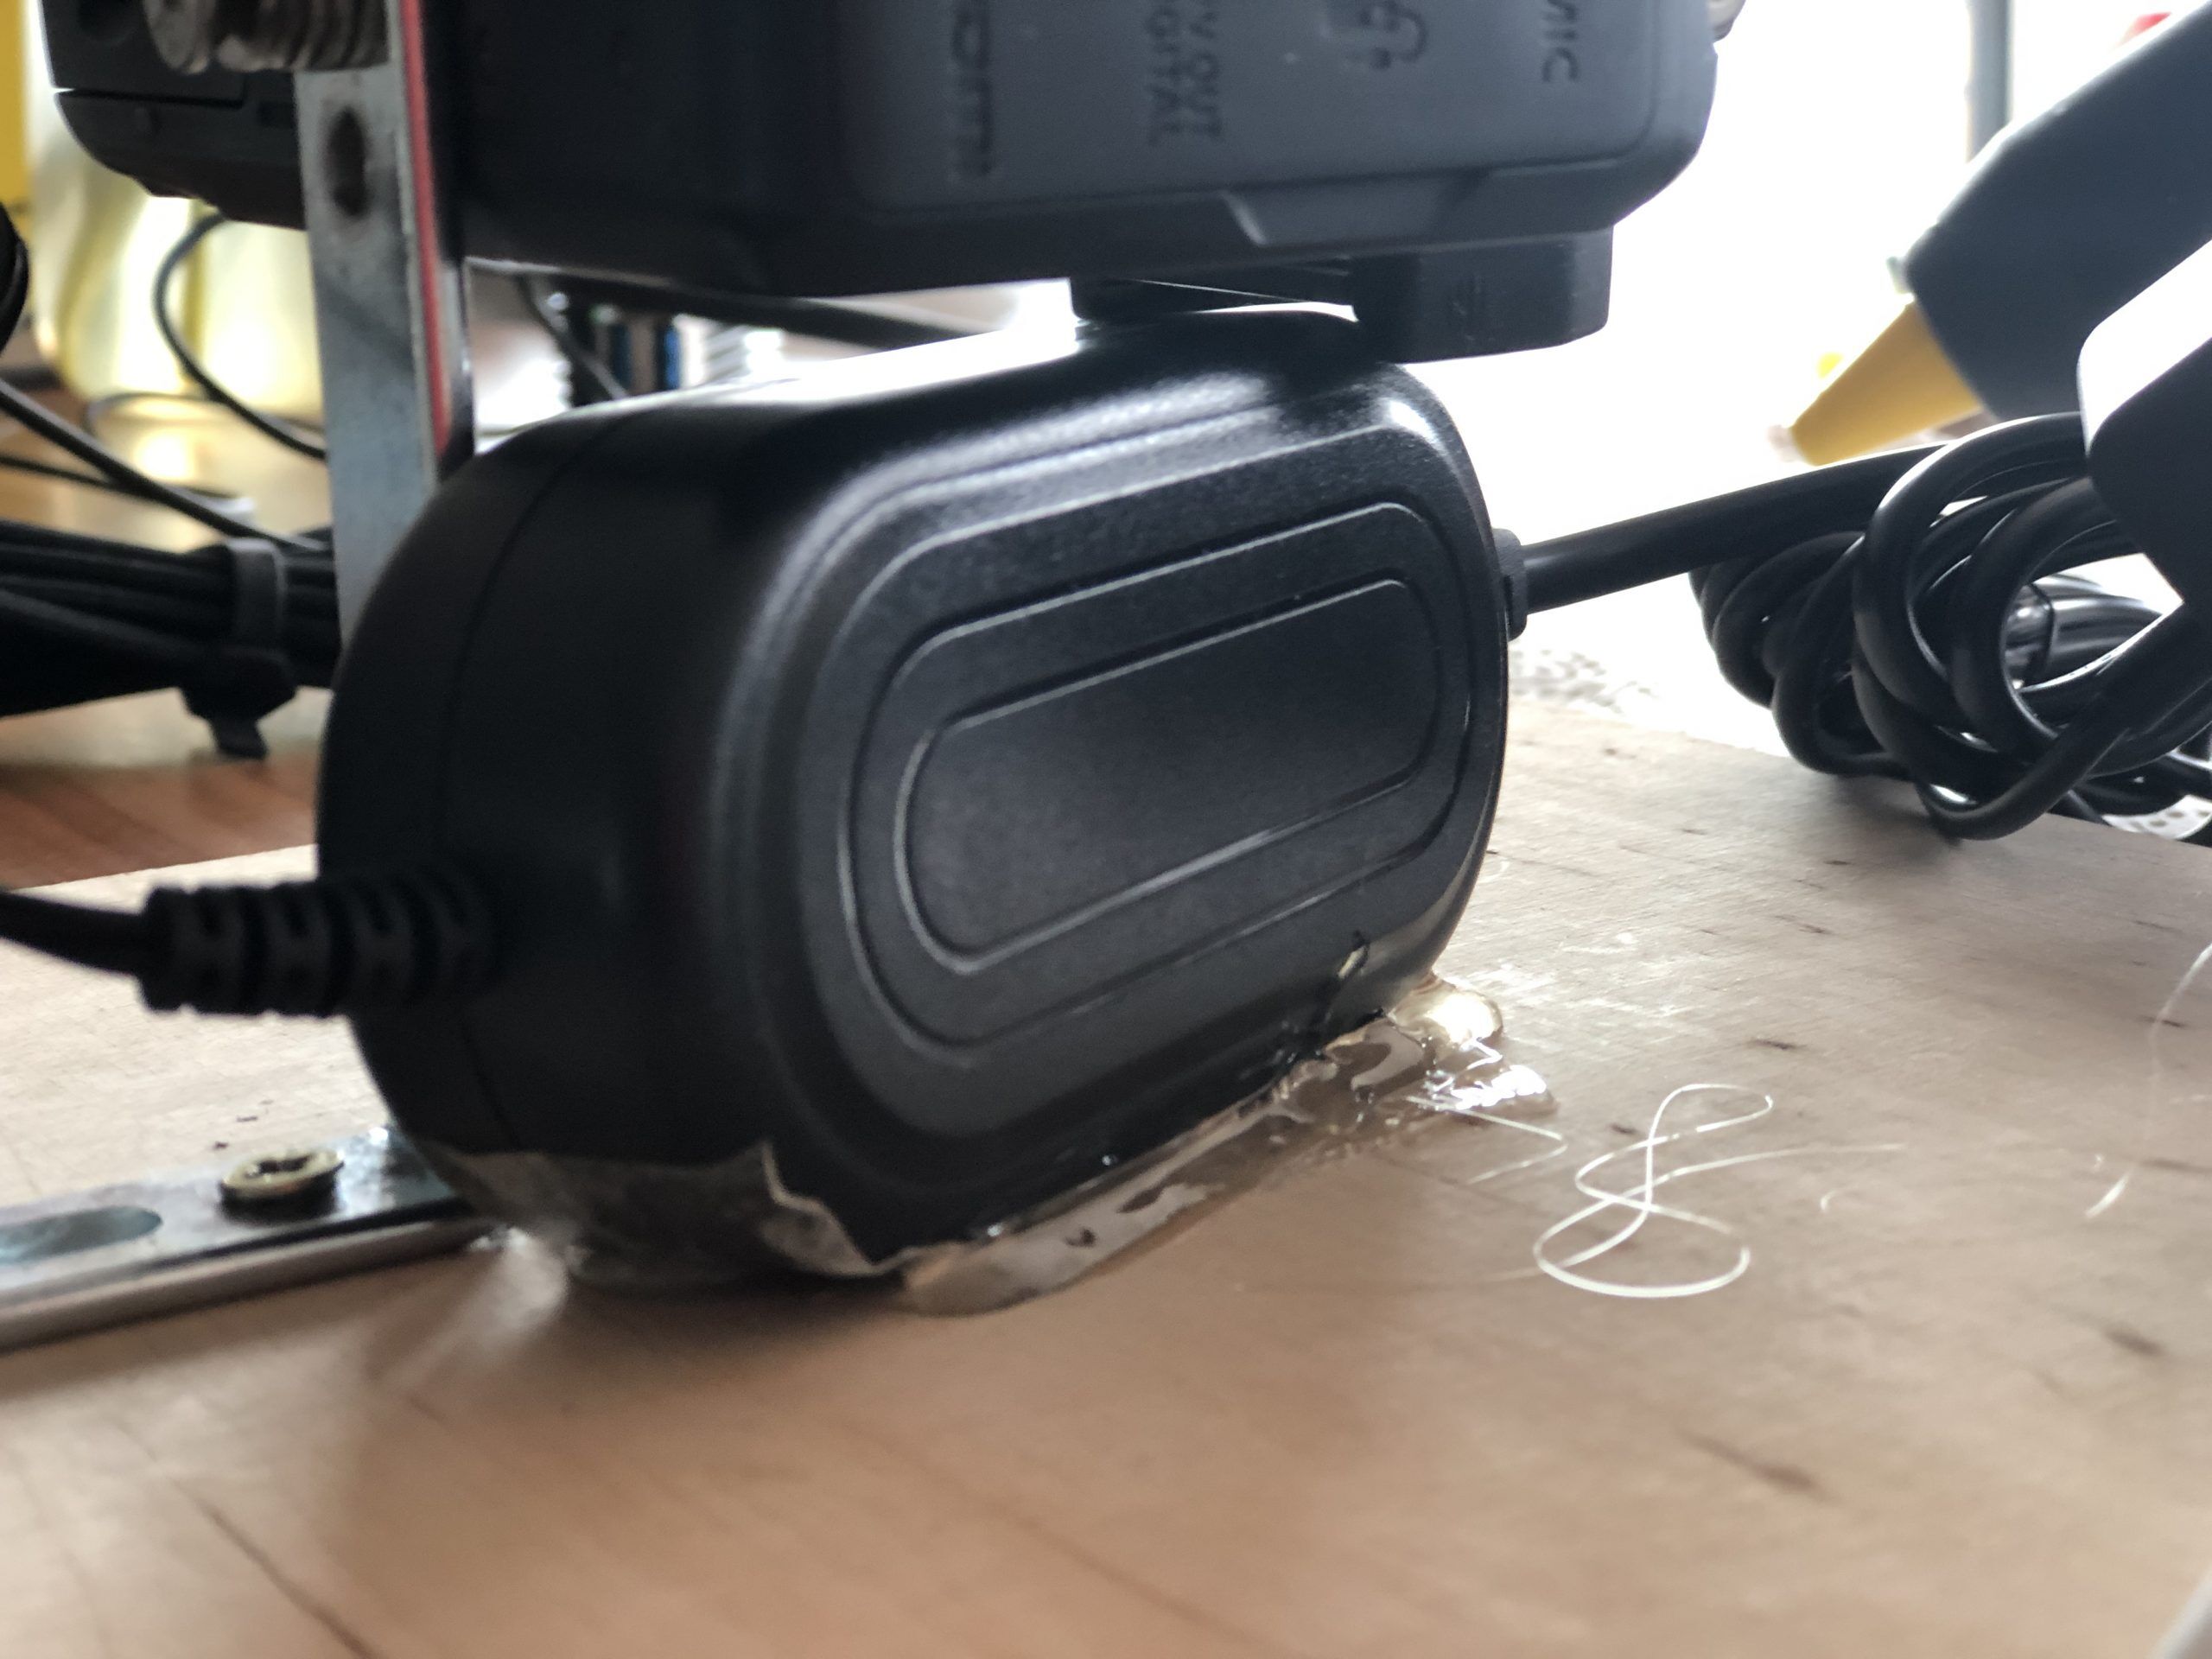
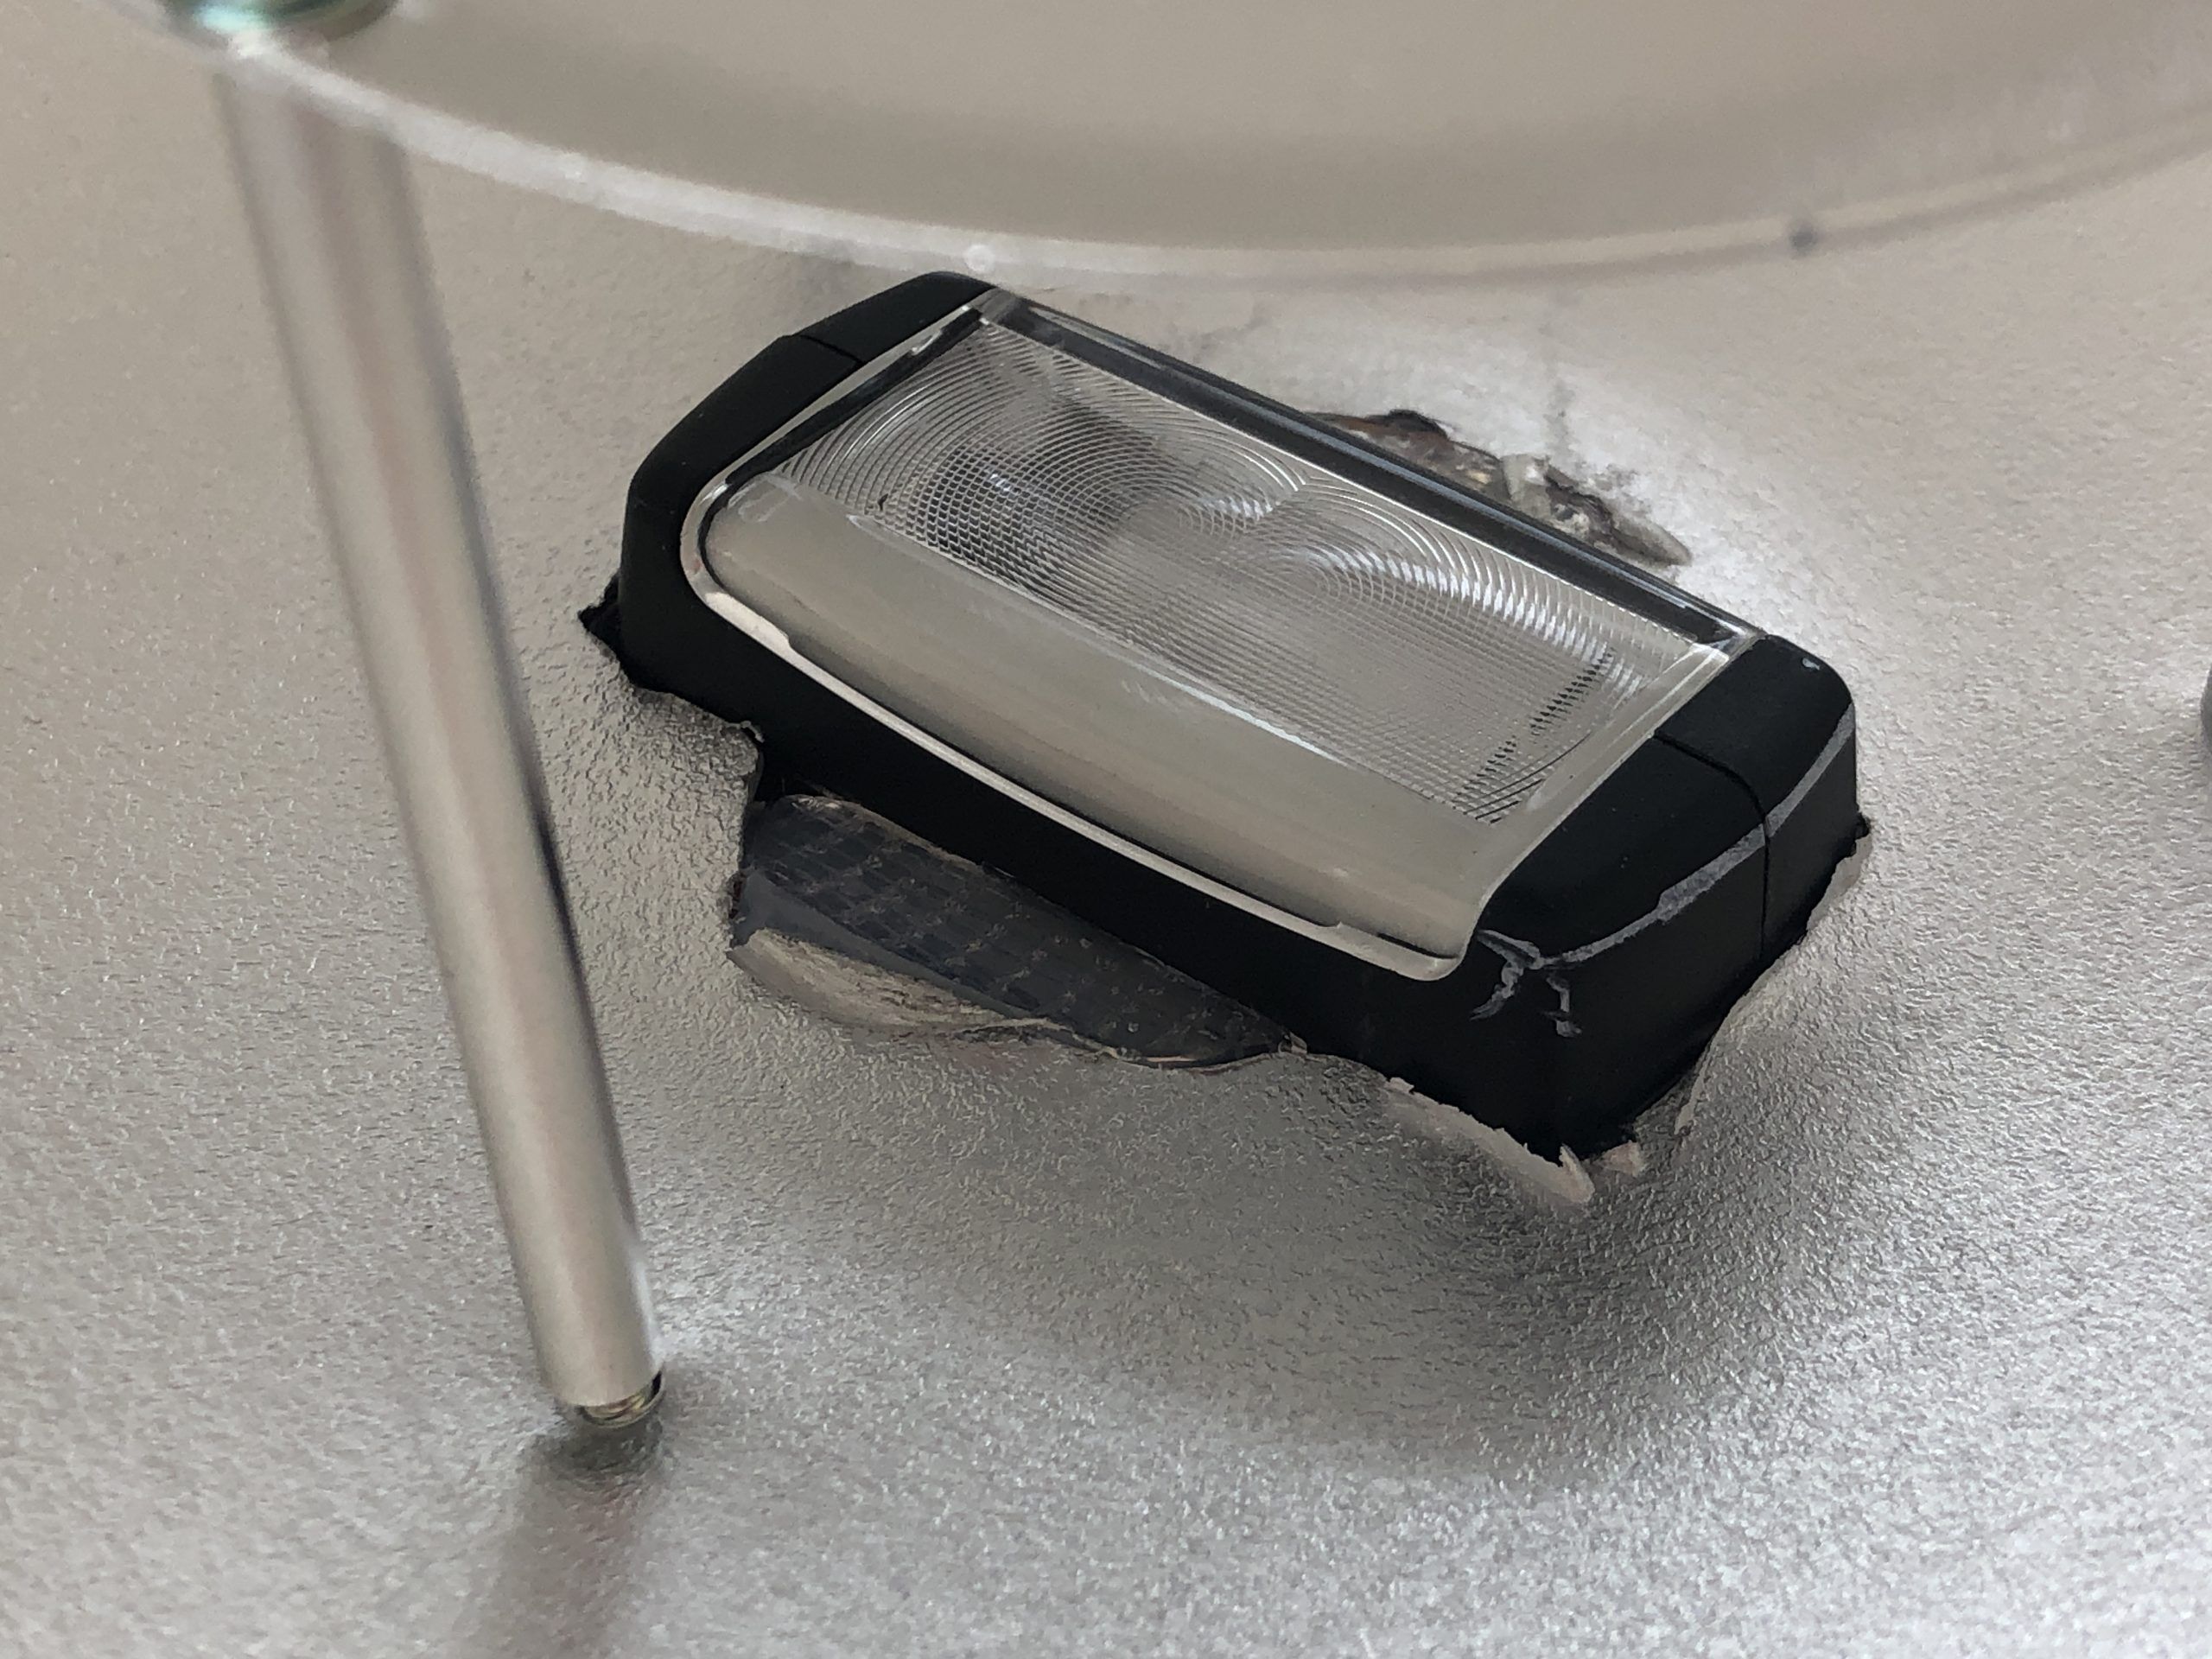
The touchscreen was still very wobbly, but I fixed that later during decoration and coloring. Next up was the flash, which I wanted to get a retro look as well to fit the camera. So I got a cheap beauty dish, that looks from the front already very vintage, but had a strange special mount. So I cut that out and glued the flash into place. Connected it to the E-TTL cable from the camera and mounted it all together with the 10-inch rigging arm and the camera extender stick:

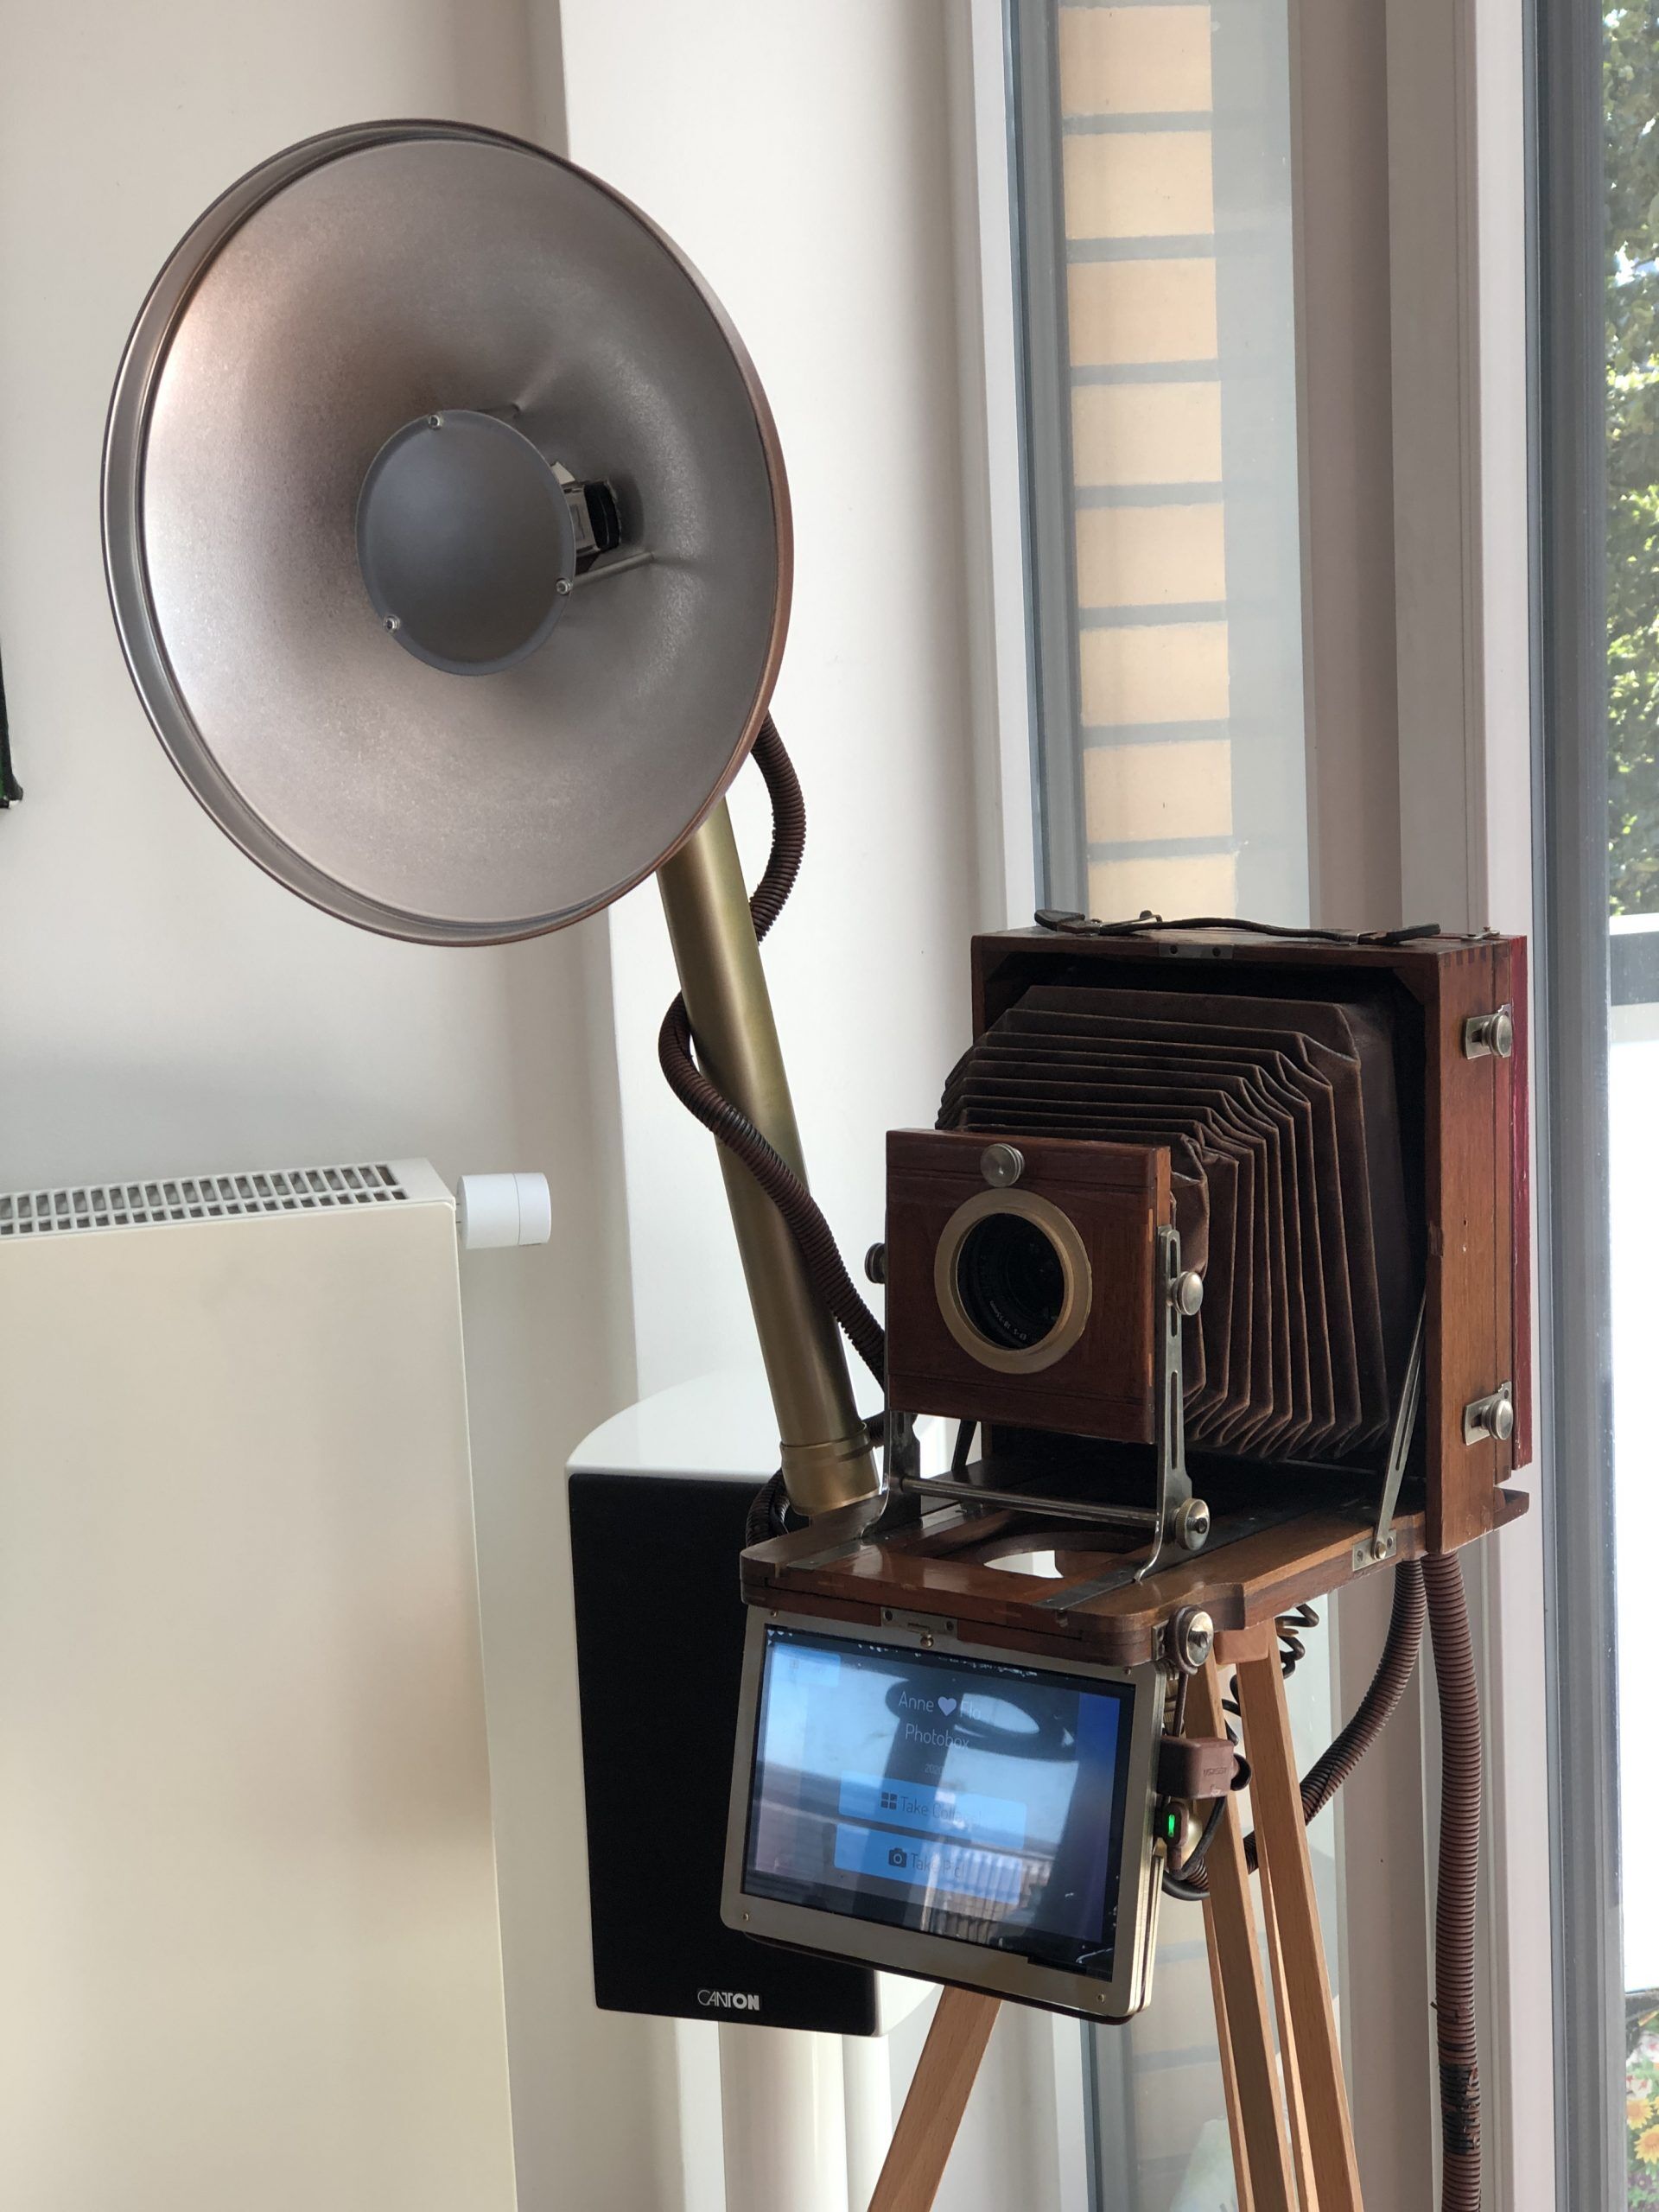
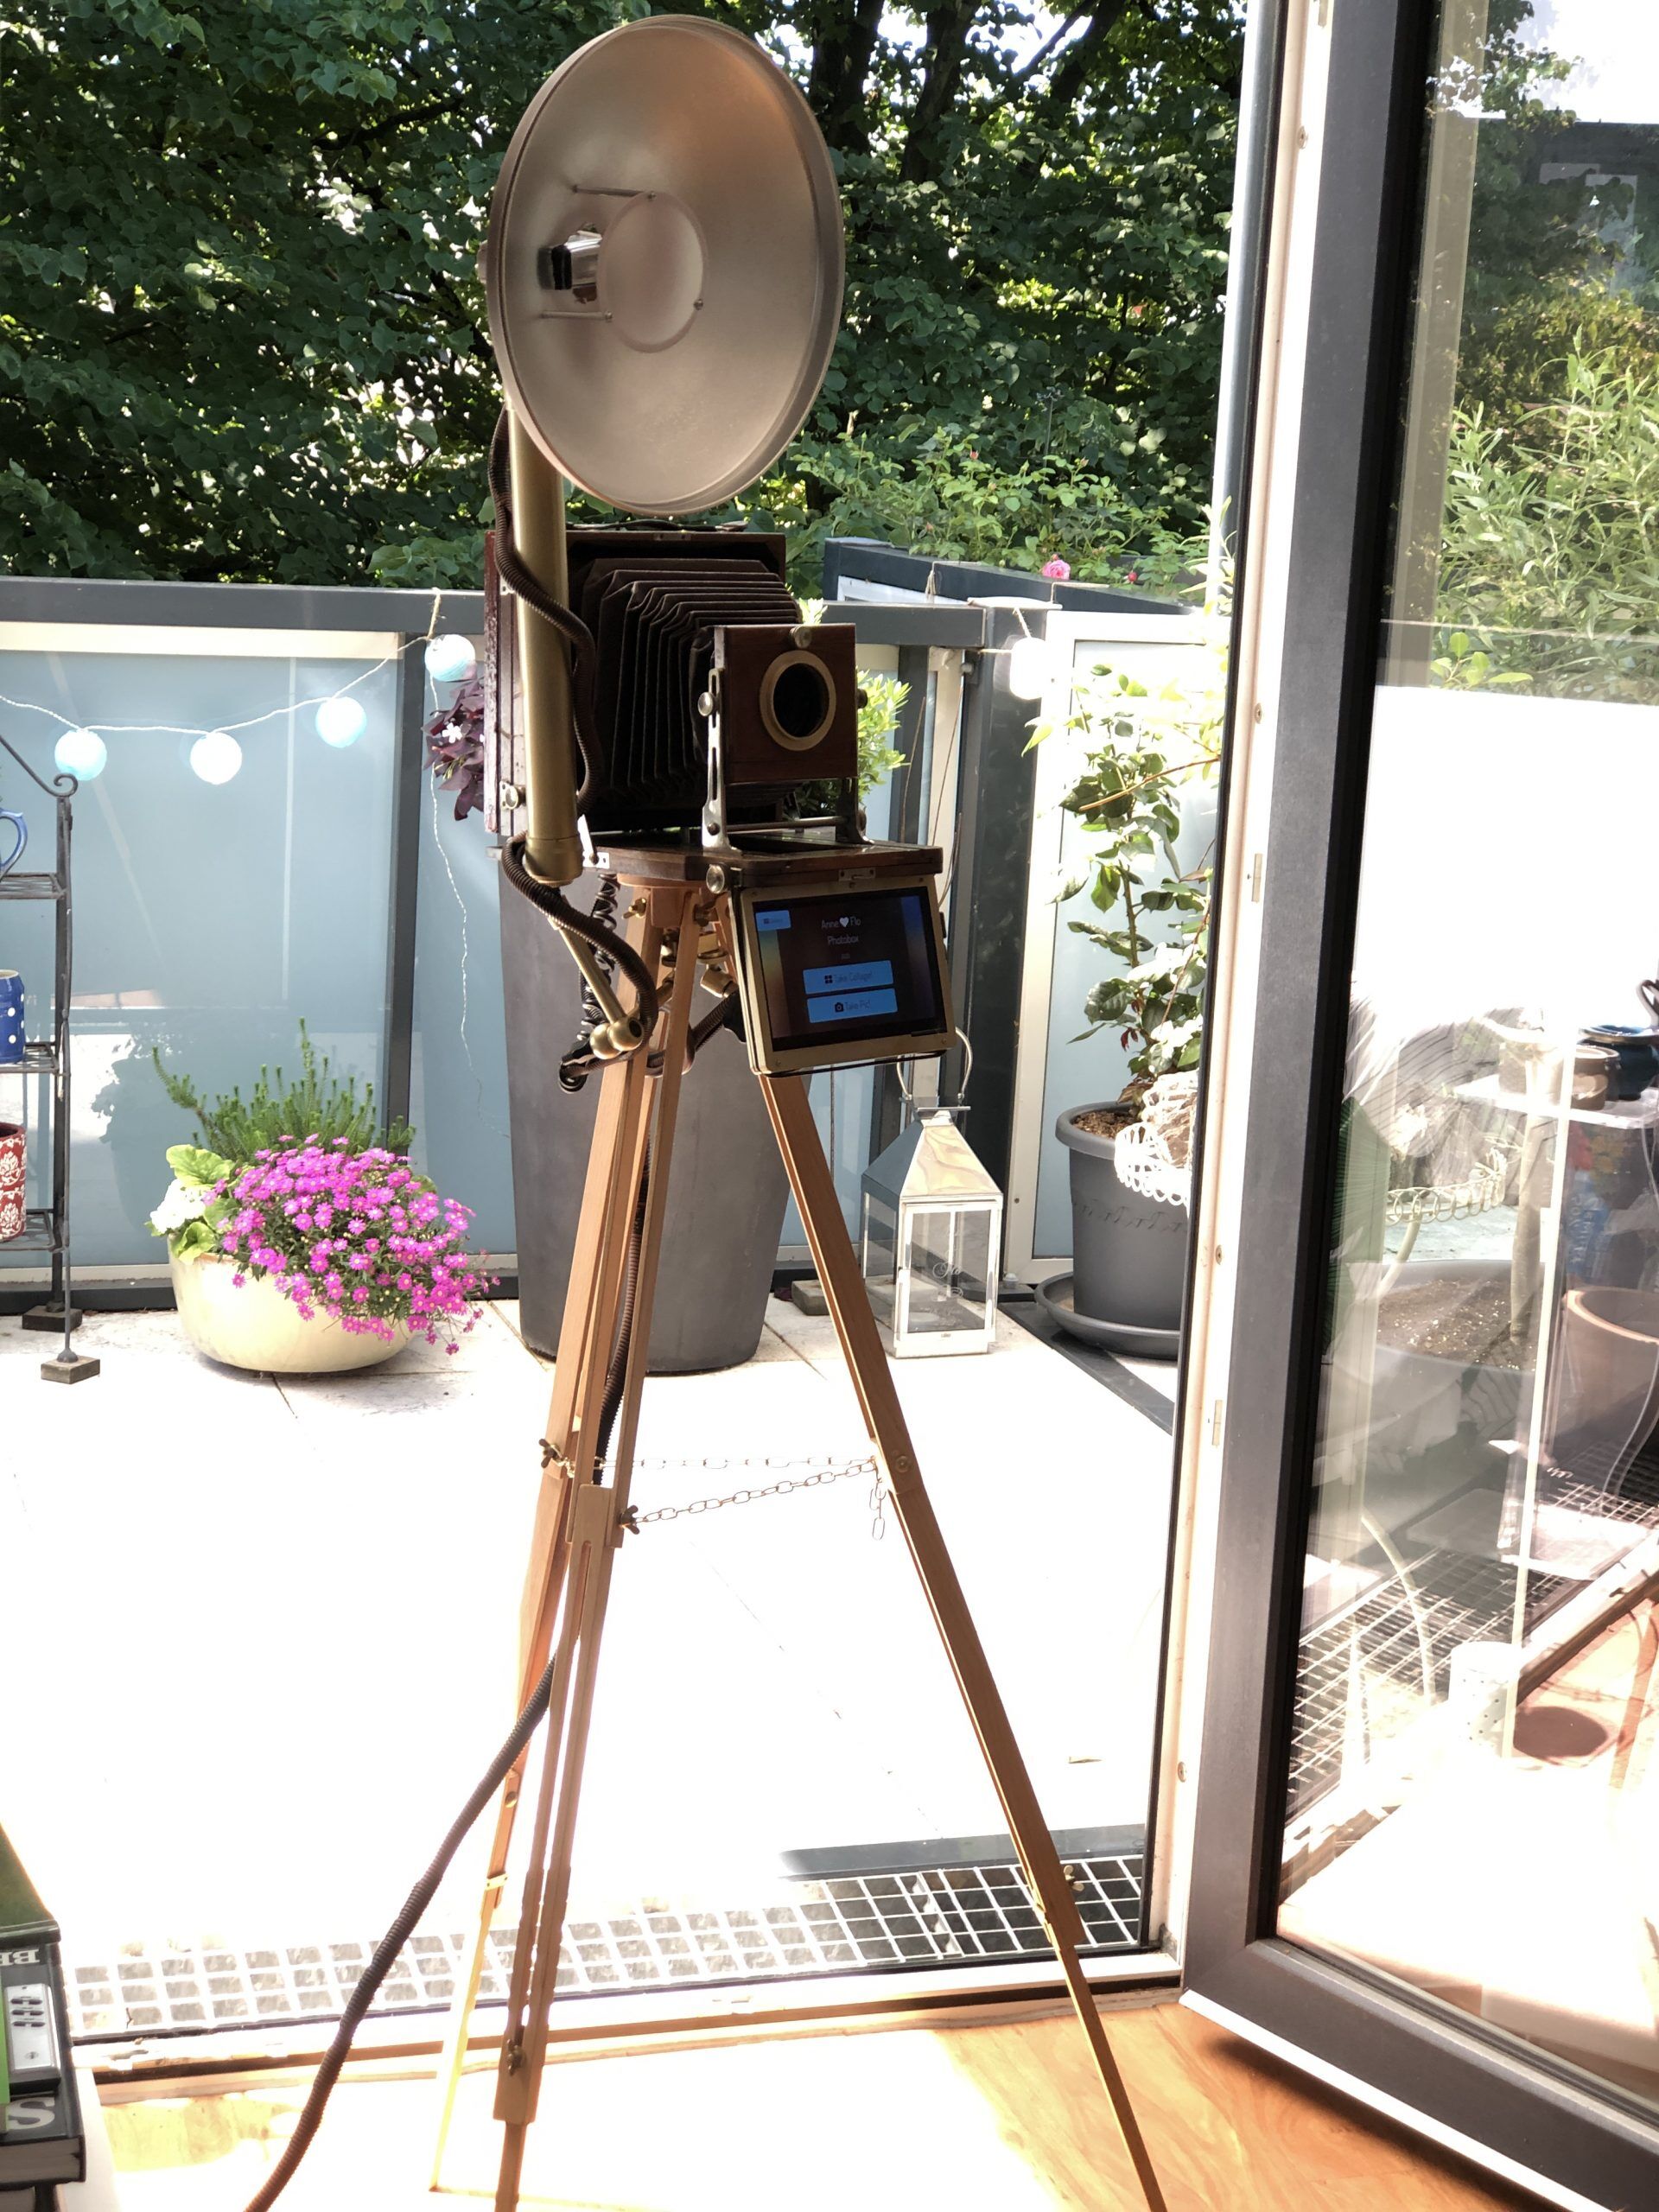
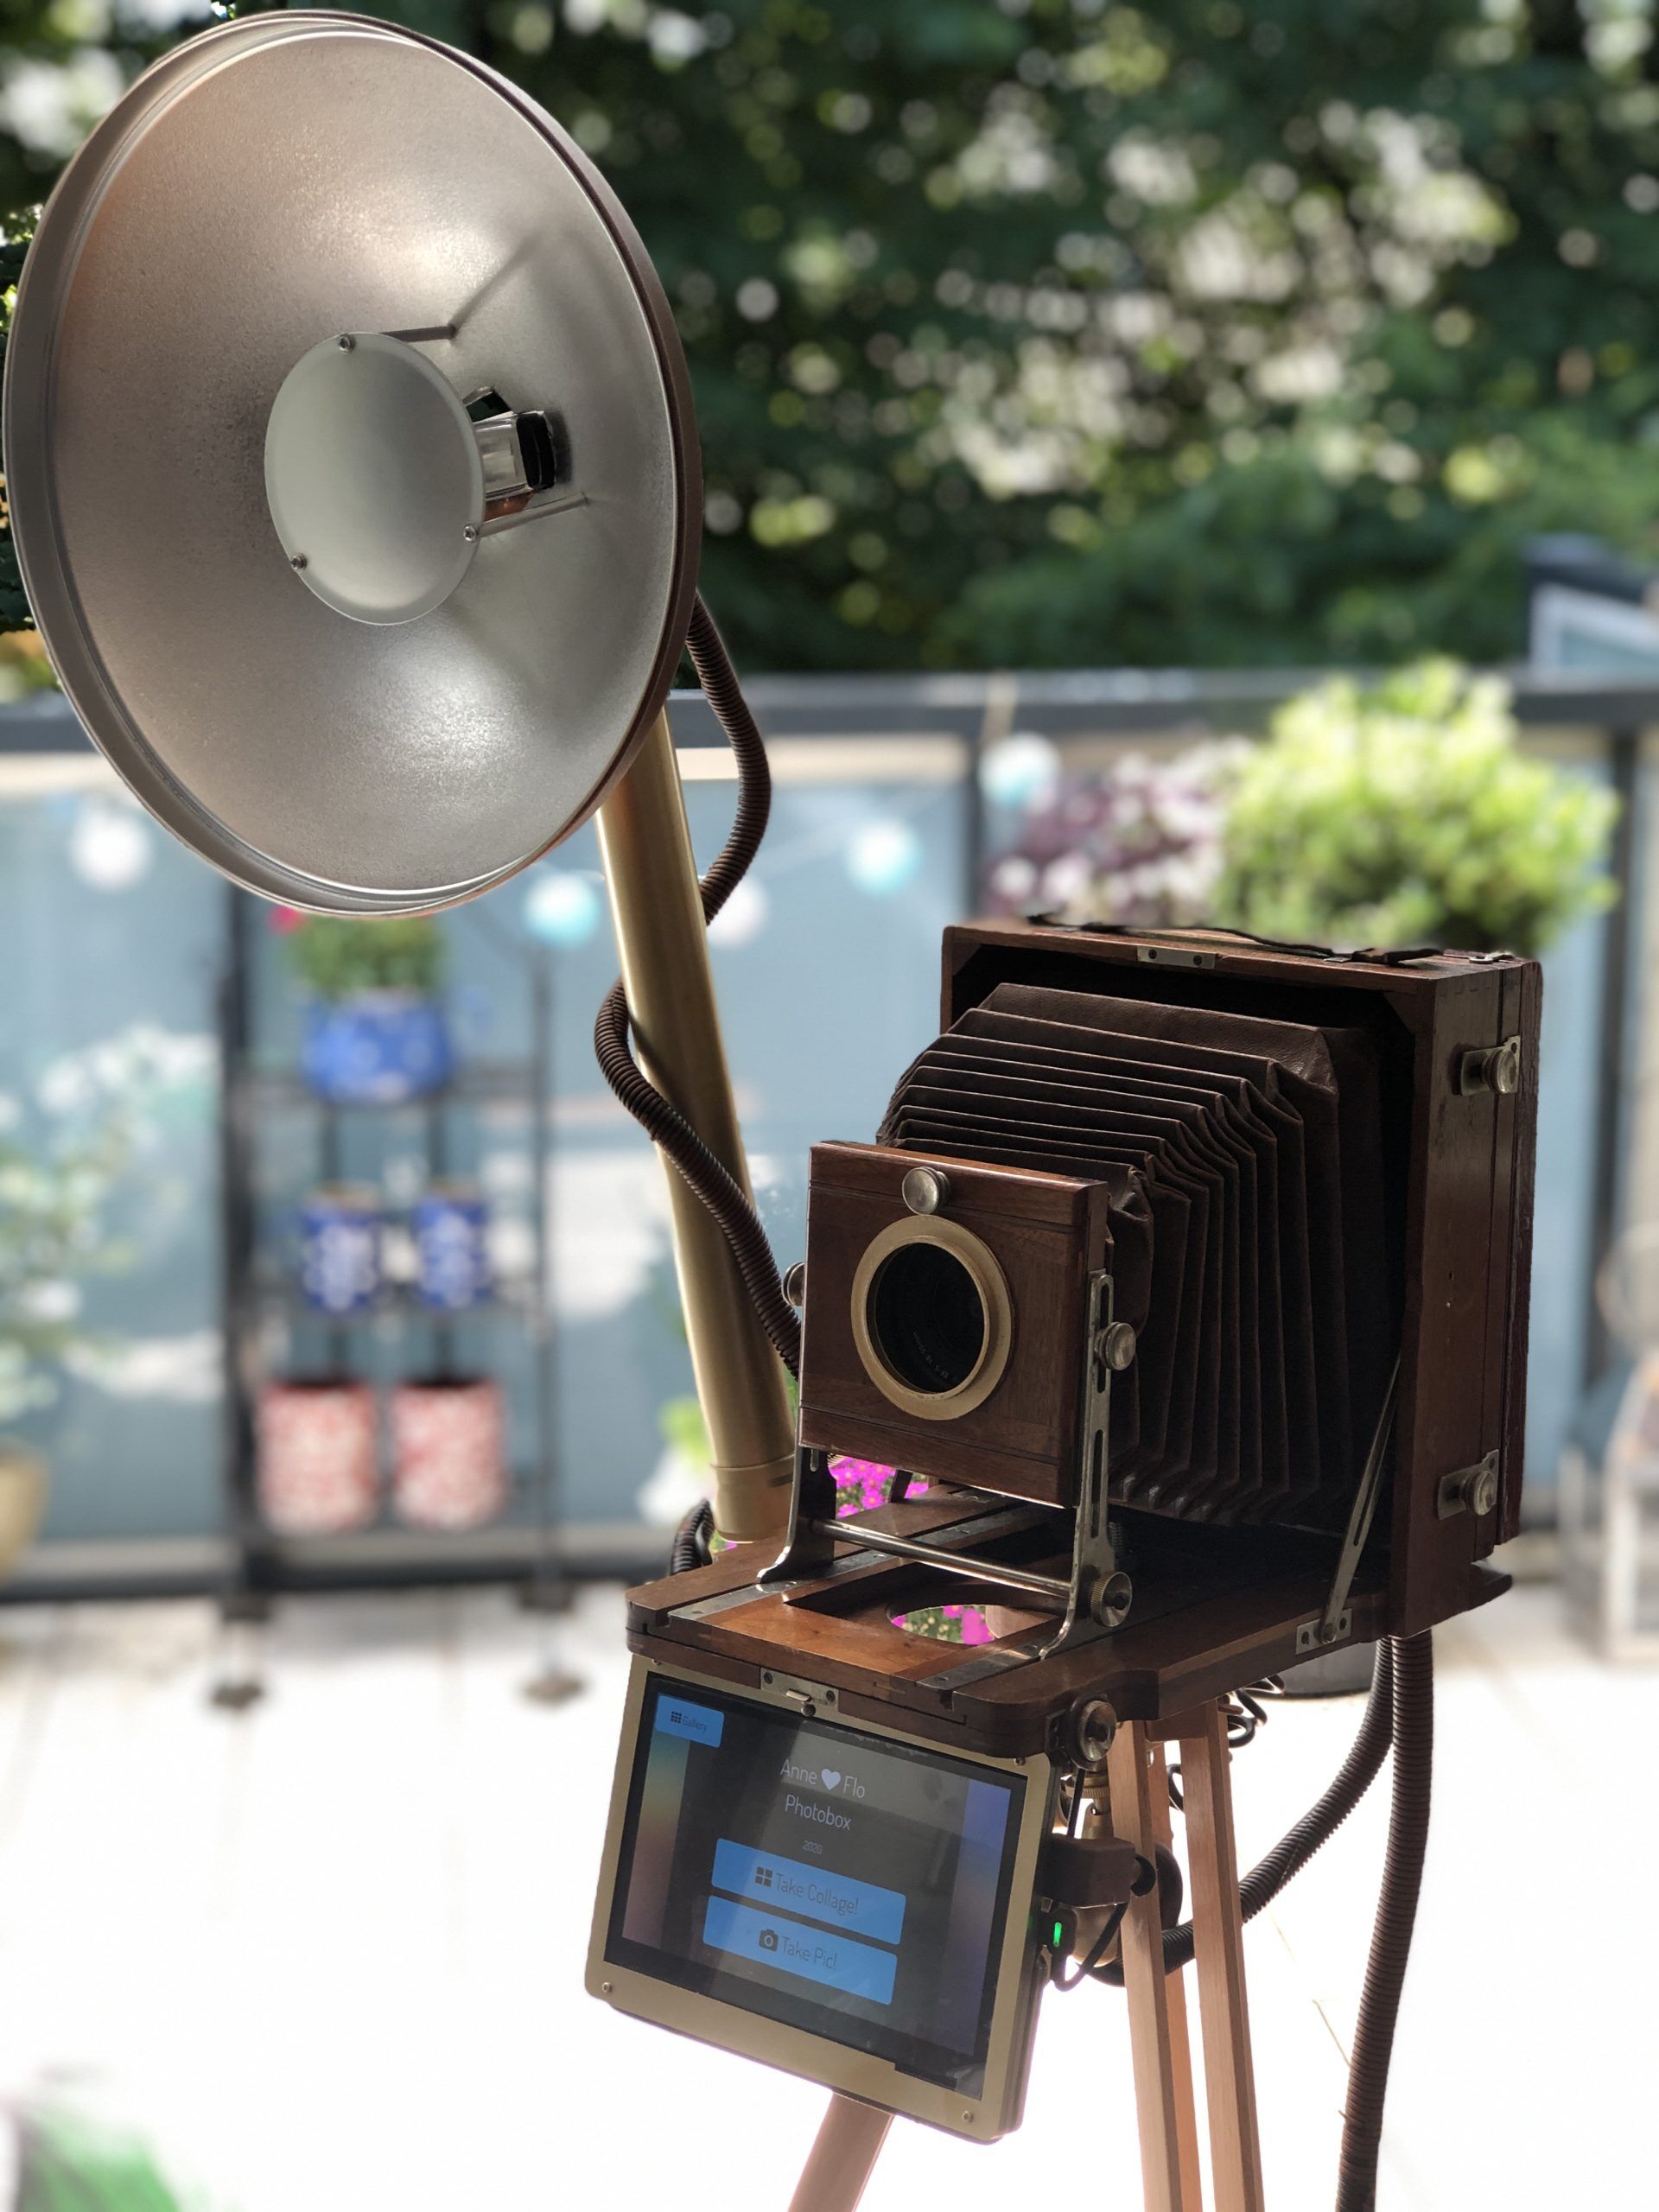
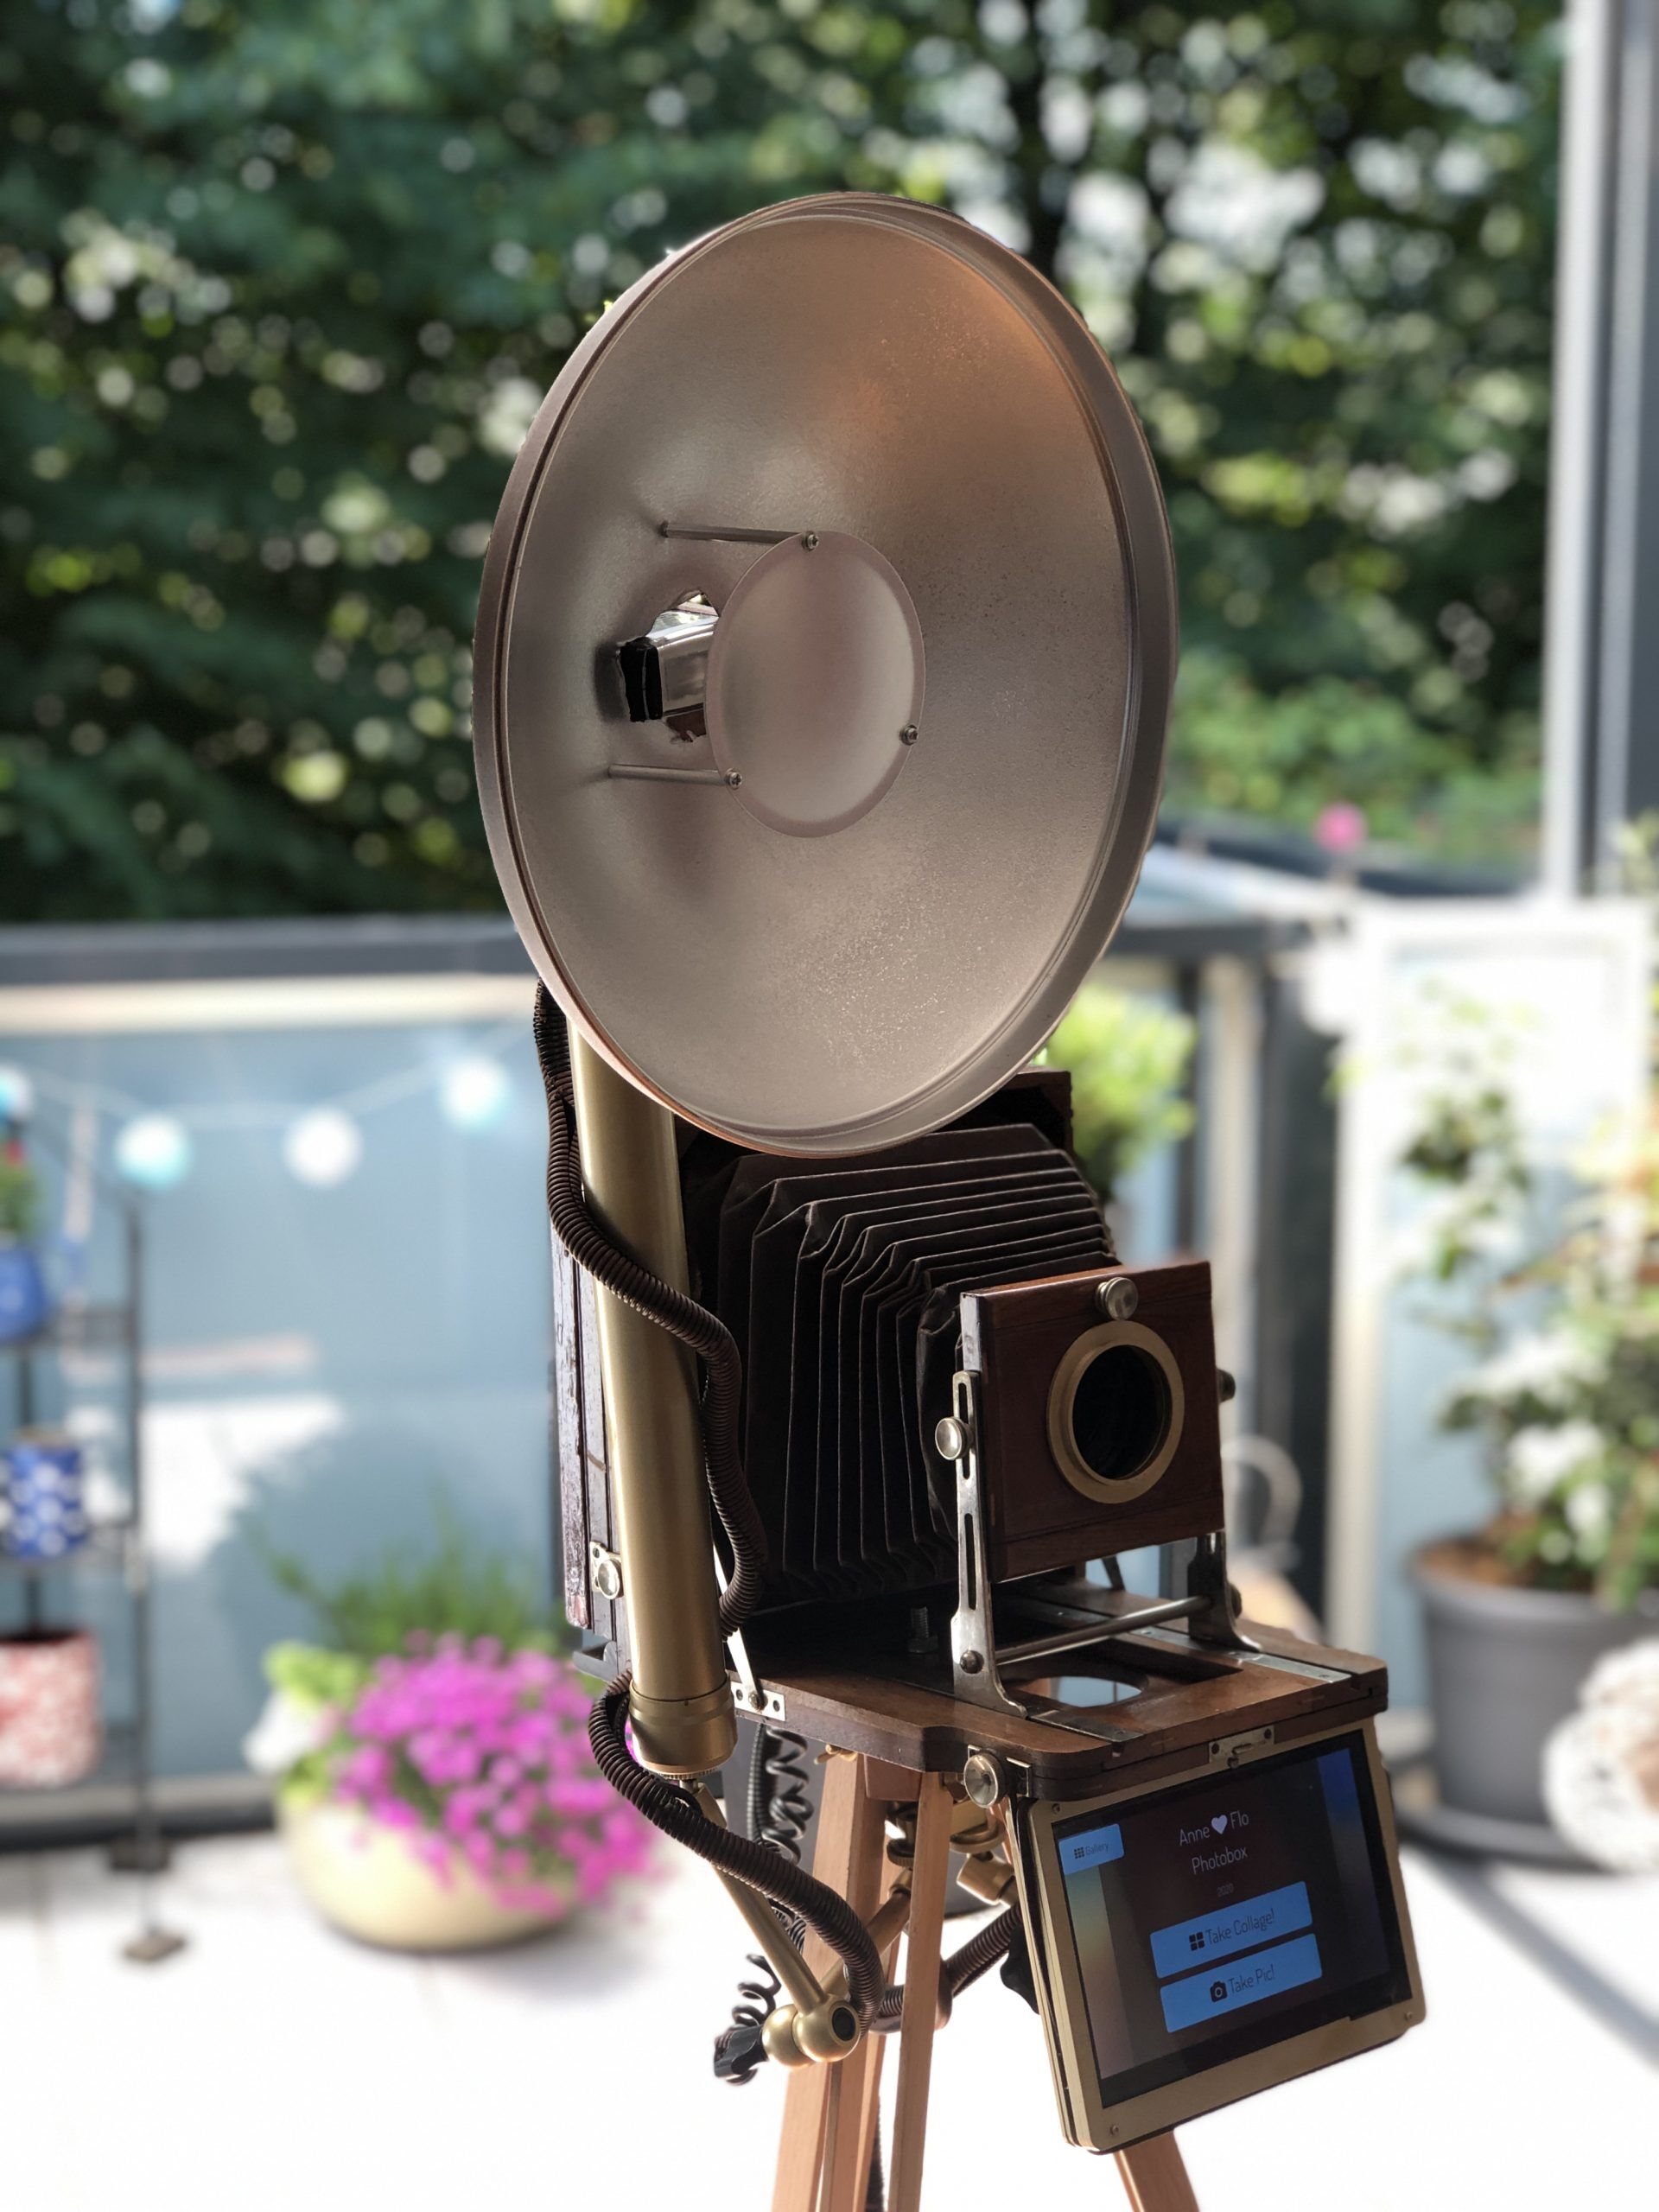
So the That was the point when everything came together nicely. Only thing left was making it pretty: coloring the parts, make them look vintage and make the cables disappear by making it look steampunky. The wobbly touchscreen got fixated with a leather strap and it sits tight now to withstand any pressure from drunken people 🙂 :

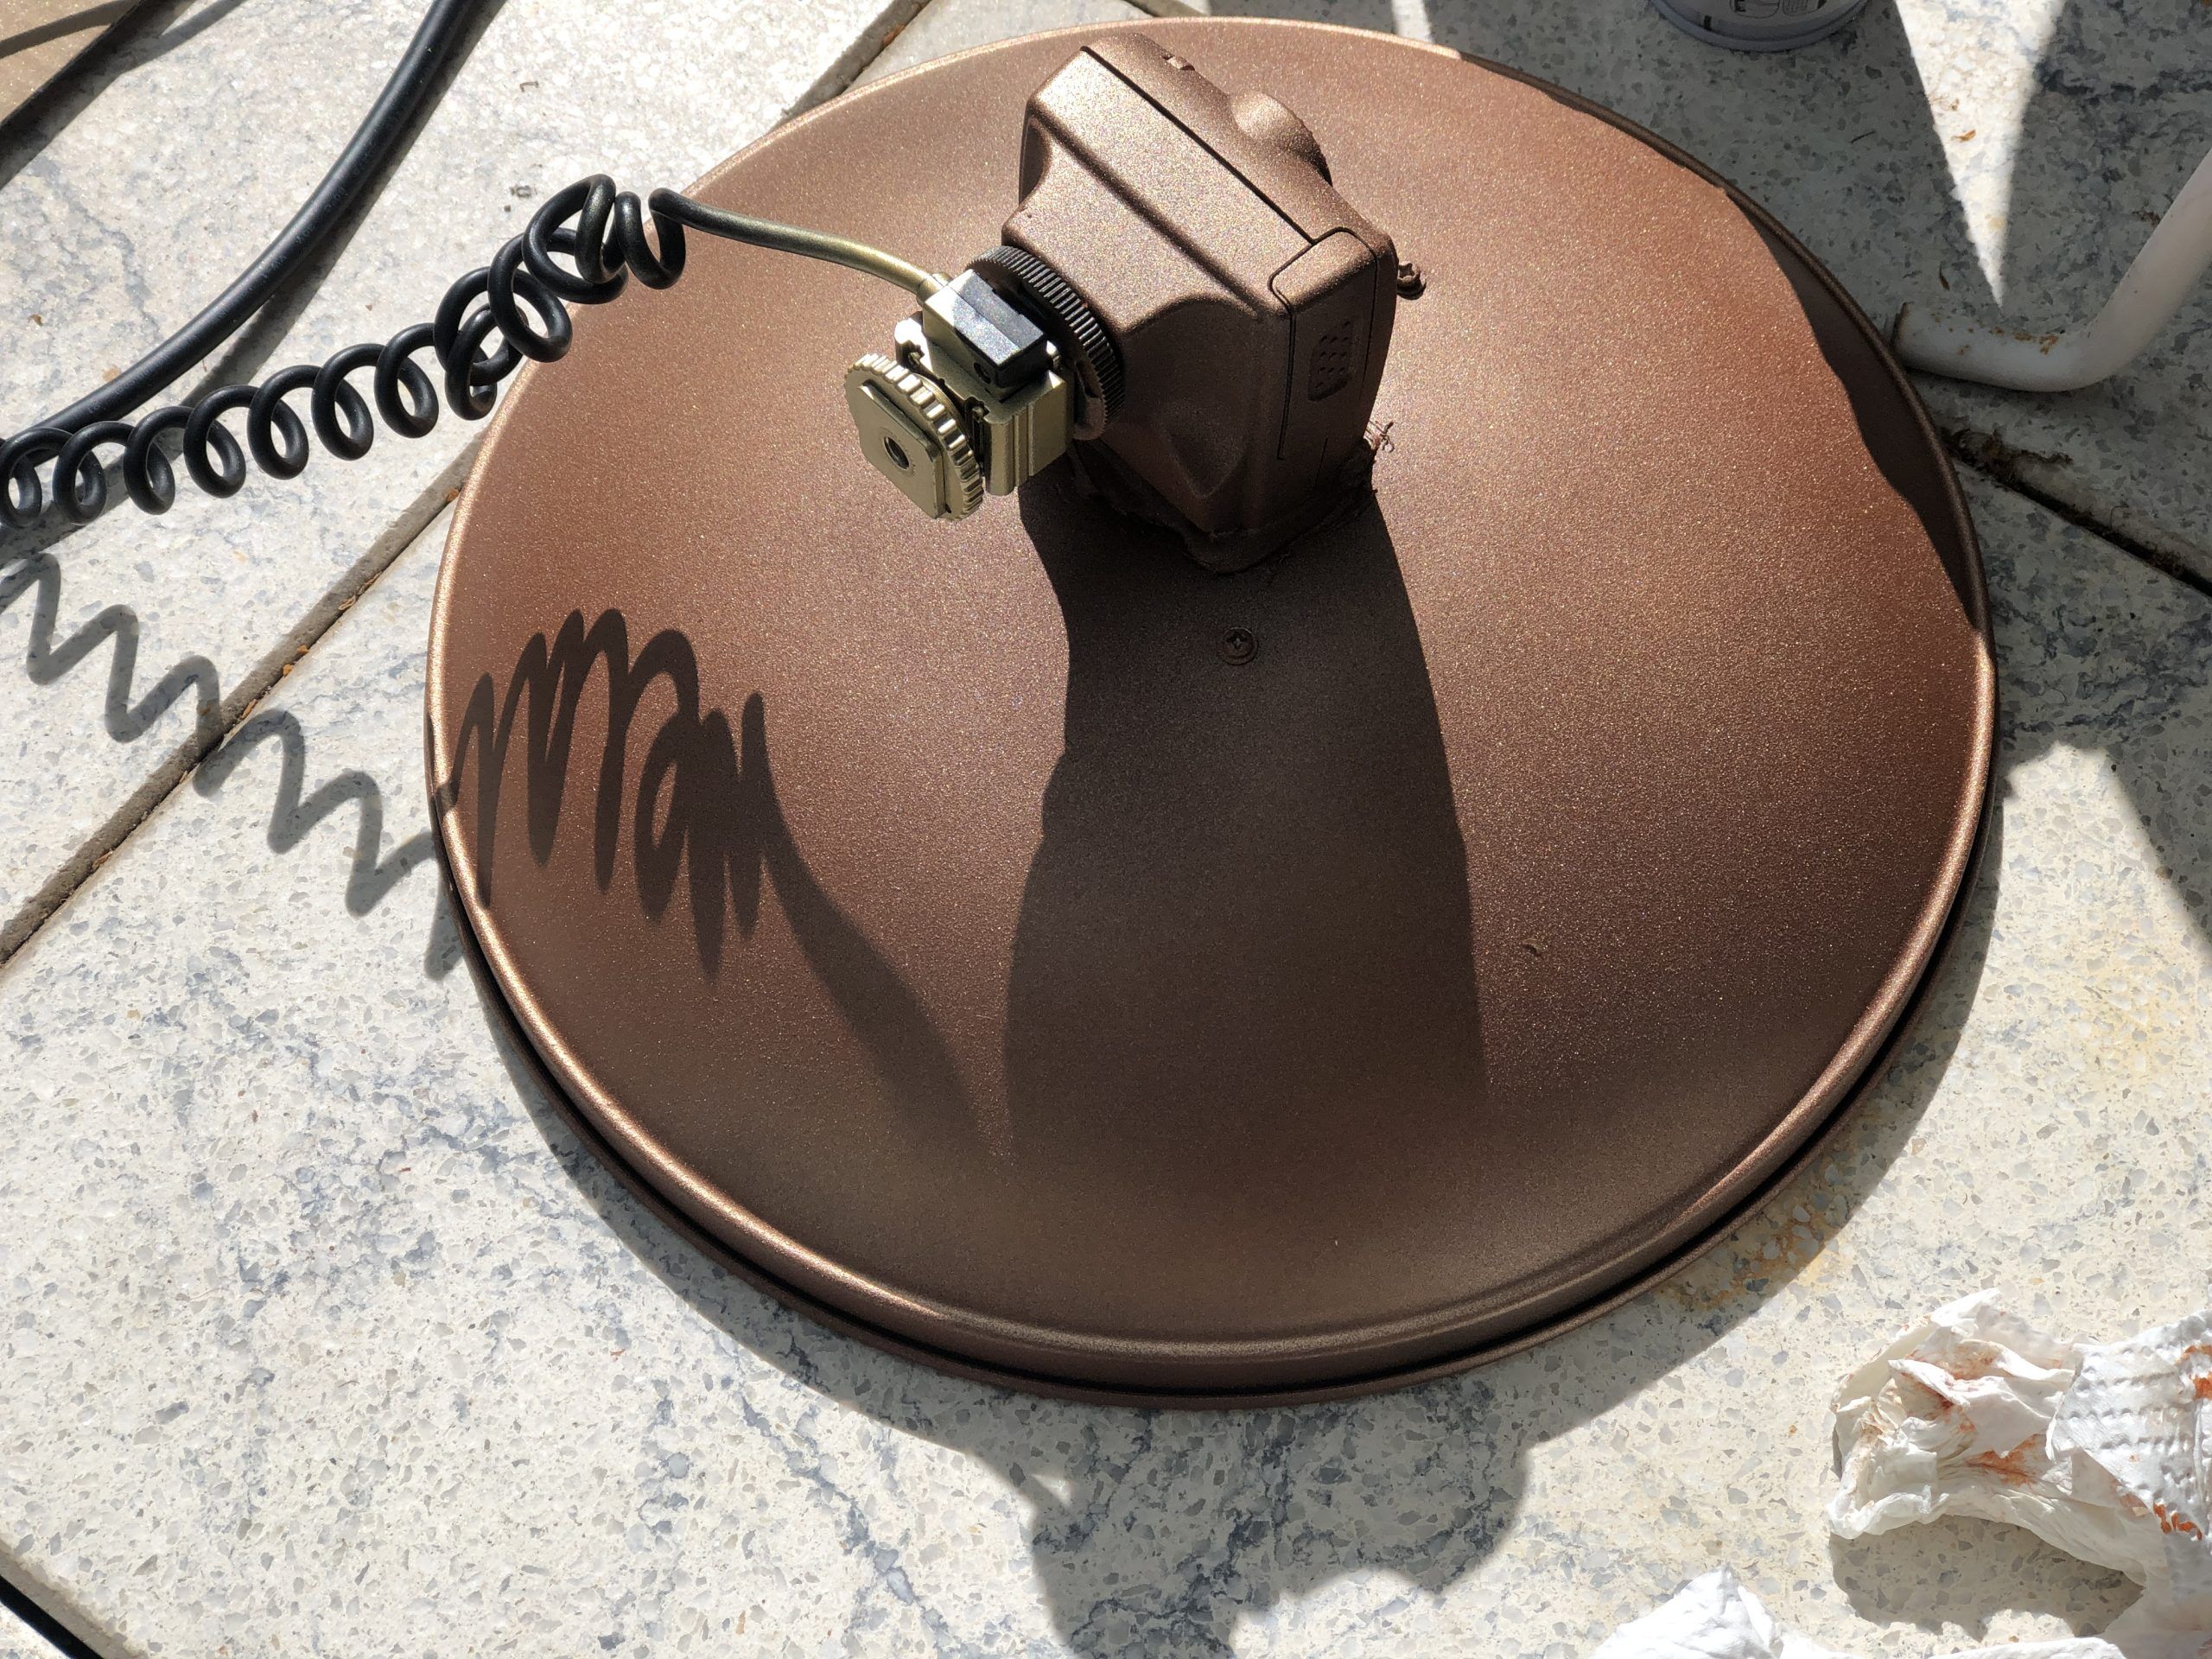


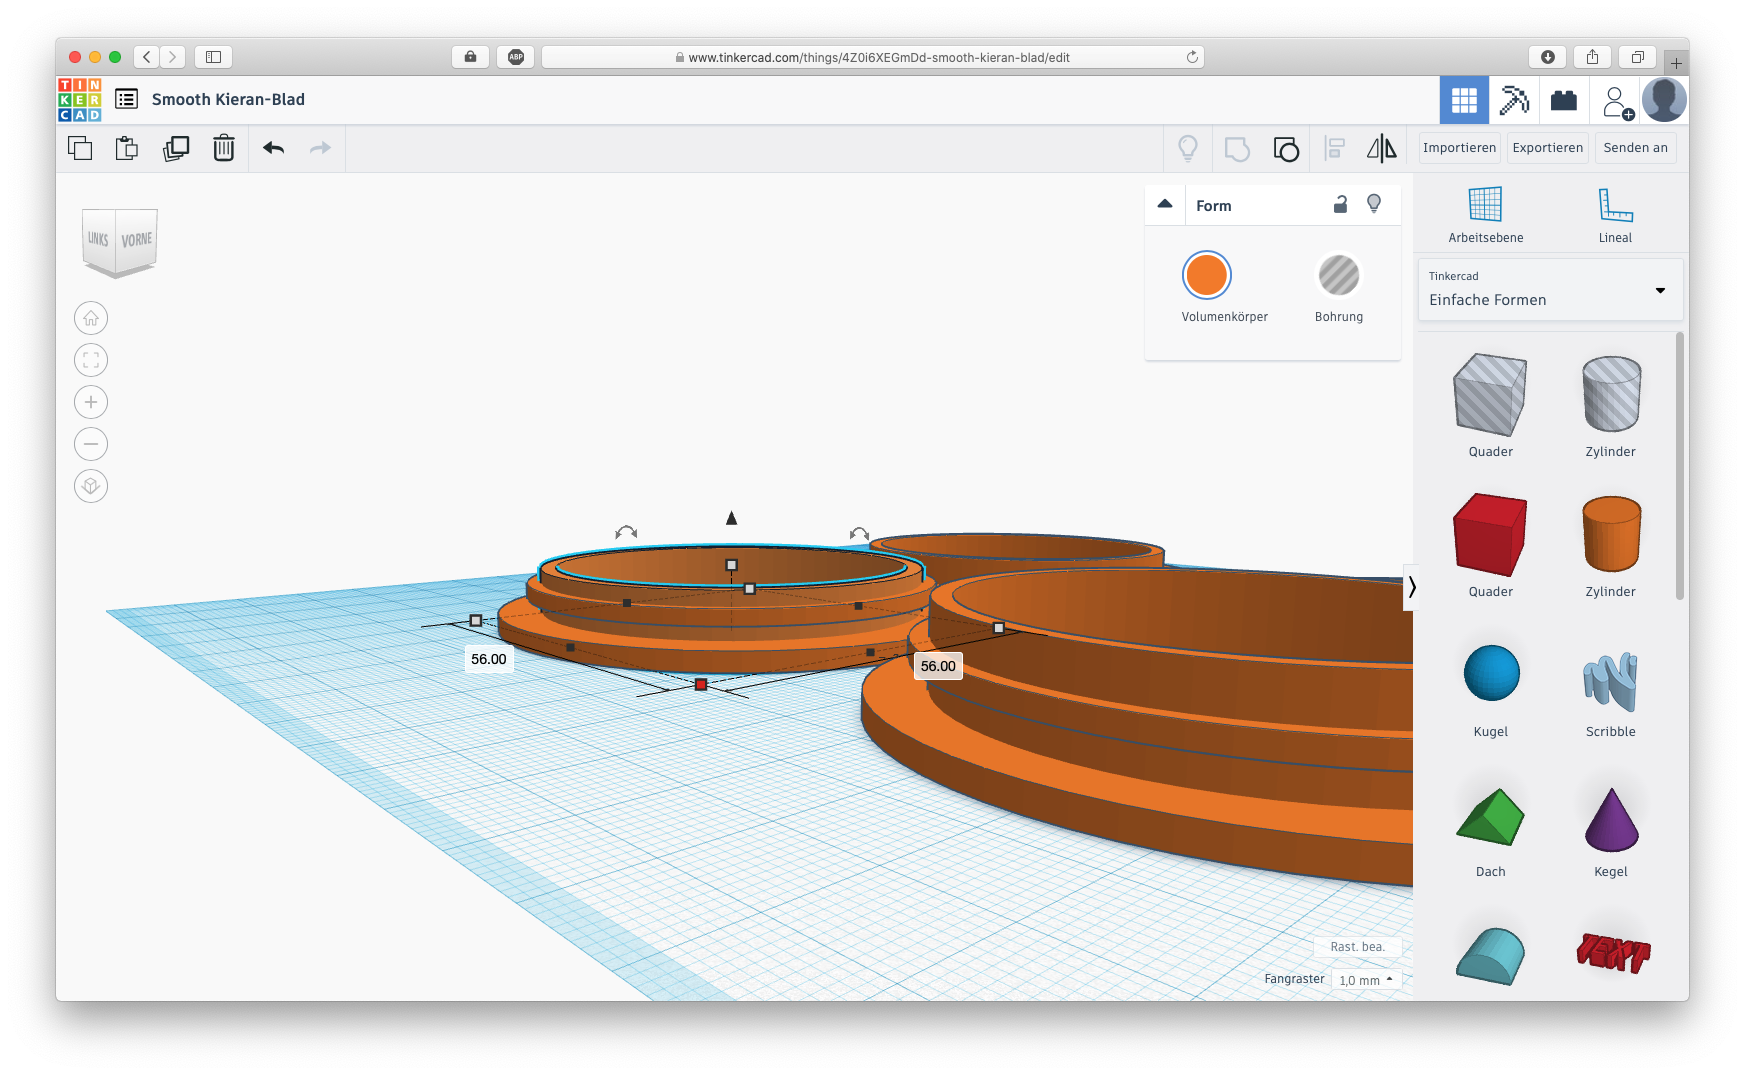
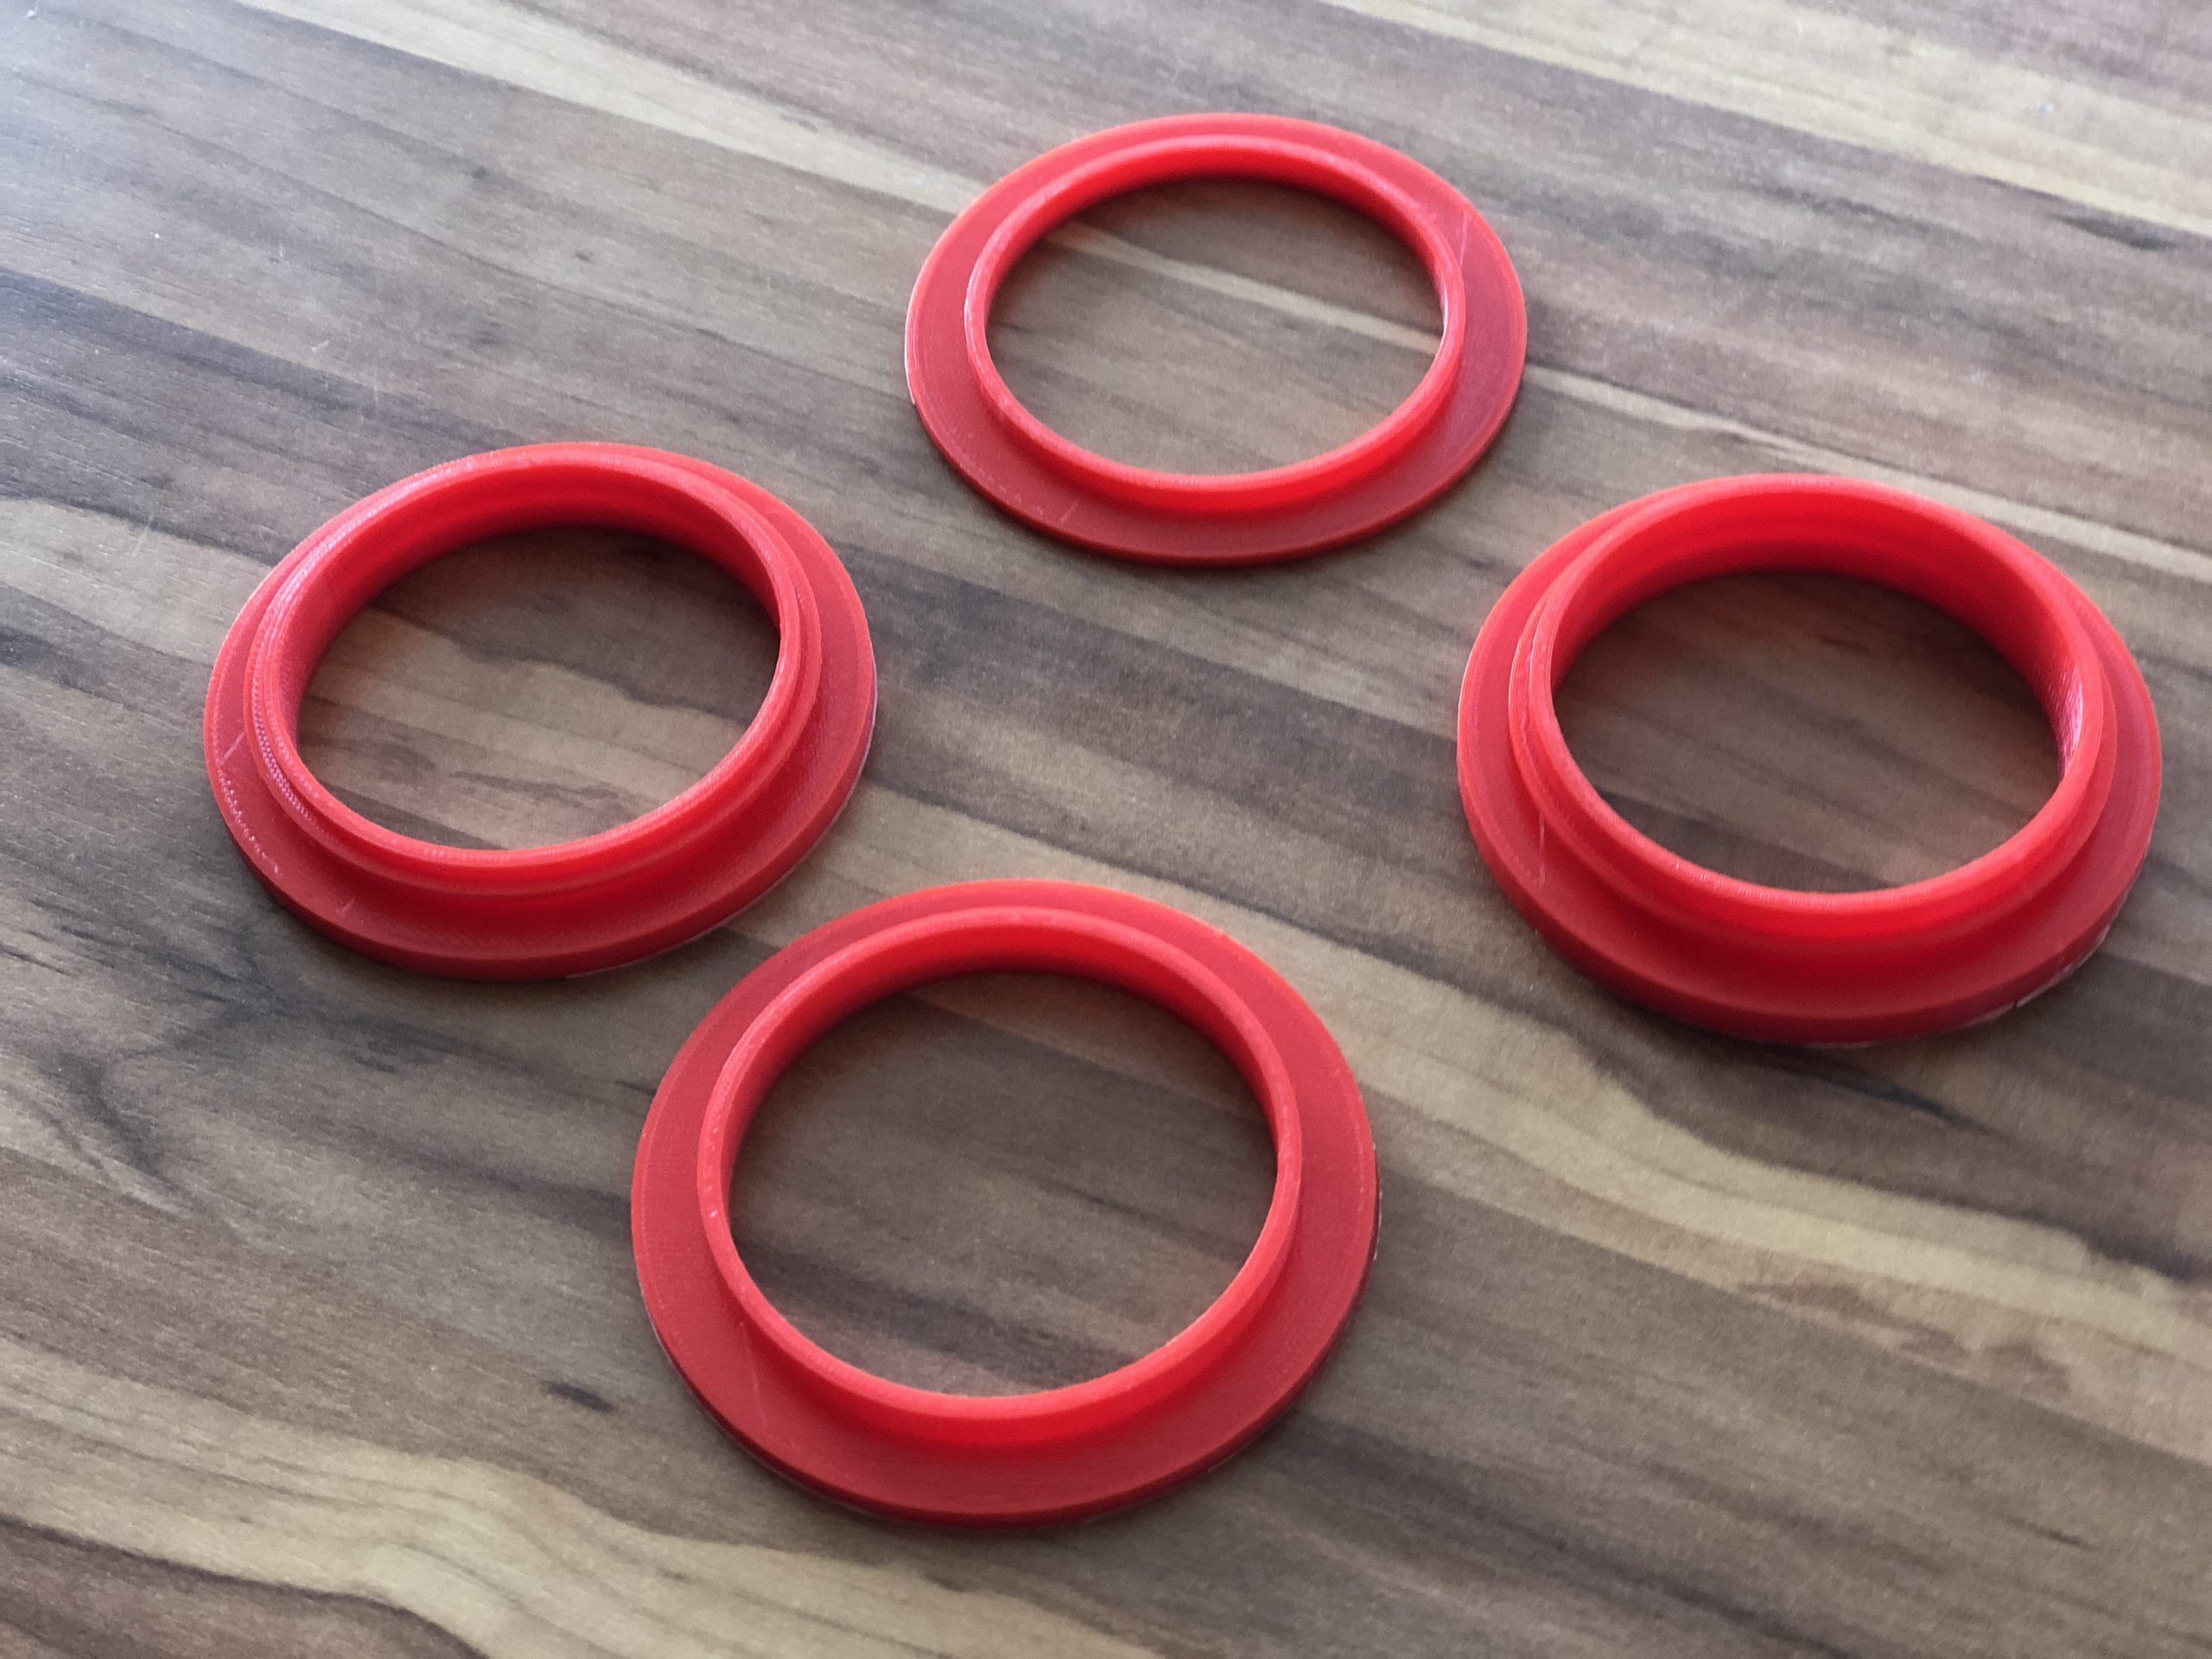
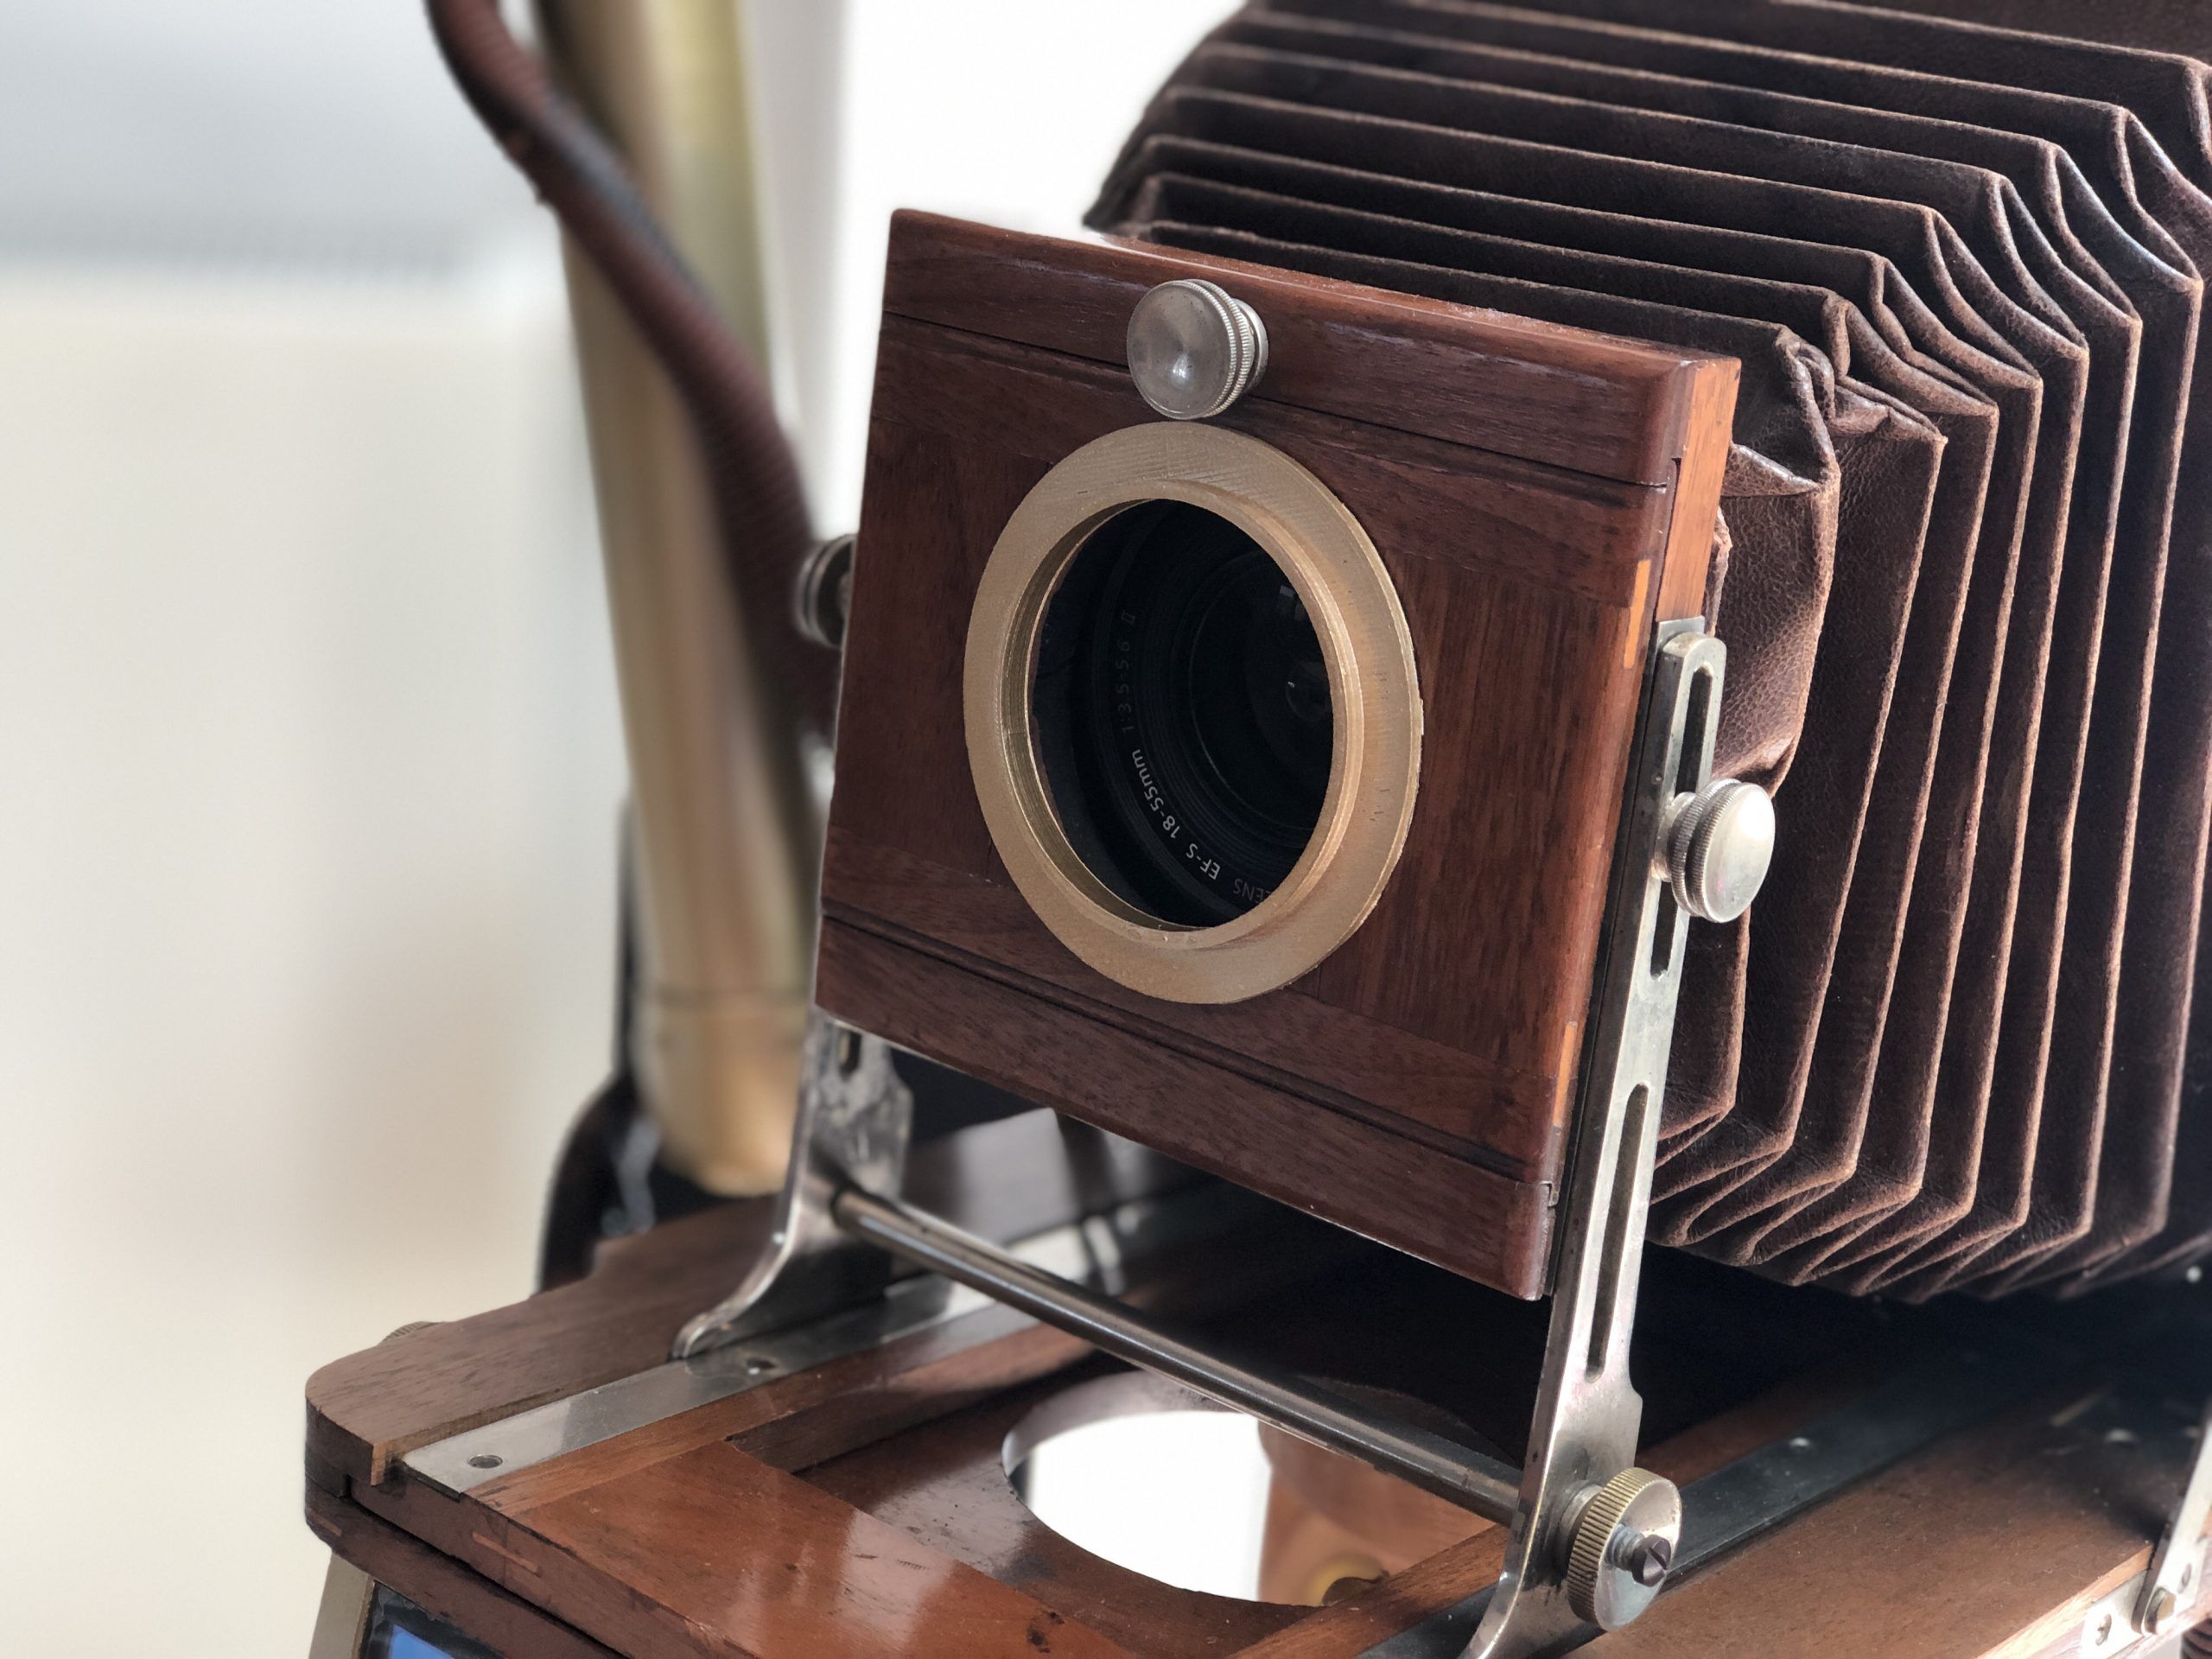
As a last finishing touch I wanted to recreate the golden lens effect on the front, that the original lens provided but I had to screw that off to make room for the real camera. So I put the measurements quickly in TinkerCAD and 3D printed some possible front parts. As I did not know how high it can be before it starts to get visible on the images of the camera, I just tried 4 different heights and spray painted it:
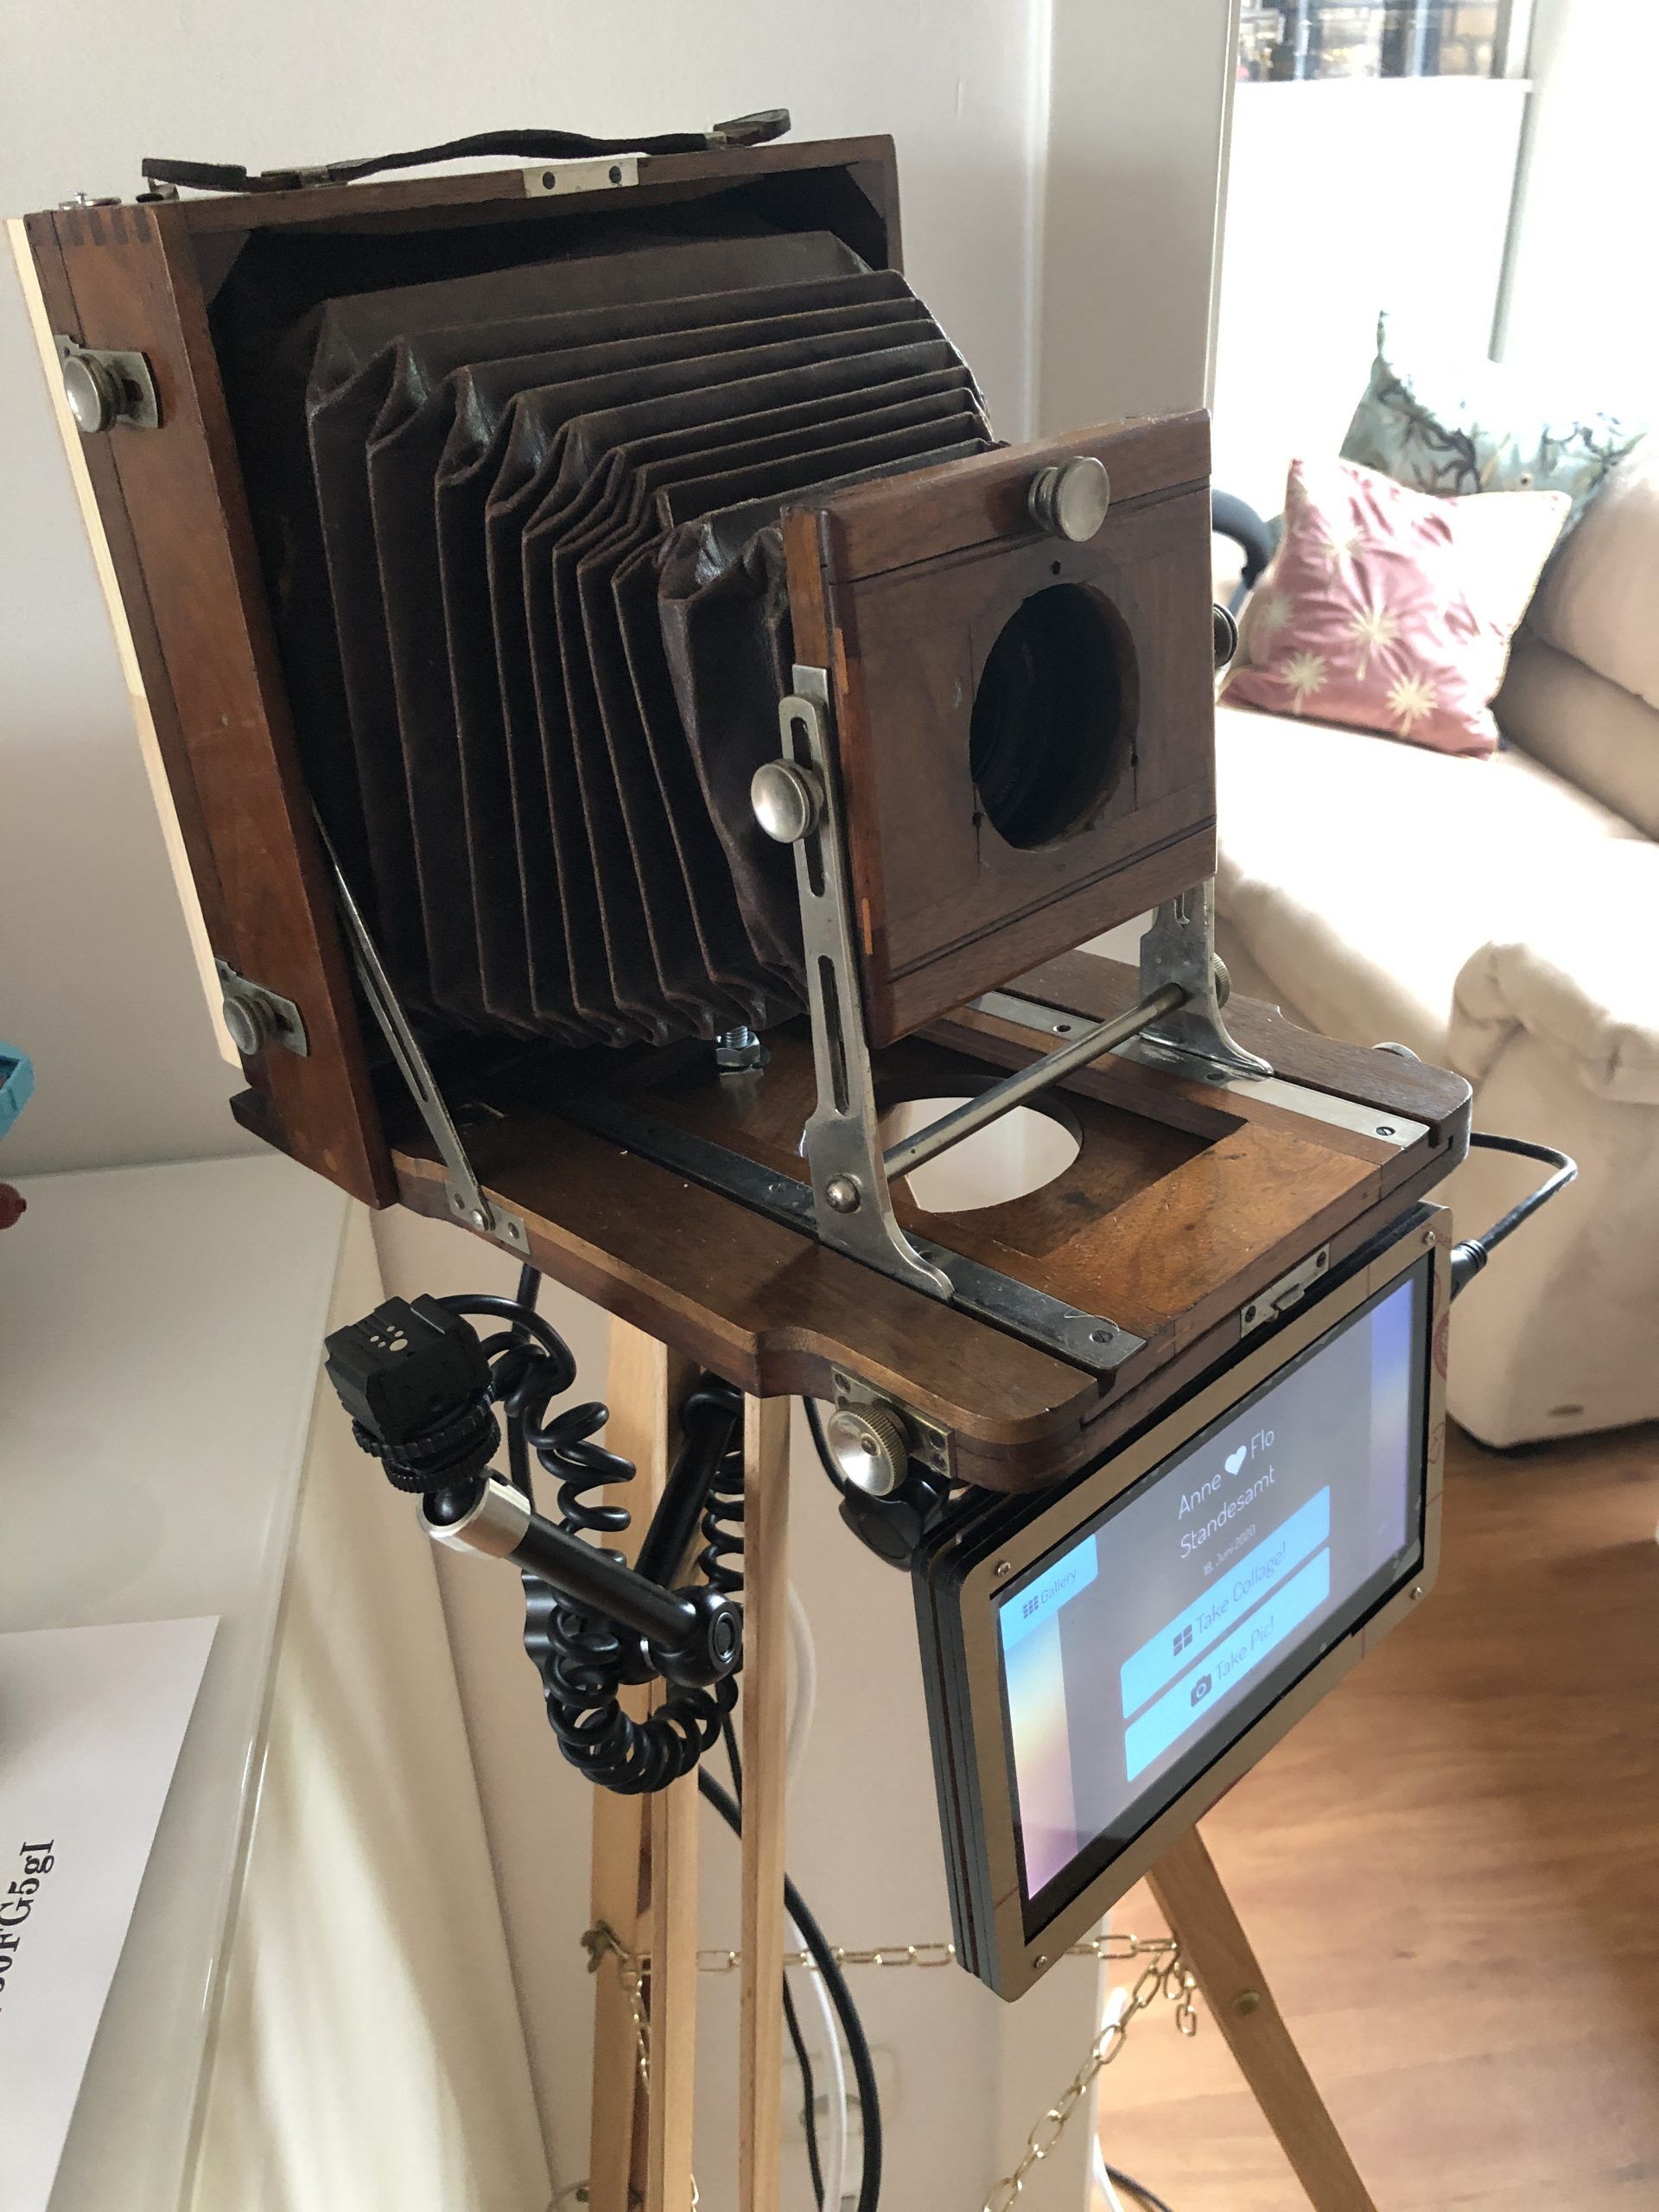
Thats it....camera ready to be decorative and with a nice function 🙂
Here are some final images for overall impression:
The software setup
After the hardware is clear, lets start with the software part. First you have to flash your SD card of the Pi with the latest version of Raspbian OS Lite. We want to run the box as light as possible, so we choose no extras and no GUI with the LITE version. I recommend tools like Etcher to flash the SDcard with the initial Raspbian OS LITE image.
When the flashing was successful make sure to create a blank file called "ssh" in the boot partition to have remote ssh available when you boot. If you want, you can also place a wpa_supplicant.conf file in the same spot with your wifi credentials to connect the pi automatically on boot with your wifi.
I normally only start with the ssh file for remote access and plug the Pi to a network cable. If you are ready, plug in the SDcard and boot the raspberry. Connect to it via ssh. Standard user will be "pi", password "raspberry":
ssh pi@your-pi-ipFirst we want to be up to date. So run:
sudo apt-get update
sudo apt-get -y upgrade
sudo apt-get -y dist-upgrade
sudo apt-get -y autoremove
sudo apt-get clean
Alternatively you can also use my pi update routine script here.
Next we config the pi via:
sudo raspi-configIn the upcoming menu we change the following:
- Localisation Options: Select your preferred locale (we simply keep the default), timezone, and keyboard layout.
- Change User Password: This is important – keeping the default password means your Pi will get owned faster than you can say “botnet” as soon as you connect it to the internet. (Make sure to have selected the correct keyboard layout before typing in the new password, though)
- Network Options: OPTIONAL: Configure WiFi as needed. Alternatively, you also configure WiFi manually using
wpa_passphraseif you don’t want your WiFi password stored on the Pi in clear text. - Boot Options: Select “Desktop / CLI” and then “Console Autologin”
- Interfacing Options: Enable SSH access if needed
- Advanced Options: Disable “Overscan” if the Pi’s output does not fill your screen completely
Save, exit & reboot with:
sudo rebootYour pi should login automatically now into the console after the reboot.
Install X with openbox and chrome for kiosk mode
For running the web application interface later on the touchscreen, we need a bare minimum of graphical interface components and libraries. Lets install X (x11) as our minimal display framework and openbox as our window manager:
sudo apt-get install --no-install-recommends xserver-xorg x11-xserver-utils xinit openboxNext we need a graphical application capable of running the web app. Lets use Chrome Webbrowser for this, as it is nice for Kiosk mode applications. Install it with:
sudo apt-get install --no-install-recommends chromium-browserNext we configure openbox:
sudo nano /etc/xdg/openbox/autostartwrite this in the config:
("http://localhost" is the url of your web application, if you change the application later you need to change it here as well to display the url on boot):
# Disable any form of screen saver / screen blanking / power management
xset s off
xset s noblank
xset -dpms

# Allow quitting the X server with CTRL-ATL-Backspace
setxkbmap -option terminate:ctrl_alt_bksp

# Start Chromium in kiosk mode
sed -i 's/"exited_cleanly":false/"exited_cleanly":true/' ~/.config/chromium/'Local State'
sed -i 's/"exited_cleanly":false/"exited_cleanly":true/; s/"exit_type":"[^"]\+"/"exit_type":"Normal"/' ~/.config/chromium/Default/Preferences
chromium-browser --check-for-update-interval=1 --simulate-critical-update --disable-infobars --kiosk 'http://localhost'
First we disable screen blanking and power management (we don’t want our screen to go blank or even turn off completely after some time).
Then we allow to quit the X server by pressing Ctrl-Alt-Backspace. (Because we didn’t install a desktop environment there won’t be a “Log out” button or the like.)
Finally we tell Openbox to start Chromium in kiosk mode. This turns out to be a bit intricate because Chromium loves to show various tool bubbles for session restore etc. The simplest way to avoid all of these seems to be tricking Chromium into thinking it exited cleanly last time it was run (see this answer on Super User for details).
Exit and save with STRG + X, confirm the saving with Y. Normally that is all you need. Anyway I was running into some issues and needed these additional steps to make it run properly. Edit:
sudo nano /etc/X11/Xwrapper.configThe file should be empty so place in the first line just this:
allowed_users = anybodyExit and save with STRG + X, confirm the saving with Y.
Also set the rights of Xorg differently and add user pi to the tty group:
sudo chmod u+s /usr/bin/Xorg
sudo usermod -a -G tty pi
This fixes a strange rigths issue with running X that might occur.
Now all is set and running X with chromium and a url in headless Kiosk mode should work just fine by running:
sudo DISPLAY=:0 startx -- -nocursorAfter a few seconds Chromium should appear showing the URL you specified. The -nocursor option tells X to not display any mouse cursor at all. Press Ctrl-Alt-Backspace to quite the X server, bringing you back into the text console.
As a last step of the basic setup we want to start X automatically on boot by adding it to our users bash profile:
sudo nano /home/pi/.bash_profileadd this single line there:
[[ -z $DISPLAY && $XDG_VTNR -eq 1 ]] && startx -- -nocursorExit and save with STRG + X, confirm the saving with Y.
Also lets create a chromium custom config to prevent the annoying update popup message that wants us to update the chrome browser:
sudo nano /etc/chromium-browser/customizations/01-disable-update-checkadd these lines there:
(THIS IS WORK IN PROGRESS, I STILL GET THE MESSAGE FROM TIME TO TIME)
#CHROMIUM_FLAGS="${CHROMIUM_FLAGS} --option=value"
##disable annoying update popup in chromium browser
CHROMIUM_FLAGS="${CHROMIUM_FLAGS}  --disable-component-update"
#alternative solution to disable update popup in chromium browser
#CHROMIUM_FLAGS="${CHROMIUM_FLAGS} --check-for-update-interval=31536000"
Reboot your pi to test if everything works as expected.
sudo rebootDSLR Camera setup with gphoto2
As this is a crucial step in our later installation, we should check if our camera is compatible and ready for the job, before continuing. If your camera is not supported you can already stop here and try get one that is 🙂
For this purpose we install gphoto2:
sudo apt install -y gphoto2After the install is complete we have a couple of commands ready to "talk" to our camera. First lets try some basics and see if the camera can be found:
gphoto2 --auto-detectThis should return:

Next lets get some more information:
gphoto2 --summaryThis gives us much more:
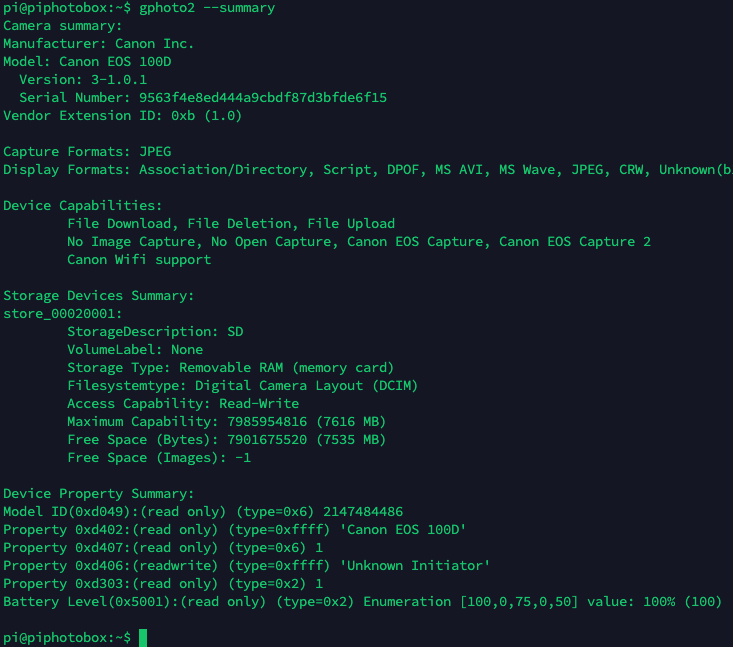
Great! Now we can already see that our camera is detected and supports most features of gphoto2. We continue now to test the most important needed features of the photobooth:
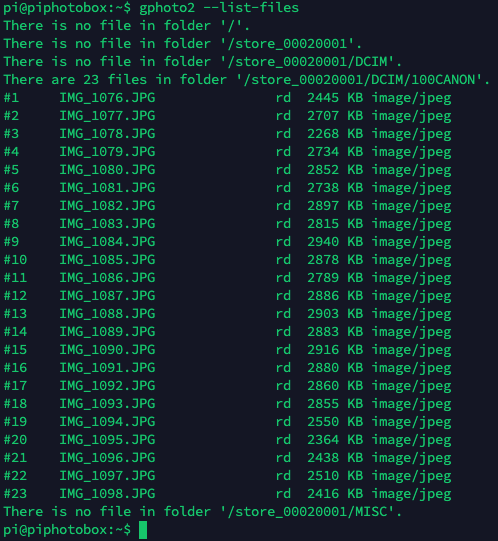
gphoto2 --list-filesThis gives us a list of taken pictures we can access:
Last we check if we can take a picture and receive it:
gphoto2 --capture-image-and-downloadThis should make the camera autofocus, take a picture, and return to you with:

Amazing! That means we have all needed functions ready on the camera and supported by gphoto2. We are now ready to proceed!
Hotspot install & setup with RT5370N USB module
To be able to connect to the photobooth pi even when we don't have any internet or other network connections, we setup a extra wifi module as a permanent hotspot, that always let us connect to that network and then still be able to ssh into the pi or controll its web application interface. For that purpose we are using this github install script which was initially commited by rudiratlos.
IMPORTANT: we need to be running this as SUPERUSER su. Enter it with:
sudo suGo to the location where we want to install:
cd /usr/local/sbinEnsure we remove any old stuff we might have still there:
rm hotspotNow checkout the script from github:
wget https://raw.githubusercontent.com/florianmueller/hotspot/master/hotspotNext make the script executable and ensure we are up to date with our repositories:
chmod +x hotspot
apt-get update
apt-get upgrade -y
Before we run the install script, we want to have a look at the script and change some parameters to our own settings:
nano hotspot- Line 10 set autostart="no" to autostart="yes"
- Line 16 set aptaddinstlist="tor openvpn" to aptaddinstlist="" (as we don't need tor and openvpn)
Save and exit the script file. You can also change the same settings via modpar.
hotspot modpar self autostart yes
hotspot modpar self aptaddinstlist ""
Or lets us it to set your own SSID and Password with:
hotspot setup
hotspot modpar hostapd ssid myHotspotID
hotspot modpar hostapd wpa_passphrase myHotspotPassword
hotspot modpar hostapd country_code SE
hotspot modpar crda REGDOMAIN SE

hotspot try
You can also leave the wifi settings to default, which automatically creates the hotspot with the following values:
ssid: <HOSTNAME>wlan-<MAC3ByteAdr> (e.g. RPIwlan-abcdef)
pwd: hallohallo
country: DE
We are now ready to start the hotspot setup and create all required scripts with our prior set parameters. Launch:
hotspot setup
hotspot try
After the script is done you should have a new WiFi now with the prior set settings. Again reboot your pi to see if everything works as expected after the reboot and the Wifi starts by itself:
rebootExtra note: if you want to turn the Wifi on or off later, for some exclusive LAN cable usage or to debug, you can do this:
### turn WiFi off:
sudo rfkill block wifi
### turn WiFi back on:
sudo rfkill unblock wifi
### check the status of your wireless communication interfaces:
sudo rfkill list all
CUPS & gutenprint unix drivers for printing
Next we install CUPS and gutenprint drivers to setup our photo printer. In my case a DNP 620a. We start with:
sudo apt install -y cups
sudo apt install -y cups-driver-gutenprint
Enable CUPS remote admin via web interface:
sudo cupsctl --remote-admin --remote-any --share-printersAdd user to lpadmin to configue printer.
sudo usermod -aG lpadmin piNext you also have to add your webserver user to the lp and lpadmin group:
sudo gpasswd -a www-data lp
sudo gpasswd -a www-data lpadmin
After success reboot the pi:
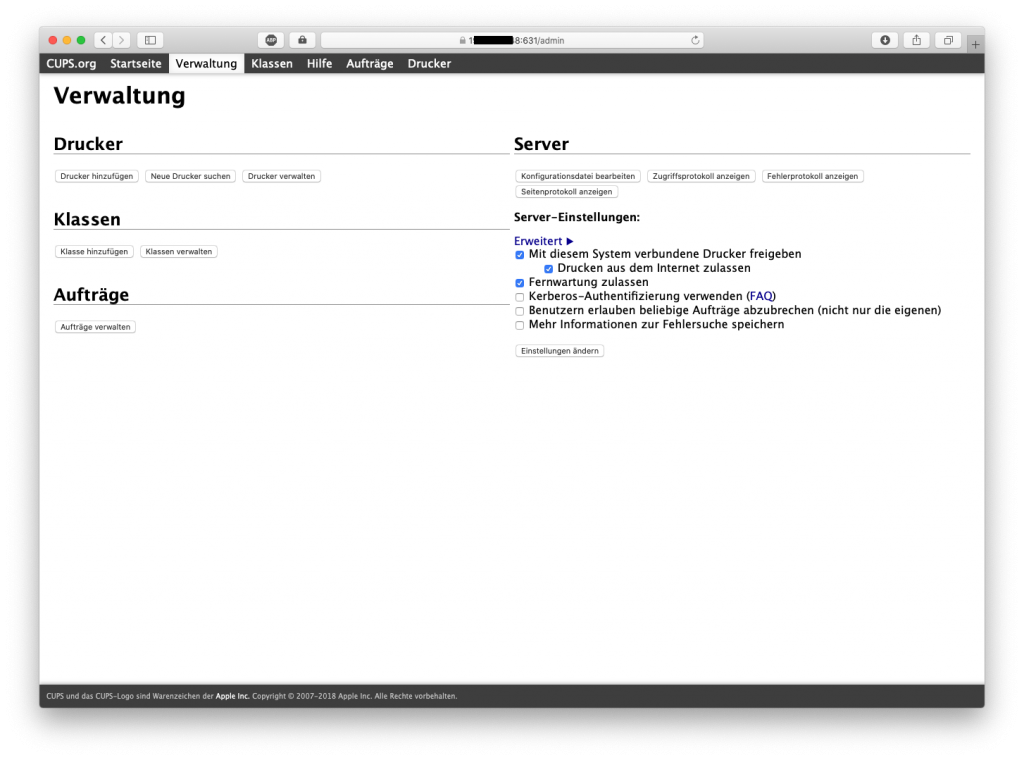
sudo rebootYou should now be able to see the CUPS webinterface under this URL in your browser:
https://YOUR-RASPBERRY-IP:631/In the web GUI you can now setup your connected printer and also share it via network and AirPrint to your users. In my case the gui looked something like this:
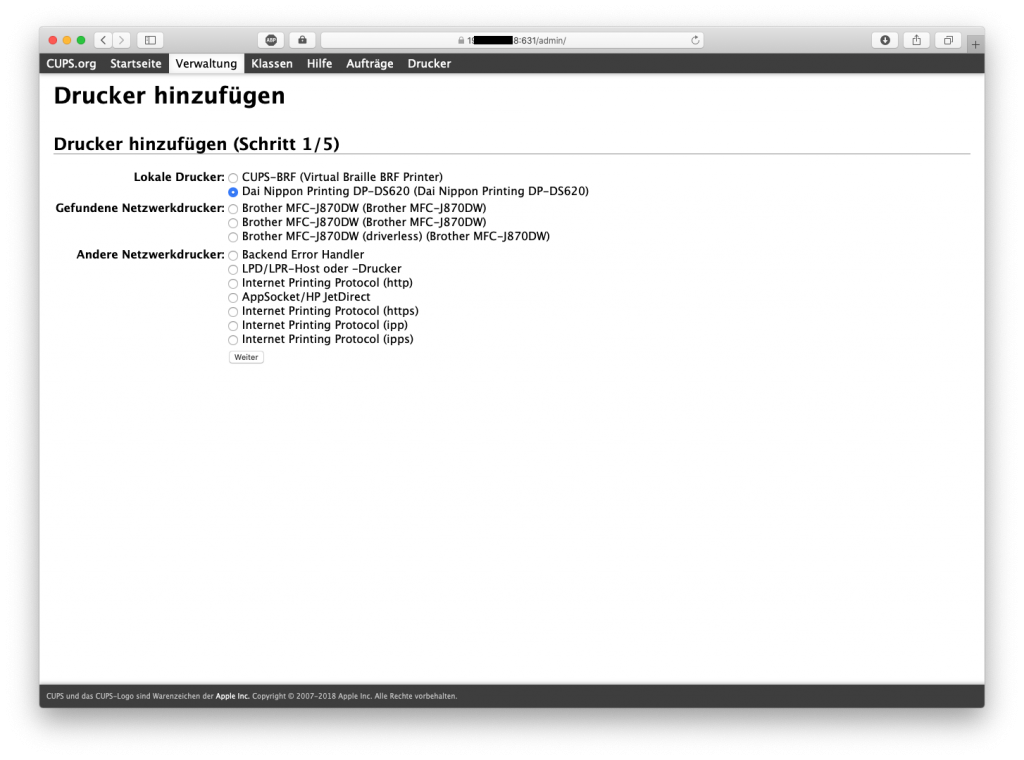
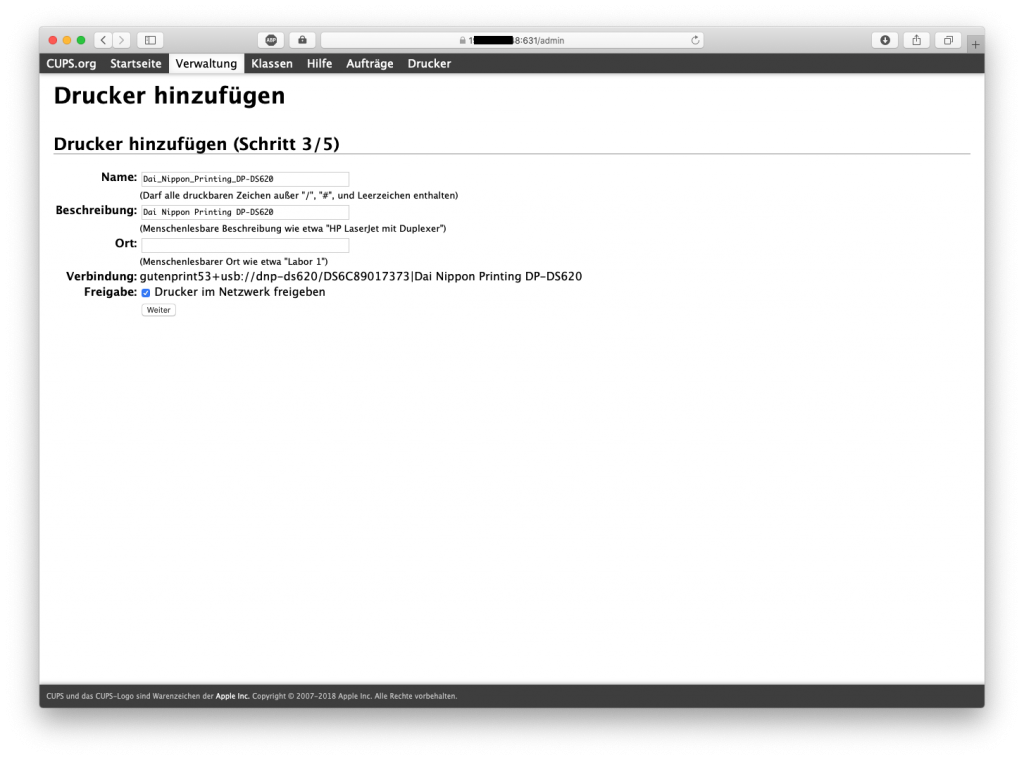
Once you have added your installed printer model, you should be ready for the final setup of the photobooth web application.
Install the photobooth web application
Now we come the the core part of the photobooth, the web application. After a lot of exploration and tryouts I settled upon the very brilliant Photobooth application by Andre Rinas. it has a great admin interface, lots of options and the github community is very responsive and active in its development. The only thing I could not solve with the guys on github is the Live Preview feature, so people se themself on the touchscreen before taking a picture. Unfortunatly gphoto2 has only 1 line available to the camera, so it either takes a picture or streams the webcam video feed. One attempt to solve was to always stop and start the livestream to the touchscreen when you take a picture, so the lane is free for the take-picture command. But besides this feature I think everything about this web application is great. So lets get started with the install:
wget https://raw.githubusercontent.com/andreknieriem/photobooth/master/install-raspbian.sh
sudo bash install-raspbian.sh
By default NGINX is used as a lightweight Webserver. To use Apache run sudo bash install-raspbian.sh apache , To use Lighttpd as Webserver run sudo bash install-raspbian.sh lighttpd.
While the installation runs the script might ask you if this is the only nginx application running and also if we want to compile with the latest github code from source, instead of using a slightly older stable release build. We answer the first with yes, and the second with no. After the script is done you should restart your Pi and then see the new web application running under:
http://localhost/
or
http://YOUR-PI-IP-ADDRESS/
To change the settings of the GUI access the admin interface via:
http://localhost/admin/
or
http://YOUR-PI-IP-ADDRESS/admin/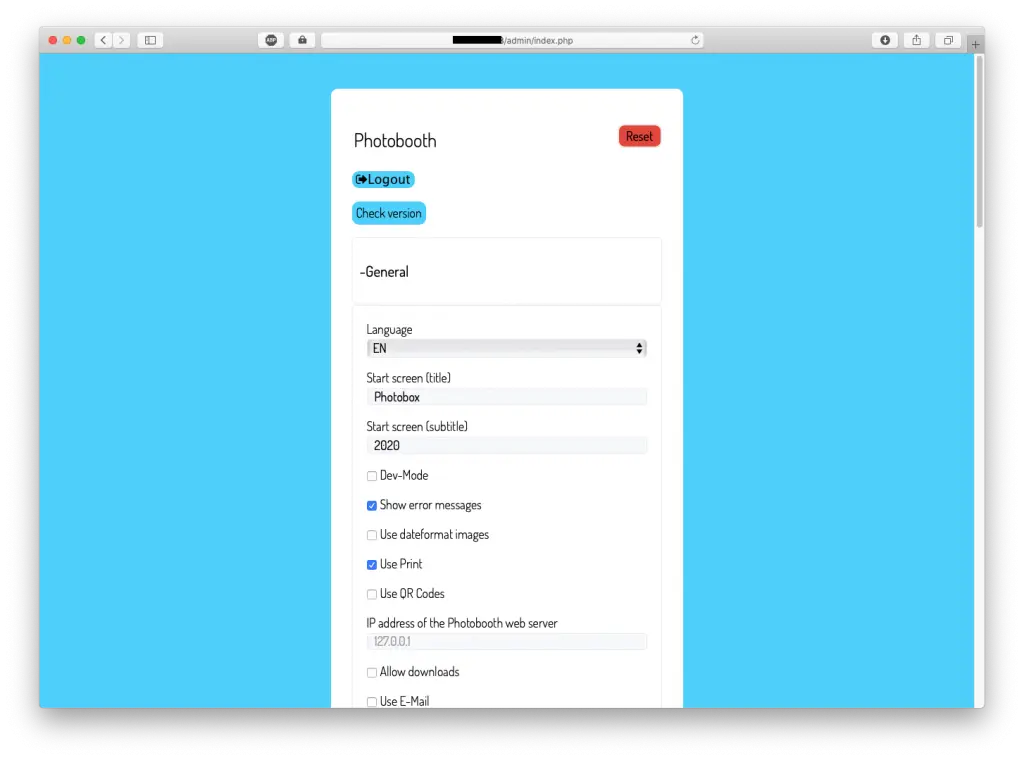
This opens the admin interface where you can change and customize a lot, but should definitely change these settings:
- -General: check the box for "use print"
- -General: uncheck the box for "use QR codes"
- -General: set "Cheeeeeeeese!-Timer in milliseconds" to "500"
- -General: uncheck "Allow image filter"
- -General: uncheck "Polaroid effect"
- -General: check "Allow photo collage"
- -General: set "Collage-countdown timer in seconds" to "3"
- -JPEG quality: if you print, THIS IS IMPORTANT: set "JPEG quality for images " to "100". Otherwise prints look crap on a photo printer.
- -User interface: set "Default font size" to "18px" as 7 inch touchscreen is very much unreadable below that value
- -Login: check "Enable login"
- -Login: set username and password
- -Gallery: check "Show Gallery"
- -Reset: THIS IS IMPORTANT: If you only want to delete images without deleting the settings super important to:
- uncheck "Delete "mail-addresses.txt""
- uncheck "Delete personal configuration (my.config.inc.php)"
You can explore and read much more about the many features of this great application. Please see the wiki here.
Congratulations, you are now set and done! Try taking some pictures with your photobox and the touchscreen!
Dropbox autosync script
Last but not least we want to add a nice comfort feature for our guests: automatic picture sync with dropbox, so we can share a short URL during the party, that points to a shared dropbox folder, to which we sync every 1 minute our pictures from the photobooth.
For this I use a little sync script that you can find here, initially committed by aicpp. Lets start with installing python and pip:
sudo apt install python-pipNow we need the pip dropbox library:
pip install dropboxTime to download the script from github. Make sure we are in our home dir and download:
cd /home/pi/
wget https://github.com/florianmueller/cloudsync/archive/master.zip
Unzip the master.zip to /cloudsync/ folder:
unzip ./master.zip
mv /home/pi/cloudsync-master/ /home/pi/cloudsync/
Create our personal script where we define our Dropbox API key and Dropbox target folder, as well as the source on the pi:
nano /home/pi/cloudsync/photobox-sync.shInsert this to the newly created empty file:
/home/pi/cloudsync/cloudsync.py \
    --token "YOUR-DROPBOX-API-KEY“ \
    --localdir /var/www/html/data/images \
    --dropboxdir "/uploads" \
    --direction "todropbox" \
    --match-days 360
If you don't have a Dropbox access token yet, generate your Dropbox API access token. Here’s how to do it:
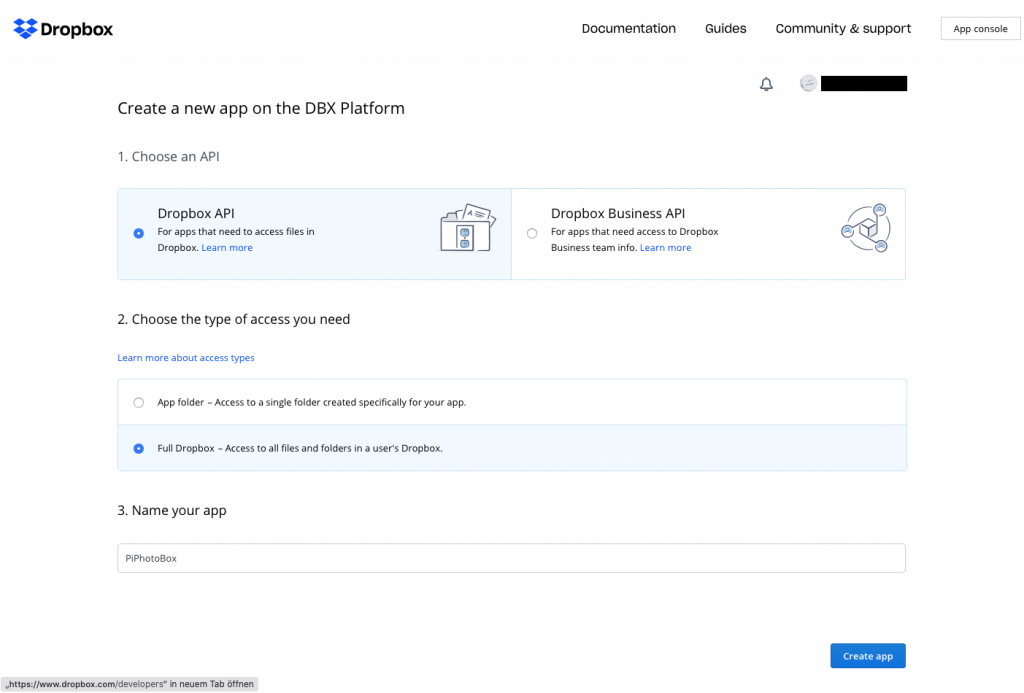
STEP 1: Create an app in your Dropbox account
- Go to https://www.dropbox.com/developers/apps/create
- Authorize, if you weren’t.
- Choose Dropbox API on the first step.
- Choose Full Dropbox access on the second.
- Give your app a name. That name will become a folder in your Dropbox account.
- Push ‘Create app’ button.
STEP2: Generate access token
You’ll be presented with your app’s settings.
- Scroll down to ‘OAuth 2’ block and hit ‘Generate’ button near ‘Generated access token’ text.
- After the token is generated you’ll see a string of letters and numbers, which looks something like this:
fkeqazcnlytdghf2hgfjh41hfghjhgk1jhk11fhyiko11ghkllre6ooo111fghewwThis is your Dropbox API access token . You should now hand over this token to your developer.
You can get acquainted with the possibilities of Dropbox API using their API explorer.
Now insert the API Key in the above script under "YOUR-DROPBOX-API-KEY" and set the path to your folders right.
Important is, that you have to create the folders on the dropbox first manually to be able to sync to it. So in our example we need to go to our Dropbox account, and browse to the folder:
(Note: "PiPhotoBox" is the name of the application we created prior with the API key)
/Apps/PiPhotoBox/Create a now folder there called "uploads" so we have now this folder available:
/Apps/PiPhotoBox/uploads/If you want you can also already share that folder and send the URL to your friends that should have access to it.
Now that all your settings in /home/pi/cloudsync/photobox-sync.sh are done, close and save the file with STRG + X and confirm save with Y.
Now before we can do a test sync, we need to make this script executable:
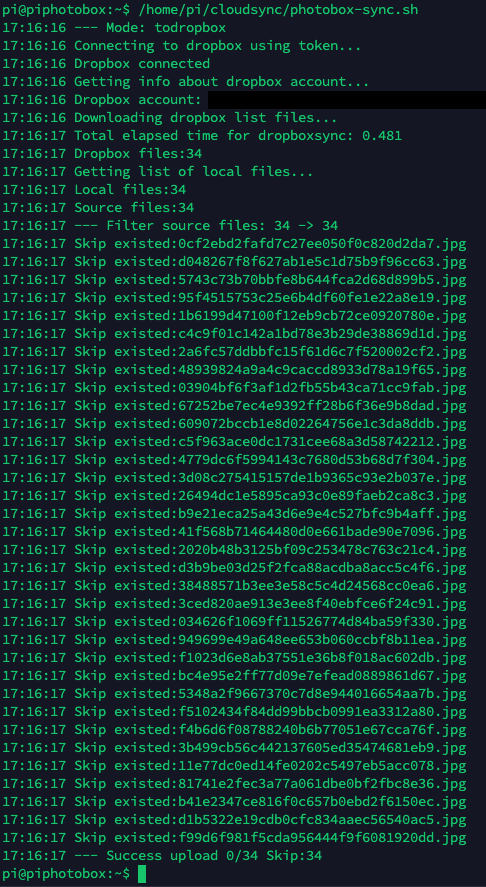
chmod +x /home/pi/cloudsync/photobox-sync.shNow run the script with:
/home/pi/cloudsync/photobox-sync.shThis should give you something similar to this:
Great! Last thing is to make the the sync run automatically every minute. For this we use crontab and create a cron job:
crontab -eIf it asks for what editor to use, take option "1", nano. Confirm your selection with ENTER and scroll to the last line of the crontab file. Add these two lines there:
## RUN DROPBOX UPLOAD SCRIPT EVERY MINUTE:
* * * * * /home/pi/cloudsync/photobox-sync.sh
Save and exit with STRG + X and confirm with Y.
If you want to change the upload folder at a later time for a new event or party, you unfortunately need to edit /home/pi/cloudsync/photobox-sync.sh and change the line:
--dropboxdir "/uploads" \to whatever you want as a new folder. You also need to create taht folder then in your dropbox account. This gets hopefully integrated better in later versions into the interface of the Photobooth application.
Optional: easy folder maintenance with netatalk and afp
Sometimes you just want to quickly get a file over to the pi or delete a individual image on the photobox. As of today thats not possible to do over the gallery, I found it very handy to have smb or afp installed and the pi mounted as a shared folder. I decided for my case to use the oldschool afp with netatalk, as it still works great on MacOS. For sure smb works as well and is probably even the better choice...just hard to get rid of old habits here 🙂 So lets install netatalk:
sudo apt install netatalkConfigure it with:
sudo nano /etc/netatalk/afp.confEverything should be commented out in the file with ; so add these config lines at the bottom:
[Homes]
basedir regex = /home

[Photobox Images]
path = /var/www/html/data/images/
Now we have our user pi homedir shared in afp and the image directory of our photobox web application. To be able to also delete images on the photobox folder we simply give the image folder 777 permission. I would not recommend it in a public network, but for our case its fine:
sudo chmod -R 777 /var/www/html/data/images/Now you can see the photobox in your finder and easily browse & delete the taken images.
Thats it! You made it! We are all setup and all software for the Photobooth is done now. I am curious what you will build with this 🙂
Happy Partying and picture taking!