Quick tip, if you want to start fresh on your self hosted Unifi Controller instance, there is a simple command to just purge and reset the database and settings to factory defaults. Just ssh into your Unifi Controller instance on Ubuntu or Debian and enter as superuser: No need to apt uninstall anything or do […]
Ubiquiti just released its new network controller version 7.3.76 and alongside with the major change of jumping from Java 8 to Java 11, the update had a lot of features and changes under the hood added. Unfortunately Ubiquiti did not release the new controller version via the official apt repositories. In the official patch notes […]
BEWARE: THIS GUIDE IS FOR AUTHELIA v4.37.5 OR EARLIER VERSIONS!Authelia introduced major changes that break your config in v4.38.x. So please be cautious with this guide until its updated! I was looking for a secure and reliable way to expose some of my homelab webinterfaces and APIs to the public. I decided to go for […]

If you are running multiple devices in a cluster layout, like docker swarm or kubernetes, you may have multiple IPs that could lead to the same service. And to make things easier you probably have set a local DNS record within your piHole to give the service an easier local domain name instead of remembering […]
Update hint: This guide installs via the official apt debian/ubuntu repositories, which does NOT have yet the actual controller version 7.3.76 including Java 11. If you want this new version, please follow after this install my update guide to the latest version here. With the latest release of Ubiquitis' Unifi consoles, the UXG-Pro, I am […]
In this quick guide we are going to setup the scalable GlusterFS filesystem for a four node Docker Swarm cluster on Ubuntu 20.04 LTS. More precise: we replace an existing persistent NFS storage on the cluster with the new GlusterFS and make it available under the same old mount point as the old NFS. Therefore […]
Most owners of a Unifi Dream Machine (Pro) know about the automatic backup feature Ubiquti offers in their UDM(P) interface. The feature creates automatic backups of all your config settings and stores it locally on the device. So you can manually download it from there before you change something. But what if you forgot about […]
WireGuard is quite a hyped new VPN server that has some pros why you would like to use it. Its part of the Linux kernel now and therefore you can setup a WireGuard VPN server on almost every piece of hardware. But some people might want to run it on their router, and if you […]
Every SmartHome enthusiast loves Home Assistant. And so do I! But, with Home Assistant as your central brain and heart of your SmartHome, downtimes are nothing you want to have or run into. So I thought a lot about what would be the best, yet affordable, hardware setup to make Home Assistant as reliable as […]
Tags: docker, docker swarm, docker-compose, grafana, high-availability, home assistant, influxDB, mariaDB, ssh, terminal, tutorial
This guide will show you how to easily virtualize the new Windows 11 on Proxmox 7 including TPM 2.0. 1. Download the ISOs: We need two ISO files: Windows 11: Go to Microsoft and download the official Windows 11 Installer ISO. virtIO drivers: Go to virtIO GitHub and download the latest ISO version there Once […]
I decided to run all of my supporting homelab services in a more flexible setup, making it easy to deploy and test new features, while also ensuring that already running and needed tasks are stable and constant available. Therefore I decided to create a four node Docker Swarm cluster with four Raspberry Pis 4 8GB […]
In this guide we will cover how to create a High Availability pihole setup with Gravity Sync, so next time one of your pihole is not reachable, your DNS requests are still resolving over the fallback pihole instance. Lets get started! Getting started: setup a second machine First, either create a second virtual machine if […]
This is a quick tutorial about a case I recently encountered. After a upgrade of a clients Proxmox cluster to the latest version, two very important VMs were not able to power on again. As it turned out fixing the root of the issue would take much longer than the downtime would allow for, as […]
Its very important to keep the order of this guide and not add and setup things prior or later, as this will create errors. Also I tried to keep it as detailed as possible, therefore it is going to be a fairly long article. Use this index to quickly jump to the area you need: […]
In this tutorial we are creating a Proxmox cluster with two physical servers, node1 and node2, and we will add a RaspberryPi as a third Quorum device to make the Proxmox cluster working as intended in High Availability mode with having an odd number of cluster votes. This gives smaller business or a homelab user […]
Problem to solve: If you have a Proxmox Server and you like tinkering around with it like I do, then you probably know that feeling that all of a sudden nothing seems to be working as it used to be and you want to re-roll to a certain point and just start all over again. […]
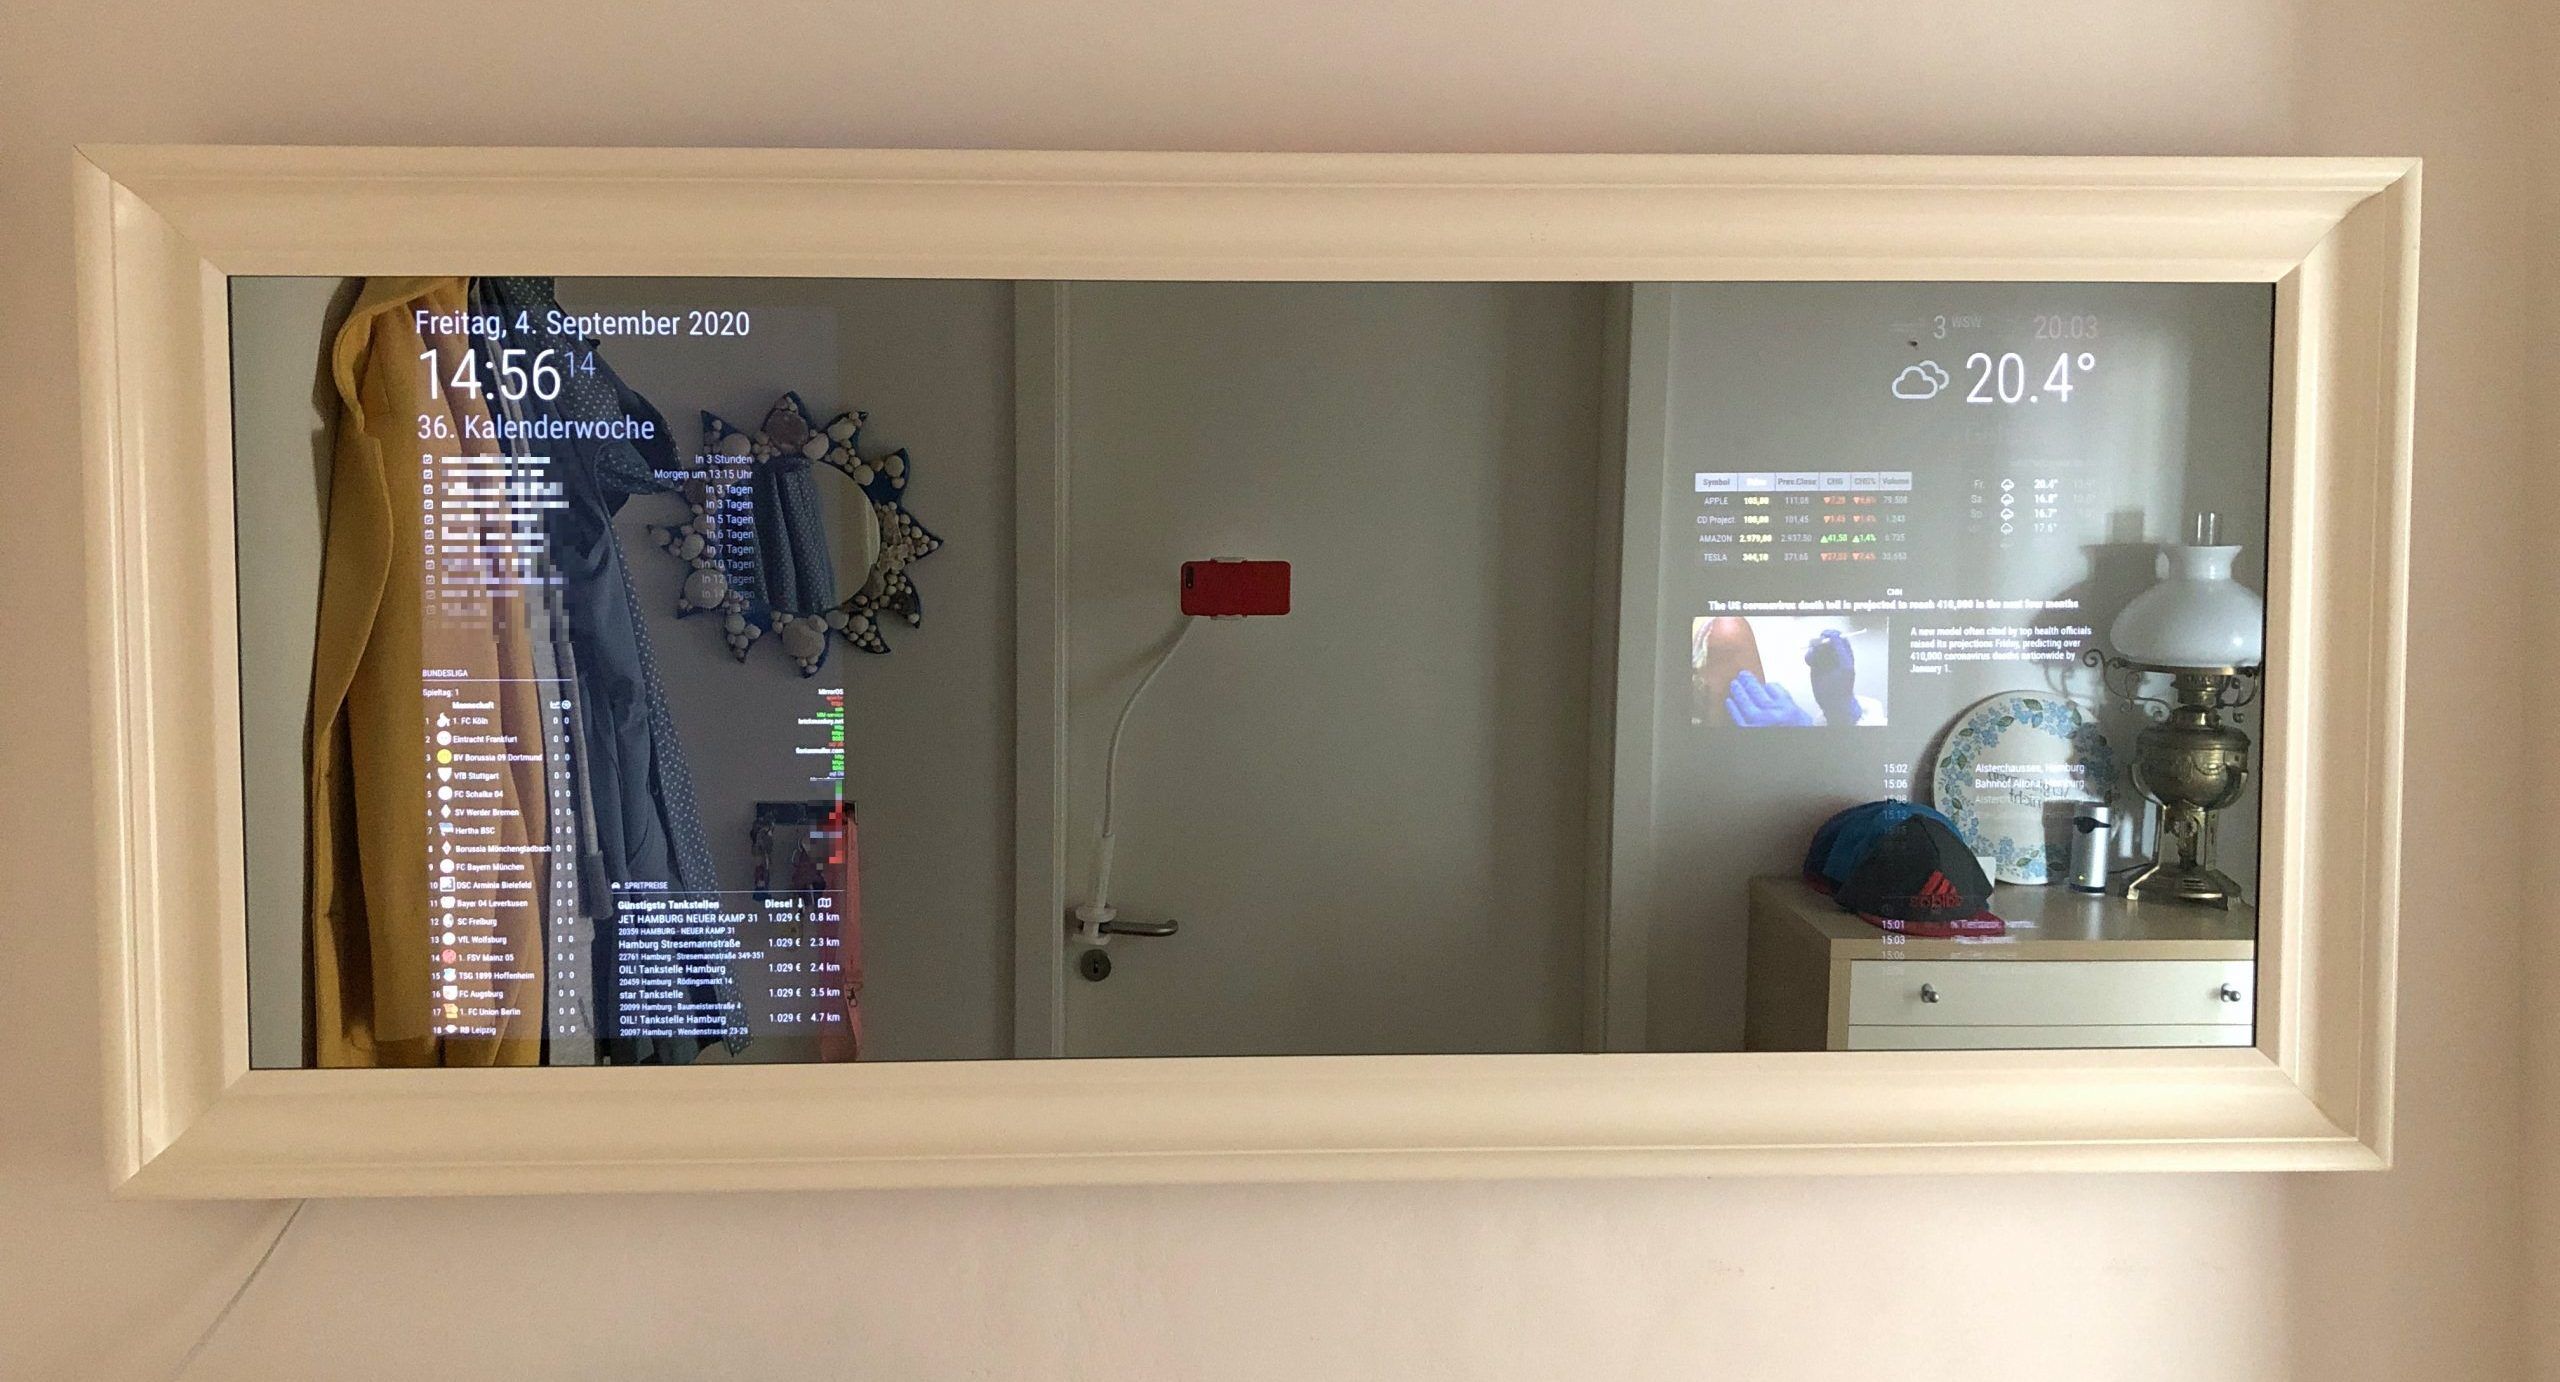
This project was already build in 2015, but due to a recent reinstall of the MagicMirror software on my mirror, I decided to share the whole build including the up to date software setup process from scratch. Also I can tell that it ran flawless for the past 5 years now, so pretty stable 🙂 […]
Today we install the famous DNS advertisment blocker pihole in a LXC container on a Proxmox server, and set this as our network wide primary DNS server on the Unifi controller. The cool thing is that even as pihole was born as a Raspberry Pi project, it can easily run on most other Debian-based operating […]

In the past years I started to switch most of the technology that runs at my home towards 19" rack sized devices. Biggest reason for this was to slowly build up and progress towards a full sized 19" rack that you would find in a single family house or a small business. So for me […]
In general the Raspberry Pi is great learning tool. One reason is the great default verbose boot and console messages you see when booting or shuting down your raspberry pi. But for some more polished projects, its quite handy to hide all of that and have a nice boot loading animation instead. In this instance […]
From time to time you may want to quickly copy a raspberry pi image from one system to another....but only have a smaller SD card. Or you started your project as a tryout on a crazy 64GB sd card, and realize later that 8GB would be way enough. So what you want to do, is […]
I always wanted to have an old vintage plate camera from the early times of photography in my home as kind of a decor item. Inspired by walking across old flee markets in Germany, I thought it may be cool to put more into it, than just having the plate camera as a decoration item. […]
This install is similar to the install on Raspbian and a raspberry pi, still there are some specialities and traps you can run into, especially with the virtual architecture and openvpn service. If you want to install the same setup on a Raspberry Pi, please read my earlier guide on this topic. WARNING: the openvpn […]
We all know this situation: you are on a fresh setup of Linux remote server or a headleas Raspberry Pi, and somehow the speed is not feeling right. Besides a iperf LAN speedtest for your device you can quickly check your connection speed to the outside with this handy python script command: If you don’t […]
This quick guide shows my standard routine for setting up secure SSH on new fresh installs of Raspbian or Ubuntu VMs. First if you are still using any system default user like "pi" or "root" or "admin", change this and create your own, custom user. Lets start in this example with our new user name […]
Introduction Over the years I piled up a lot of different projects running in my home on different Raspberry Pis. Because this amazing little piece of technology can literally do anything, I love to tryout and build things with it. Roughly every third project turned out to be one I will keep running and so […]
I exchanged my Synology server for a 10Gbit capable model, and after deploying it, I wanted to confirm the actual available speed over my network. For this matter I use the tool iperf3. It is a great command line interface (CLI) based tool, that supports all varieties of operating systems: from Windows over MacOS and […]
Published by Florian Müller in Development
This is a quick guide on how to setup your Mac to mount and run Raspbian images for rapid rpi prototyping, testing and tinkering. It enables your Mac to start and simulate a Pi 3 and all its (web)services via the terminal. So you can start tinkering in no-time before deploying on a life rpi. […]
Published by Florian Müller in Development
This is a little helper script that runs all the update commands of the Raspberry Pi in an order. Making it more comfortable to use and also possible to tie to a cronjob for automatic system update schedules. Lets start with creating the script file in our home dir: Paste the following script into the […]
Published by Florian Müller in Development
Problem to solve: If you have some Raspberry Pis at home and you like tinkering around with them like I do, then you probably know that feeling that all of a sudden nothing seems to be working as it used to be and you want to re-roll to a certain point and just start all […]
Published by Florian Müller in Development
First update the Debian apt package repository to include the NodeSource packages: Now that we have added the NodeSource package repository, we can move on and install Node.js! After it finished validate install by typing: You should get a response like "$ 12.10.0". Now you are good to go to run npm.
Published by Florian Müller in Development
A couple of month ago I started exploring Synologys so far very undocumented WEB API. I basically started with the authentication and from there experimenting and researching on my own Synology DSM Webinterface. I found out, that a lot of the terminology and paths used in the WEB API are exactly the same as used […]