Update hint: This guide installs via the official apt debian/ubuntu repositories, which does NOT have yet the actual controller version 7.3.76 including Java 11. If you want this new version, please follow after this install my update guide to the latest version here.
With the latest release of Ubiquitis' Unifi consoles, the UXG-Pro, I am returning again to a divided and separate setup of my Gateway/Router and my network device Unifi controller. The UDM-Pro I used until now was fine, but too often the controller crashed or was unreachable, which made a full restart necessary, which created downtimes from my ISP, which all in all can be avoided if you have those devices separate and for my personal taste, I always like things in clear separations.
Instead of using the Unifi Cloud Key device solution, I decided to use one of my existing hardware solutions and self host the controller on my Proxmox VM as a ubuntu 20.04 LTS LXC container. Docker on a raspberry pi 4 cluster would also be an option, but I wanted to keep the controller flexible and on a more powerful hardware. I also like Proxmox snapshots and easy restore process, as well as the simple way of moving LXCs around the cluster if one machine gets unavailable. So lets get started!
Index
Setup the LXC container in Proxmox
Security: create a new admin user
Security: generate ssh keys for the new user
Security: hardening ssh settings and set custom port
Security: Disable root account
Security: Enable the firewall
Security: Install fail2ban
Install Unifi Controller
Optional: Performance tweaks for bigger deployments or lots of devices
Optional: Unifi log files location
Optional: Secure the Webinterface with Cloudflare, Traefik reverse proxy and SSL
Optional: additional fail2ban commands
Setup the LXC container in Proxmox
IMPORTANT: If you want to use the "Remote Access" cloud feature of the Unifi Controller, you need to use a 64-bit OS and 64-bit capable hardware. As this feature requires JAVA 64-bit to run.
I am not deep diving into Proxmox, so I assume you already know your way around Proxmox, and therefore only share a series of screenshots of my LXC container setup:
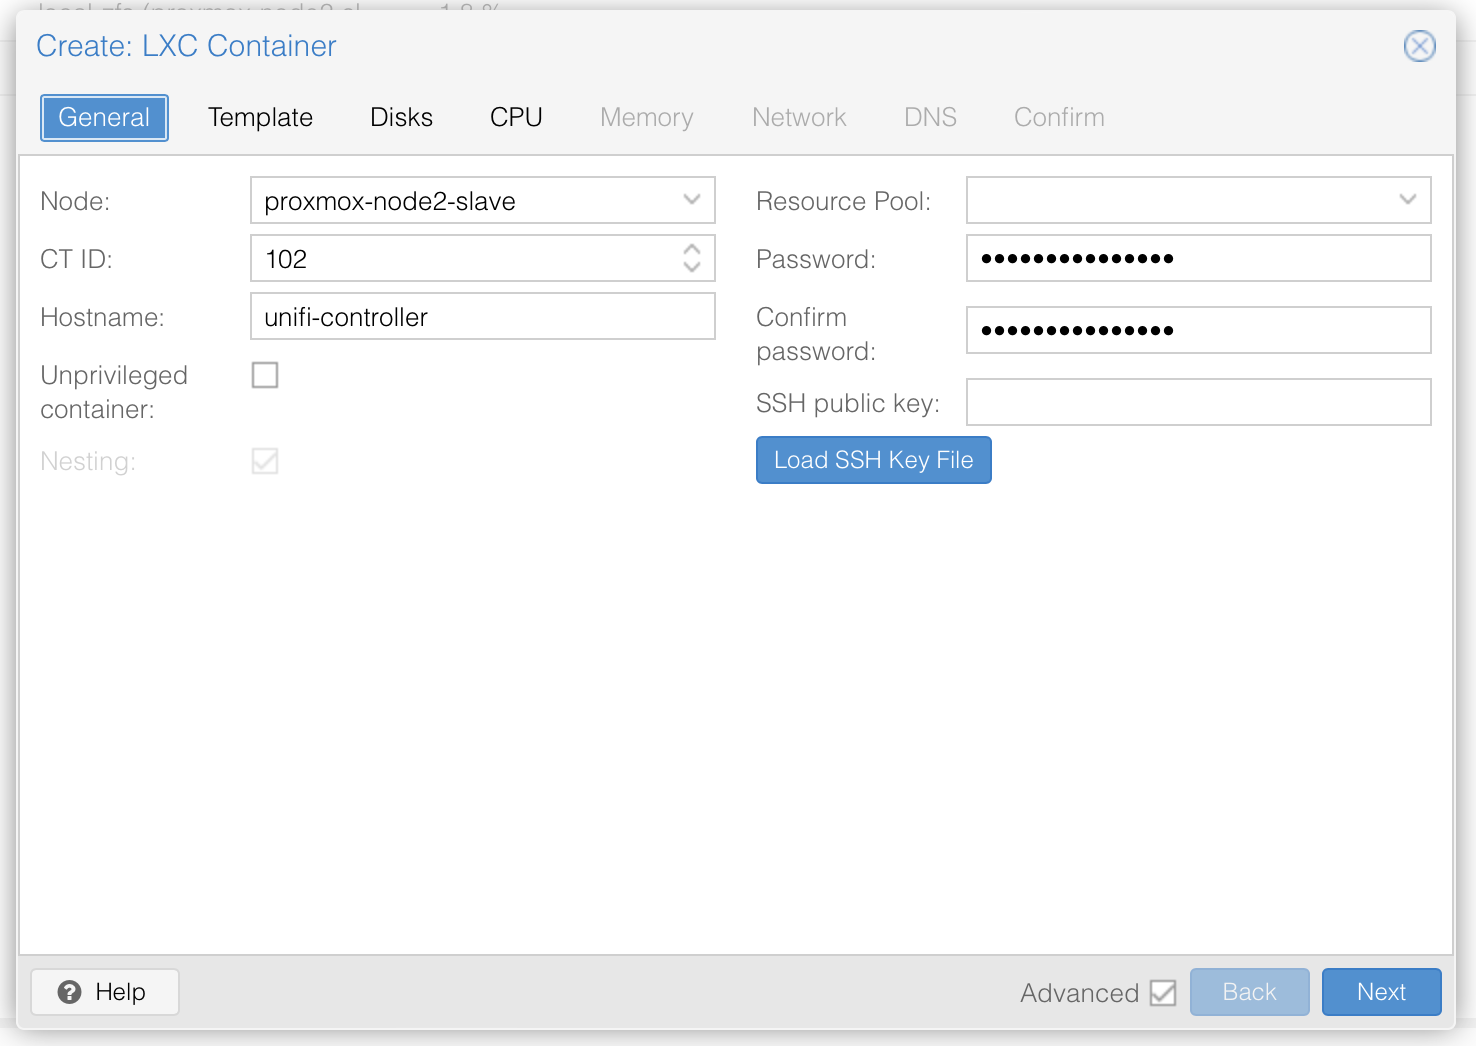
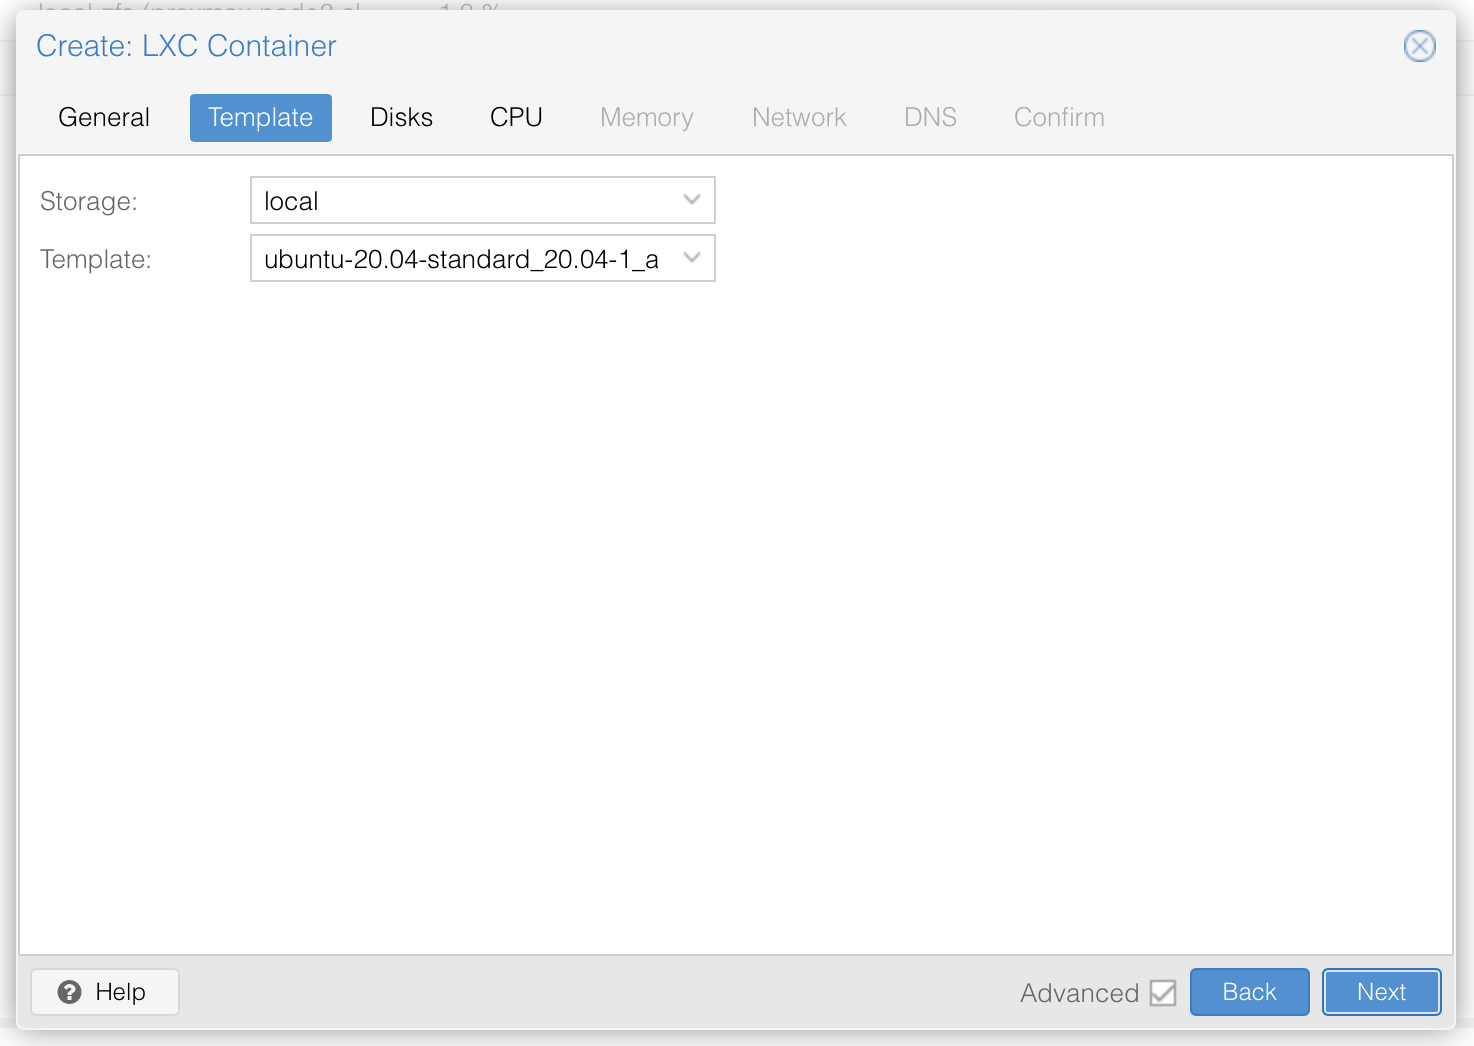


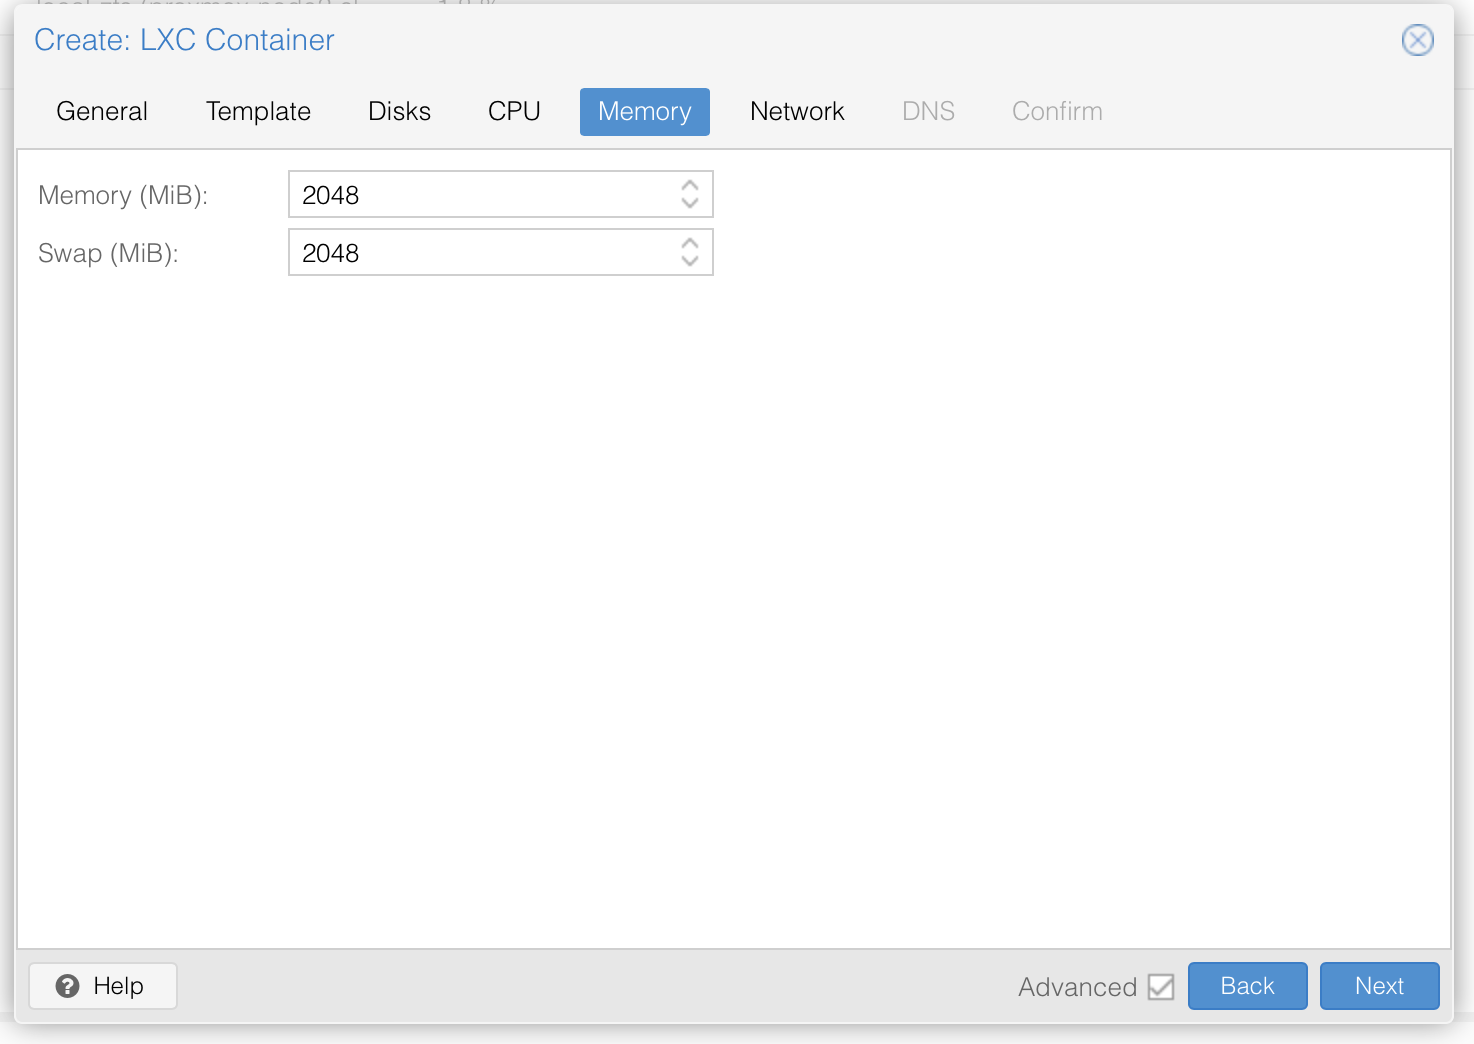
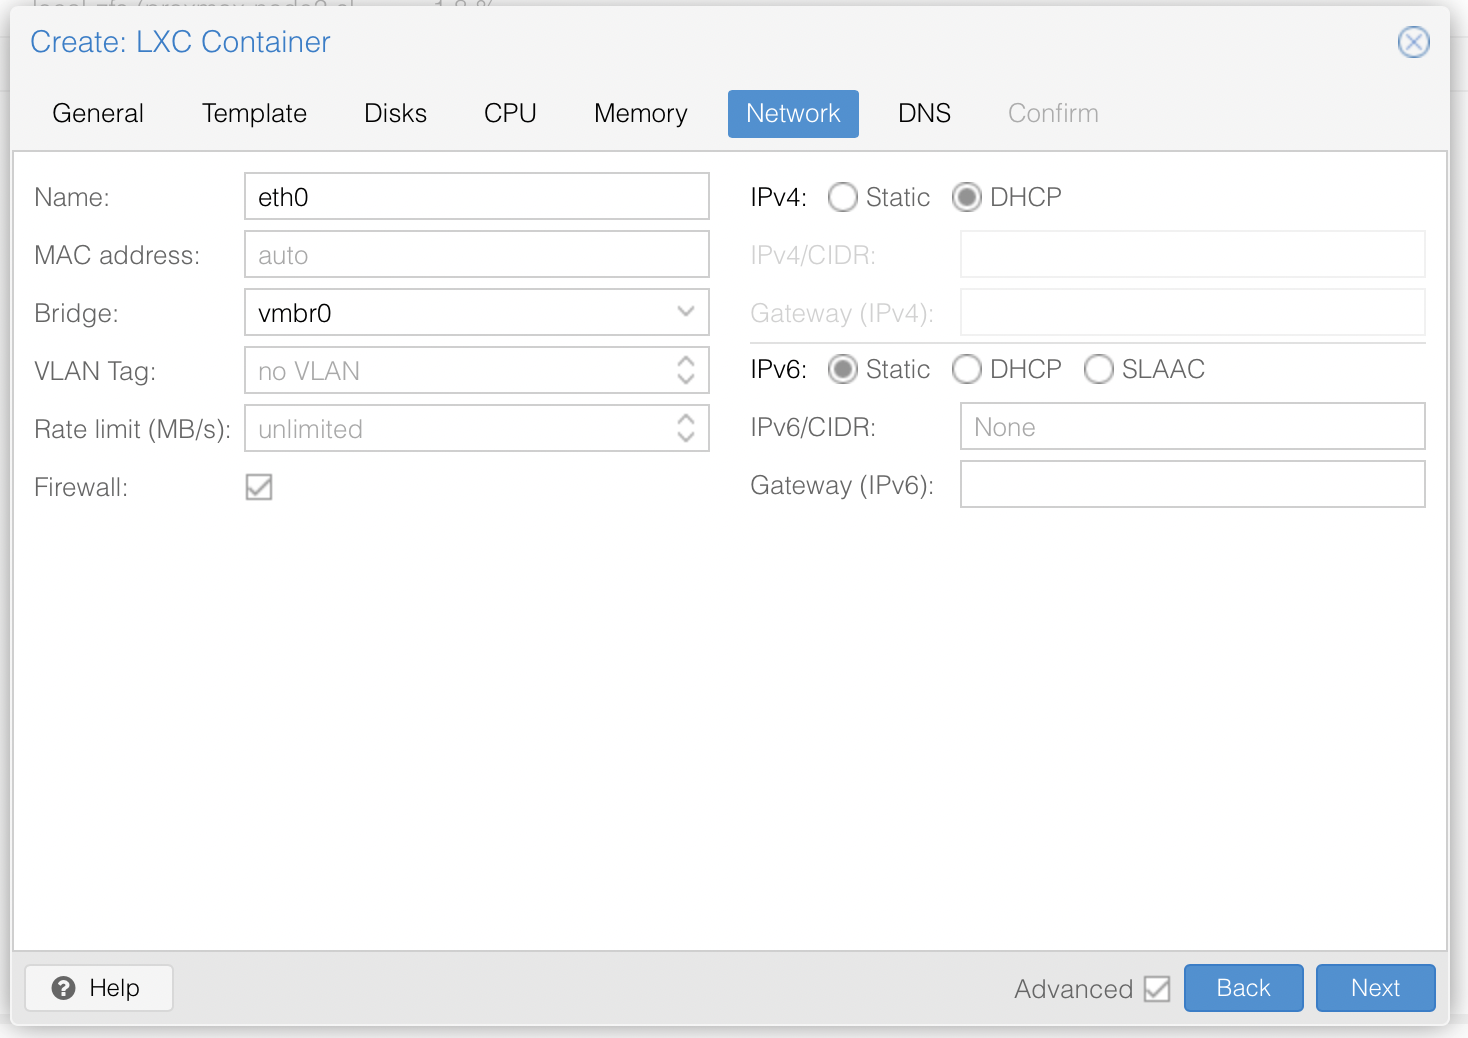
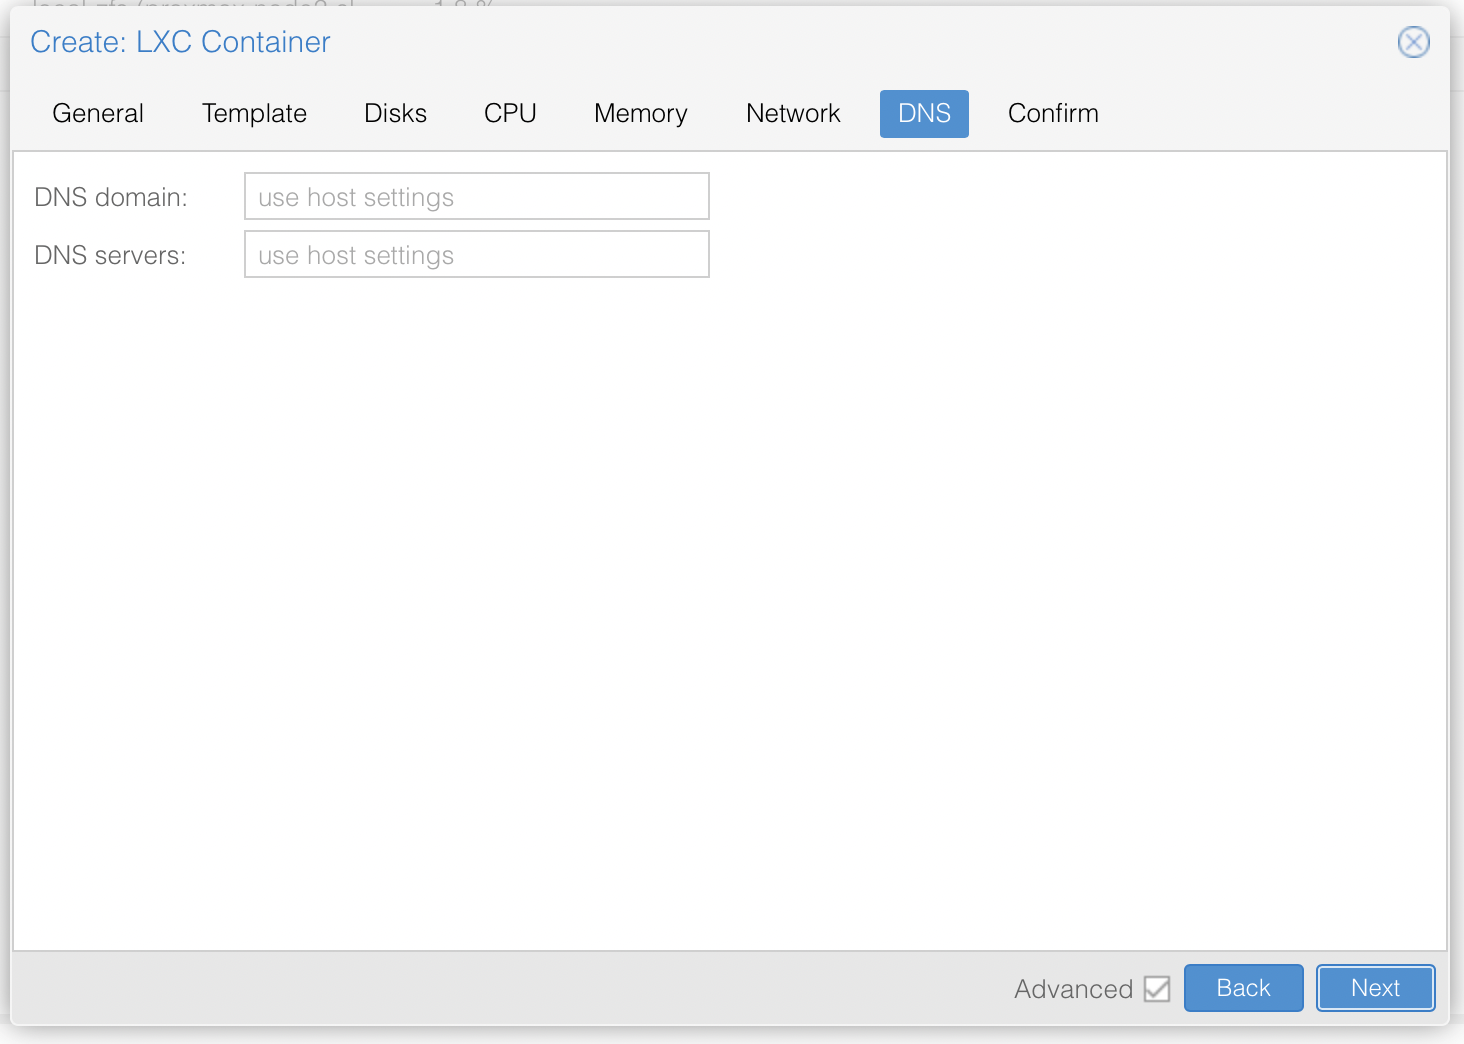
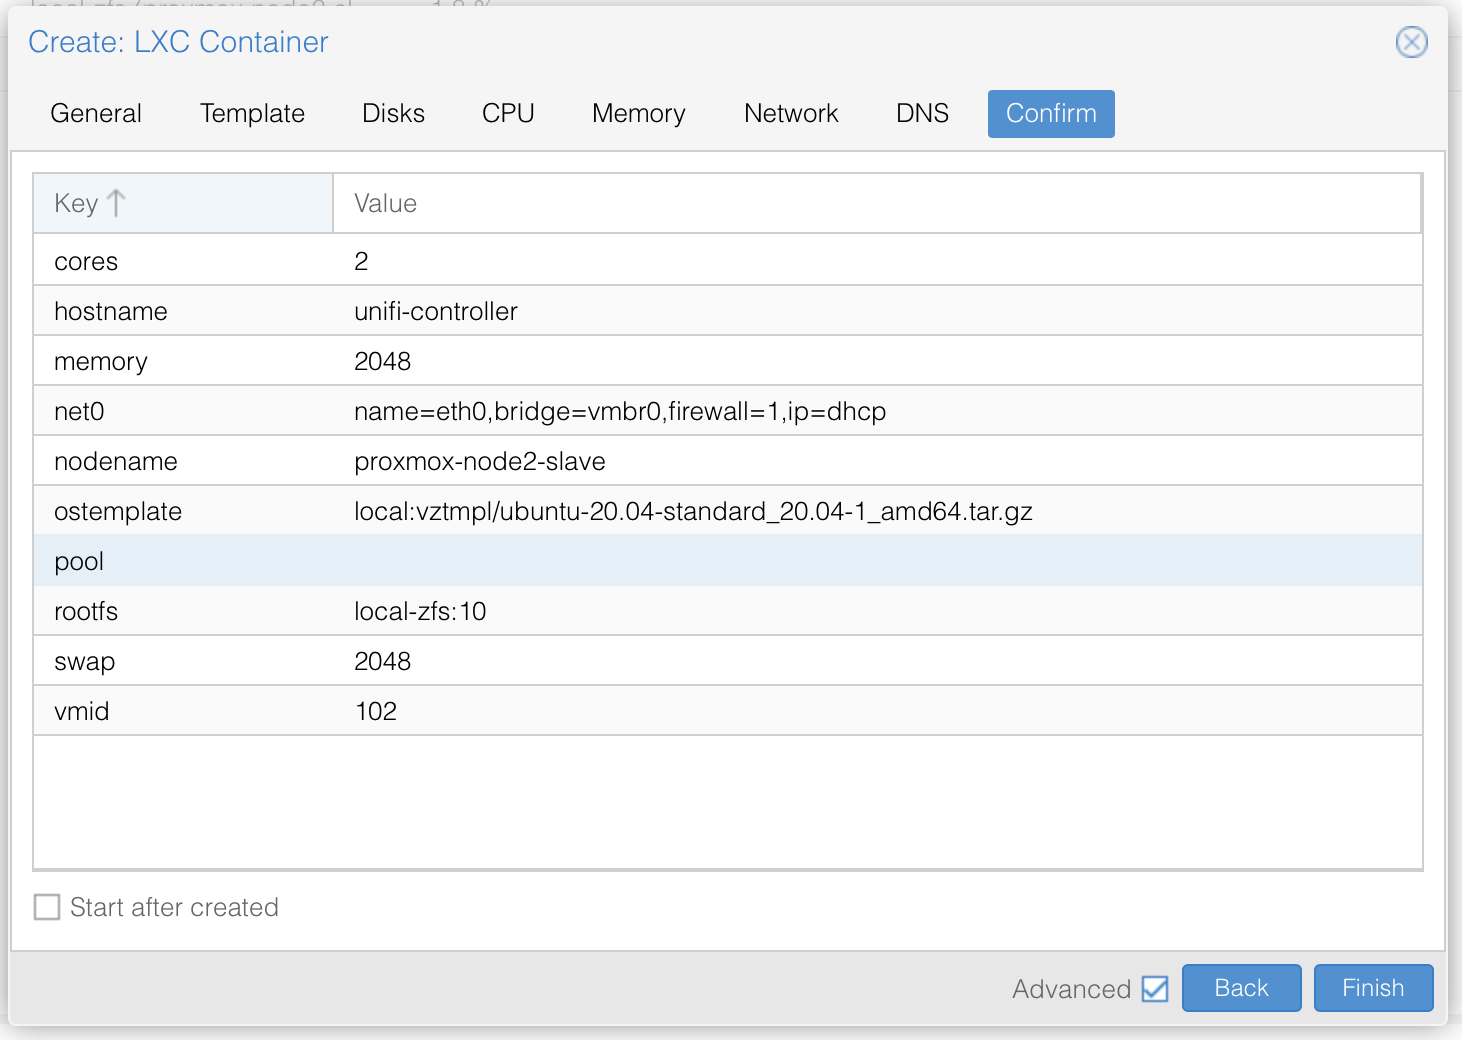
Once you have setup the LXC container with ubuntu 20.04 LTS, go ahead and start it up.
Update the lxc container to latest packages:
SSH into your container with the user root (default for LXC) and your previously set password in the Proxmox setup. (replace the IP with your own LXC container IP)
ssh [email protected]Now, before we start, we want to update our container with the latest available updates. Run:
apt update && apt upgrade -yOnce all upgrades are installed, reboot the container with:
reboot nowSecurity: create a new admin user
Once restarted, login back into the container using root and your previous set password. Next we want to disable root user and replace it with another not to obvious username.
adduser uiadminNow elevate that freshly created user to sudo privileges
usermod -aG sudo uiadminGreat your our new user uiadmin is now able to use the sudo command to run things on root level.
Security: generate ssh keys for the new user
Next we create ssh keys for the new admin user:
ssh-keygenThat generates the ssh key pair and will ask you for the location. Keep the default which should be the root user location /root/.ssh/ and apply with enter. When asked for a passphrase for the ssh key, I would highly recommend you set one as the Unifi Controller will be critical infrastructure.
Before we copy the keys to our new user uiadmin we will need to find our given dhcp IP address. Inside the containers console enter:
ip address showIt will return something like this and shows your IP:
2: eth0@if15: <BROADCAST,MULTICAST,UP,LOWER_UP> mtu 1500 qdisc noqueue state UP group default qlen 1000
    link/ether 0a:30:45:31:5c:4f brd ff:ff:ff:ff:ff:ff link-netnsid 0
    inet 192.168.2.87/24 brd 192.168.2.255 scope global dynamic eth0
       valid_lft 85106sec preferred_lft 85106sec
    inet6 fe80::830:45ff:fe31:5c4f/64 scope link
       valid_lft forever preferred_lft forever
So in our case it is 192.168.2.87. Now with that info lets copy our keys to the new user:
ssh-copy-id [email protected]Choose yes when asked if you want to continue, and enter uiadmin password when prompted. This command will copy the public key to the uiadmin user ~/.ssh directory as an authorized_keys file. You can now use the private key to authenticate with this server as user uiadmin.
Security: hardening ssh settings and set custom port
Now we will harden the ssh settings:
nano /etc/ssh/sshd_configFind the following parts, uncomment them if needed and set the below value:
Port 33
PermitRootLogin no
PasswordAuthentication no
StrictModes yes
MaxAuthTries 3
PubkeyAuthentication yes
AllowUsers uiadmin
Exit and save the file with STRG + X and Enter to confirm. Now restart sshd service with:
systemctl restart sshdGreat, your changes on ssh are now applied and the service runs on the non default port 33. Remember: Don't use a custom port greater than 1024! Now we need to download our ssh private key file and save it in our favorite keychain. Output the private key with:
cat ~/.ssh/id_rsaPaste the key into a very secure location, like your keychain storage or your ssh client like putty or Termius.
If you are on Mac or Linux, you can for example save the key in your local users ~/.ssh directory. On your LOCAL TERMINAL run:
sudo nano ~/.ssh/id_rsa_unifiCopy & Paste the private key you got just earlier from the output into the open text field. Save and exit the file with STRG + C and confirm with Enter.
Now you can logon from your local machines terminal using this command and the just stored key:
ssh -p33 -i ~/.ssh/id_rsa_unifi [email protected]It will ask you the first time to add the passphrase to your known hosts and then to enter your passphrase for the generated ssh key (if you set one). Congratulations you are now connecting with the new admin user, key based only, on a custom port.
As we are running a LXC container we need to make a small adjustment to make the lxc container use sshd service instead of ssh.socket file. So you can either adapt that (systemctl edit ssh.socket and add your port) or use ssh.service instead. We will use ssh.service instead:
For this enter first:
sudo systemctl disable ssh.socketthen:
sudo systemctl enable ssh.serviceGreat, your ssh.service is now ready and will survive restarts as well as normal.
Security: Disable root account
Before we disable root, you have to make sure your new uiadmin user works and can use the sudo command. For that login with the above ssh command, and try to run a simple sudo command like:
sudo ls -l /It asks for your uiadmin users password, and will then list your base filesystem right away. If thats the case, you are good to go!
To disable the root user (by expiring its password), enter now:
sudo passwd -l rootIf you ever want to re-enable the root user again, use this and set a very strong new root password:
sudo passwdSecurity: Enable the firewall
Now we will enable the ubuntu ufw firewall. We start by adding and allowing the ports we need for the Unifi controller to run, and then disallow all other ports. We also add our custom ssh port, so we can still remote manage the system.
First we add our ssh port. This is the general, not so strict rule:
sudo ufw allow 33If you want to be more strict and secure, have a fixed IP address and only want to connect from this one IP location, please use this rule, which only allows you to ssh in from that specific IP:
sudo ufw allow from [YOUR IP ADDRESS] to any port 33Next we do the same for our Unifi Controller management port. Again, this is the general allow, if you want it stricter, use the below one:
sudo ufw allow 8443If you want to be more strict and secure, have a fixed IP address and only want to connect from this one IP location, please use this rule, which only allows you to ssh in from that specific IP:
sudo ufw allow from [YOUR IP ADDRESS] to any port 8443Next the STUN port and the UniFi devices inform port:
sudo ufw allow 3478/udp
sudo ufw allow 8080
If you are going to be using a guest portal with UniFi, you will also want to open these ports:
sudo ufw allow 8880
sudo ufw allow 8843
Here is also a list of additional Unifi Controller ports, which are purely optional and depend if you want to use the connected services with it. I did not use them, but the list is for you to check and if needed, add them in the same above matter:
UDP	5514	Port used for remote syslog capture.
TCP	6789	Port used for UniFi mobile speed test.
TCP	27117	Port used for local-bound database communication.
UDP	5656-5699	Ports used by AP-EDU broadcasting.
UDP	10001	Port used for device discovery.
UDP	1900	Port used for "Make application discoverable on L2 network" in the UniFi Network settings.
Now we are ready to enable the firewall. Check once again that you for sure added your previously set SSH port to the ruleset! Then enable the firewall with:
sudo ufw enableIf all went fine you should still keep your ssh connection and to check and see the status of the firewall run:
sudo ufw statusSecurity: Install fail2ban
fail2ban is a UNIX service (daemon) that automatically detects malicious behaviour and bans offenders by updating the firewall rules. Basically once fail2ban identifies a malicious user they can’t connect to the server at all, requests to connect go unanswered until the ban is lifted.
sudo apt install fail2ban -yOnce fail2ban installs you can check the service Status
sudo service fail2ban statusConfigure fail2ban
A full description of fail2ban configuration is beyond the scope of this article. However the main configuration file /etc/fail2ban/jail.conf which you should never edit directly. We’ll add some overrides in /etc/fail2ban/jail.local
sudo nano /etc/fail2ban/jail.local- I think the default ban time is too short, 8h should deter most people.
- Ignore any IP address that I own which do not change often (like my home IP address) and the server itself.
- Enable the jail for sshd.
 [DEFAULT]
 bantime = 8h
 ignoreip = 127.0.0.1/8 xxx.xxx.xxx.xxx
 ignoreself = true

 [sshd]
 enabled = true
Now restart the fail2ban service:
sudo service fail2ban restartGreat, your fail2ban is running and protecting your user logins. We are now ready to finally install the Unifi controller!
Install Unifi Controller
Now we can finally install the Unifi controller. For this we follow the official guide from here. So first install the needed packages:
sudo apt-get update && sudo apt-get install ca-certificates apt-transport-httpsNext we add the necessary apt package to our source list:
echo 'deb https://www.ui.com/downloads/unifi/debian stable ubiquiti' | sudo tee /etc/apt/sources.list.d/100-ubnt-unifi.listNow we add the trusted key for the unifi repo and update our repo list afterwards:
sudo wget -O /etc/apt/trusted.gpg.d/unifi-repo.gpg https://dl.ui.com/unifi/unifi-repo.gpgRefresh the repositories:
sudo apt updateLast we make sure that an incompatible JAVA version is not installed when installing unifi:
sudo apt-mark hold openjdk-11-*Now finally we install the unifi controller application with:
sudo apt-get update && sudo apt-get install unifi -yIMPORTANT: I had a weired issue with the JAVA_HOME dir, that prevented my install from starting: "unifi.init[2689]: Cannot locate Java Home".
So I had to fix it with the following default install of java8-headless:
sudo apt install openjdk-8-jreWhen all installed without errors, proceed and activate/starting the unifi service:
sudo service unifi restartThis can take a moment to restart and take the new java version. Now when done you can check with this command if the controller is running fine:
sudo service unifi statusGreat! You now succesfully installed the Unifi Controller. Now lets move forward and test the webinterface. The default link to the Controller web GUI will be https://[server IP or FQDN]:8443, in our case:
https://192.168.2.87:8443You can now follow the standard webinterface Unifi setup guide.
Optional: Performance tweaks for bigger deployments or lots of devices
If you need more resources allocated to your Unifi Controller than the standard set of memory and mongoDB cache, you can tune the system.properties file of the controller with the following command:
sudo nano /usr/lib/unifi/data/system.propertiesIf the file opened we scroll to the very end of it and add as new last lines the following:
Increase memory usage to 4GB RAM with the XMS and XMX option:
unifi.xmx=4096
unifi.xms=4096
Increase Mongo WiredTiger engine cache
If you already increased the UniFi Network application memory settings to at least 4GB (xmx), you may need to also change the default Mongo WiredTiger engine cache. By default the UniFi Network Application uses:
db.mongo.wt.cache_size=256Enabling High Performance Java Garbage Collector
If increasing memory is still not giving enough performance you may consider also adding this line to the system.properties file (note this only applies to applications NOT hosted on Cloud Keys):
unifi.G1GC.enabled=trueThis enables a new Java Garbage Collector that can help optimize performance. However, if after these changes high CPU usage does continue after memory increase, a larger machine with more CPU cores and more memory to handle the workload may be necessary.
After you changed those settings in the system.properties, you need to restart the Unifi controller to take effect:
sudo service unifi restartIf you need more infos about large scale Unifi Controller settings, please refer to the official Unifi guide here.
Optional: Unifi log files location
Log files will be essential for any troubleshooting you might perform. Find them here:
- /usr/lib/unifi/logs/server.log
- /usr/lib/unifi/logs/mongod.log
Optional: Secure the Webinterface with Cloudflare, Traefik reverse proxy and SSL
If you are exposing the controller to the public internet, you should definitely setup a FQDN and a couple of protection layers, like Cloudflare, Traefik and SSL. In my case I am using Cloudflare to manage and DNS my controller domain. From there it points via CNAME to my IP address that redirects all 443 traffic to my Traefik docker instance. Traefik has a entry to resolve and add SSL to the incoming domain unifi.mydomain.com before pointing it to its internal final destination at 192.168.2.87:8443.
So you need to setup Cloudflare first with the following effect:
External Traffic -> Cloudflare DNS with your FQDN -> CNAME/A towards your internal IP/dyndnsNext you need to setup your router/firewall to forward port 443 to your traefik instance. Then you can create the following setup in your Traefik reverse proxy, with editing your config.yml :
http:
  routers:
    unifi:
      entryPoints:
        - "https"
      rule: "Host(`unifi.trionix.net`)"
      middlewares:
        - default-headers
      tls: {}
      service: unifi

  services:
    unifi:
      loadBalancer:
        servers:
          - url: "https://192.168.2.87:8443"
        passHostHeader: true

  middlewares:
    https-redirect:
      redirectScheme:
        scheme: https

    default-headers:
      headers:
        frameDeny: true
        sslRedirect: true
        browserXssFilter: true
        contentTypeNosniff: true
        forceSTSHeader: true
        stsIncludeSubdomains: true
        stsPreload: true
        stsSeconds: 15552000
        customFrameOptionsValue: SAMEORIGIN
        customRequestHeaders:
          X-Forwarded-Proto: https

    default-whitelist:
      ipWhiteList:
        sourceRange:
        - "192.168.2.0/24"

    secured:
      chain:
        middlewares:
        - default-whitelist
        - default-headers
If you want even more security you could also ad an additional 2fa auth service like Authelia with Traefik before your Unifi controller.
Optional: additional fail2ban commands
List Banned offenders
sudo iptables -L f2b-sshd --line-numbersoutput:
Chain f2b-sshd (1 references)
num  target     prot opt source               destination
1    REJECT     all  --  test.example.com     anywhere             reject-with icmp-port-unreachable
2    RETURN     all  --  anywhere             anywhere
Here we are listing only the rules in the f2b-sshd chain. If you want to see everything simply run sudo iptables -L --line-numbers
So to unban test.example.com from example output above:
sudo iptables -D fail2ban-ssh 1Remove ban
sudo iptables -D fail2ban-ssh <Chain num>